How to View Tapo Camera on PC, NAS, or NVR Using RTSP/ONVIF
Tapo wired cameras support two protocols for third-party streaming: Real-Time Streaming Protocol (RTSP) and Open Network Video Interface Forum (ONVIF). These let you view your Tapo RTSP stream on a PC using software like VLC, or connect a Tapo camera to a NAS or network video recorder (NVR) for continuous recording and management.
Key Takeaways
- The Tapo RTSP stream URL uses the format rtsp://username:password@IP Address/stream1 for high quality or rtsp://username:password@IP Address/stream2 for standard quality. The default RTSP port is 554.
- You must create a camera account in the Tapo app before connecting to any third-party platform. This is a separate credential from your Tapo account login.
- If your PC, NAS, or NVR supports ONVIF, you can get extra camera management features such as PTZ (pan-tilt-zoom) control. The Tapo camera supports ONVIF Profile S.
- Compatible platforms include VLC media player, Agent DVR, Synology Surveillance Station, and other ONVIF-compatible software/NAS/NVRs.
- Only use RTSP and ONVIF on trusted local networks with encrypted Wi-Fi. These protocols are not recommended for use on public networks.
Before You Start
Make sure the following are in place before connecting your Tapo camera to a PC, NAS, or NVR:
- Tapo app must be installed on your phone.
- The computer, NAS, or NVR must be on the same local network as the camera.
- You will also need the camera's IP address, which is assigned by your router. You can find it in your router's DHCP client list or in the Tapo app by going to the camera's Device Settings page and tapping Device Info. For step-by-step instructions, see how to find the IP address of your Tapo and Kasa camera.
Notes:
1. For Battery-powered (or solar-powered) cameras and doorbells such as Tapo C425, C460, C660, C645D and D230, RTSP streaming is generally not supported due to battery and hardware design limitations that prioritize power efficiency. However, an exception exists for select video doorbell models with flexible power options: the Tapo D235, D225, and TD25 can support RTSP streaming, but only when hardwired for power, with a jumper cable installed, and with always-on mode enabled.
2. Tapo Care cloud storage cannot be used at the same time as NVR or microSD card (sold separately) recording as Tapo cameras have a limited number of streams. If all three are active, NVR recording will be disabled. To resume NVR recording, remove the microSD card (sold separately) from the camera.
3. For dual-lens cameras connected via ONVIF, only the wide-angle lens stream is available.
Step 1: Create a Camera Account in the Tapo App
Before connecting to any third-party device, you need to create a dedicated camera account. This is not the same as your Tapo account and uses a separate username and password.
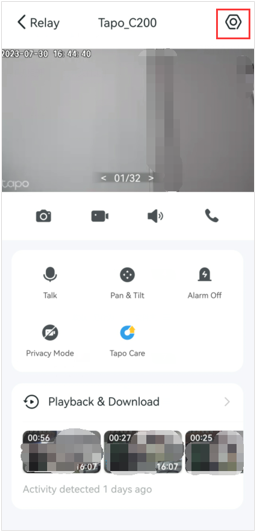
- On the Tapo app Home page, tap your camera's card to open the Live View page. Alternatively, go to Cameras > Manage on your camera model to reach the Live View page.

- On the Live View page, tap the icon in the top right corner to go to the Device Settings page.
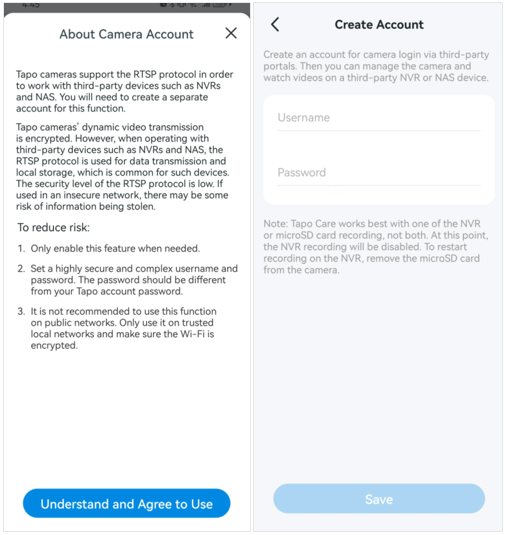
- Tap Advanced Settings, then select Camera Account.
![Device Settings screen showing Advanced Settings option highlighted, and the Advanced Settings screen showing Camera Account option highlighted, third image in Current Content, Step 1]](https://static.tp-link.com/upload/faq/image-20260306170055-3_20260306090054u.png)
- Read the Camera Account notice and tap Understand and Agree to Use. Then create your camera username and password. Both must be between 6 to 32 characters. Use a strong, unique password that is different from your Tapo account password.
For more details on managing your camera account credentials, see how to manage the camera account on the Tapo app.
Step 2: Connect Your Tapo Camera to a PC, NAS, or NVR
Once your camera account is set up, you can connect using either the ONVIF or RTSP protocol. ONVIF offers additional management capabilities such as PTZ control, while RTSP provides a direct video stream. Choose the option that fits your platform.
Option A: Connect Using ONVIF (Agent DVR Example)
- Open Agent DVR on your computer.
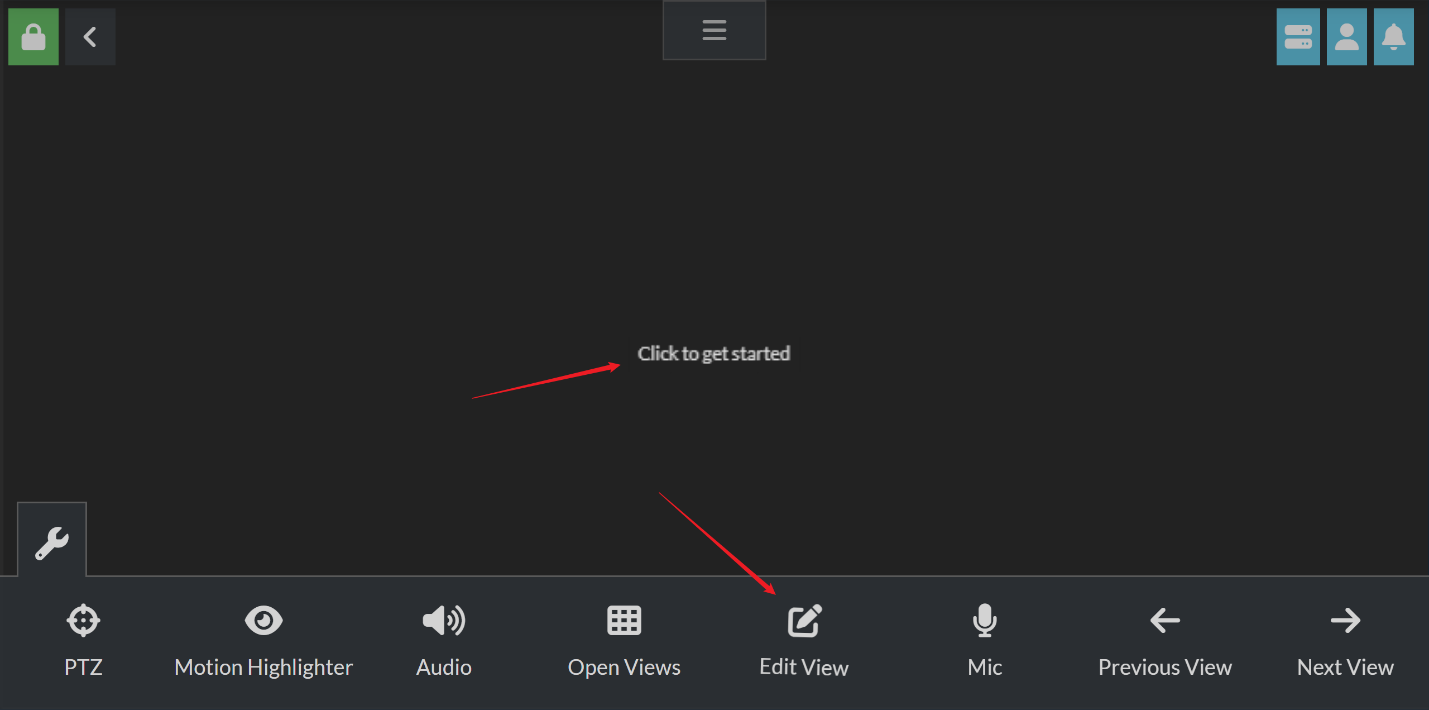
- Click the blank area or Edit View to get started.
- Click the blank area or + to add a new device.
![Agent DVR Configure View screen showing the + button for adding a new device, sixth image in Current Content, Step 2 Option 1]](https://static.tp-link.com/upload/faq/image-20260306170055-6_20260306090053v.png)
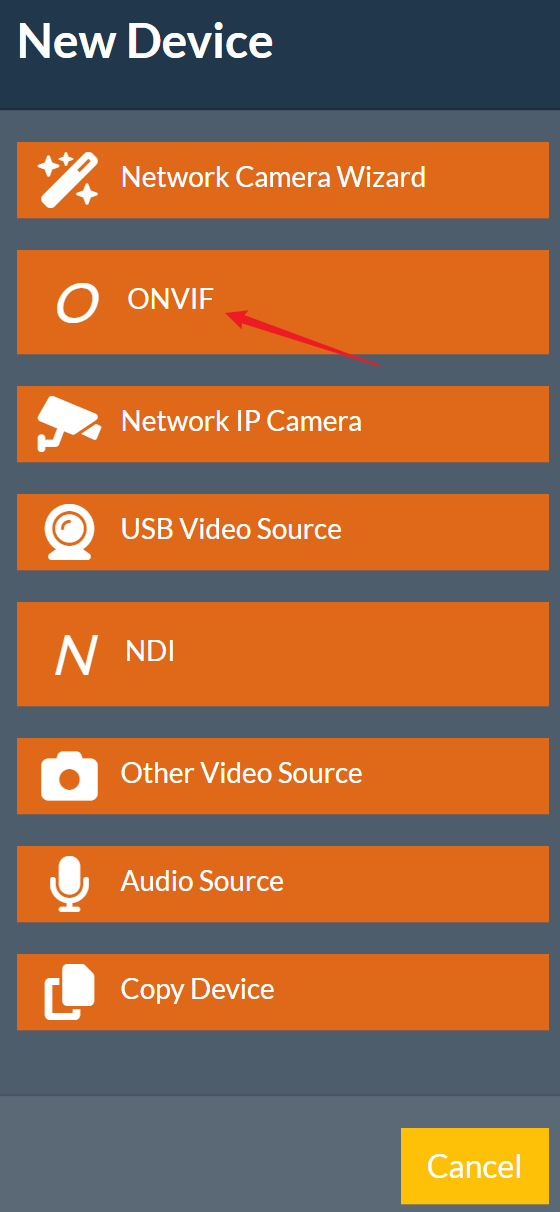
- Click New Device, then select ONVIF.
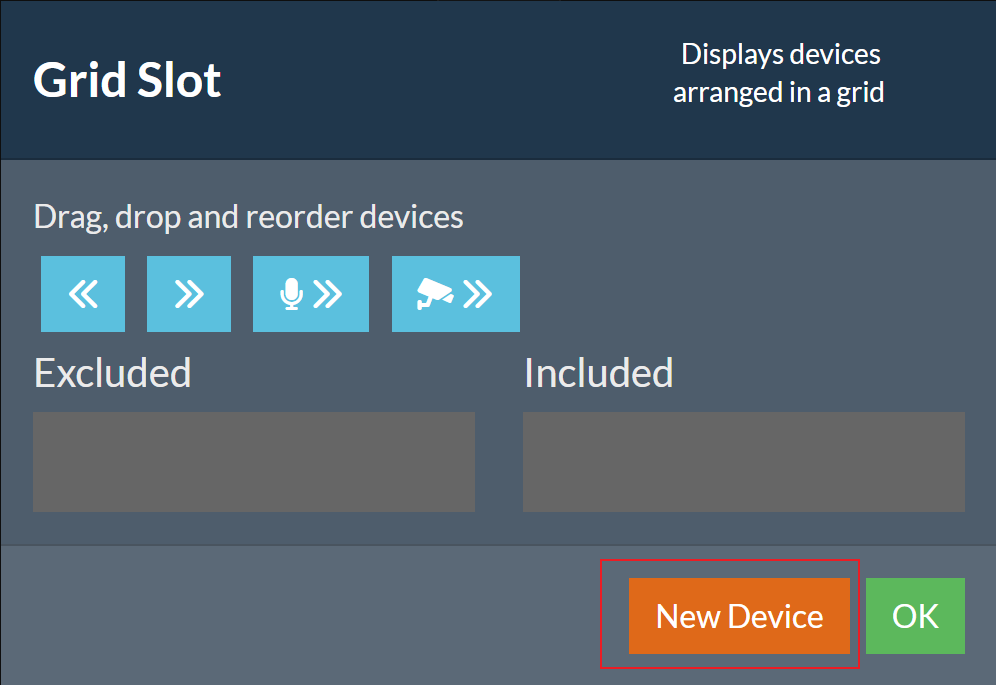
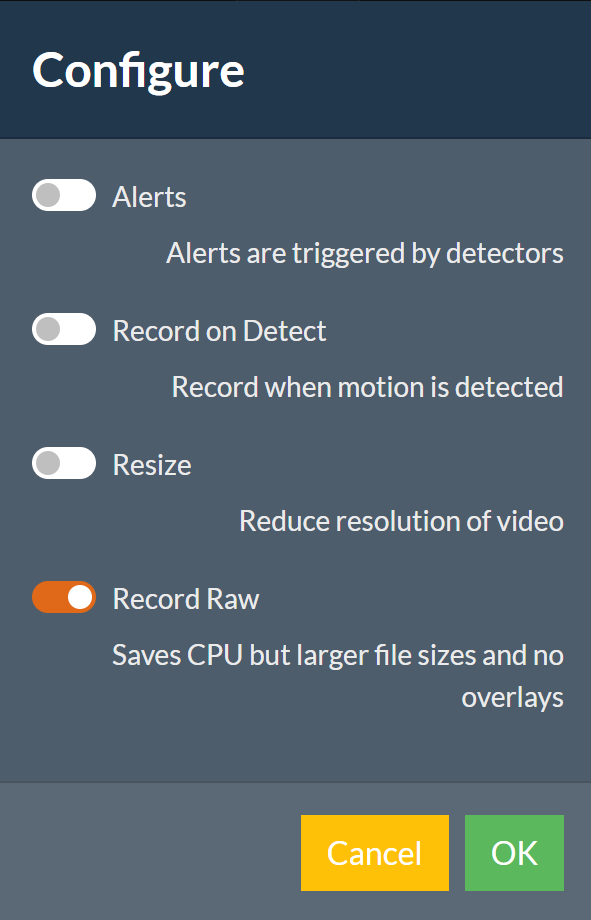
- Configure features such as Alerts, Record on Detect, Resize, and Record Raw as needed, then click OK.
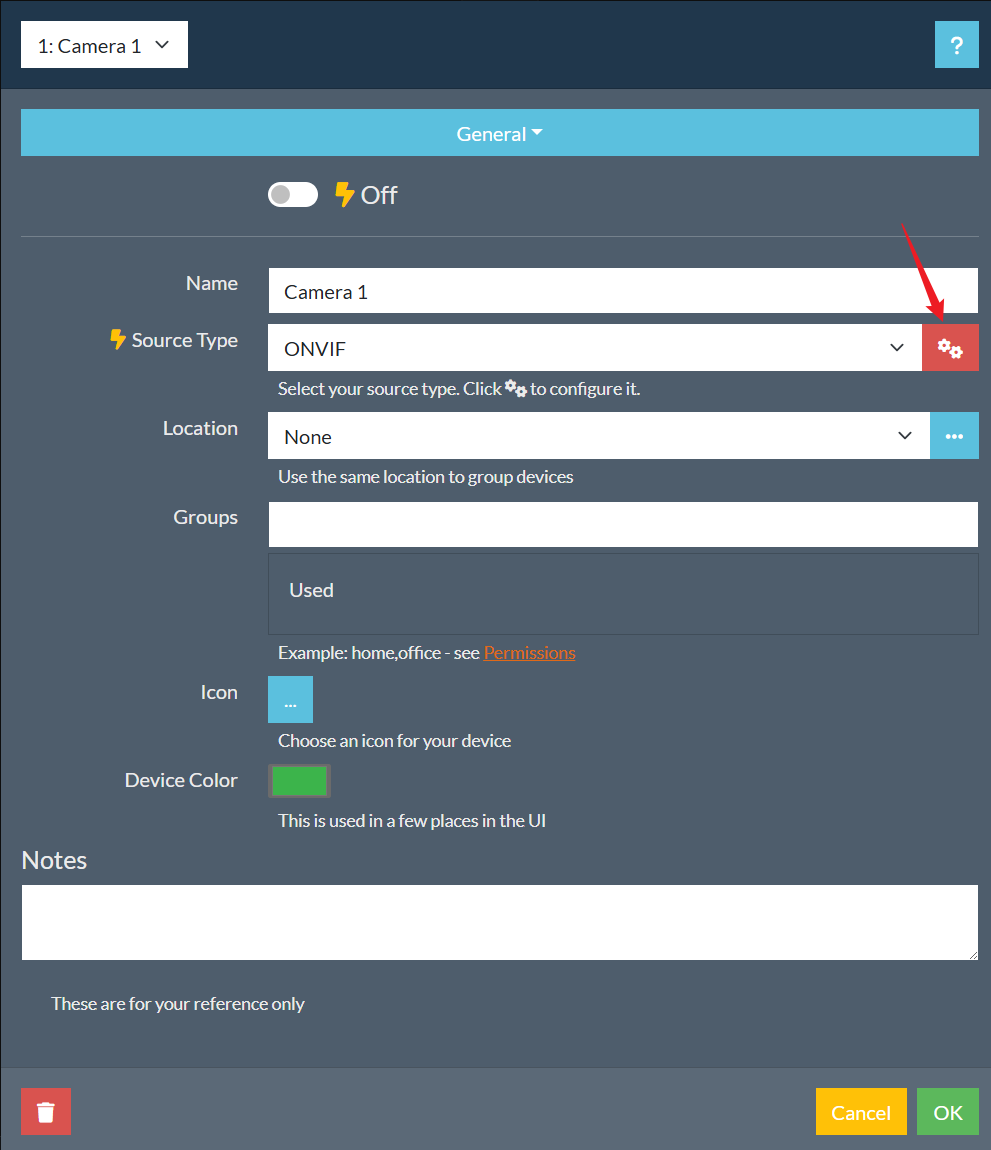
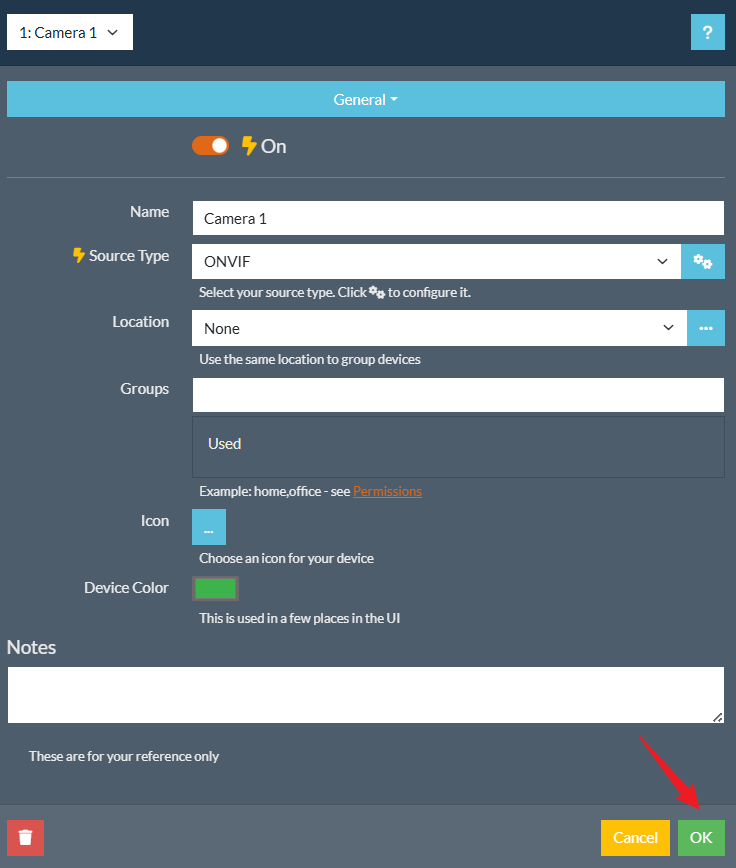
- Click the Configuration button next to the Source Type field.
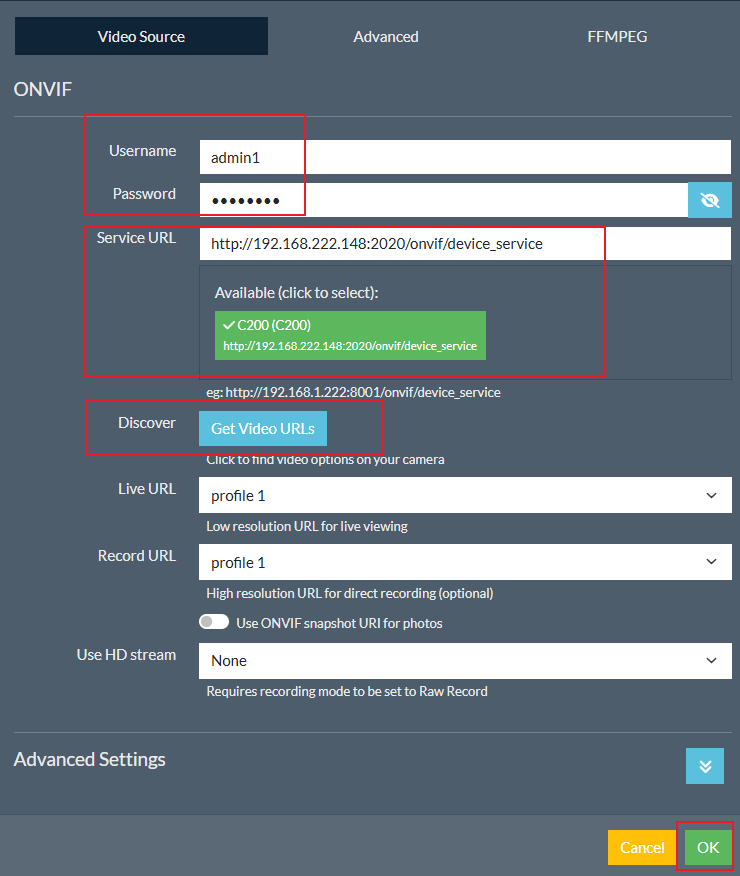
- Enter the camera account Username and Password you created in Step 1. Select the Service URL, then click Get Video URLs to automatically pull the stream URL. Click OK.
- Customize the camera Name, Icon, Device Color, and other settings as needed. Click OK.
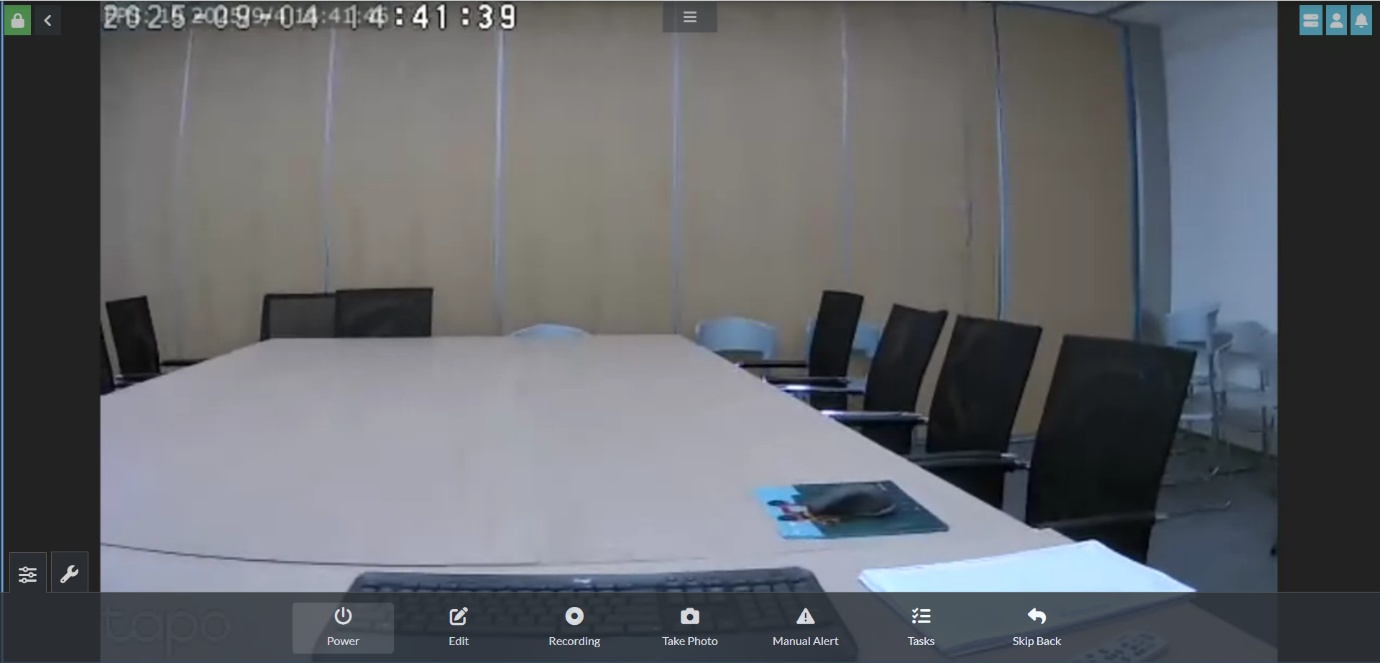
- Click Power to start the camera live view.
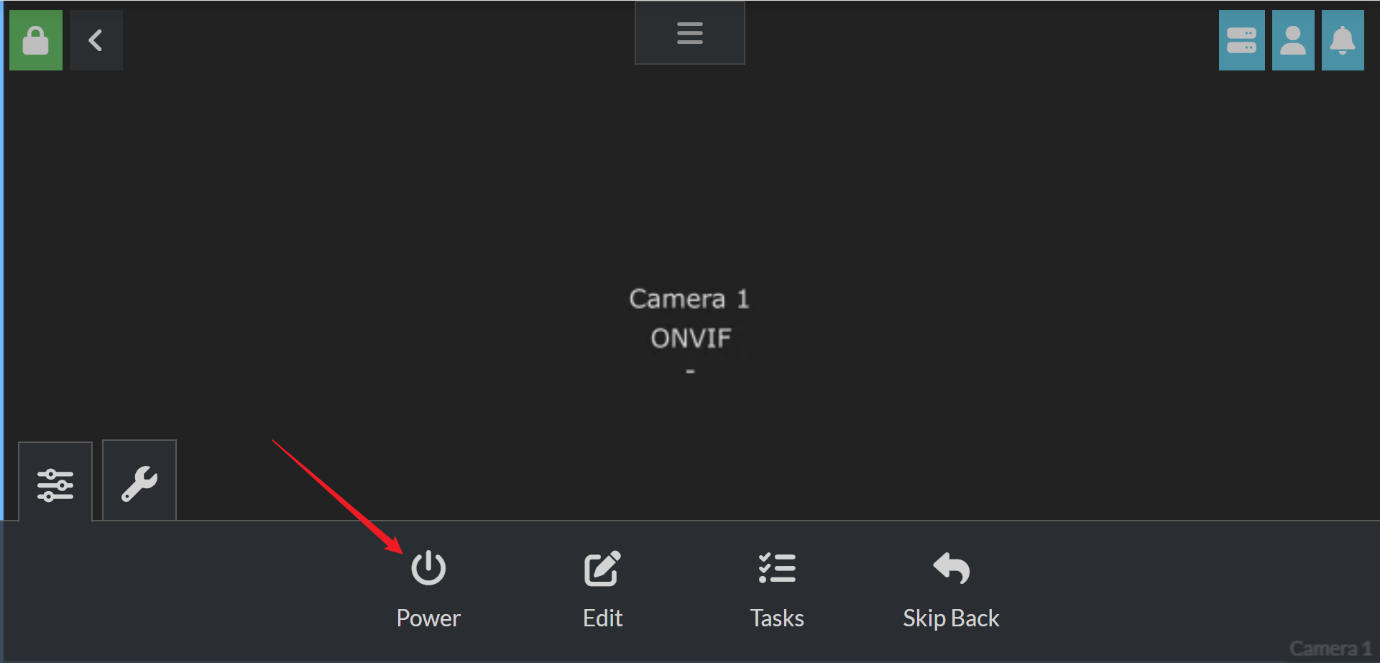
- After connecting, you can monitor your camera in Agent DVR, view the live stream, customize motion detection, review recordings, and set recording schedules.
Option B: Connect Using RTSP Only (VLC Example)
- Open VLC media player and go to Media > Open Network Stream.
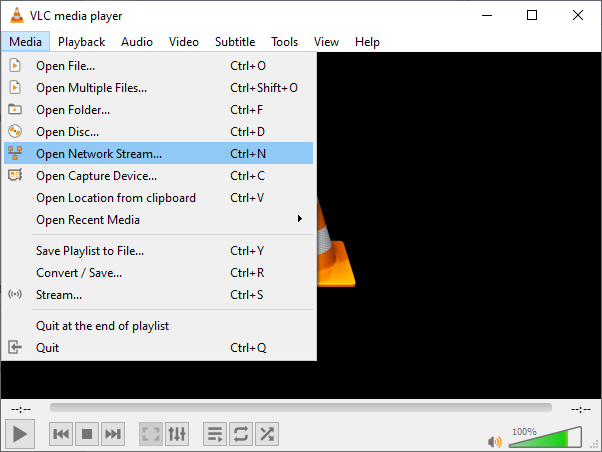
- Enter the RTSP stream URL for your Tapo camera in the network URL field.
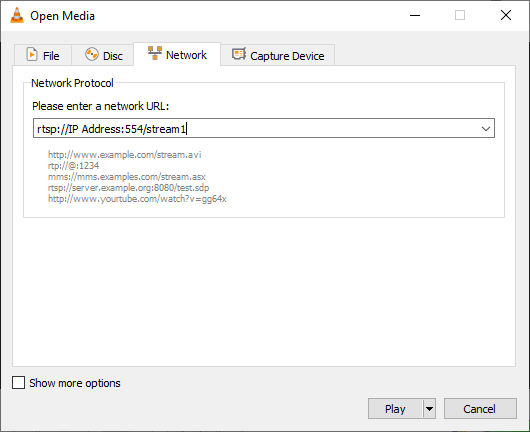
The Tapo RTSP Stream URL format is:
- High quality (stream1): rtsp://username:password@IP Address/stream1
- Standard quality (stream2): rtsp://username:password@IP Address/stream2
If your software requires a port number, use the default RTSP port 554:
- rtsp://username:password@IP Address:554/stream1
- rtsp://username:password@IP Address:554/stream2
The URL structure of Tapo Dual-lens cameras differs by lens. For the wide-angle lens, use stream1 or stream2 as above. For the telephoto lens, use rtsp://username:password@IP Address/stream6 for high quality or rtsp://username:password@IP Address/stream7 for standard quality.
For help with common connection issues, see general questions about viewing Tapo cameras via RTSP and ONVIF protocols.
Troubleshooting
Stream not loading: If the stream fails to open, confirm that the camera account username and password were entered correctly. Try switching between the RTSP URL and the IP-based address. Make sure the camera and the device running your streaming software are on the same local network.
ONVIF device not discovered: Confirm that the ONVIF Service Port (2020) is accessible on your network. Verify you are using the correct camera account credentials.
Choppy or low-quality video: For some models, Stream 1 quality is tied to the video quality setting in the Tapo app. Go to the camera's settings and change the video quality to Best Quality to improve Stream 1 resolution.
Time limits when viewing on third‑party devices: There is no time limit when streaming via RTSP/ONVIF using VLC or AgentDVR. The Alexa app limits live view to 30 minutes, and Google Hub or Alexa Echo Show limits live view to 10 minutes per session.
Only one lens visible on dual‑lens cameras: ONVIF clients can only access the wide‑angle lens. RTSP clients can switch lenses using different URLs. On Alexa/Google Hub/Echo Show, switch lenses in Tapo App > Camera Settings > Advanced Settings > Third‑Party Display > 1x View/2.5x View.
No audio or very low audio: Adjust the camera microphone settings in the Tapo app.
No two‑way audio: Tapo cameras support ONVIF Profile S, which does not include two‑way audio. Profile S covers only basic functions such as video/audio streaming, network configuration, event handling, and PTZ control.
Remote viewing from another network: RTSP and ONVIF are not highly secure protocols and are not recommended for long-term exposure on a public IP. To view your camera remotely, consider setting up a virtual private network (VPN) or using your router's port forwarding feature to reach the camera's public IP and port. A secure, encrypted VPN is the recommended approach. ONVIF Service Port 2020 and RTSP Service Port 554 are the ports Tapo camera uses.
For a full overview of Tapo camera capabilities, visit general questions about Tapo cameras.
Looking For More
Is this faq useful?
Your feedback helps improve this site.
TP-Link Community
Still need help? Search for answers, ask questions, and get help from TP-Link experts and other users around the world.