How to configure Address Reservation on Wi-Fi Routers (new logo)
This Article Applies to:
1. Log in to the web-based interface of the router. If you don’t know how to do that, please refer to
How do I log into the web-based Utility (Management Page) of TP-Link wireless router?
2. Go to Advanced > Network > DHCP Server.
- To specify the IP address that the router assigns:
1) Tick the Enable DHCP Server checkbox.
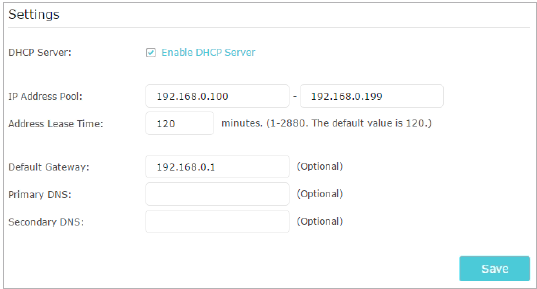
2) Enter the starting and ending IP addresses in the IP Address Pool.
- Enter other parameters if the ISP offers. The Default Gateway is automatically filled in and is the same as the LAN IP address of the router.
4) Click Save.
- To reserve an IP address for a specified client device:
1) Click Add in the Address Reservation section.
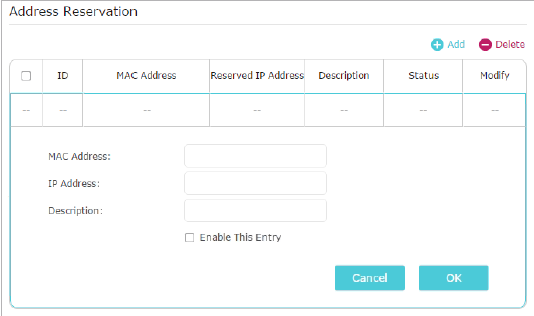
- Click View Existing Devices or enter the MAC address of the client device.
- Enter the IP address to reserve for the client device.
- Enter the Description for this entry.
- Tick the Enable This Entry checkbox and click OK.
Get to know more details of each function and configuration please go to Download Center to download the manual of your product.
Is this faq useful?
Your feedback helps improve this site.


TP-Link Community
Still need help? Search for answers, ask questions, and get help from TP-Link experts and other users around the world.