How to manage Kasa cameras in my Kasa care plan
Kasa Care provides plans that allow multiple cameras to enjoy cloud-based storage and related functions.
You could subscribe to advanced plans and add more cameras to the APP.
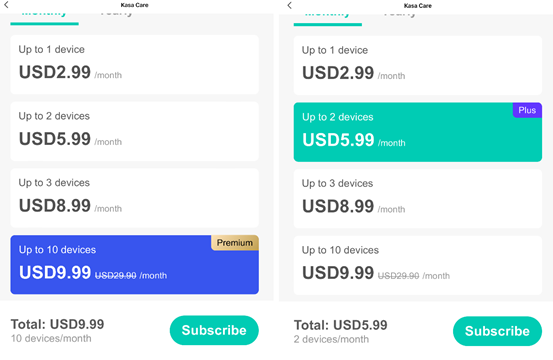
The Plus plan supports up to 3 cameras, and the Premium plan supports up to 10 cameras.
If you want to manage the device in your Kasa Care plan, please kindly refer to the steps below.
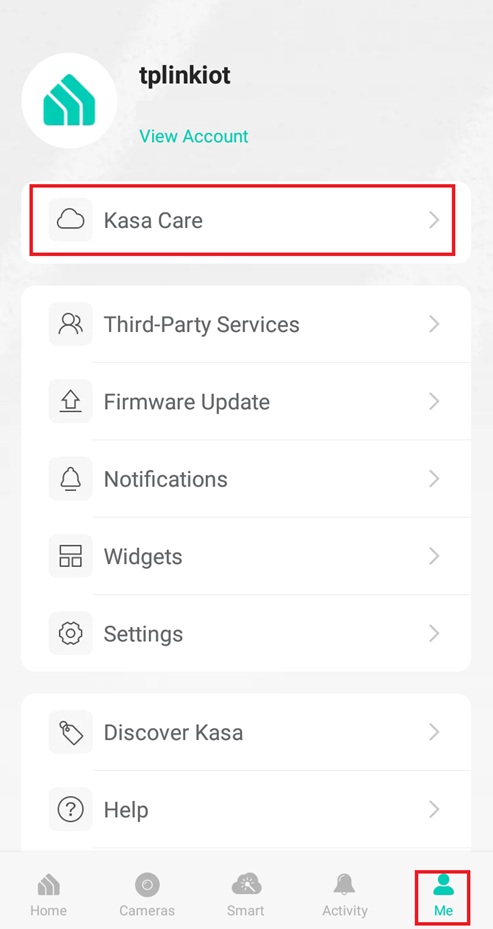
1.Open Kasa App, click Me-> Kasa Care.
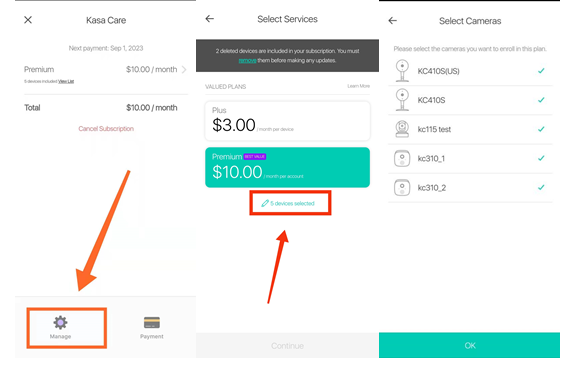
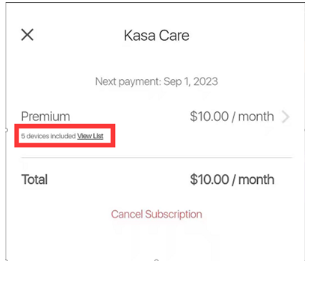
2. On the Kasa Care page, kindly check the Applied Cameras info, it is the camera’s number you can add to the plan. For example, as below picture, it is a premium plan, that can manage 10 cameras.
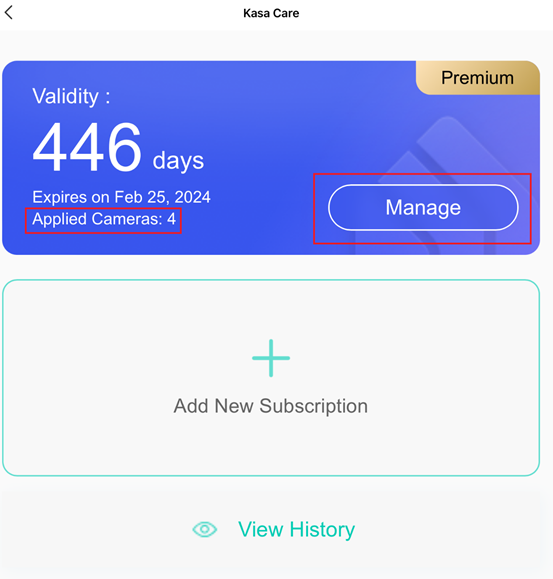
3. If the camera’s number has not exceeded the maximum, click Manage to add the new camera to your account. If you have used a Plus plan and have exceeded the maximum, please refer to step 4 to upgrade the service.
4. Click the Kasa Care plan, and choose the new service you want to upgrade, click Upgrade.
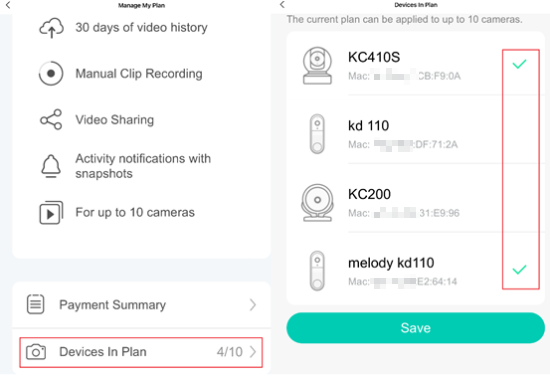
5. Click Devices in Plan, and then it will show the cameras in the current plan, you can add/remove devices on that page.
From the Kasa Care Web Portal or Android
1. Login the Kasa Care website(https://kasa.tplinkra.com) with your TP-Link ID.
2. Click on Manage, then click on the Edit button to select the new cameras. Please make sure all the cameras are selected and then click on OK.
3. Click on Continue on the next two pages.
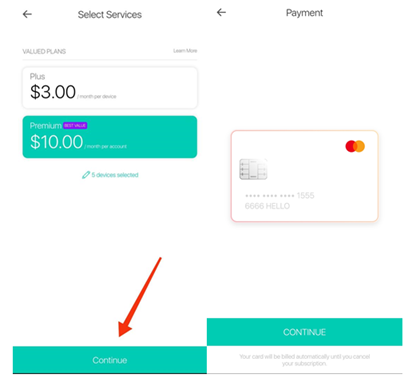
4. Click on Place Order. It won’t cost anything as you’re already paid for the Premium Plan. Then click to Agree and Subscribe and finally Done.
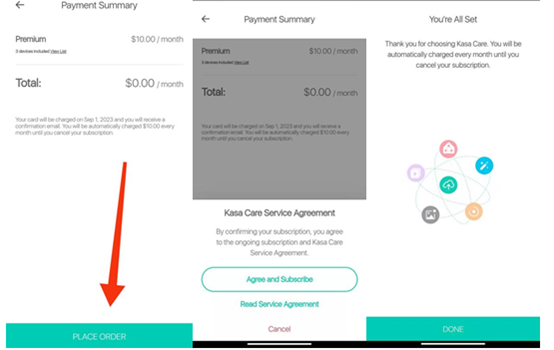
5. On the Kasa Care main page, you may click on View List to see all cameras enrolled in the Premium Plan. Please note only up to 10 cameras can be included in the Premium Plan. If there are Unknown Devices in the list, please remove it as the instructions.
If you need any help with Kasa Care, contact TP-Link technical support here and try to provide the following information for us to help with your case.
1. Your TP-Link ID
2. A screenshot error message and payment record with Invoice number or Order ID.
Is this faq useful?
Your feedback helps improve this site.
TP-Link Community
Still need help? Search for answers, ask questions, and get help from TP-Link experts and other users around the world.