How to use Time Machine function on TP-Link routers (case 2)
User’s Application Scenario
Use the USB drive connected to my TP-Link router as the backup disk of my MacBook.
If the web interface of your TP-Link router looks different from the example below, please refer to How to use Time Machine function on TP-Link routers (case 1)?
How can I do that?
Follow the steps below, here takes Archer C4000 as demonstration:
1. Log in to the web management page of your router. Please refer to How do I log into the web-based Utility (Management Page) of TP-Link wireless router?
2. Go to Advanced > USB Sharing > Time Machine.
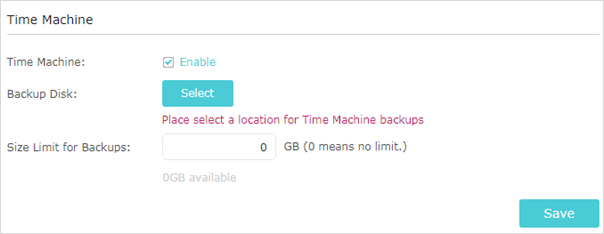
3. Tick the Enable checkbox.
4. Click Select to set a location for Time Machine backups.
5. Click the Size Limit for Backups.
Note: 0 means no limit for the space.
6. Click Save to save the settings.
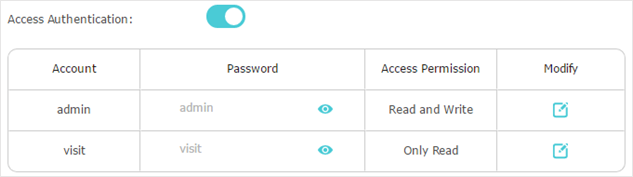
7. For data security, you can set up authentication for your USB device.
1). Go to Advanced > USB Sharing > USB Storage Device and locate the Sharing Contents and Security section.
2). Toggle on Access Authentication.
3). Click to modify the access account. The username and password are both admin for default administrator account, and are both visit for default visitor account.
Settings on MacBook
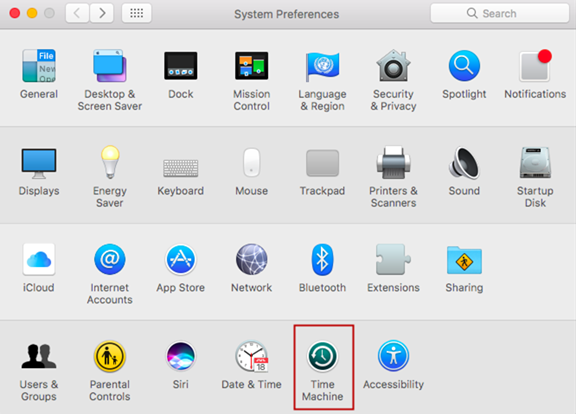
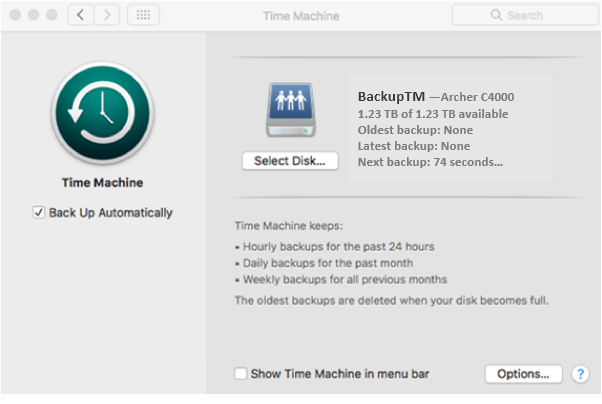
8. Make sure your MacBook is connected to the router. Open System Preferences and click on Time Machine on your MacBook.
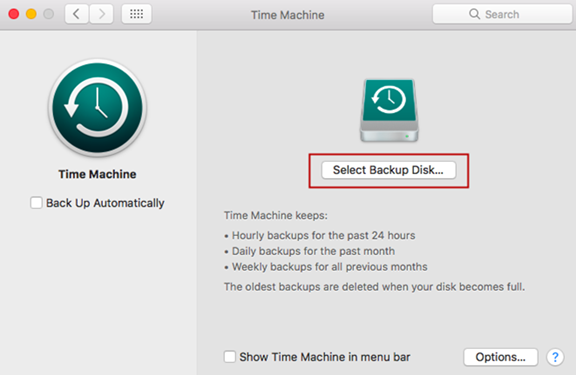
9. Select BackupTM on Archer C4000 as Backup Disk.
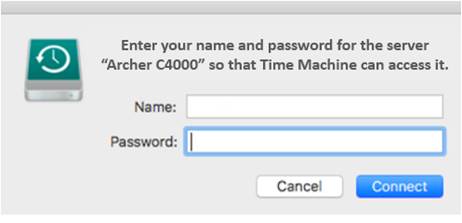
10. Enter the Sharing Account of the router and then Connect.
11. Succeed! You can back up your data to the external disk now.
Get to know more details of each function and configuration please go to Download Center to download the manual of your product.
Is this faq useful?
Your feedback helps improve this site.


TP-Link Community
Still need help? Search for answers, ask questions, and get help from TP-Link experts and other users around the world.