How to Configure Tapo / Kasa Devices to Work with Samsung SmartThings
This article will introduce how to connect Tapo/Kasa devices to your Samsung SmartThings app. After setting up the connection successfully, you will be able to control Tapo/Kasa devices through your SmartThings app.
Link Tapo / Kasa service with SmartThings
Before Getting Started:
- Set up your Tapo/Kasa devices via the Tapo/Kasa app first and make sure they can be controlled by the Tapo/Kasa app. Take Note of the TP-Link Login Used for Later.
- Check for any Available Firmware Updates and Update Your Device If Needed
- Download and install the SmartThings app, a Samsung or SmartThings Account is Needed, Please Create One if You Do Not Already Have One.
How to Link Your Tapo/Kasa Account with SmartThings:
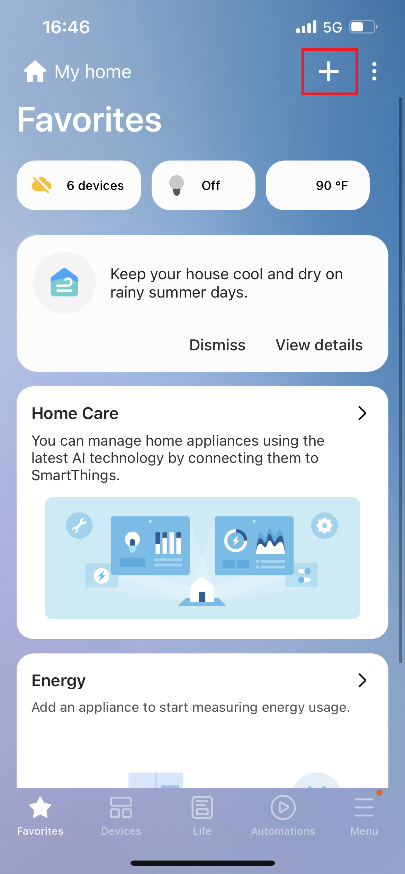
Step 1: Open the SmartThings app, tap the “+” icon on the top right, and choose “Add Device”, then tap “Partner devices”.

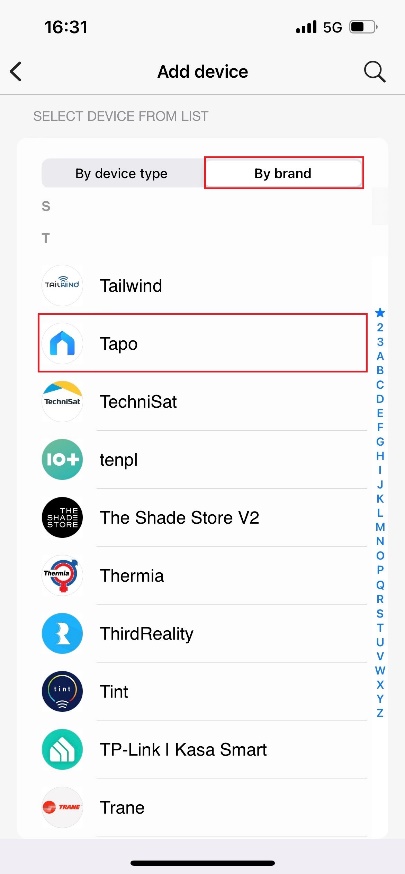
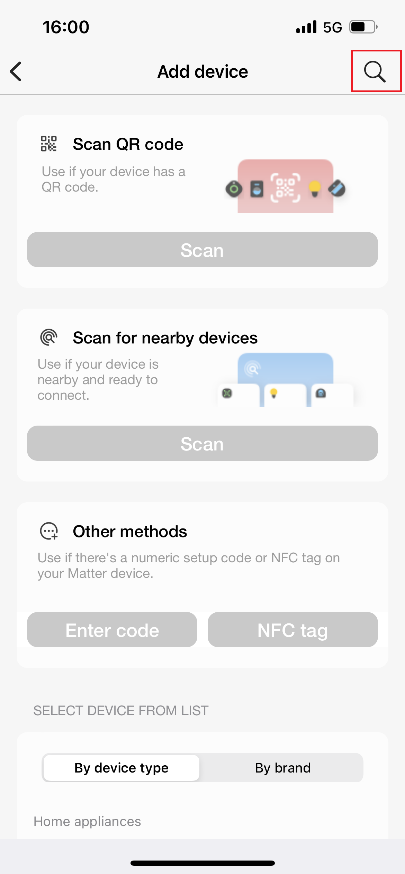
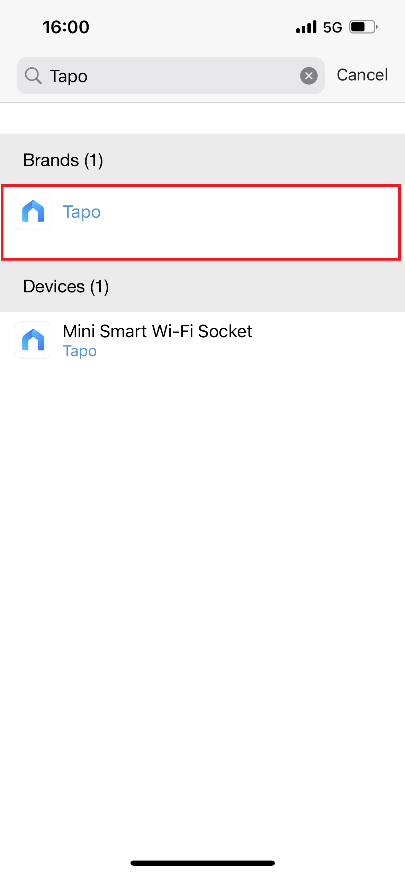
Step 2. Find “Tapo/Kasa” by brand. Or tap the search icon, enter “Tapo/Kasa”, and then find “Tapo/Kasa” under the list of brands available.
Step 3. Tap “Next” to start linking Tapo/Kasa with SmartThings.

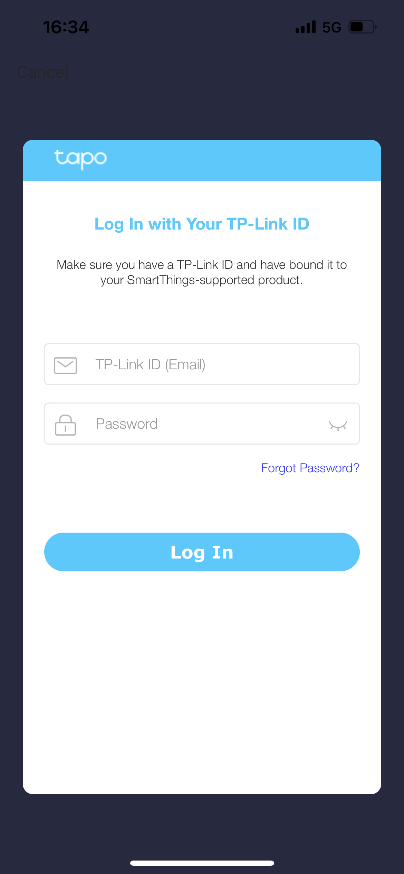
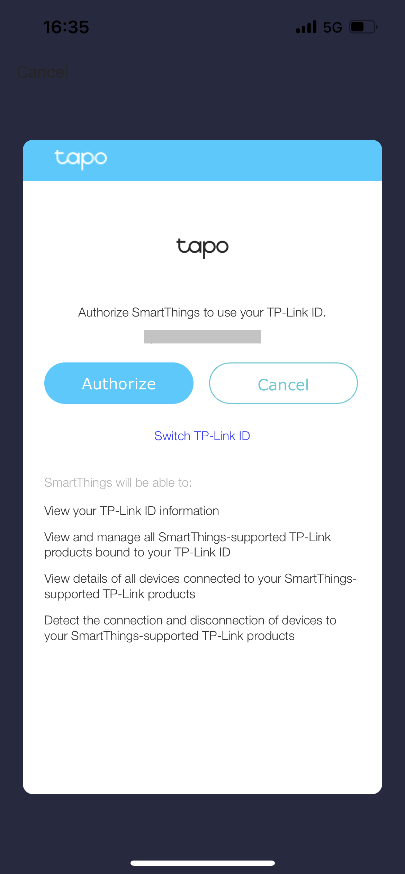
Step 4. Enter your TP-Link ID and password, then tap on “Authorize”. Please Ensure that this is the same login used to login to your Tapo/Kasa App and control your devices.
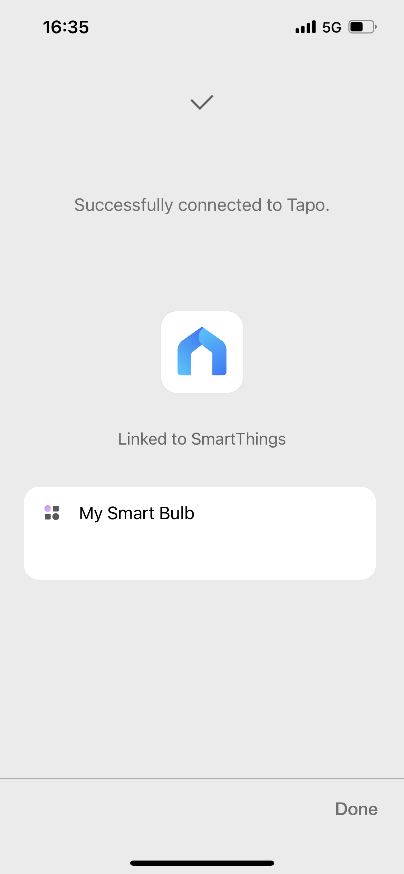
Step 5. The connection is successful when the following page comes up. Tap “Done” to complete the connection setup.
Enjoy!
You can now control the Tapo/Kasa devices with the SmartThings app. Go to the “Devices” page to find all your Tapo/Kasa devices.
Note: If you want to unlink Tapo/Kasa with SmartThings, you can go to Menu > Settings > Linked services.
Please Be Aware that Not All Features and Functions Available in the Tapo/Kasa App Are Available to the Samsung SmartThings Platform.
Matter devices connect to SmartThings directly
Please refer to this FAQ for more information:
How to set up Matter device with Alexa, Google, Apple or SmartThings
Fick du svar på din fråga?
Your feedback helps improve this site.


TP-Link Community
Still need help? Search for answers, ask questions, and get help from TP-Link experts and other users around the world.