How to configure IP&MAC Binding with TP-Link Wireless Dual Band 4G LTE Router (new logo)
IP & MAC Binding, namely, ARP (Address Resolution Protocol) Binding, is used to bind network device’s IP address to its MAC address. This will prevent ARP Spoofing and other ARP attacks by denying network access to a device with matching IP address in the Binding list, but unrecognized MAC address.
Here takes Archer MR200 as demonstration.
I want to: Prevent ARP spoofing and ARP attacks.
How can I do that?
1. Log in to the web-based interface of the router. If you don’t know how to do that, please refer to How to log into the web-based management interface of TP-Link Wireless Dual Band 4G LTE Router? (new logo)
2. Go to Advanced > Security > IP & MAC Binding and enable IP & MAC Binding.
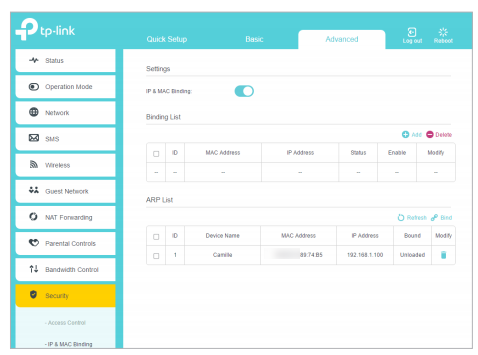
3. Bind your device(s) according to your needs.
To bind the connected device(s)
1) Select the device(s) to be bound in the ARP List.
2) Click Bind to add to the Binding List.
To bind the unconnected device
1) Click Add.
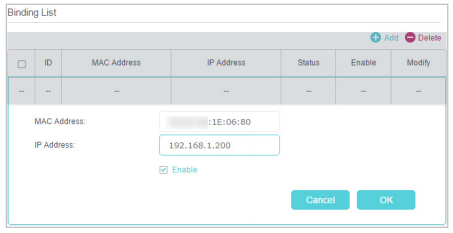
2) Enter the MAC address and IP address that you want to bind.
3) Select the checkbox to enable the entry and click OK.
Now you don’t need to worry about ARP spoofing and other ARP attacks.
Get to know more details of each function and configuration please go to Download Center to download the manual of your product.
Is this faq useful?
Your feedback helps improve this site.


TP-Link Community
Still need help? Search for answers, ask questions, and get help from TP-Link experts and other users around the world.