How to establish IPv6 internet connection with TL-WR902AC (standard wireless router mode) (new logo)
Your ISP provides information about one of the following IPv6 internet connection types: Dynamic IPv6, Static IPv6, PPPoEv6 and Tunnel 6to4.
IPv6 is only available when the TL-WR902AC is on standard wireless router mode. Before we start, please make sure it’s configured successfully, otherwise, click the corresponding mode below for internet setup instruction.
1. Visit http://tplinkwifi.net, and log in with the username and password you set for the router.
2. Go to IPv6 > IPv6 WAN.
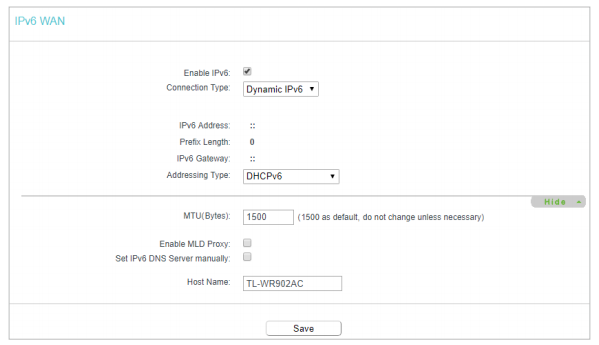
3. Enable IPv6 and select the internet connection type provided by your ISP.
Note: If you do not know what your internet connection type is, contact your ISP or judge according to the already known information provided by your ISP.
4. Fill in the blanks as required by different connection types.
1) Dynamic IPv6: the router will automatically get related parameters from your ISP.
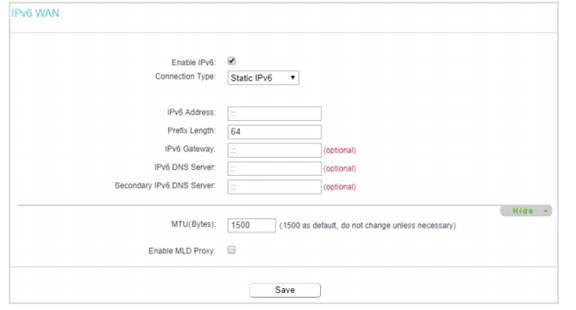
2) Static IPv6: Fill in the IPv6 address, gateway (optional) and DNS servers (optional) and click Save.
3) PPPoEv6: By default, the router uses the IPv4 account to connect to the IPv6 server. Click Advance to input further information if your ISP requires.
Note: If your ISP provides two separate accounts for the IPv4 and IPv6 connections, please untick the PPPoE same session with IPv4 connection checkbox and manually enter the username and password for the IPv6 connection.
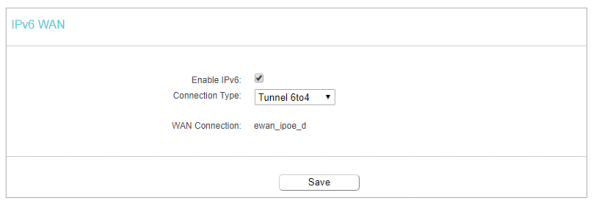
4) Tunnel 6to4: An IPv4 connection type is a prerequisite for this connection type.
5. Configure the LAN settings. Select an Address Auto-Configuration Type to assign IPv6 addresses to the computers in your LAN. RADVD and DHCPv6 Server are provided. If RADVD is selected, it doesn’t need to be configured. If DHCPv6 Server is selected, please fill in the following parameters.
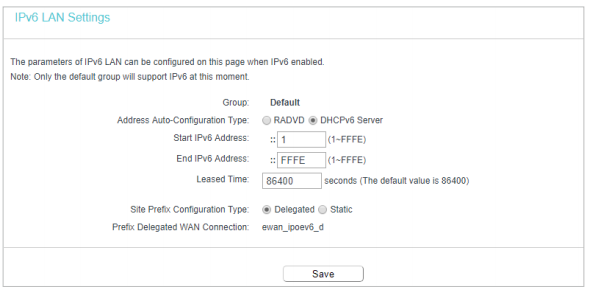
Note: If your IPv6 wan connection type is “Tunnel 6to4”, the Site Prefix Configuration Type should be “Static” to make sure “Tunnel 6to4” works properly.
6. Select a type to assign IPv6 prefix addresses to the computers in your LAN. Delegated and Static are provided.
1) If Delegated is selected:
• Prefix Delegated WAN Connection - Displays the WAN connection selected to assign prefix.
2) If Static is selected,
Enter the Site Prefix and Site Prefix Length.
7. Go to IPv6 > IPv6 Status to check whether you have successfully set up an IPv6 connection.
Get to know more details of each function and configuration please go to Download Center to download the manual of your product.
Fick du svar på din fråga?
Your feedback helps improve this site.
TP-Link Community
Still need help? Search for answers, ask questions, and get help from TP-Link experts and other users around the world.