How to configure TL-WR902AC as Hotspot Router (new logo)
Note: For the TL-WR902AC V1, please refer to the FAQ: https://www.tp-link.com/support/faq/1501/
In Hotspot Router mode, the router enables multiple users to share an internet connections from WISP.
1. Switch the operating mode to Share Hotspot and plug the router into an electrical outlet within the range of the public hotspot.
2. Connect your device to the router wirelessly or via an Ethernet cable. The Wi-Fi network name and password are on the router’s label.

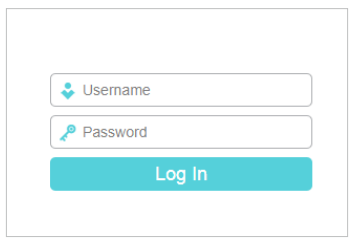
3. Launch a web browser and enter http://tplinkwifi.net in the address bar. Log in with admin (in lowercase) for both username and password.
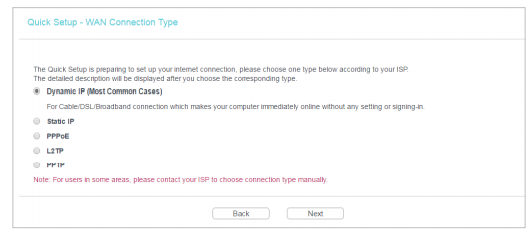
4. Click Next to start the Quick Setup.
5. Select the WAN Connection Type. When using the router in a hotel room or a small office, select Dynamic IP. In this case, we take Dynamic IP that requires no more parameters for instance. For other connection types, please enter the parameters provided by your ISP.
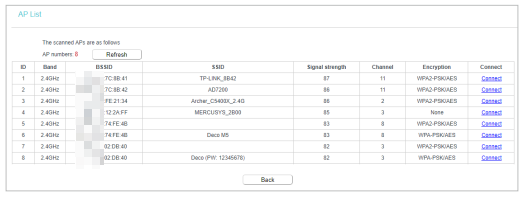
6. Click Connect to connect to the public Wi-Fi in the AP List page.
7. Enter the password of the public Wi-Fi in the Password field of the Client Setting section. In the Wireless 2.4GHz/5GHz section, either customize your Local Network SSID and Wireless Password for the 2.4GHz/5GHz network or keep the default ones, and then click Next.

8. Click Finish to apply the settings.
Get to know more details of each function and configuration please go to Download Center to download the manual of your product.
Is this faq useful?
Your feedback helps improve this site.
TP-Link Community
Still need help? Search for answers, ask questions, and get help from TP-Link experts and other users around the world.