How to install TP-Link Printer Server by using Standard TCP/IP port in Windows 2000 and XP
Step 1 Click Star->Printers and Faxes-> Printers.
Step 2 Double click on Add Printer.
Step 3 Click Next on the Welcome screen.
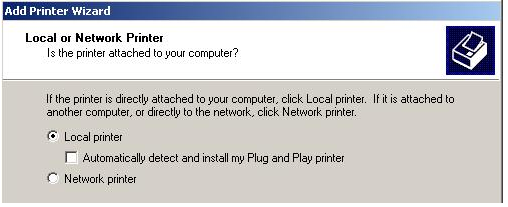
Step 4 The Local or Network Printer screen will open. Select Local printer. Uncheck Automatically detect and install my Plug and Play printer.
Step 5 Click Next.
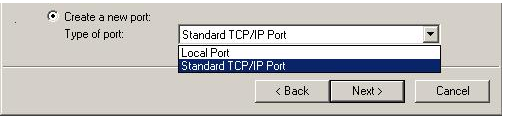
Step 6 The screen of Select a Printer Port will open. Select Create a new port and Standard TCP/IP Port.
Step 7 Click Next.
Step 8 Click Next again on the welcome screen.
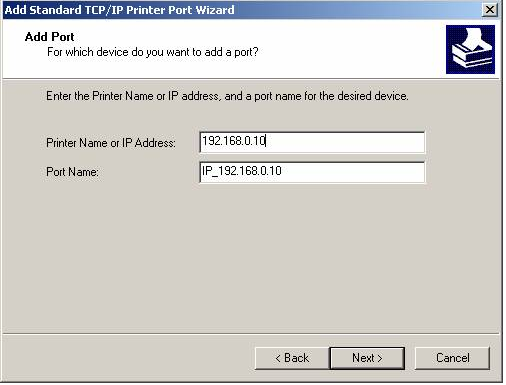
Step 9 The Add Standard TCP/IP Printer Port screen will open. Enter the IP address of the printer server. For Port Name, it will be entered automatically.
Step 10 Click Next.
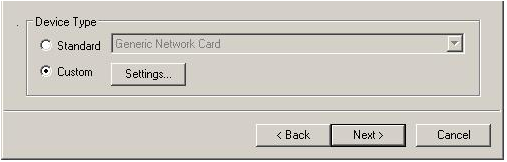
Step 11 The Additional Port Information Required screen will open. Select Custom. Click Settings.
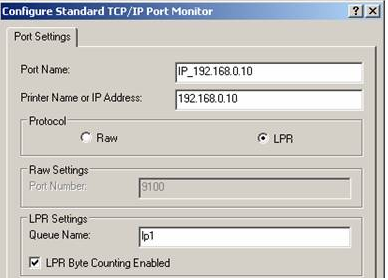
Step 12 The Configure Standard TCP/IP Port Monitor screen will open.
By using LPR protocol
Select LPR for Protocol. Enter lp1 in the Queue Name field. Click on the LPR Byte Counting Enabled checkbox (Due to a flaw in Windows LPR, some print servers will not accept jobs unless Byte Counting is enabled).
By using Raw protocol
In the Protocol section, select Raw
In the Port Number field, enter 9100

Step 13 Click OK, then Next and Finish.
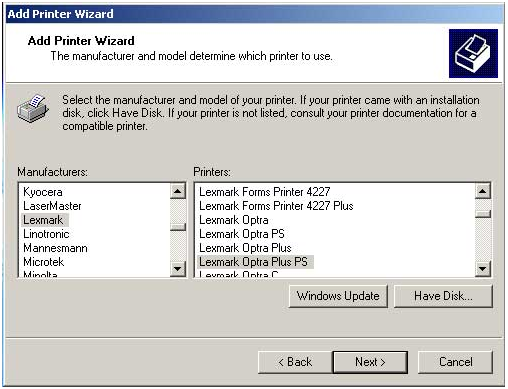
Step 14 A window will show all of the drivers, select the appropriate one.
a. In the window, select an appropriate name (Use the Queue name for clarity when making multiple printer definitions).
b. Keep existing driver if necessary.

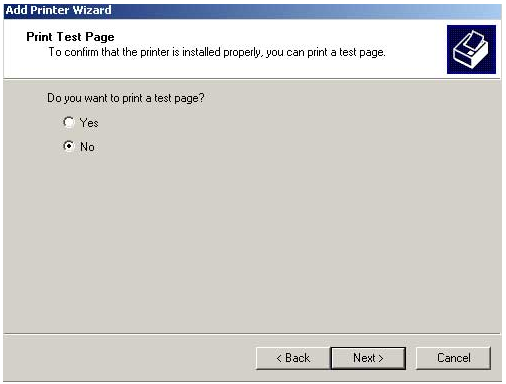
c. In the Print Test Page window, you may test as needed if necessary.
d. Click Next.
e. Click Finish.
Is this faq useful?
Your feedback helps improve this site.
TP-Link Community
Still need help? Search for answers, ask questions, and get help from TP-Link experts and other users around the world.