How to set up system time of Archer C9_V1, C8, C5_V2, C1900
System time is the time displayed while the router is running. The system time you configure here will be used for other time-based functions like Parental Controls and Wireless Schedule. You can manually set how to get the system time.
How can I do that?
Follow the steps below and take Archer C9 V1 as demonstration.
1. Please refer to How do I log into the web-based Utility (Management Page) of TP-Link wireless router?
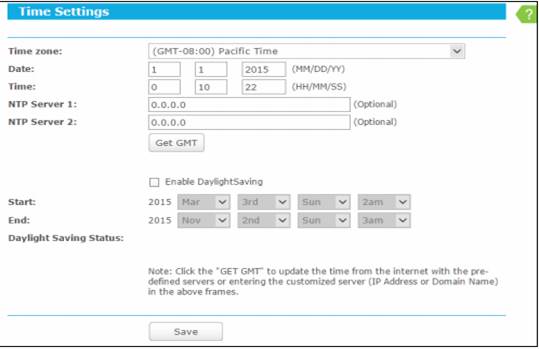
2. Go to Advanced > System Tools > Time Settings page.
3. Configure the system time using the following methods:
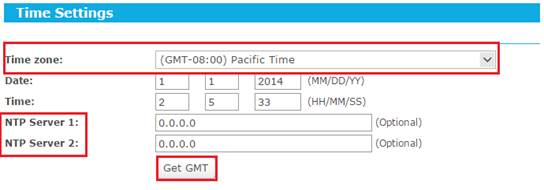
To automatically synchronize the time (recommended)
Make sure your router can access the Internet before you select this way to get system time.
1) Select your local time zone.
2) Enter the address or domain of the NTP Server I or NTP Server II (optional).
3) Click the Get GMT button to get system time from Internet if you have connected to the Internet.
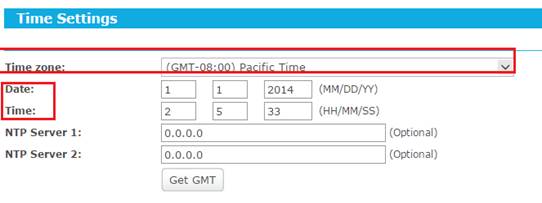
To manually set the date and time
- Select your local time zone.
- Enter the Date in Month/Day/Year format.
- Enter the Time in Hour/Minute/Second format.
- Click Save.
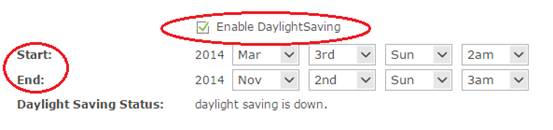
To set Daylight Saving:
1) Check the box to enable Daylight Saving.
2) Select the start time from the drop-down lists in the Start field.
3) Select the end time from the drop-down lists in the End field.
4) Click the Save button to save the settings.
Note:
1) This setting will be used for some time-based functions such as firewall. You must specify your time zone once you log in the router successfully; otherwise, these functions will not take effect.
2) The time will be lost if the router is turned off.
3) The router will automatically obtain GMT from the Internet if it is configured accordingly.
4) The Daylight Saving will take effect one minute after the configurations are completed.
Get to know more details of each function and configuration please go to Download Center to download the manual of your product.
Is this faq useful?
Your feedback helps improve this site.
TP-Link Community
Still need help? Search for answers, ask questions, and get help from TP-Link experts and other users around the world.