How to configure WDS function on TP-Link Wireless Routers (new logo)
A Wireless Distribution System (WDS) is a system that enables the wireless interconnection of access points in an IEEE 802.11 network. It allows a wireless network to be expanded using multiple access points without the need for a wired backbone to link them, as is traditionally required. For more information about WDS, please refer to Wikipedia. The instruction below is a solution for SOHO WDS connection.
In order to build a successful WDS connection between different devices, it requires that both devices use the same wireless MAC address format. For example, Site A uses 4-address MAC Address format in passive WDS bridge mode, Site B also need to use 4-address MAC Address format in active WDS bridge mode.
WDS may be incompatible between different products (even occasionally from the same vendor) since the IEEE 802.11-1999 standard does not define how to construct any such implementations or how stations interact to arrange for exchanging frames of this format.-----From Wikipedia

Note:
- LAN IP of the extended router should be different but in the same subnet of the root router;
- The DHCP Server on the extended router should be disabled;
- WDS bridging only requires the WDS setting on either the root router or the extended router.
To set up WDS with TP-Link wireless router which is marked in Active WDS of the screenshot above, the following steps are required:
Step 1
Log in to the router’s web management page:
How do I log into the web-based Utility (Management Page) of TP-Link wireless router?
Step 2
Go to Network -> LAN to Modify the LAN IP Address of the router, then click Save.
Note: If is suggested to change the router’s IP Address to be in the same network of the root network. For example, if your root router’s IP Address is 192.168.1.1~192.168.1.100, while our router’s default LAN IP Address is 192.168.0.1, we need to change our router’s IP Address to be 192.168.1.X.
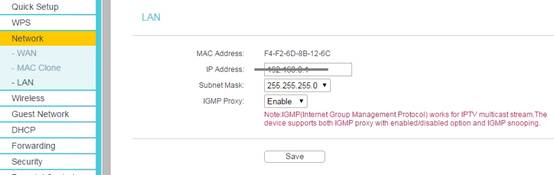
After that, please log in the router with the new LAN IP address or the default domain name.
Step 3
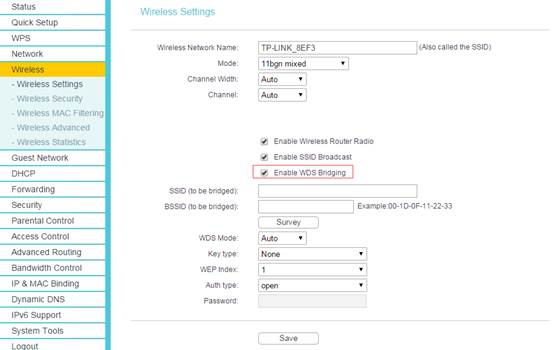
Go to Wireless -> Wireless Settings. Check Enable WDS (Enable WDS Bridging). Then the page will show as below:
Note: For some interface, you may need to go to System Tools—System Parameters, then you can find WDS.
Step 4
The SSID on the top of the page is the local wireless network name of this router. You can name whatever you like.

Step 5
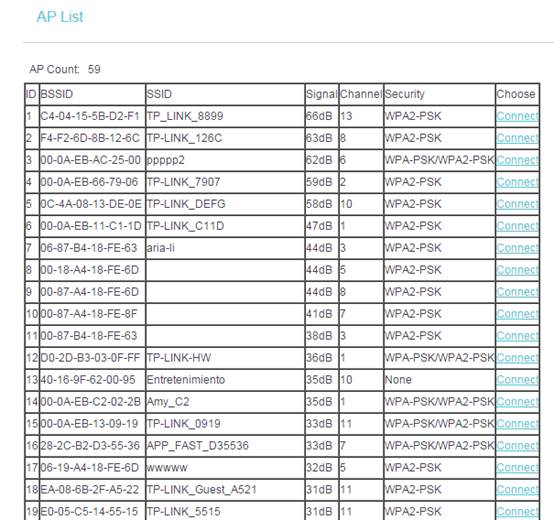
Click Search/Survey. On the pop-up window, find the SSID and channel of your root router, and hit Connect.
Step 6
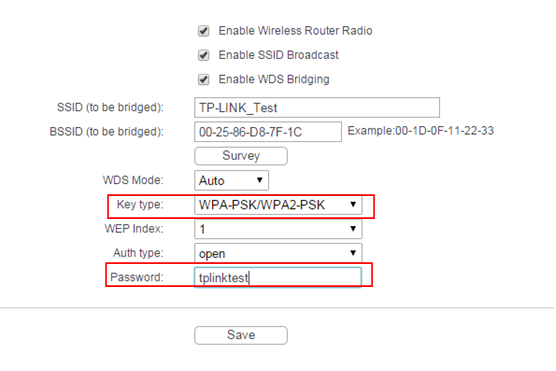
The root AProuter’s SSID and BSSID (MAC Address) will be filled in automatically. Then, please input the wireless security settings and wireless channels to match the ones on the root router. Click on Save.
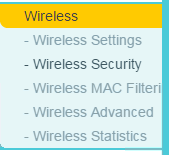
Step 7
Go to Wireless Security page to secure the local wireless network of the router itself. The Encryption settings here can be different from your root router’s.
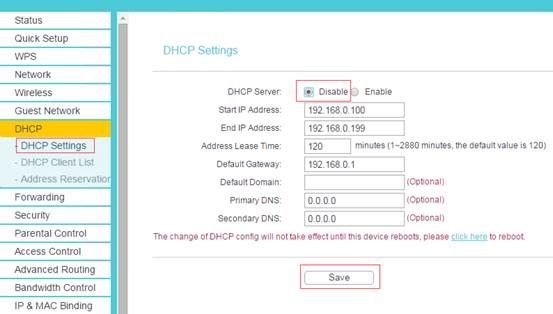
Step 8
Click DHCP -> DHCP Settings page. Choose Disable DHCP Server, and click Save button.
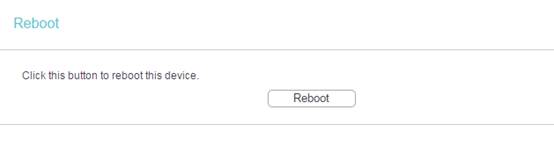
Step 9
Please go to System Tools -> Reboot page to reboot the unit.
Step 10
Check whether you can get Internet when connected to our router’s network. If not, it is suggested to power cycle the main root AP and our router and try the Internet again. The two devices could be incompatible in WDS bridge mode if Internet still does not work after power cycling them.
To get to know more details of each function and configuration please go to Download Center to download the manual of your product.
Is this faq useful?
Your feedback helps improve this site.
TP-Link Community
Still need help? Search for answers, ask questions, and get help from TP-Link experts and other users around the world.