How to make applications free from port restriction by DMZ on TP-Link ISP-customized Router
Introduction
This article provides a simple introduction to DMZ and the step-by-step instructions for configuring your computer as a DMZ host.
Setting a device as a DMZ (Demilitarized Zone) Host in your local network fully exposes it to the internet, allowing unlimited two-way communication between the device and external networks. The DMZ host acts like a virtual server with all ports open.
This feature is primarily used when:
- You are unsure which specific ports need to be opened for certain applications (e.g., IP cameras, database software, or specialized programs).
- You need a quick setup without manually configuring port-forwarding rules.
For example, you may set up a DMZ to allow the home computer to join an internet-based game without having to open ports. Due to port restrictions, you can log in to online games but cannot join a team with other players. To solve this problem, set your computer as a DMZ with all ports open.
Note:
- A DMZ host is completely unprotected by your router’s firewall, making it vulnerable to hacking, malware, or unauthorized access. Never enable DMZ on devices containing sensitive data (e.g., personal files, financial information).
- If DMZ is not actively needed, ensure it remains turned off in your router settings.
Configuration
Step 1. Log in to the router's web interface. Ensure your device is connected to the router via Wi-Fi or an Ethernet port. Open a web browser and enter one of these addresses in the browser bar to access the web interface:
For models starting with E/H: http://tplinkwifi.net
For models starting with V/N/M: http://tplinkmodem.net
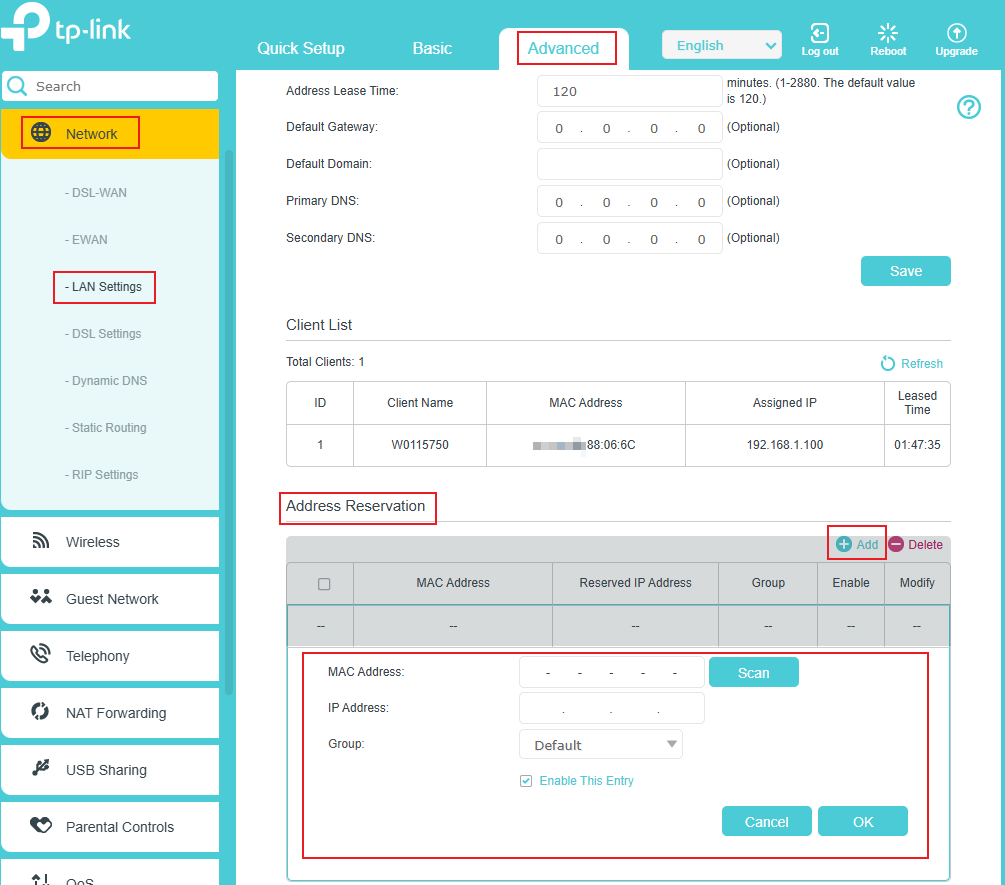
Step 2. Reserve an IP address (e.g., 192.168.1.100) for your computer.
Go to Advanced > Network > LAN Settings; scroll down the screen to the Address Reservation section, click Add > Scan, select your computer, then click OK.
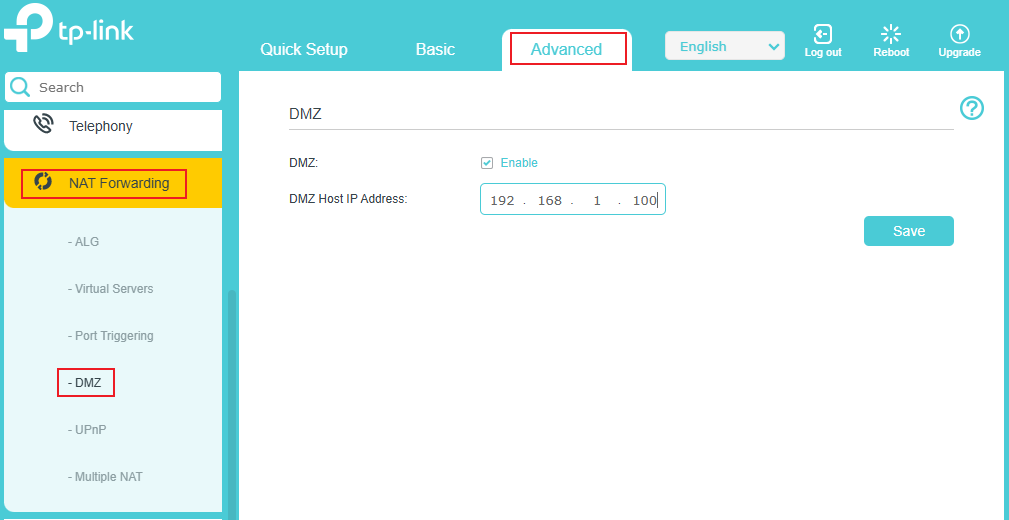
Step 3. Navigate to Advanced > NAT Forwarding > DMZ, tick Enable, enter the reserved IP address, and click Save to apply the settings.
Done!
The configuration is completed. You’ve set your computer to a DMZ host, and now you can make a team to game with other players.
Is this faq useful?
Your feedback helps improve this site.
_1.0-R-package_normal_20240530021753z.png)

TP-Link Community
Still need help? Search for answers, ask questions, and get help from TP-Link experts and other users around the world.