
How to Set Up Your TP-Link Range Extender to Access Point (AP) Mode
Normally, TP-Link extenders connect to a router's Wi-Fi and rebroadcast the signal to extend coverage. However, if your extender has one or more Ethernet ports, you can switch it to Access Point (AP) mode. This allows you to connect the extender to your router via an Ethernet cable, turning a wired network into a wireless one.
Note: In AP mode, the Signal LED stays off. The 2.4G/5G LEDs now show the extender's own Wi-Fi status, not the connection to the router. For example, if the 2.4G LED is off, the extender's 2.4GHz Wi-Fi is disabled.
Key Takeaways
- AP mode lets you use your extender to turn a wired network into a wireless one.
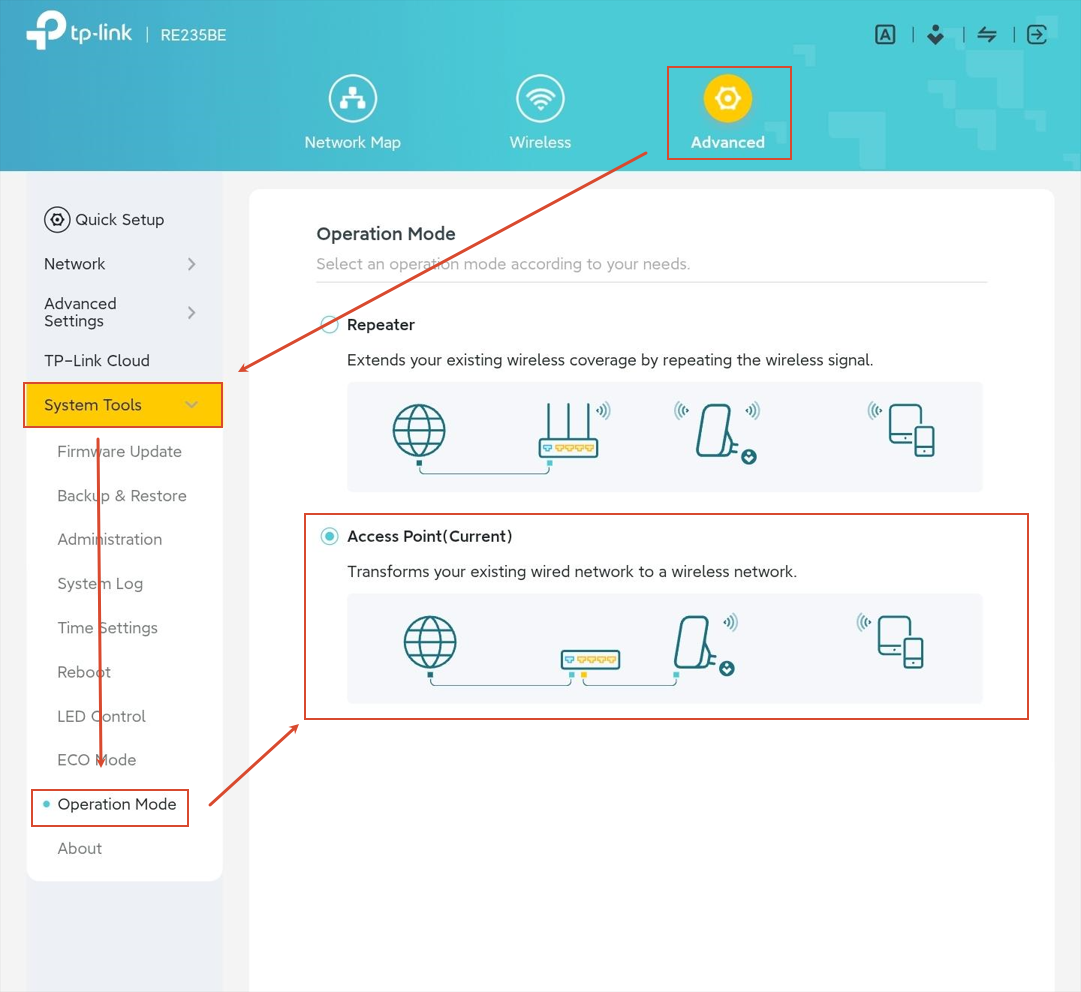
- Use the Tether app (More > Operation Mode) or Web interface (Advanced > System Tools > Operation Mode) to switch modes.
- After switching, connect the extender's Ethernet port to your router.
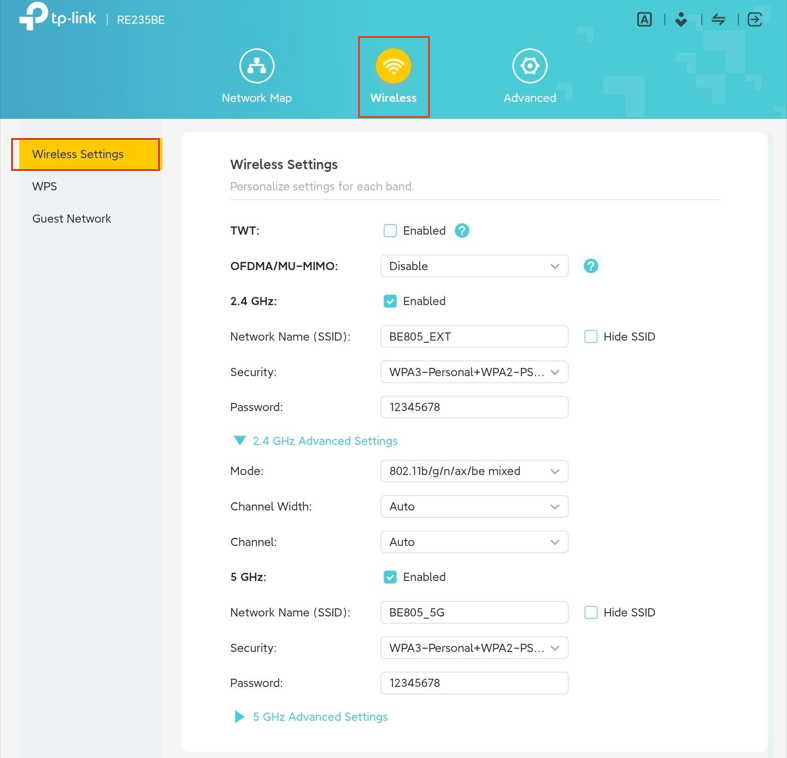
- You can customize the Wi-Fi name and password after switching to AP mode.
Configuration Guide
Method 1: Using the Tether App (for Tether-compatible models)
Step 1: Access the Extender
Connect your phone to the extender’s Wi-Fi.
Open the Tether app, and tap the extender under My Devices.
Enter the login password you created.
Note: If the extender is in factory default mode, you'll need to complete the initial setup in the app before you can change the operation mode.
Step 2: Change the Operation Mode
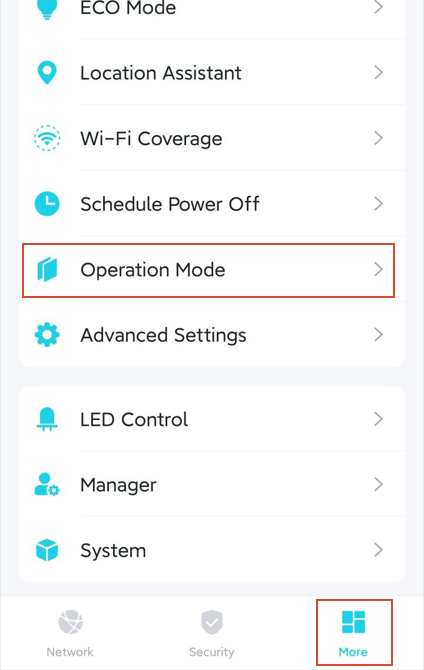
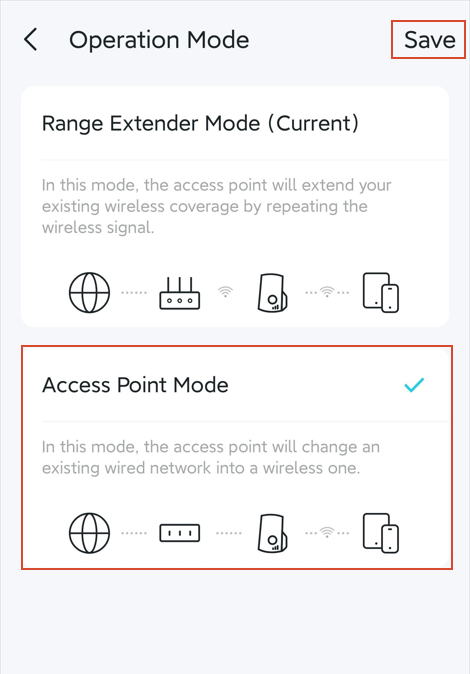
Go to More > Operation mode, select Access Point Mode, and click Save.
When prompted, tap Reboot Network to restart the extender.
Step 3: Connect the Ethernet Cable
Connect one end of the Ethernet cable to the extender's Ethernet port.
Connect the other end to your router or another upstream device for Internet access.
Step 4: Adjust Wi-Fi Settings (Optional)
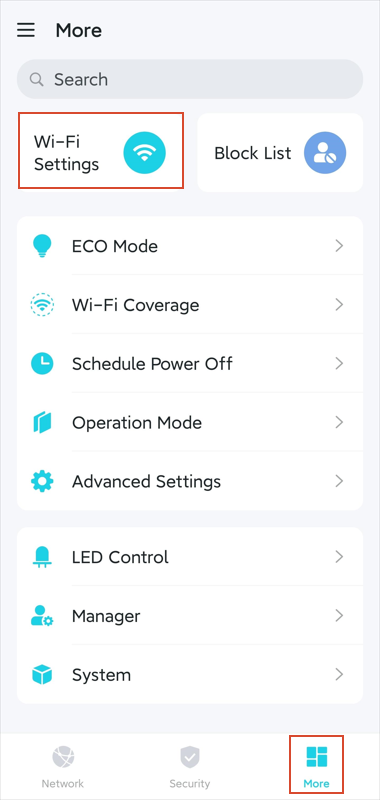
If you want to change the extender’s Wi-Fi name and password, go to More > Wi-Fi Settings, and make your adjustments.
Method 2: Using the Web Interface (for all models)
Step 1: Access the Extender
Connect your computer or phone to the extender’s Wi-Fi.
Open a web browser, and visit https://tplinkrepeater.net or the extender’s IP address (default: https://192.168.0.254/.
Enter the login password you created.
Notes:
1. Once connected to a router, the extender’s IP address will be assigned by the router. You can find it on the router’s DHCP client list.
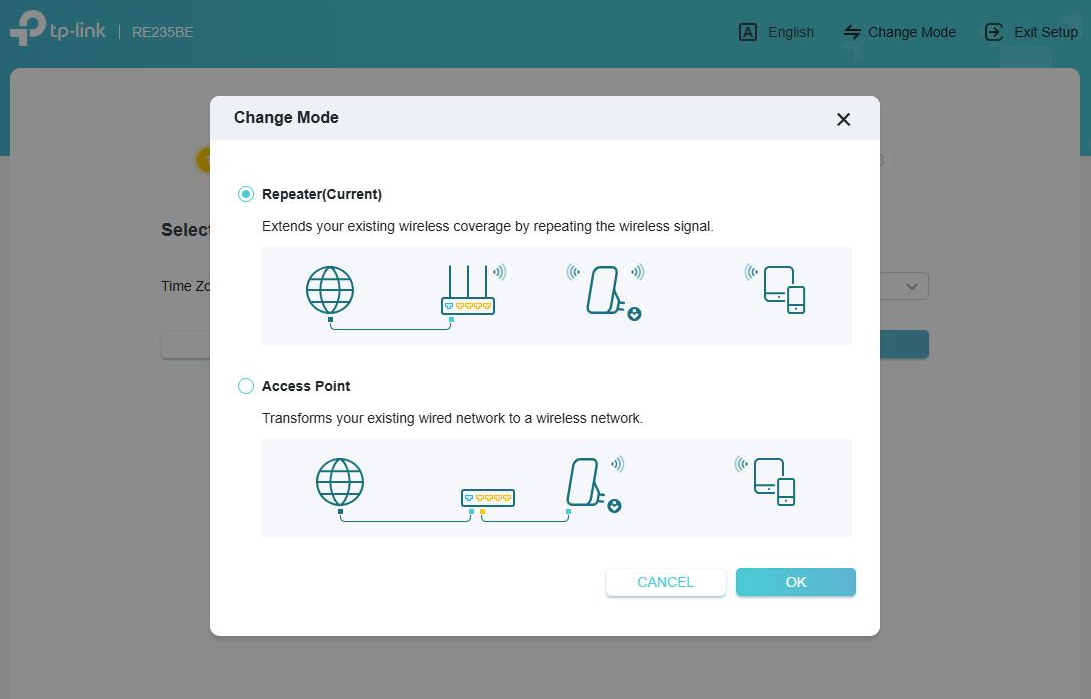
2. If the extender’s in factory default mode, you’ll see an option to change mode once logged in. Select Access Point, click OK, then click Reboot.
Step 2: Change the Operation Mode
Go to Advanced > System Tools > Operation Mode, select Access Point Mode, and click Save.
When prompted, click Reboot to restart the extender.
Step 3: Connect the Ethernet Cable
Connect one end of the Ethernet cable to the extender's Ethernet port.
Connect the other end to your router or another upstream device for Internet access.
Step 4: Adjust Wi-Fi Settings (Optional)
If you want to change the extender’s Wi-Fi name and password, go to Wireless > Wireless Settings and make your adjustments.
To get to know more details of each function and configuration, please go to the Download Center to download the manual for your product.
Looking For More
Is this faq useful?
Your feedback helps improve this site.



TP-Link Community
Still need help? Search for answers, ask questions, and get help from TP-Link experts and other users around the world.