How to configure my Range Extender via WPS button to extend an existing wireless network’s coverage
This Article Applies to:
Here in this article, we’ll introduce how to configure Range Extender via WPS button. It’s similar to the QIG of each product, but certainly there is something different.
This article will answer two questions for you:
1. Sometimes you may find it is difficult to connect your RE product to your Router/AP using WPS button. Why?
2. Sometimes you can only connect your dual-band RE product to the Wi-Fi 2.4G or 5G of your dual band router/AP using WPS button, but not both bands’ Wi-Fi. Why?
Part A: First let’s explain how to configure Ranger extender via WPS button:
1. Plug your Range Extender into a power outlet near your main Router/AP.
2. Push the WPS button on your main Router/AP first, then immediately push the WPS button on your Range Extender.
Note1: After you have pushed WPS button of your Router/AP, you need to push WPS button of your Range Extender within 2 minutes. So we strongly suggest you should push WPS button of your RE product as soon as you have pushed WPS button of your router.
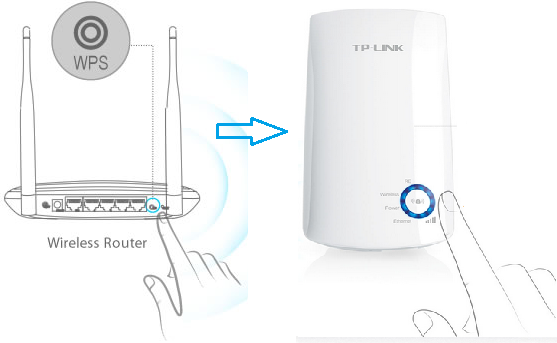
Note2: After pushing the WPS button of your Router/AP, your Router/AP’s WPS LED should blink. If your Router/AP’ WPS LED doesn’t blink, it means you need to push the WPS button again until the WPS LED of your Router/AP blinks. The same reason is also suitable for RE product. After pushing the WPS button of your Range Extender, the WPS/RE light of your Range Extender should blink. If not, push again.
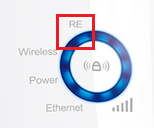
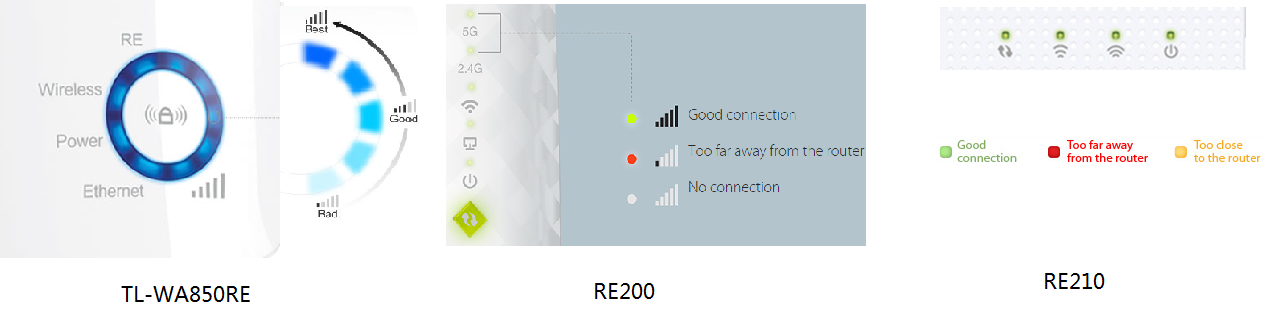
Below is the WPS LED of TL-WA850RE and RE200:

3. The WPS process will last 2 minutes. You can wait 2 minutes, and then check the wireless signal LED of your Range Extender. If it’s on (no matter what color it is or how many signal bars there are), then your Range Extender has been successfully connected to your main Router/AP.
4. After 2 minutes, if the wireless signal LED of your Range Extender is still off, it means the WPS process fails. You may need to try one more or several more times of WPS operation, and repeat the steps above.
5. At last, you can put your Range Extender in a proper place where you want to extend the wireless network’s coverage, and enjoy the extended wireless network. No need to repeat the process. Once it’s done, it will connect automatically every time you plug it back in.
Part B: Now let’s check this problem “sometimes you may find it difficult to connect your RE product to your Router/AP using WPS button”.
There are many factors which can affect the WPS process. For details, please check this FAQ: How can I copy the wireless setting from the front router using Wi-Fi Clone button?
Note: If you can’t configure your Range Extender via WPS, please follow the articles below to configure it via its Web GUI:
Part C: At last, let’s check this problem “sometimes you can only connect your dual-band RE product to the 2.4G or 5G Wi-Fi of your dual band router/AP using WPS button, but not both bands’ Wi-Fi”.
In fact, this problem is mostly caused by the dual band Router/AP but not our dual band Range Extender:
Some dual band Router/AP only allows the clients including Range Extender to connect to its single frequency band (2.4G or 5G, it’s decided by Router/AP) with one push at the WPS button.
Is this faq useful?
Your feedback helps improve this site.


TP-Link Community
Still need help? Search for answers, ask questions, and get help from TP-Link experts and other users around the world.