How to configure TL-WA701ND V1, TL-WA801ND V1 or TL-WA901ND V1 & V2 as an Access Point
This Article Applies to:
The topology below shows how the access point works:
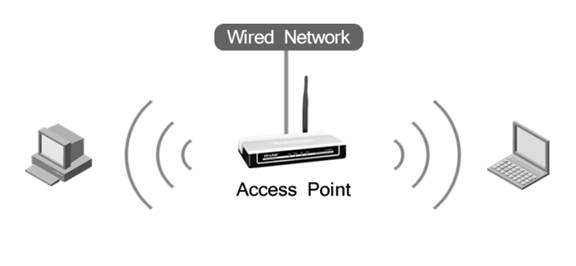
Note:
1. To work as an access point, these devices are ‘plug and play’. Please find the default wireless network name and wireless password on the bottom label of the access point. If you want to customize the wireless network name or wireless password, please go to 2.
2. If this is not the initial setup, please reset the access point to factory default settings firstly referring to here. Then go through all the steps below.
Here we take TL-WA701ND V1 and the information below as a reference. If the detailed information for your case is different, please use the corresponding information to configure it.
Information of the root router:
LAN IP of the root router:192.168.1.254
Subnet Mask:255.255.255.0
Configuration on the access point:
Log in to the Access point’s web management interface.
Since the DHCP Server on the Access Point is disabled by default, we have to manually assign an IP address as 192.168.1.x (1<x<254) for the computer to match the default IP address (192.168.1.254) of the Access point. Please click here for the detailed instructions.
Step 2
Click Network. Please make sure the access point’s IP address is in the same IP segment with the Root Router and avoid the IP conflict. In this instance, we can change the IP to “192.168.1.250”. Then click Save. If your root router is in the different segment like 192.168.0.254, then please change access point’s IP Address to 192.168.0.250.

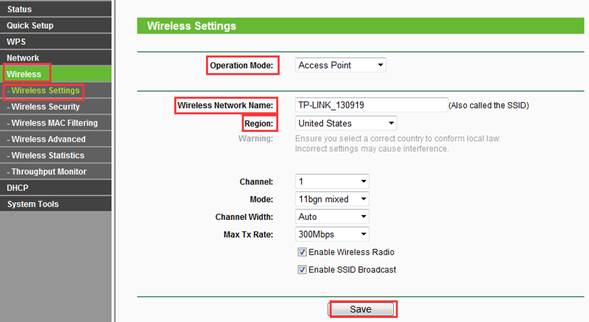
Step 3
Click Wireless ->Wireless Settings. Select Access Pointas the Operation Mode. Change the Wireless Network Name to whatever you want. Select your own country as the Region.Then click Save.
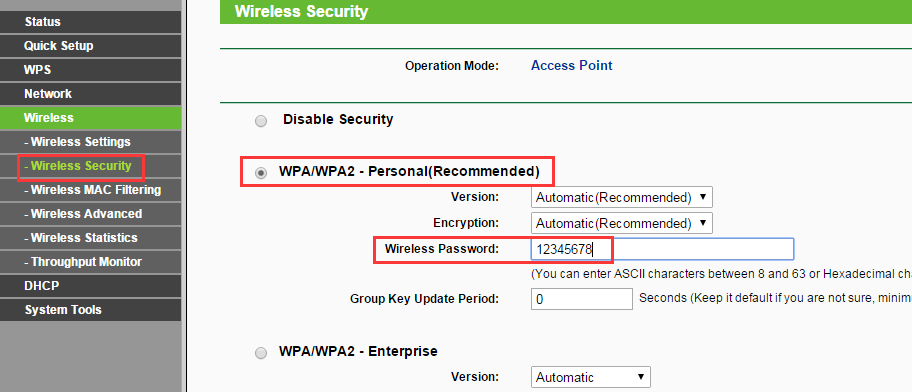
Step 4
Click Wireless ->Wireless Security. If you want to secure this wireless network, please select one security type, for example, WPA/WPA2-Personal (Recommended). Then create a wireless password in the Password box. Finally, click Save button.
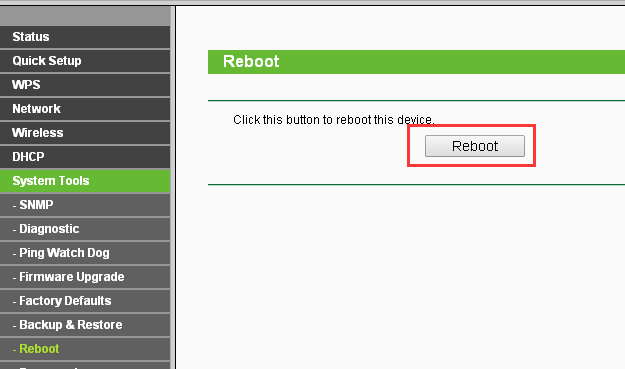
Step 5
Click System Tools-> Reboot to reboot the Access Point.
After you go through all the above steps, the access point should get working properly with the root router. Please connect this Access Point to the root router with an Ethernet cable and change the IP address on your computer back to obtain the IP address automatically, please refer to Step 1if you don’t know how to do it.
Get to know more details of each function and configuration please go to Download Center to download the manual of your product.
Is this faq useful?
Your feedback helps improve this site.
TP-Link Community
Still need help? Search for answers, ask questions, and get help from TP-Link experts and other users around the world.