
Share Tapo and Kasa Devices with Family or Multiple Users (Device Sharing 2.0)
Note: Device Sharing 2.0 is being rolled out gradually, and feature availability may vary by account. Check Tapo App > Me > Device Sharing to see if it's available for your account.
The Tapo app's Device Sharing feature lets you give family members or other users access to your Tapo cameras, doorbells, robot vacuums, and other smart home devices. Shared users can view and control supported features, and you can remove their access at any time. Sharing works by sending an invitation to another TP-Link account, and you can stop sharing at any time.
Key Takeaways
- You can share Tapo and Kasa smart devices with other TP-Link accounts using the Device Sharing feature in the Tapo app. You can also stop sharing at any time.
- Tapo cameras, doorbells, and robot vacuums can be shared with up to five (5) TP-Link accounts. Other smart home devices can be shared with up to eight (8) accounts. Home sharing can be shared with up to (10) accounts.
- With Device Sharing 2.0, owners can now choose from three permission tiers: Live View Only, Basic, and Advanced. For more details about permission tiers, refer to Introduction to Tapo Device Sharing 2.0
- The device owner can manage or remove shared access at any time through the app.
- Kasa Smart device owners can also use the Device Sharing feature by syncing their Kasa devices to the Tapo app.
Share the Entire Home or Specific Devices
Step 1: Recipient Creates a TP-Link/Tapo Account
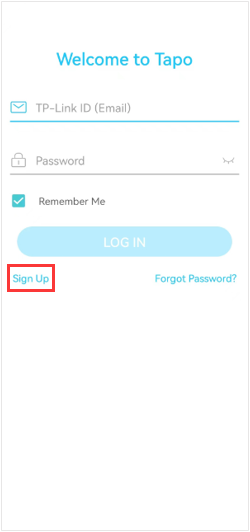
The person you want to share with must have their own TP-Link ID. Ask them to open the Tapo app and tap Sign Up to create an account before you send the invitation. For more on what a TP-Link ID is and how to create one, see What is TP-Link ID and how to create a TP-Link ID?
Step 2: Owner Chooses What to Share
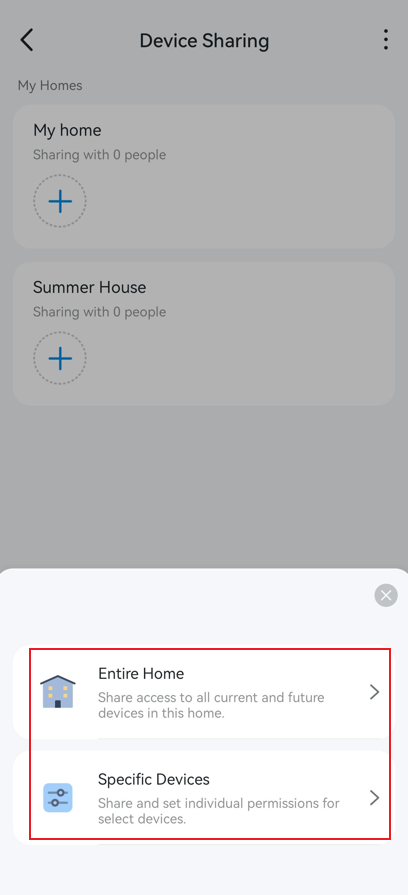
You can share either the entire Home or specific devices.
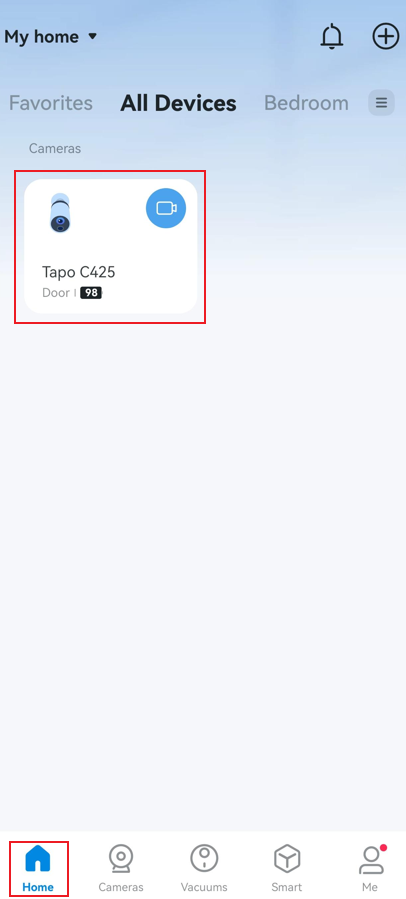
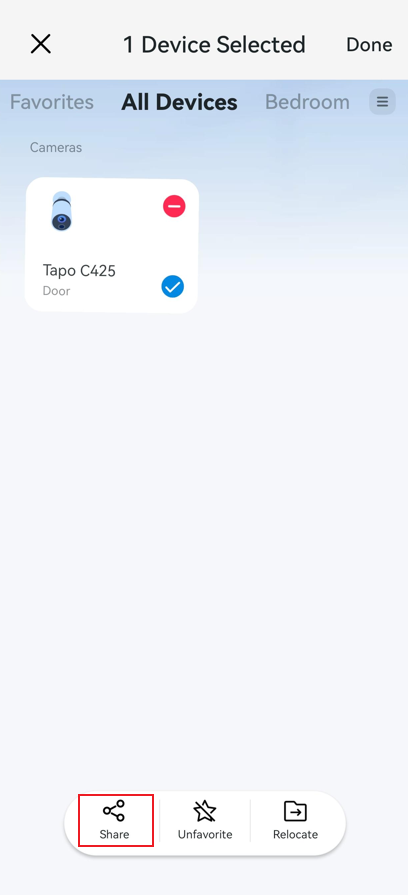
Method 1. On the Tapo app Home page, long-press the device card you want to share, then tap Share.
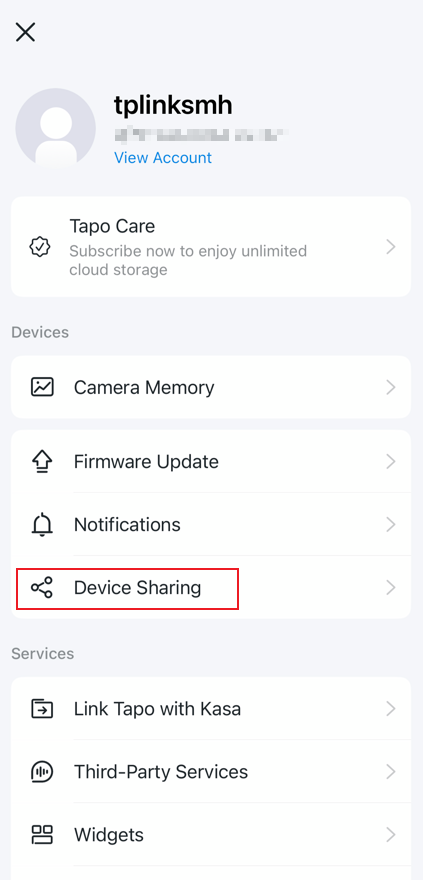
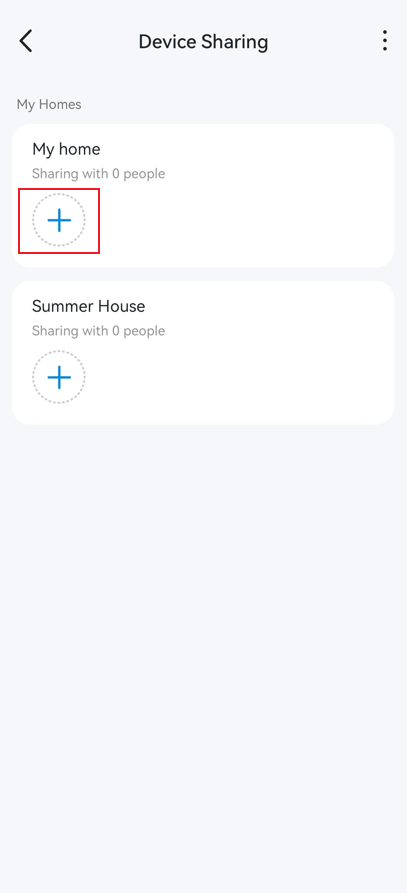
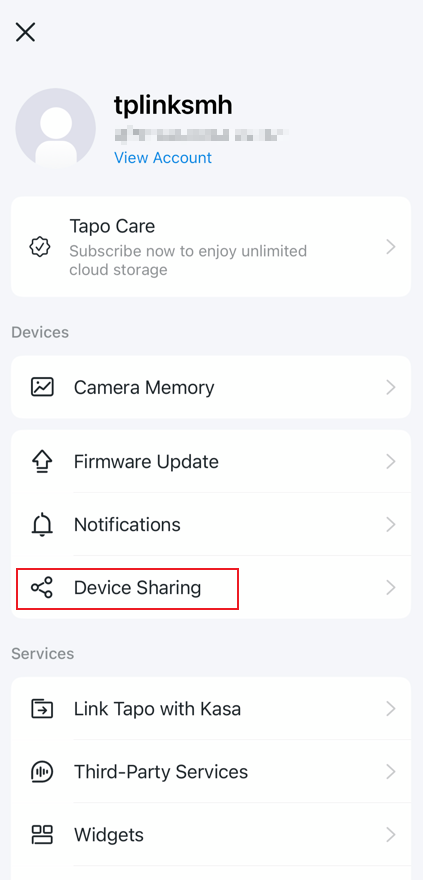
Method 2. Open the Tapo app Me page (tap the profile picture in the top left or the Me button in the bottom right), go to Device Sharing, select a Home, tap the plus icon, and choose Entire Home or Specific Devices.
Step 3: Enter the Recipient's TP-Link ID
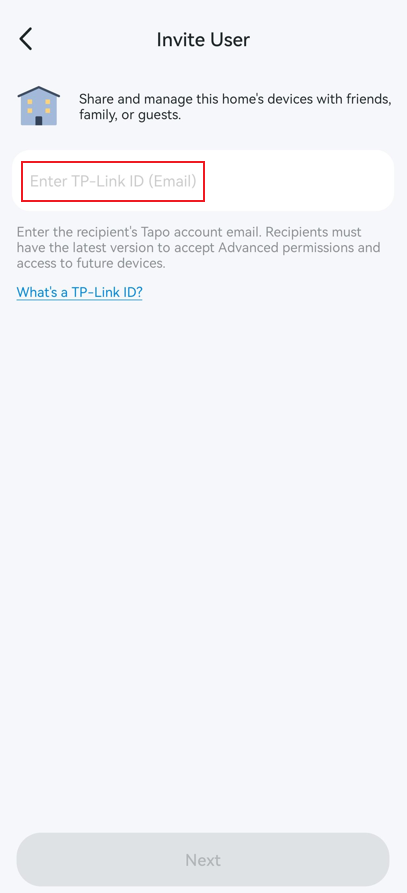
Enter the recipient's TP-Link ID (email address) or Phone Number (If supported). Note that Recipients must have the latest version to accept Advanced/View-Only permissions and access to future devices.
Step 4: Set Permissions
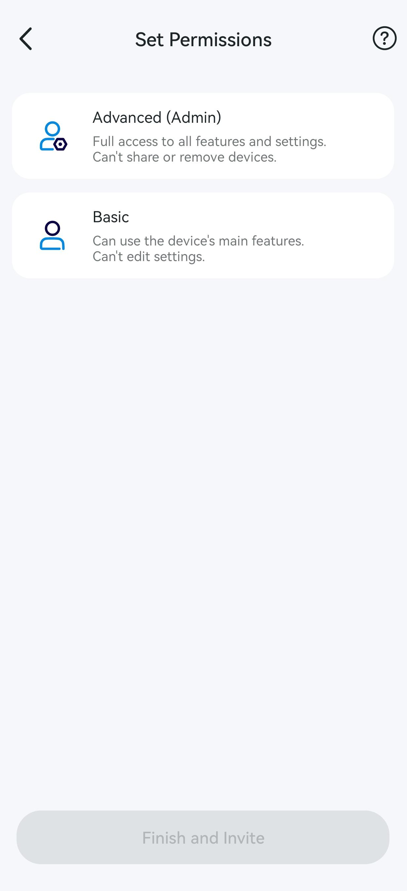
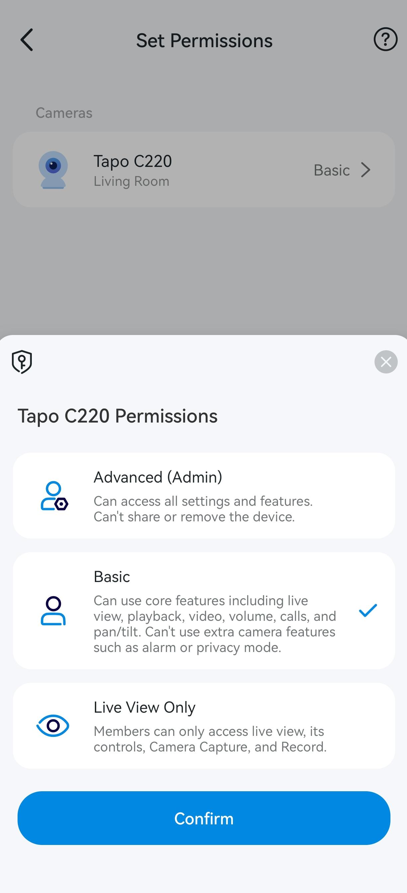
After entering the TP-Link ID, tap Next to set permissions. For more details about Permission Tiers, refer to Introduction to Tapo Device Sharing 2.0.
Case 1: Entire Home Sharing
- Advanced (Admin): Full access to all features and settings. Can't share or remove devices.
- Basic: Can use the device's main features. Can't edit settings.
Case 2: Specific Devices Sharing
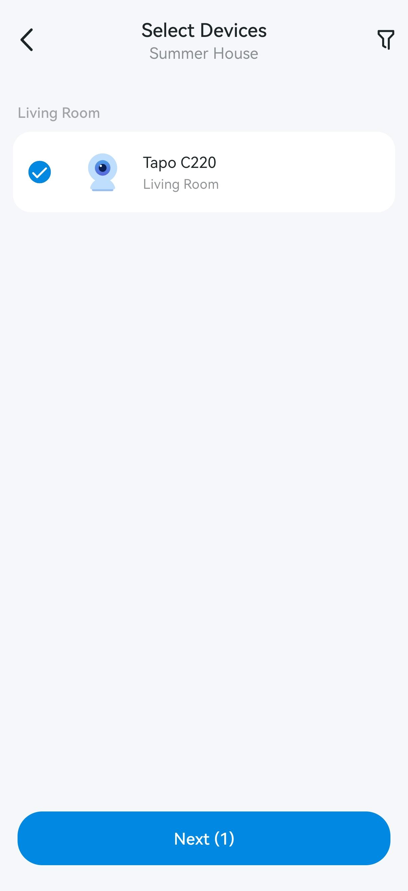
Select the devices to share and tap Next to set permissions.
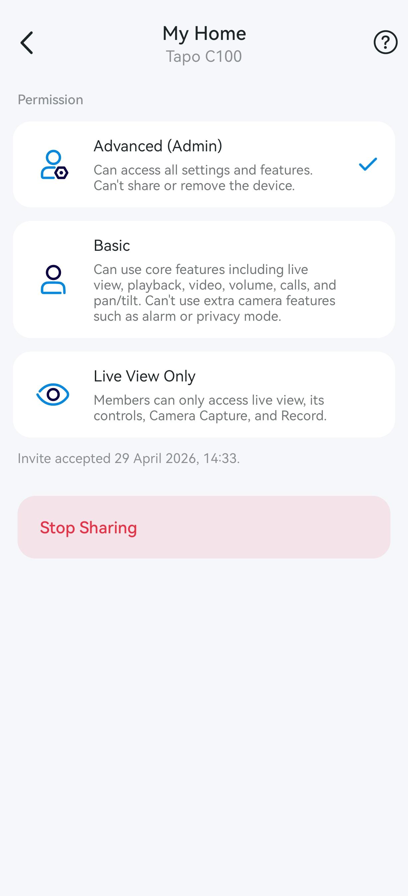
- Advanced (Admin): Can access all settings and features. Can't share or remove the device.
- Basic: Can use core features including live view, playback, video, volume, calls, and pan/tilt. Can't use extra camera features such as alarm or privacy mode.
- Live View Only: Members can only access live view, its controls, Camera Capture, and Record.
Step 5: Recipient Accepts the Invitation
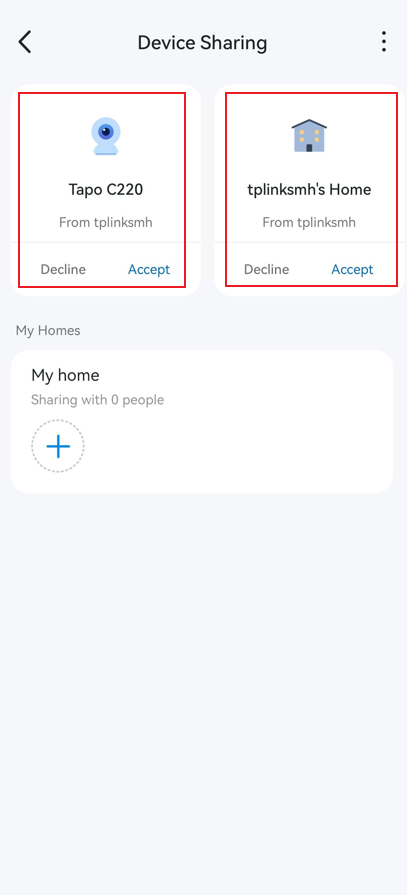
The recipient has 24 hours to accept the invitation in the Tapo app.
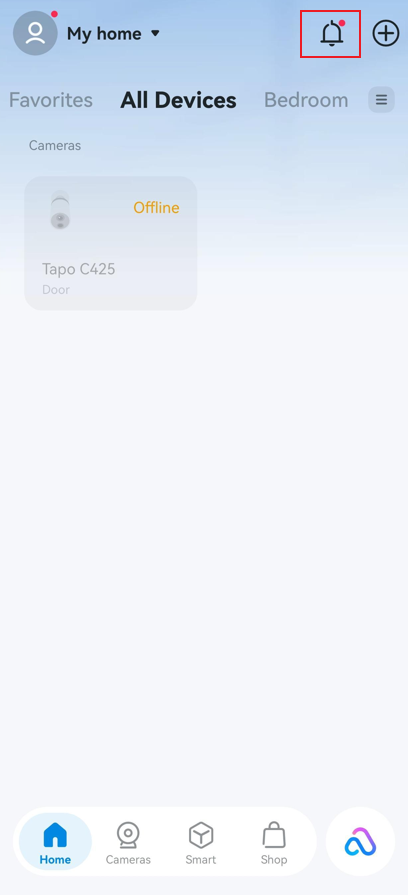
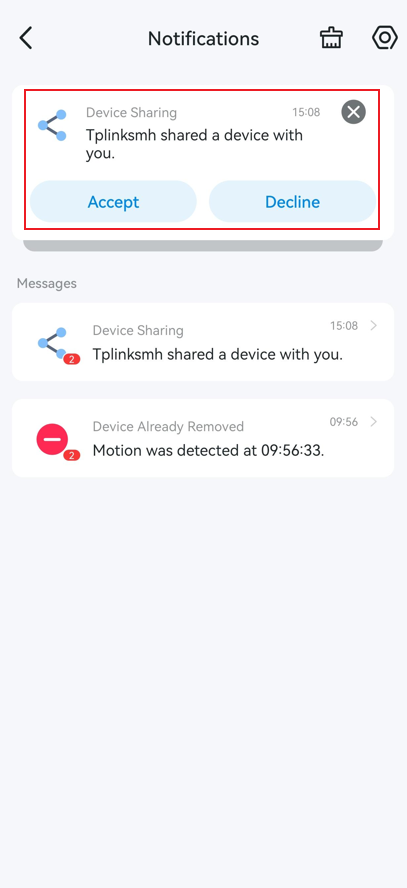
Method 1. On the Tapo app Home page, tap the Bell icon in the top right to open Notifications, then tap Accept.
Method 2. Go to the Tapo app Me page (tap the profile picture in the top-left corner or the Me button in the bottom-right corner), open Device Sharing, find the pending invitation, and tap Accept.
Manage the Entire Home or Specific Devices Shared with You
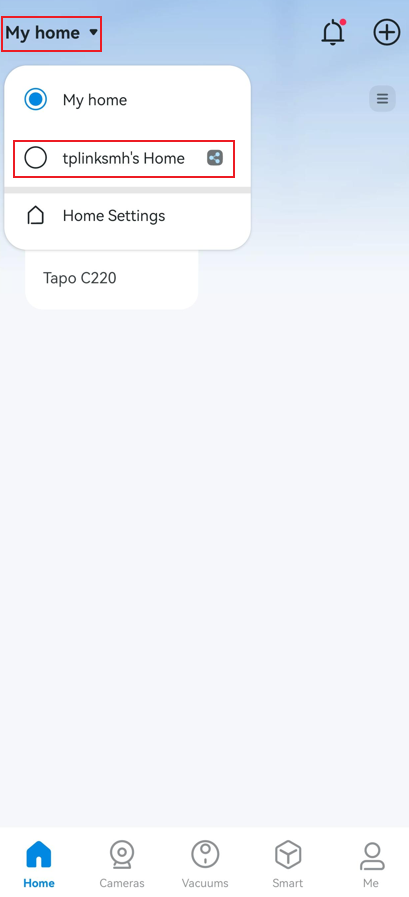
On the Tapo app Home page, tap Home Settings in the top-left corner, then select a Home shared with you to manage all devices in that Home.
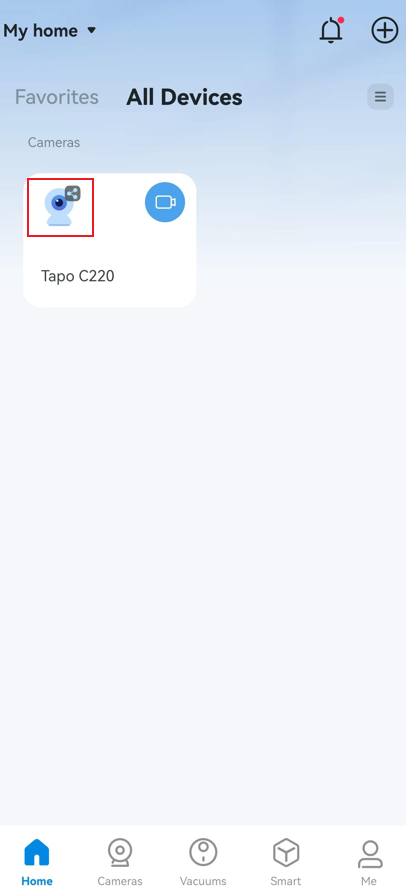
Or go to My Home > All Devices to manage individual devices shared with you. Shared devices are marked with a sharing icon.
Change Permission or Stop Sharing from Owner Account
Method 1. From Tapo App Me Page
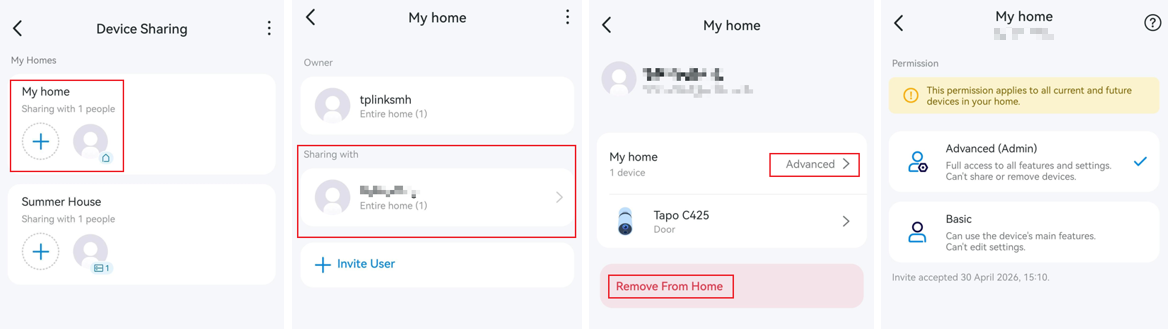
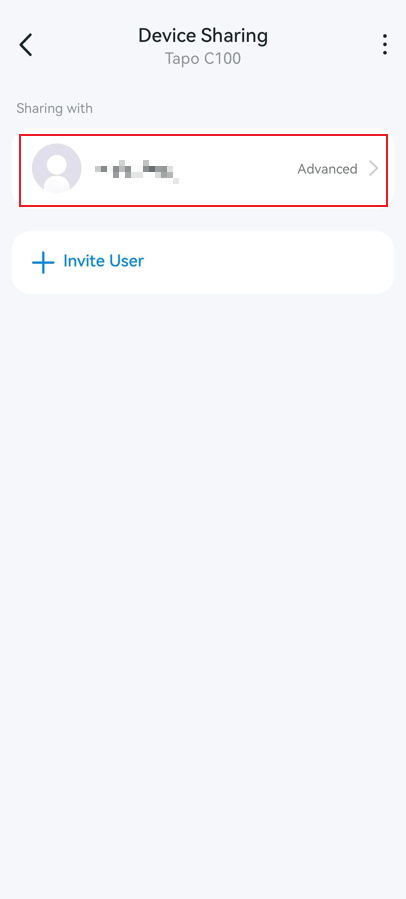
Go to the Tapo app Me page (tap the profile picture in the top-left or the Me button in the bottom-right), then open Device Sharing. Under My Homes, select a Home and tap a recipient to view or change their permissions, or tap Remove From Home to stop sharing the entire Home.
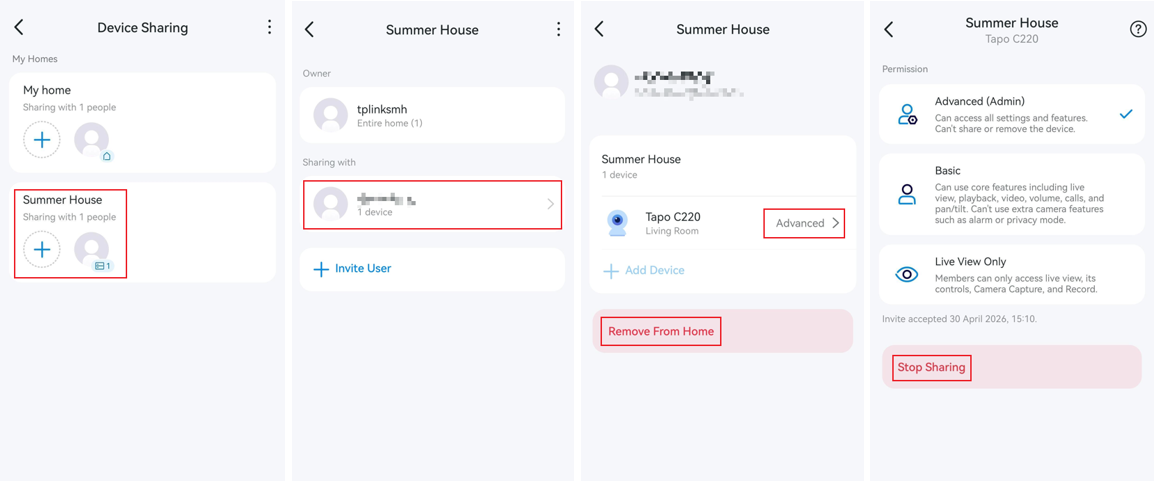
You can also tap a Specific Device card to modify permissions or tap Stop Sharing.
Method 2. From the Control Panel or the Device Settings Page
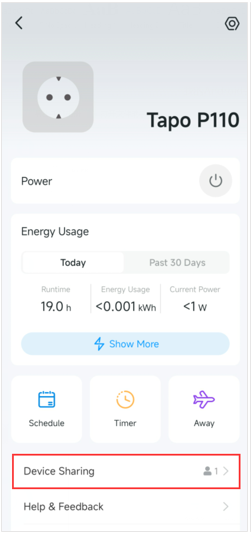
For plugs, lights, switches, hubs, and door locks:
On the Tapo app Home page > tap a shared device > select Device Sharing from the device control page > select a recipient > change permissions or stop sharing.
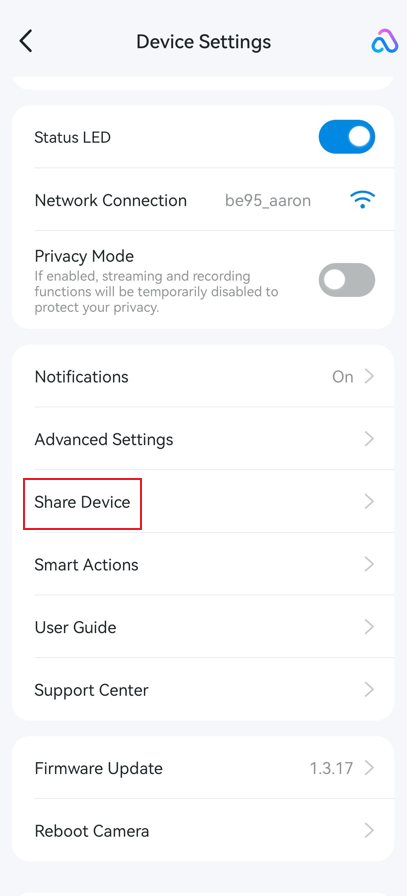
For cameras, doorbells, robot vacuums, and IR remotes:
On the Tapo app Home page > tap a shared device > tap the gear icon in the top right to enter Device Settings > select Share Device/Device Sharing > select a recipient > change permissions or stop sharing.
Check Permissions or Stop Sharing from the Recipient Account
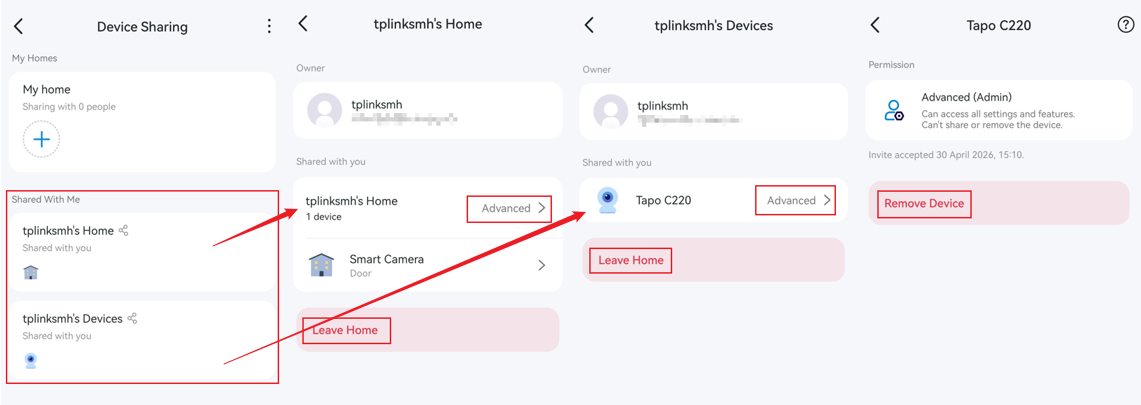
Go to the Tapo App Me page (tap the profile picture in the top left corner or the Me button in the bottom right corner) and open Device Sharing.
Under Shared With Me, you’ll see the Homes or devices that have been shared with you. Tap any item to view your permissions. Tap Leave Home or Remove Device to stop sharing. Once confirmed, you’ll lose access immediately. To regain access, the owner must send a new invitation.
Can I Share My Kasa Smart Devices?
By syncing your Kasa Smart devices to the Tapo app, you can use the Device Sharing feature for those devices as well. For step-by-step instructions and a list of supported Kasa devices, see Share Kasa Devices through the Tapo App.
If you are unable to share a Tapo or Kasa device, please contact TP-Link technical support with the following information:
- Your TP-Link ID and the recipient's TP-Link ID
- The model number of your Tapo or Kasa device and its firmware version
- Your Tapo app version
Looking For More
Is this faq useful?
Your feedback helps improve this site.



TP-Link Community
Still need help? Search for answers, ask questions, and get help from TP-Link experts and other users around the world.