How do I enable Guest Network on TL-WR820N?
Guest Network allows you to set up a separate wireless network with a separate network name (SSID) and password that your guests can use to access the Internet.
1. Visit http://tplinkwifi.net, and log in with the password you set for the router.
How do I log in web-based interface/utility of TL-WR820N?
2. Go to Advanced > Wireless > Guest Network.
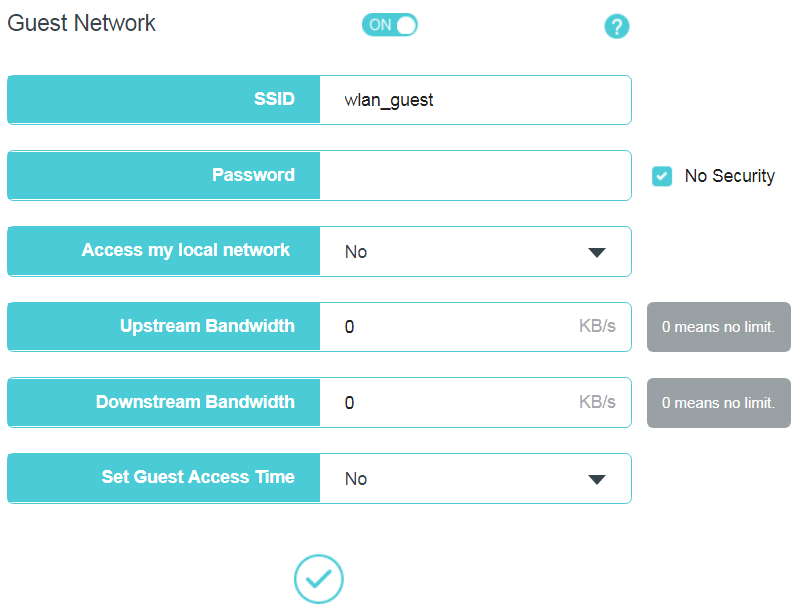
3. Switch on guest network function.
4. Set the network name (SSID) and password for Guest Network.
Password may contain 8-63 characters. It is recommended you use a combination of numbers, letters and symbols.
Access my local network - Select whether to allow wireless devices on the guest network to access your local network. The default value is No.
Upstream Bandwidth/Downstream Bandwidth - Configure the total upload/download speed of the guest network.
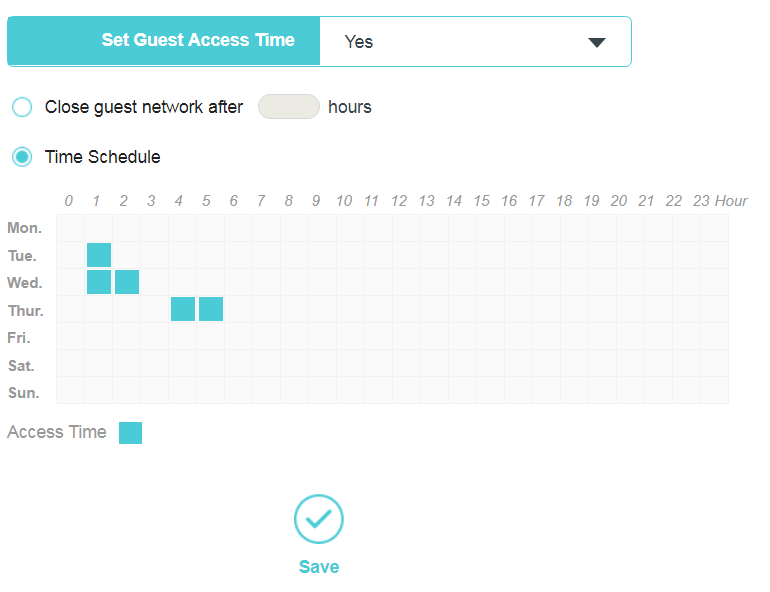
5. Set the time period to enable guest network.
There are two options:
Close guest network after some hours: enter a digit and click Save and it will begin to count down.
Time Schedule: draw the cursor to select access time and click Save.
Note: Make sure you select the correct time zone on Advanced>System Tools>Time Settings.
Get to know more details of each function and configuration please go to Download Center to download the manual of your product.
Is this faq useful?
Your feedback helps improve this site.
TP-Link Community
Still need help? Search for answers, ask questions, and get help from TP-Link experts and other users around the world.