How to add a device to the network using tpPLC Utility (new logo)
To add a device to the current network, follow the steps below:
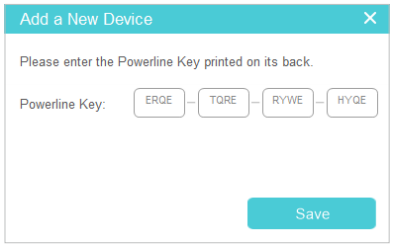
1. Write down the 16-digit powerline key printed on the device label.
2. Plug the device into a wall socket and wait until its LEDs become stable.
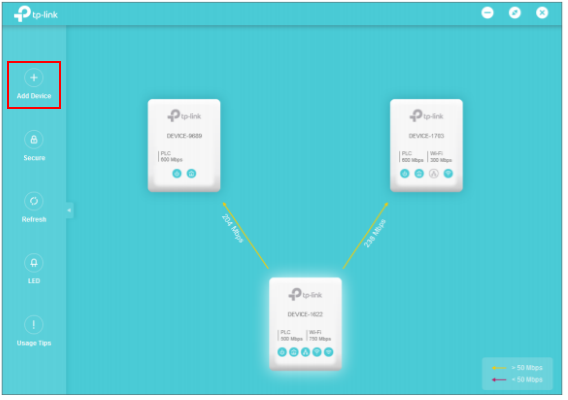
3. Open the utility, and click Add Device on the left column.
Please note: If the Utility hasn’t been installed yet, please refer to How to prepare for using the tpPLC Utility (new logo)?
4. On the Add a New Device page, enter the powerline key you wrote down, and click Save.
Now the new device will appear on the utility.
Get to know more details of each function and configuration please go to Download Center to download the manual of your product.
Is this faq useful?
Your feedback helps improve this site.


4.0_package_1568103121723d.jpg)
TP-Link Community
Still need help? Search for answers, ask questions, and get help from TP-Link experts and other users around the world.