How to configure static IP on the computer
Step 1.Click Start->Control Panel->select and double click Network and internet connections (If you can´t find it, please go next) ->select and double click Network Connections.
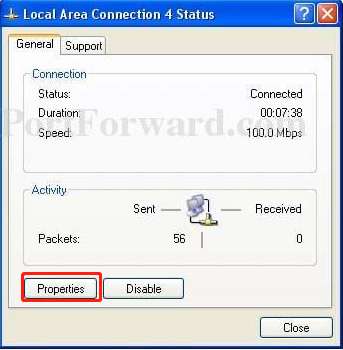
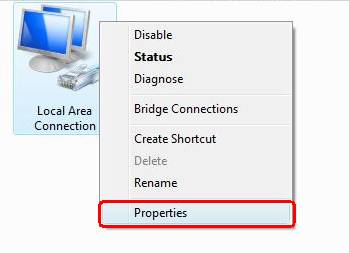
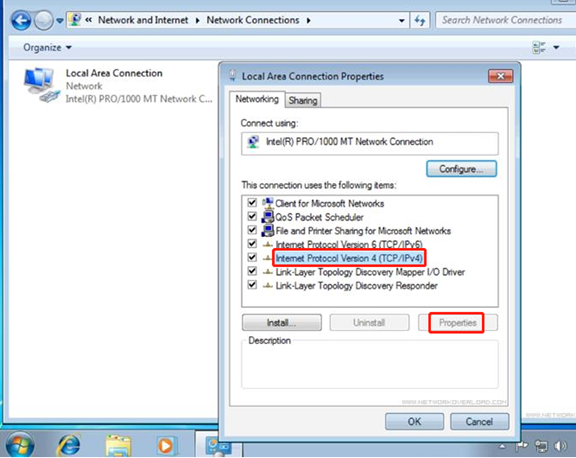
Step 2.Highlight and right-click the Local Area Connection icon; click on Status and go to General. Click the Properties button to open up the properties window.
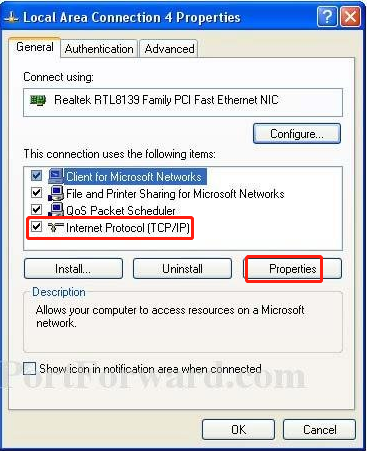
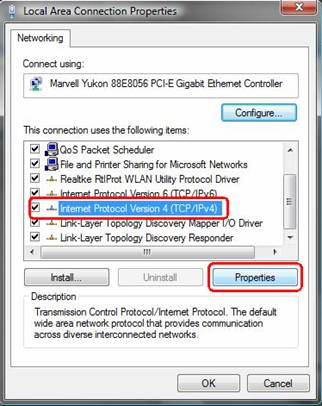
Step 3.Highlight the Internet Protocol (TCP/IP) tab, and then double click it or click Properties. The TCP/IP Properties window will display.
Step 4.Now you have two ways to configure the TCP/IP protocol below:
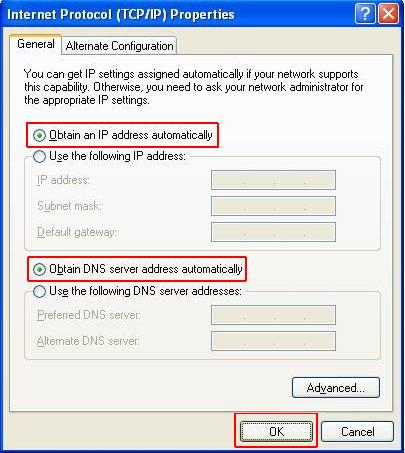
1. Assigned by DHCP Sever
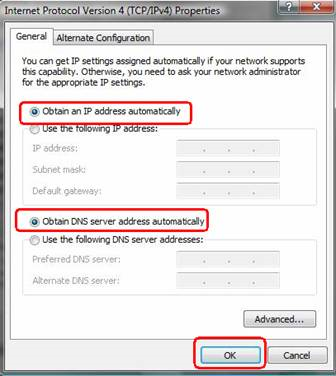
Select Obtain an IP address automatically and Obtain DNS Server address automatically, as shown in the figure below. These may be selected by default. Then click OK to save setting.
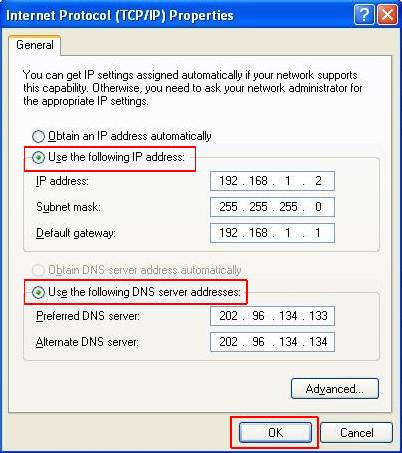
2.Assigned manually
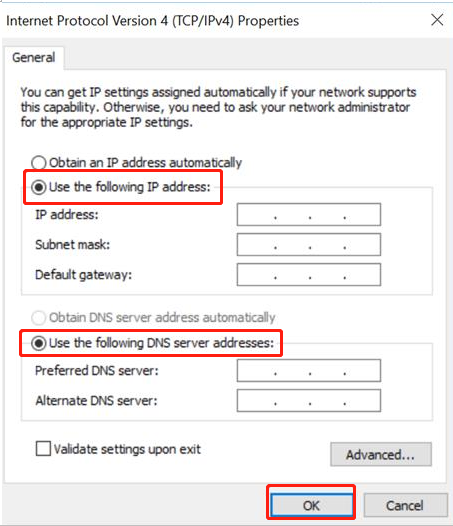
1) Select Use the following IP address, as shown in the following figure.
If the router’s LAN IP address is 192.168.1.1, please type in IP address 192.168.1.x (x is from 2 to 253), subnet mask 255.255.255.0, and default gateway 192.168.1.1.
2) Select Use the following DNS server addresses, as shown in the following figure. And then type the DNS server IP address, which should be provided by your ISP. Finally, remember to click OK to save settings.
Note: In most cases, type your local area DNS server IP addresses into it. The Preferred DNS server is the same as the default gateway. For the Secondary DNS server, you could leave it blank or type in 8.8.8.8.
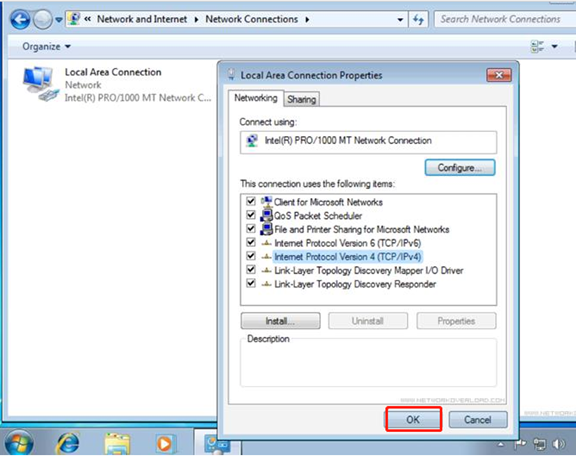
Step 5. Click OK to save and apply your settings.
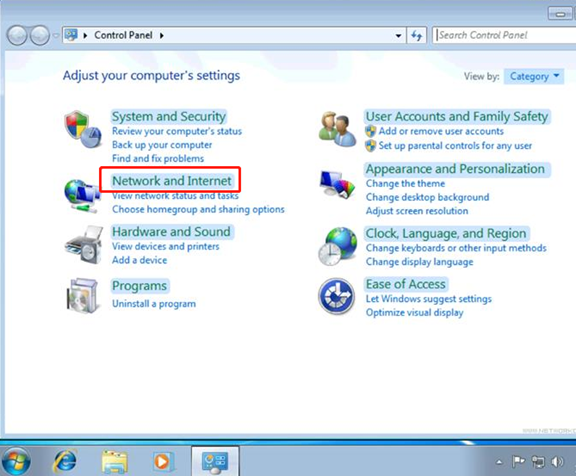
Step1.Click Start ->Control Panel -> Network and Internet -> Network and Sharing Center.
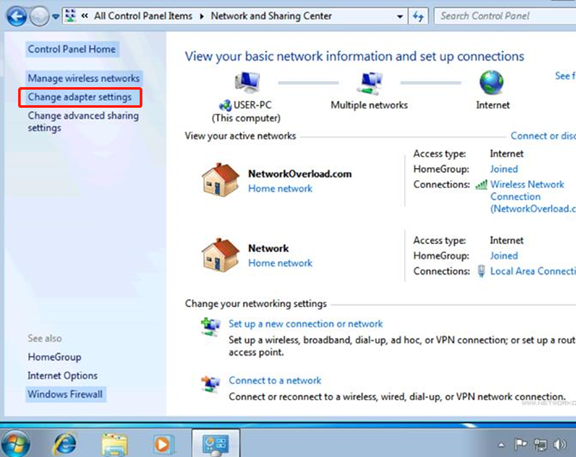
Step2.In the task list, please click Manage network connections (for Windows Vista)/Change adapter settings (for Windows7).
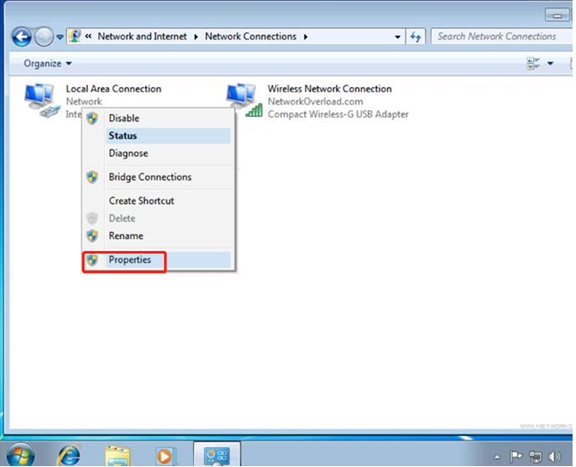
Highlight and right-click the Local Area Connection icon and select Properties.
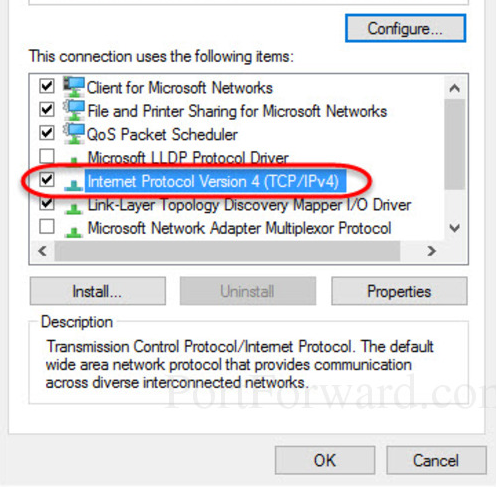
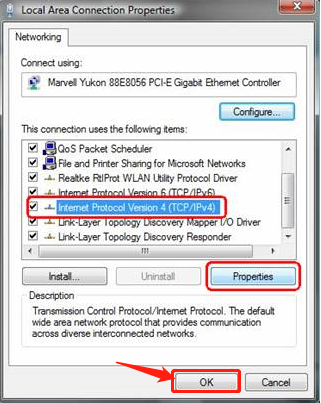
Step 3.Select Internet Protocol Version 4(TCP/IPv4), double click it or click Properties.
Step 4. There are two ways to configure the TCP/IP Properties, Assigned by DHCP server automatically or manually.
1. Assigned by DHCP server
Select Obtain an IP address automatically and Obtain DNS server address automatically. If necessary, then click OK to save the settings.

2. Assigned manually
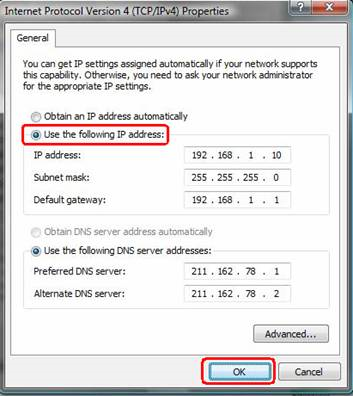
1) Select Use the following IP address, type the IP address, subnet mask, and default gateway IP address into it.
If the router’s LAN IP address is 192.168.1.1, please type in IP address 192.168.1.x (x is from 2 to 253), subnet mask 255.255.255.0, and default gateway 192.168.1.1.
2) Select Use the following DNS server addresses, as shown in the following figure. And then type the DNS server IP address, which should be provided by your ISP. If necessary, then click OK to save the settings.
Note: In most cases, type your local area DNS server IP addresses into it.
The Preferred DNS server is the same as the default gateway. For the Secondary DNS server, you could leave it blank or type in 8.8.8.8.

Step 5 Click OK to save and apply your settings.

Step1.Go to Control Panel. Here we will illustrate different ways to find a control panel on Windows 8.
- Press “Windows key
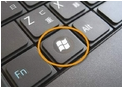 +F”, a search box will come out, please input the control panel and press enter;
 - Press “Windows key+ R”, then there will be a “run” box, input control panel, and press enter;
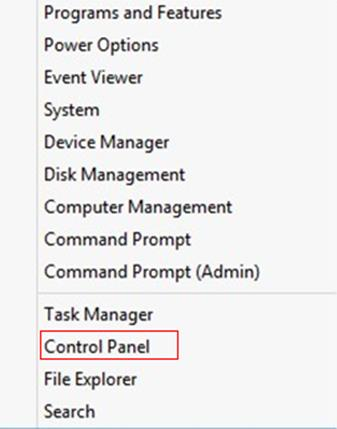
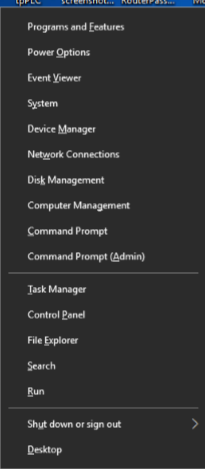
- Press “Windows key +X”, and click on “control panel”;
- You can also input “control panel” in the search bar on the right-hand side of the screen.
Step 2.In Category view click on Network and Internet
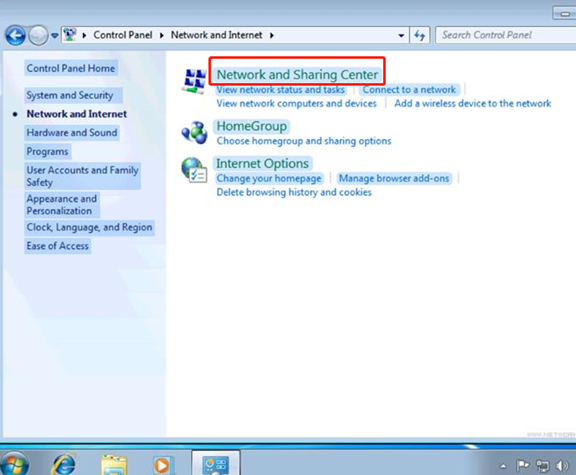
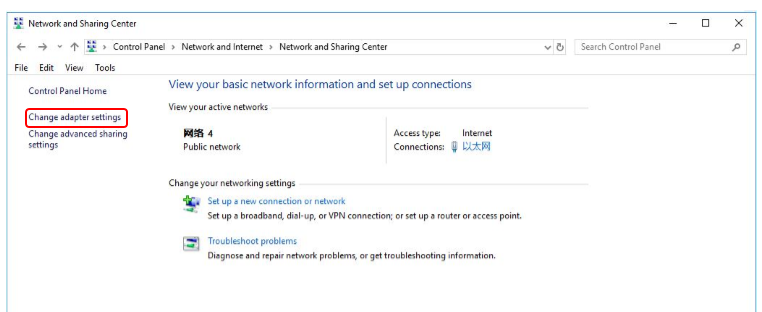
Step 3.Click on Network and Sharing Center
Step 4.Click on Change Adapter Settings
Step 5.Right-click on Local Area Connection and click Properties
Step 6. Click Internet Protocol Version 4 (TCP/IP) then click Properties
Step 7. Change to Use the following IP address and input your IP and DNS information.
Step 8.Click OK to save and apply your settings.
Step 1.Go to Control Panel. Press Windows key + X at the same time and select Control Panel.
Step2.Click on Network and Internet -> Network and Sharing Center, click on Change adapter settings on the left side.
Step 3. Highlight and right-click on Ethernet, then select Properties.
Step 4. Double-click on Internet Protocol Version 4 or click Properties.
Step 5.There are two ways to configure the TCP/IP Properties, Assigned by DHCP server automatically or manually.
1. Assigned by DHCP server
Select Obtain an IP address automatically and Obtain DNS server address automatically. If necessary, then click OK to save the settings.
2. Assigned manually
1) Select Use the following IP address, type IP address, subnet mask and default gateway IP address into it.
If the router’s LAN IP address is 192.168.1.1, please type in IP address 192.168.1.x (x is from 2 to 253), subnet mask 255.255.255.0, and default gateway 192.168.1.1.
2) Select Use the following DNS server addresses, as shown in the following figure. And then type the DNS server IP address, which should be provided by your ISP. If necessary, then click OK to save the settings.
Note: In most cases, type your local area DNS server IP addresses into it.
The Preferred DNS server is the same as to default gateway. For the Secondary DNS server, you could leave it blank or type in 8.8.8.8.
Step 6.Click OK to save and apply your settings.
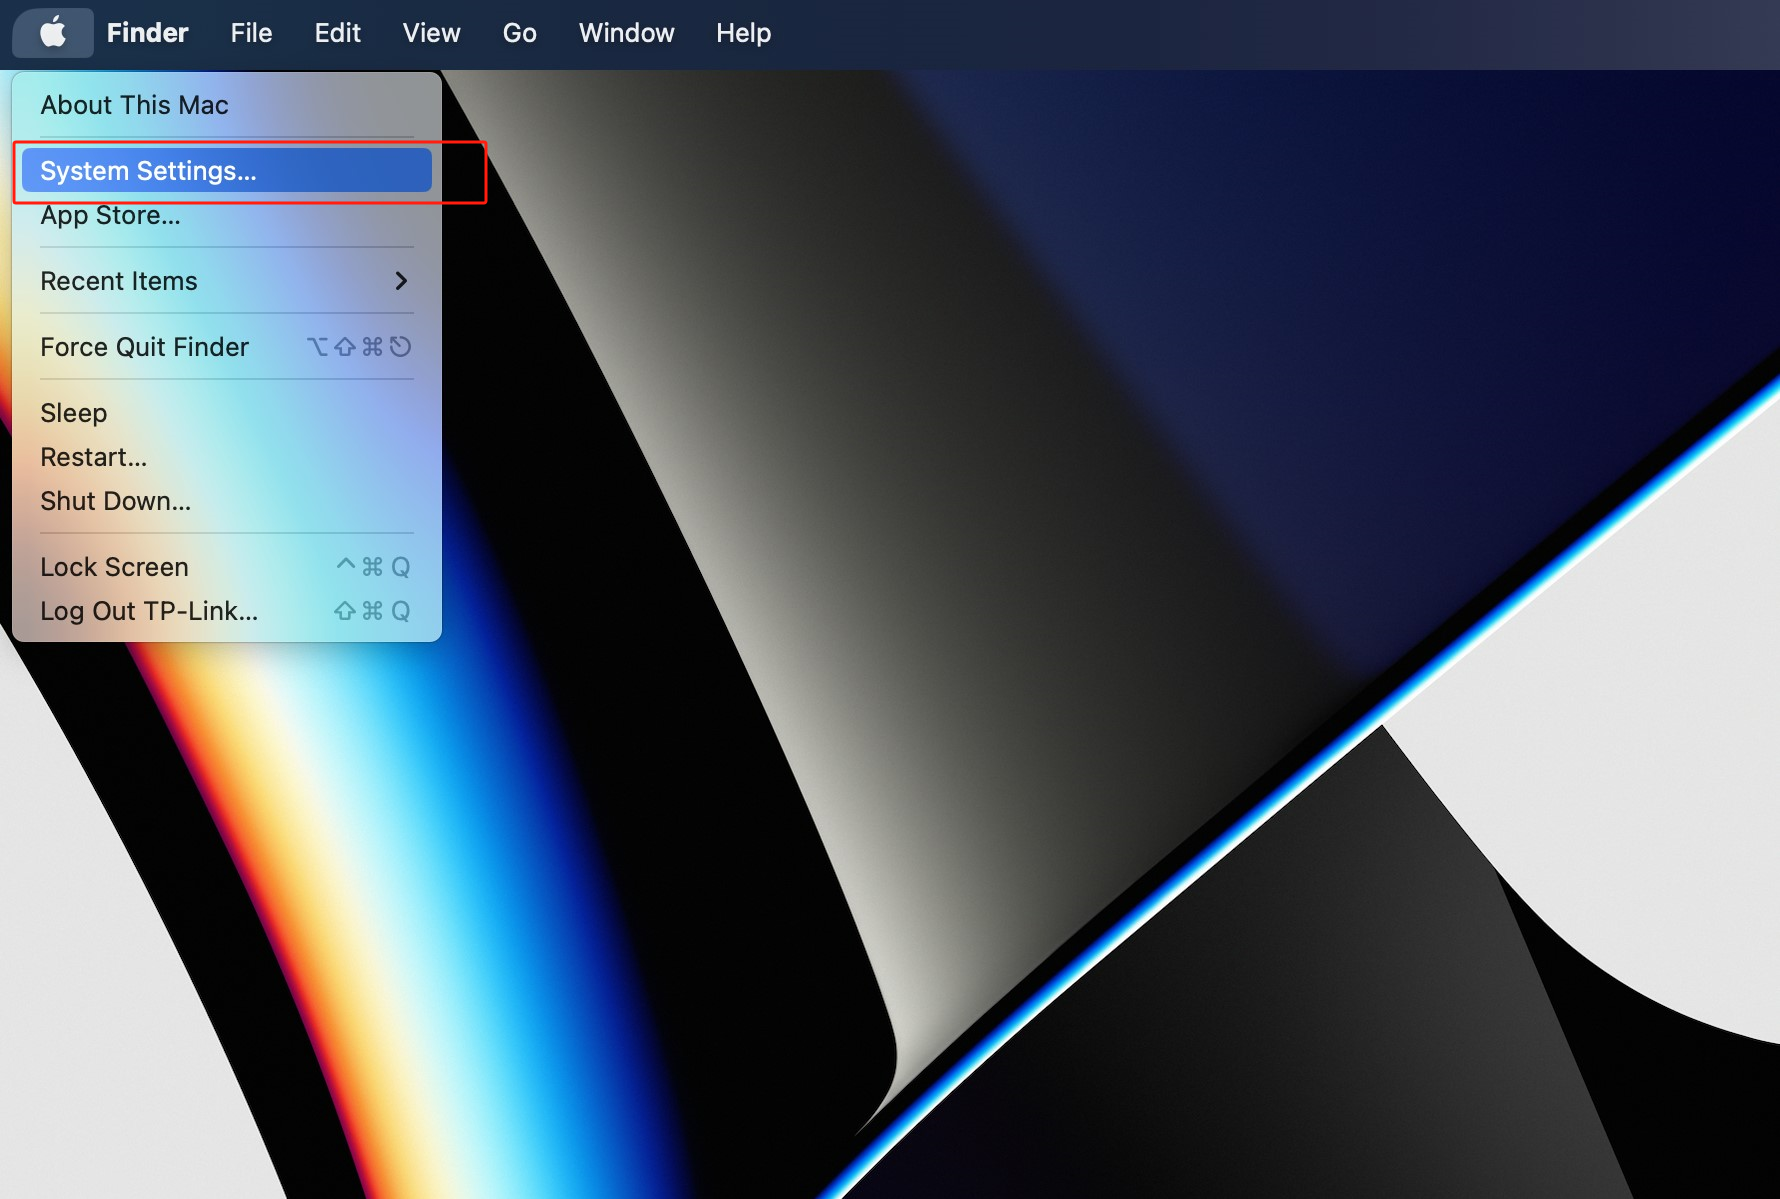
Step 1 On your Mac, choose Apple menu  > System Settings, then click Network
  in the sidebar. (You may need to scroll down.)
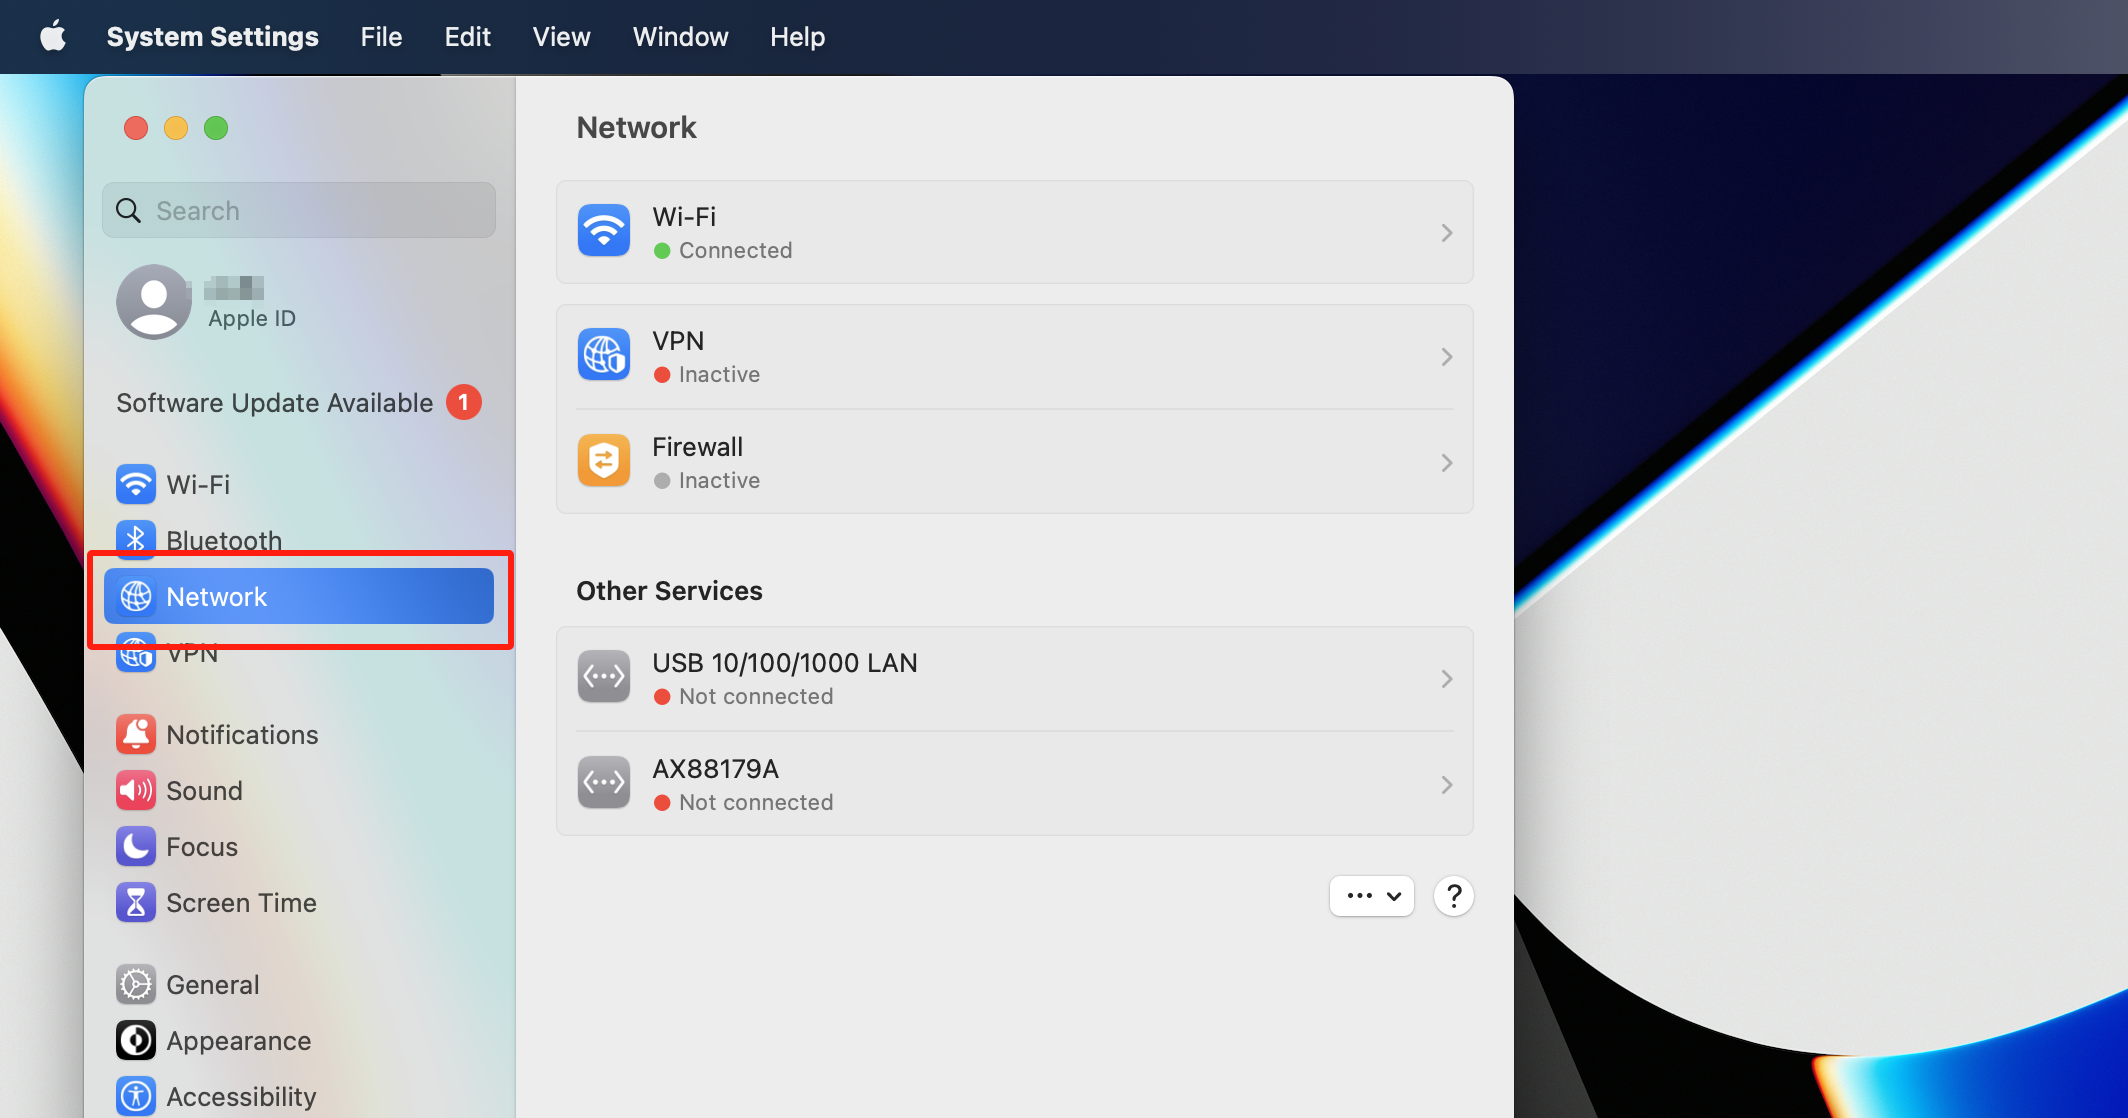
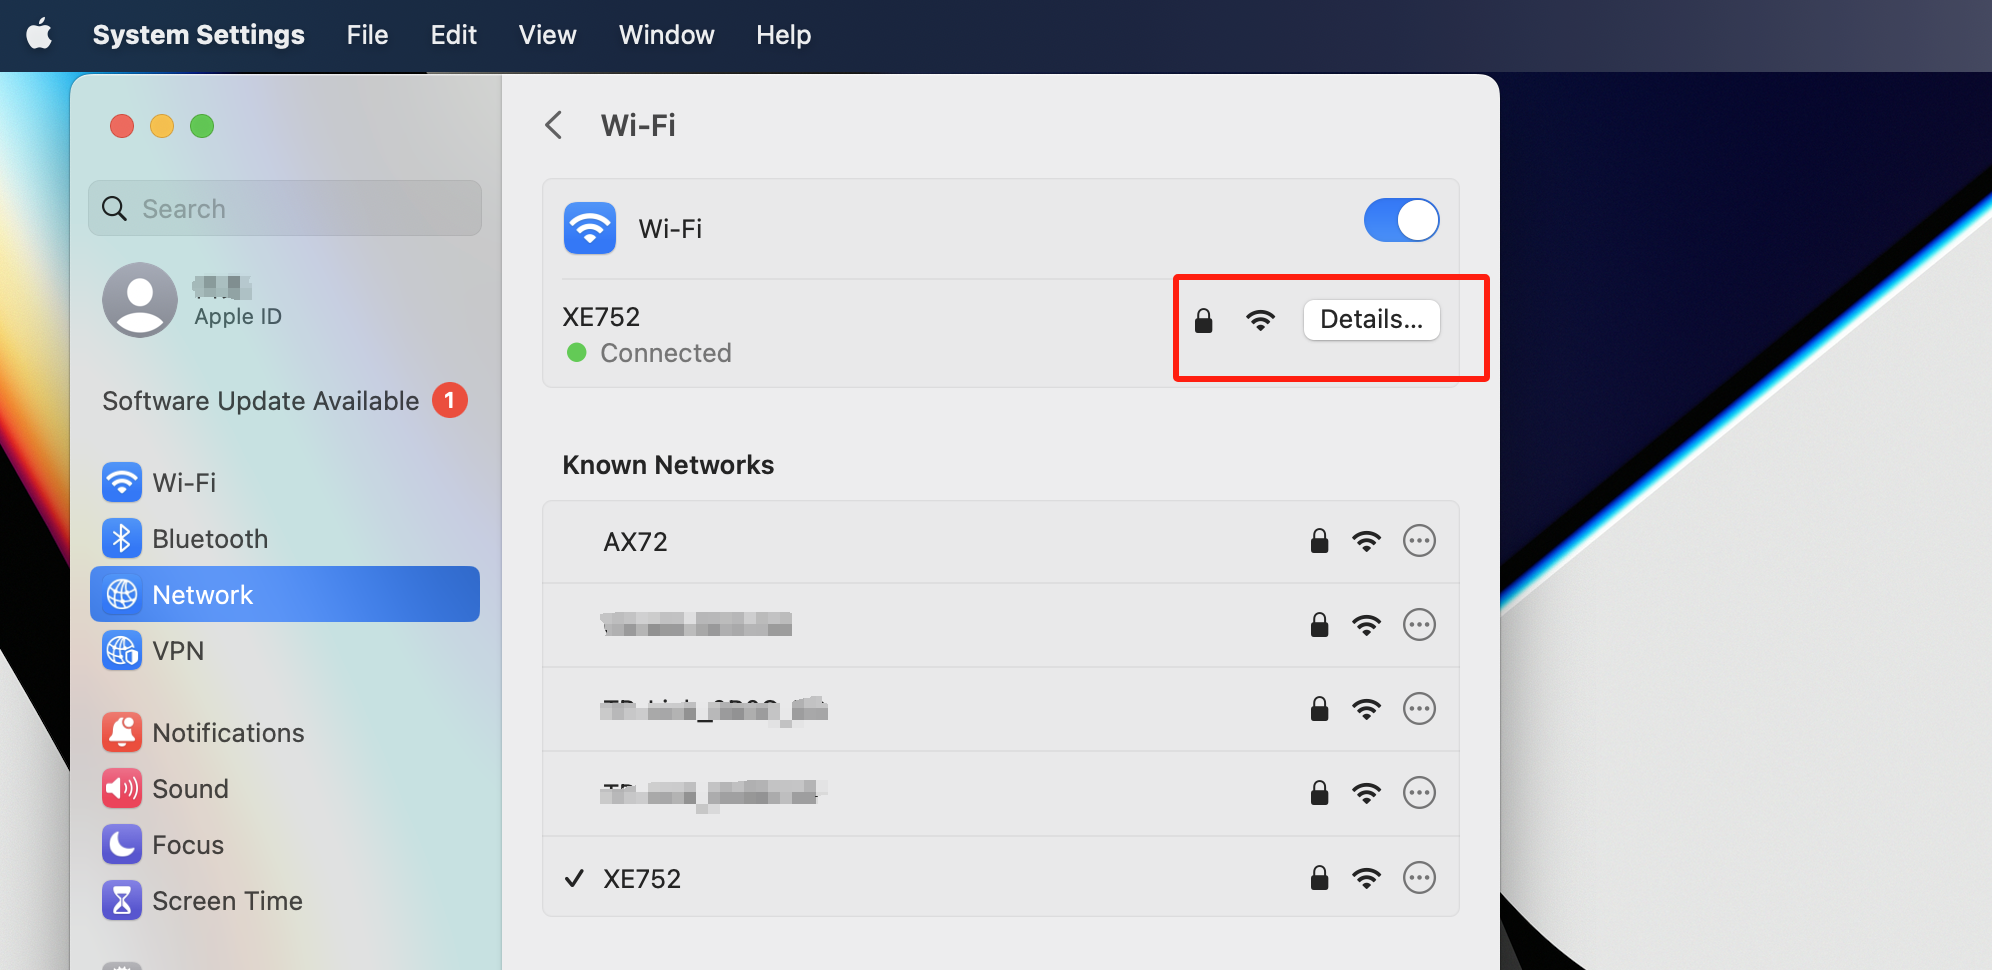
Step 2 Click the network connection you want to use on the right, then click Details.
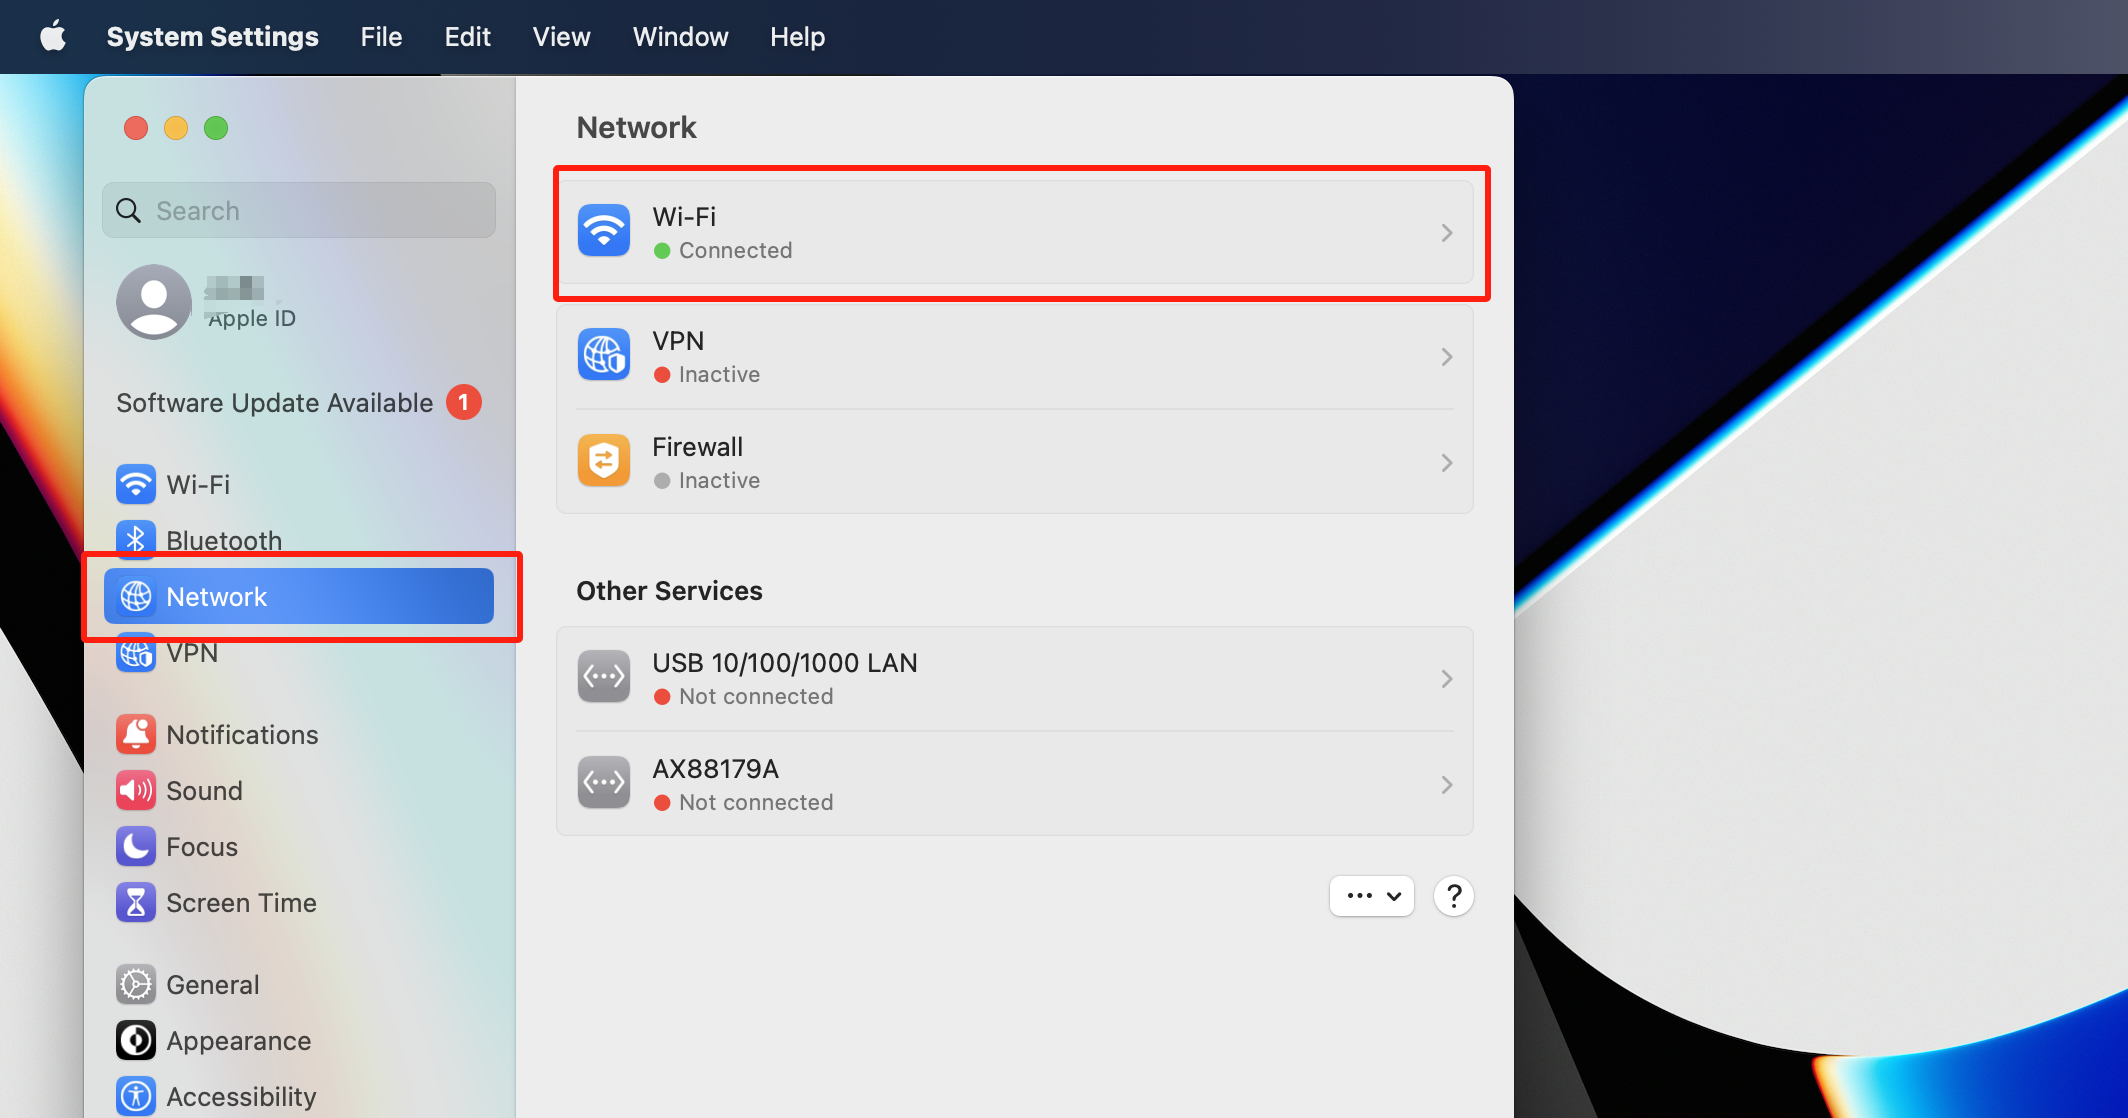
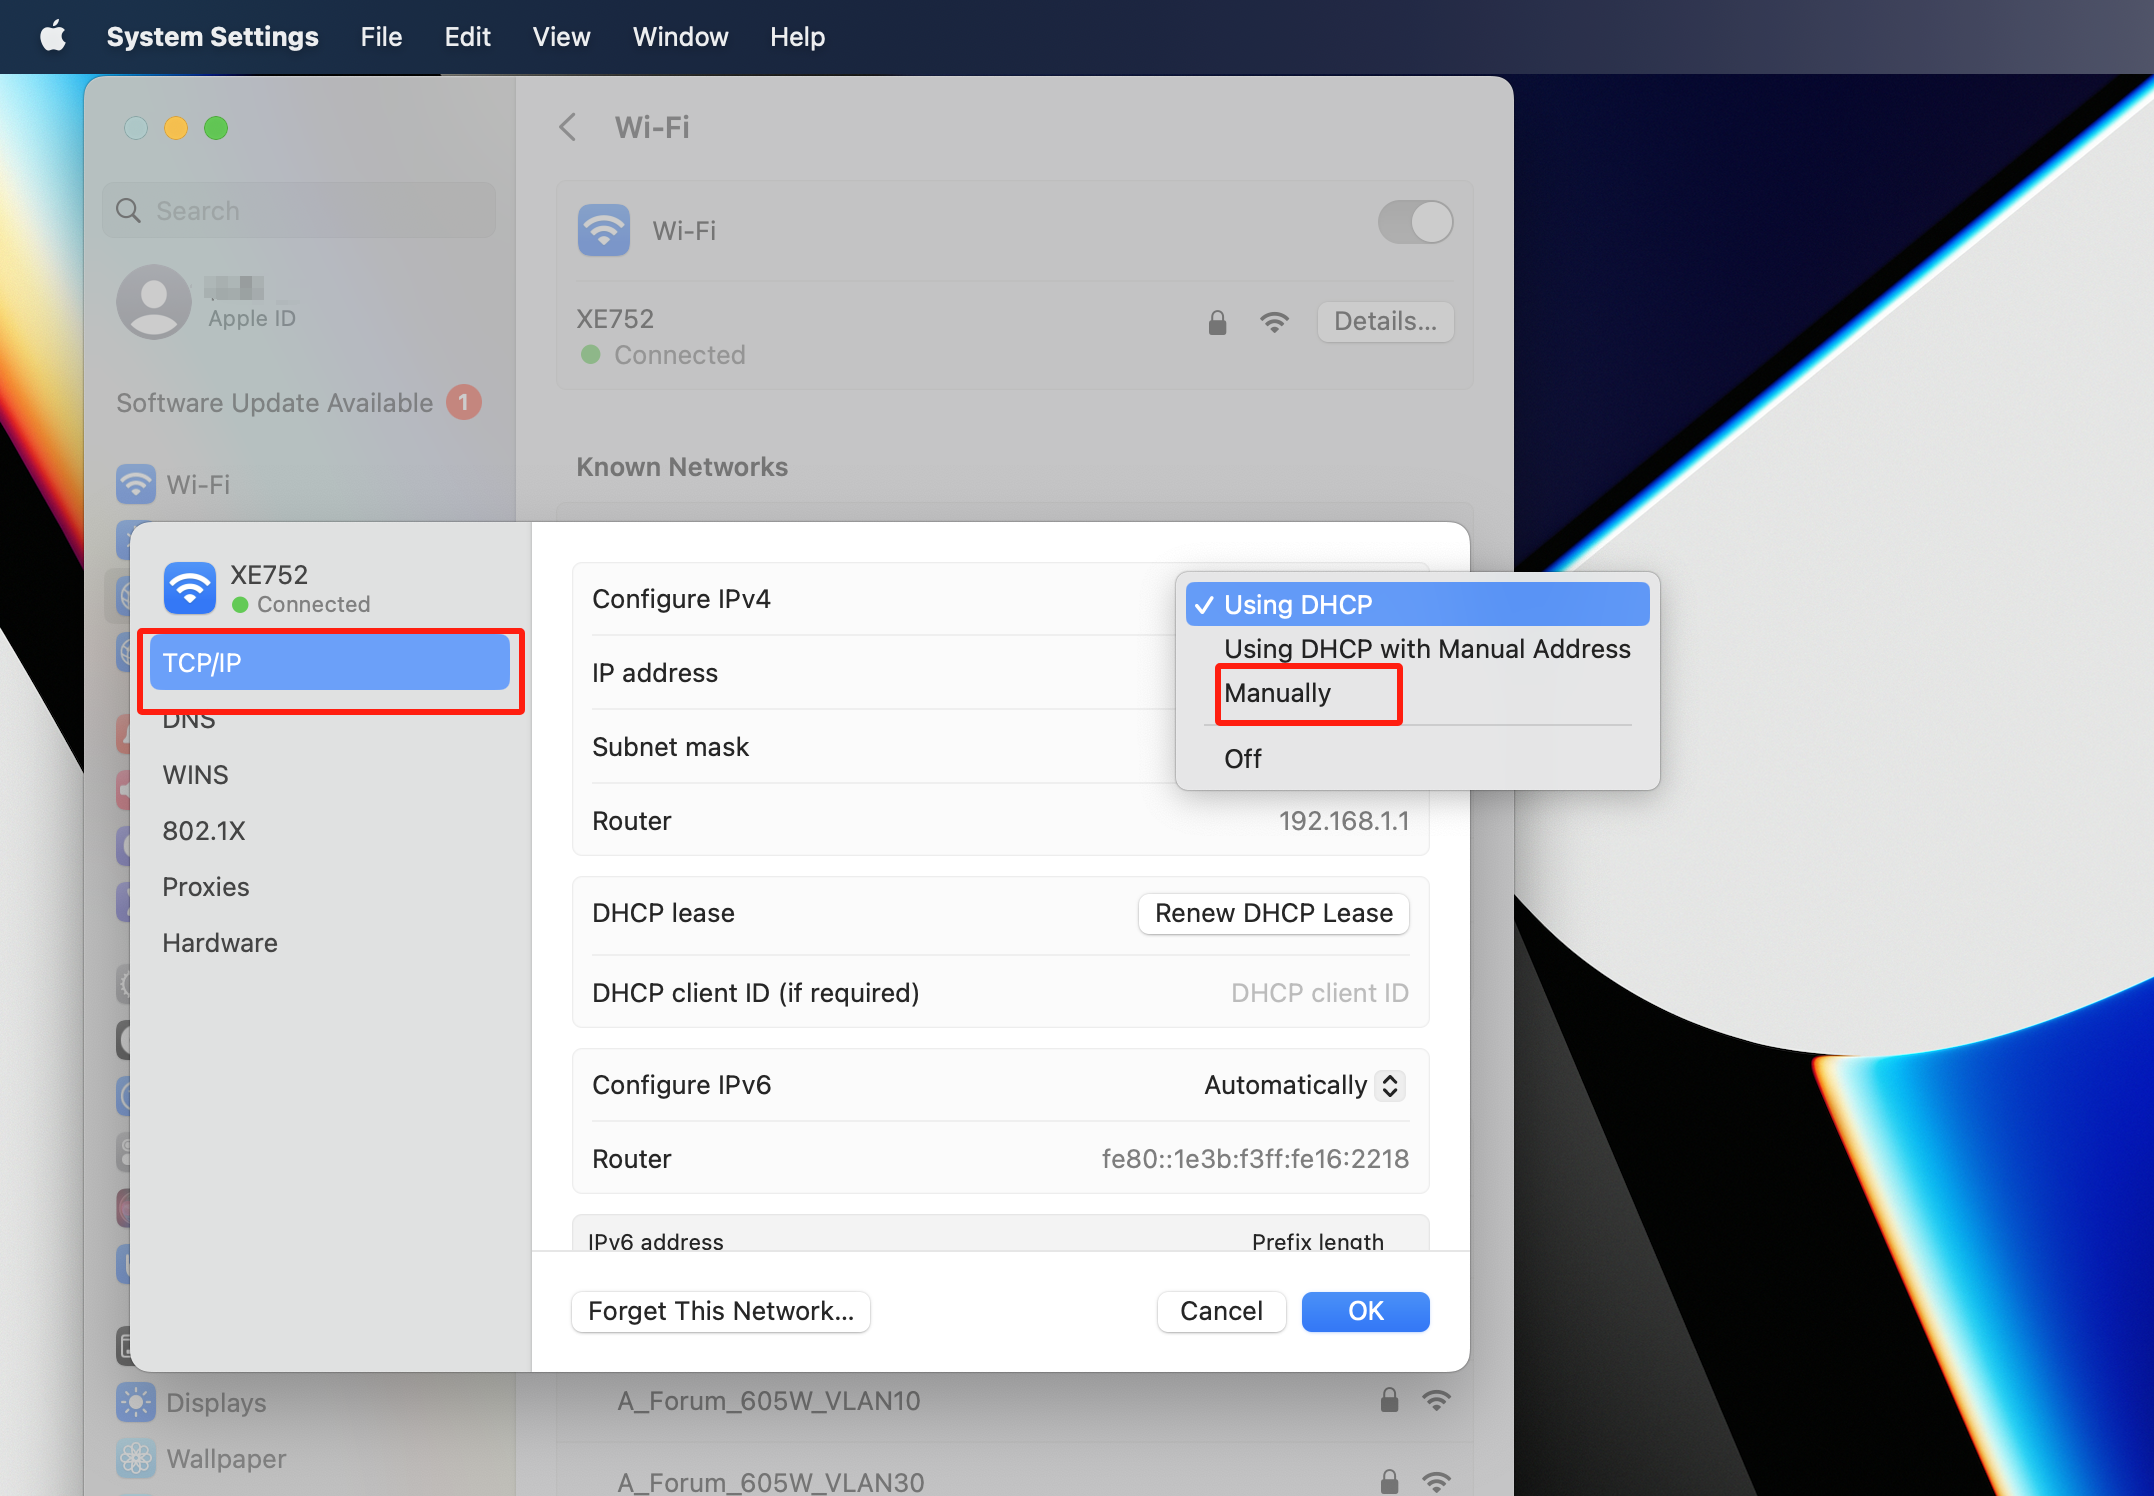
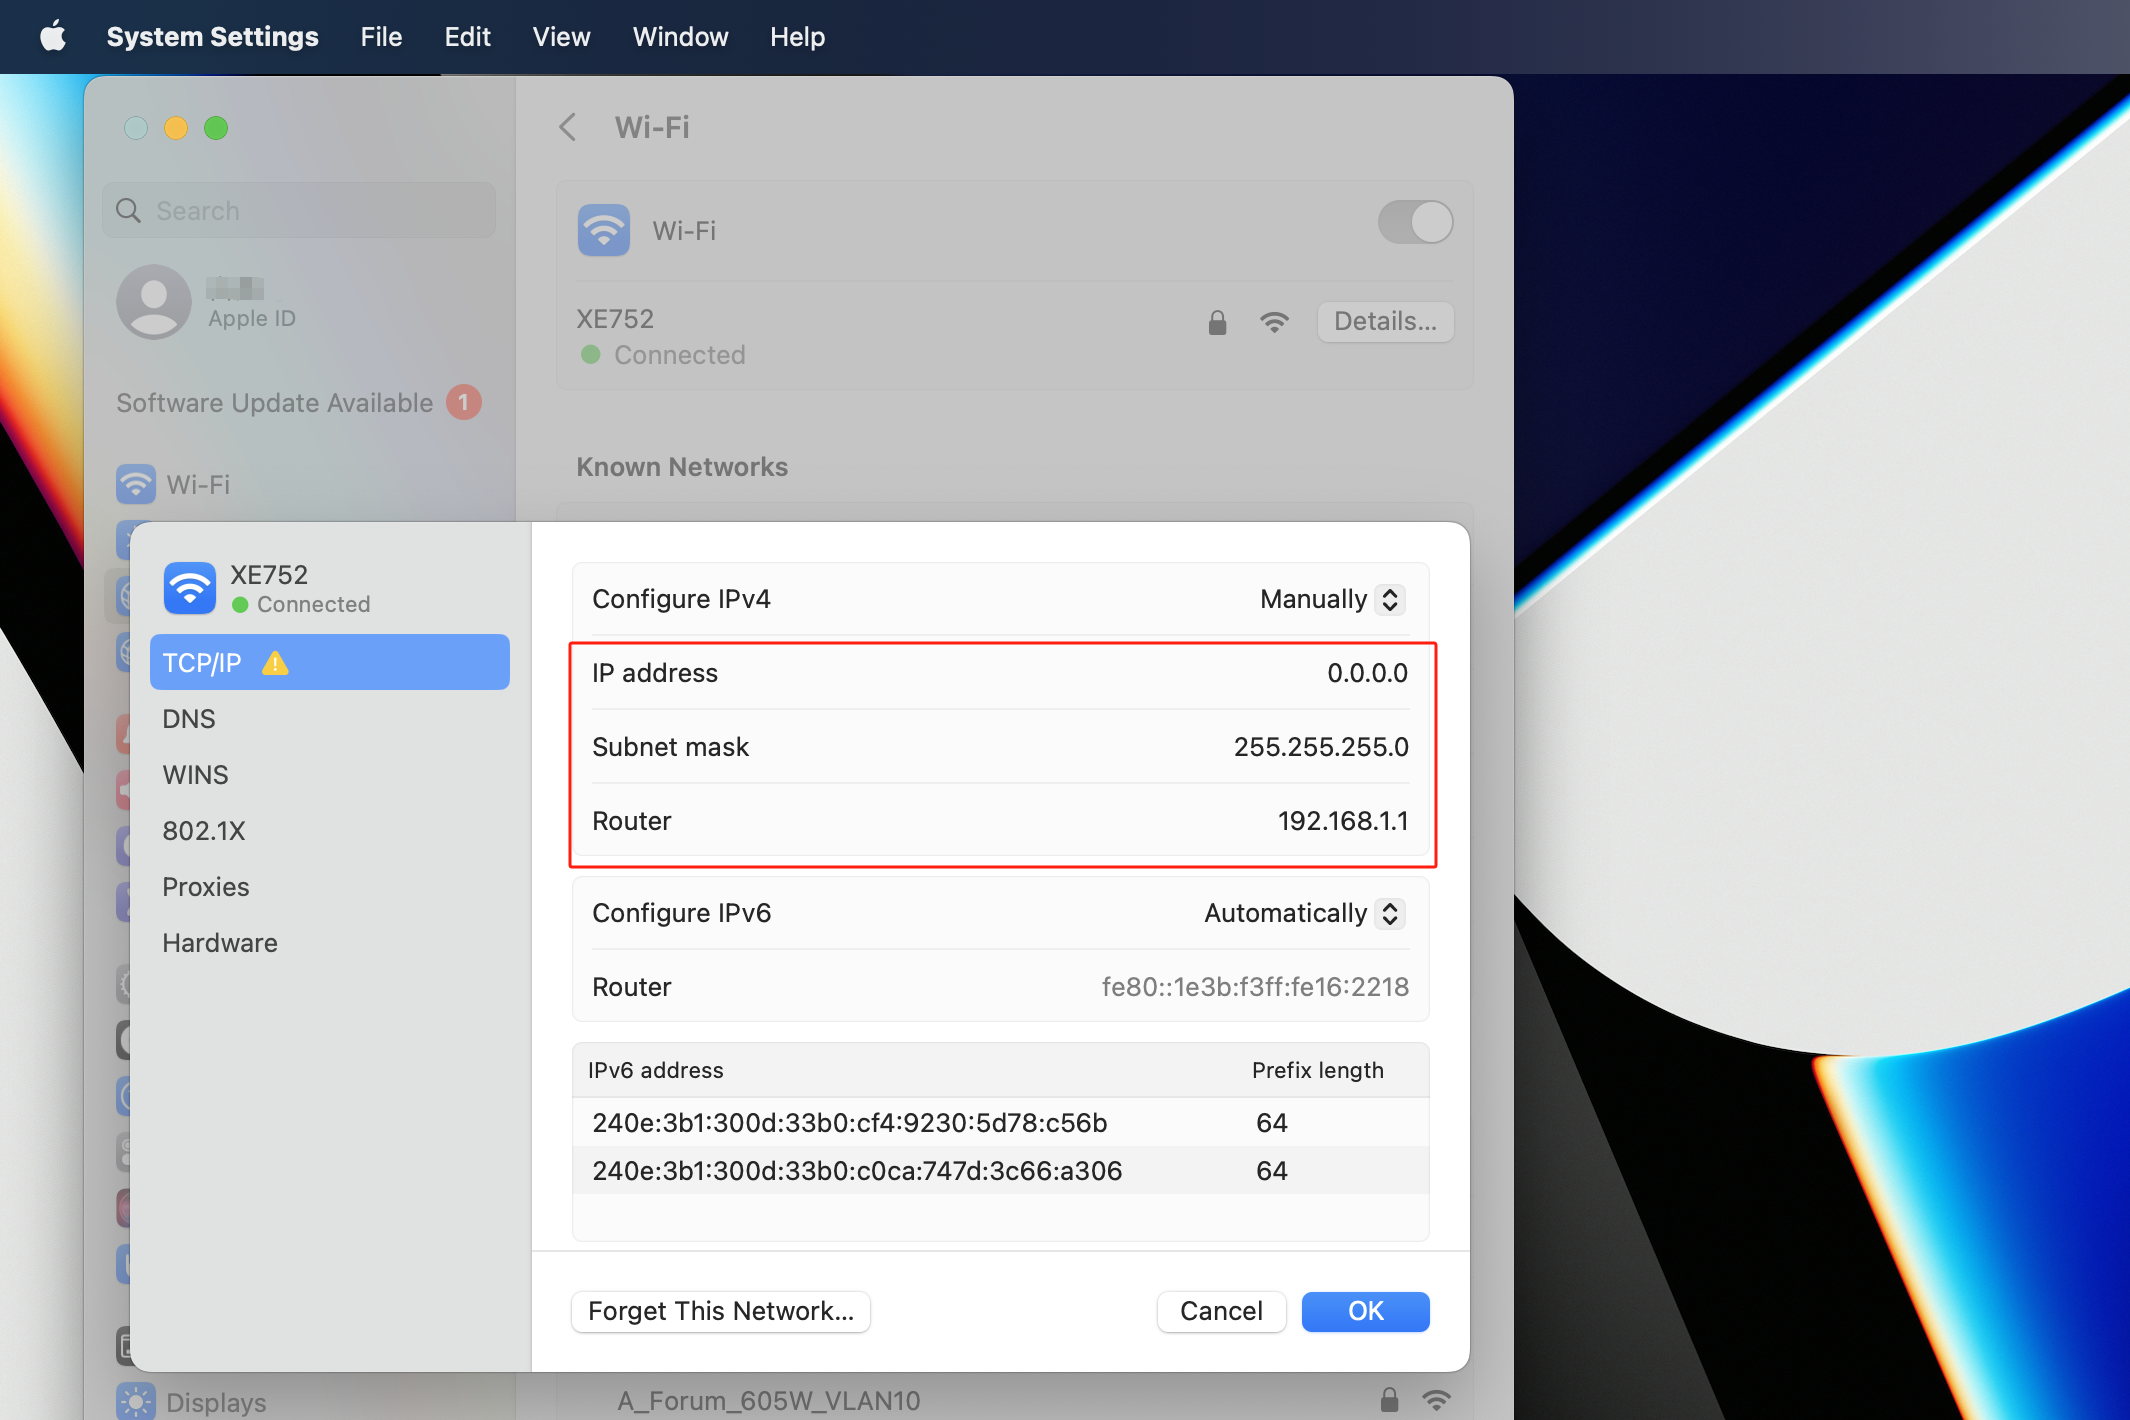
Step 3. Click TCP/IP and choose Manually in Configure IPv4 pop-up menu. Then enter the address in the IP address field. If your ISP gave you additional information such as the subnet mask and router, enter those values in the labelled fields.
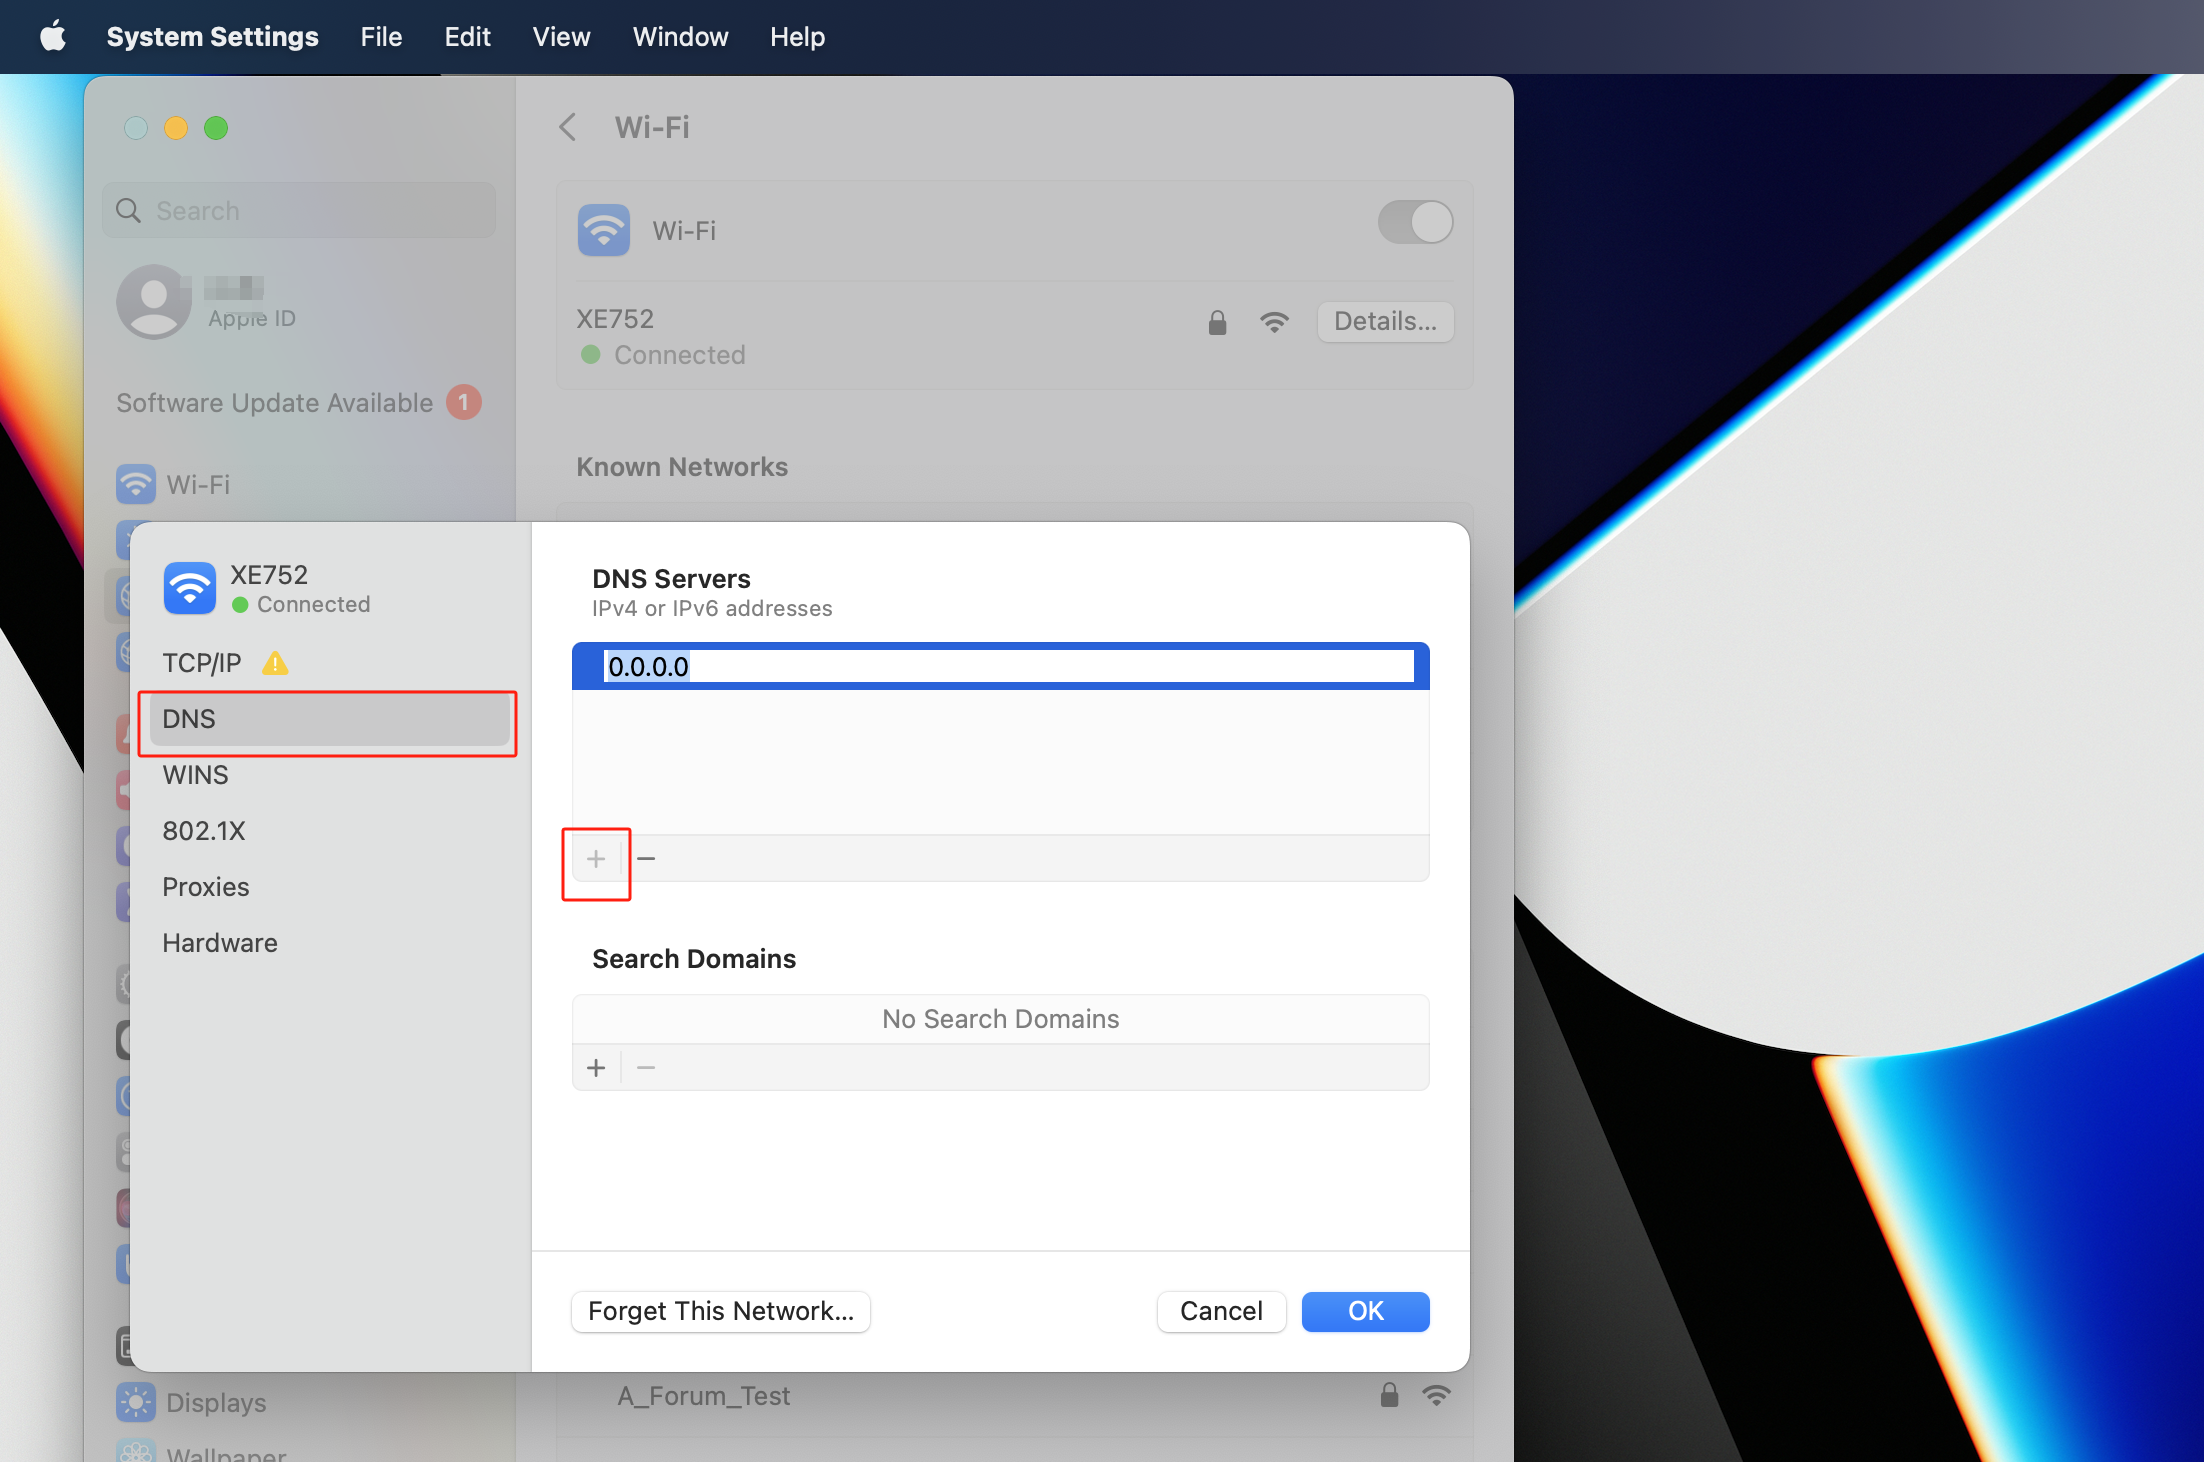
Step 4. If you received a DNS server address, click DNS, click the Add button  at the bottom of the list of DNS servers, then enter the address.
Note:
1.DNS server should be provided by your ISP. Please contact your ISP to check them.
2.In most cases, you could type your local area DNS server IP addresses into it. The DNS server is the same as the Router LAN IP address. In some cases, you could also leave it blank or type in 8.8.8.8.
Is this faq useful?
Your feedback helps improve this site.
TP-Link Community
Still need help? Search for answers, ask questions, and get help from TP-Link experts and other users around the world.