How to Set Up Your TP-Link Wi-Fi Router on the Web Management Page
This guide walks you through a complete TP-Link router setup using the browser-based web management page. You can access the router setup page at tplinkwifi.net once your device is connected to the router. Prefer using your phone? The TP-Link Tether app offers a mobile alternative for router setup.
Key Takeaways
- Access the setup wizard at tplinkwifi.net, 192.168.0.1, or 192.168.1.1 from a device connected to your router.
- You will need to know your Internet service provider (ISP) connection type (Dynamic IP, PPPoE, or Static IP). Contact your ISP if you are unsure.
- The setup wizard walks you through time zone selection, Internet connection type, Wi-Fi name and password, and a firmware update option.
- Setup takes approximately 5 to 10 minutes with an Ethernet or Wi-Fi connection to the router.
- The TP-Link Tether app is a mobile alternative to browser-based setup.
Before You Begin
1. Unplug your modem, and remove the backup battery if it has one.
2. Connect the powered-off modem to the router’s Internet port with an Ethernet cable.
3. Power on the modem, and then wait about 2 minutes for it to restart.
4. Connect the power adapter to the router and turn it on.
5. If your ISP uses PPPoE, have your ISP-provided username and password on hand.
Step 1: Connect Your Modem to the Router
The steps below use the Archer AX55 as a demonstration.
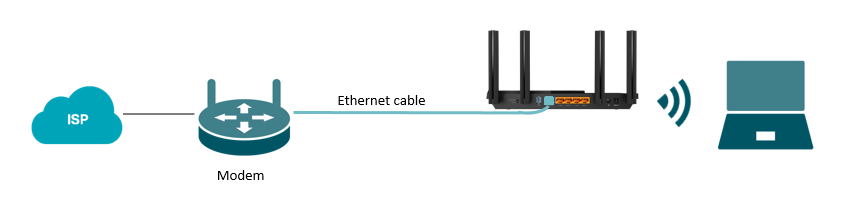
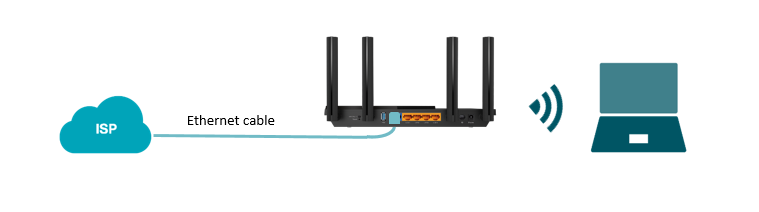
Plug one end of an Ethernet cable into your modem, then plug the other end into the WAN port on your TP-Link router. Alternatively, if your home has an Ethernet wall port, you can connect that directly to the router's WAN port instead.
Step 2: Open the Router Setup Page in Your Browser
Open Chrome, Firefox, or Edge for the best compatibility with the web management page. Type one of the following addresses directly into your browser's address bar and press Enter:
- tplinkwifi.net
- 192.168.0.1
- 192.168.1.1
Do not enter these into a search engine — they must be typed into the address bar to reach the router setup page. If you run into trouble reaching the page, see why you might fail to access tplinkwifi.net for troubleshooting help.
For additional guidance on logging in, see how to log in to your TP-Link router's web management page.
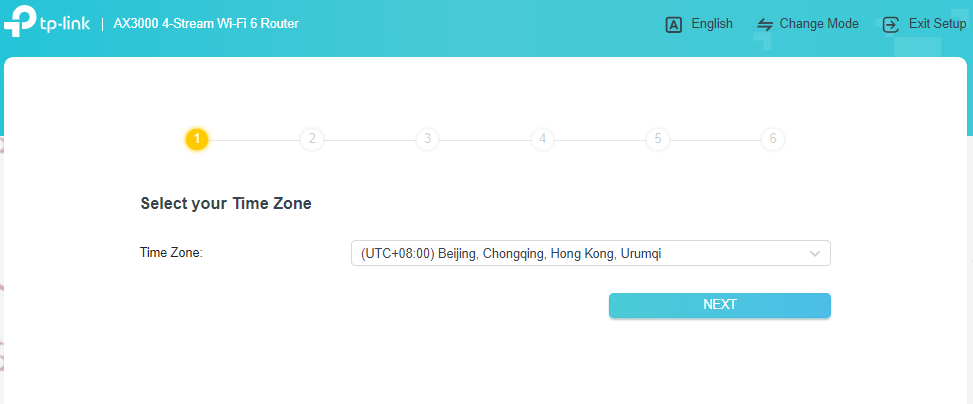
Step 3: Select Your Time Zone
Once the setup wizard loads, choose your time zone from the dropdown menu and click Next.
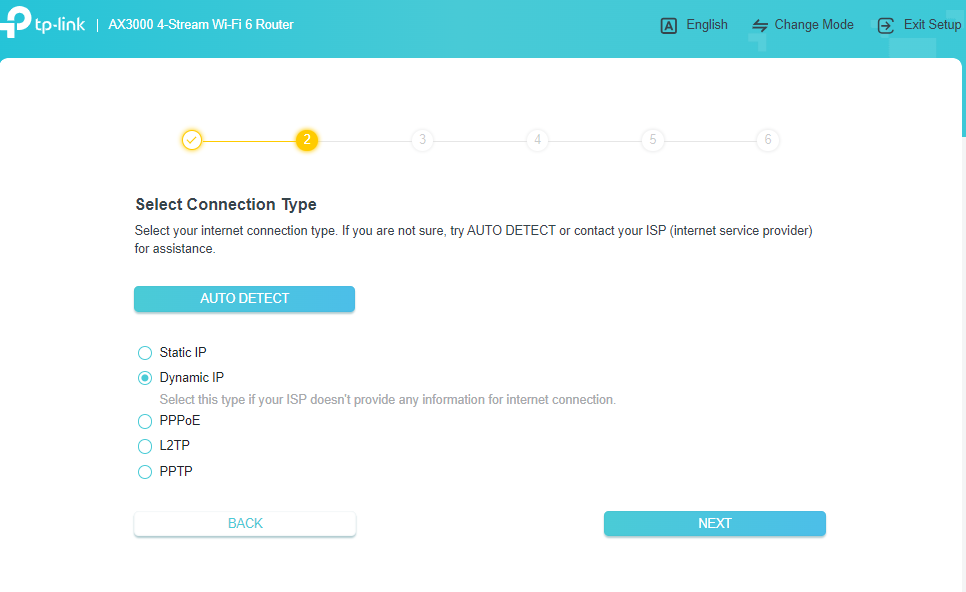
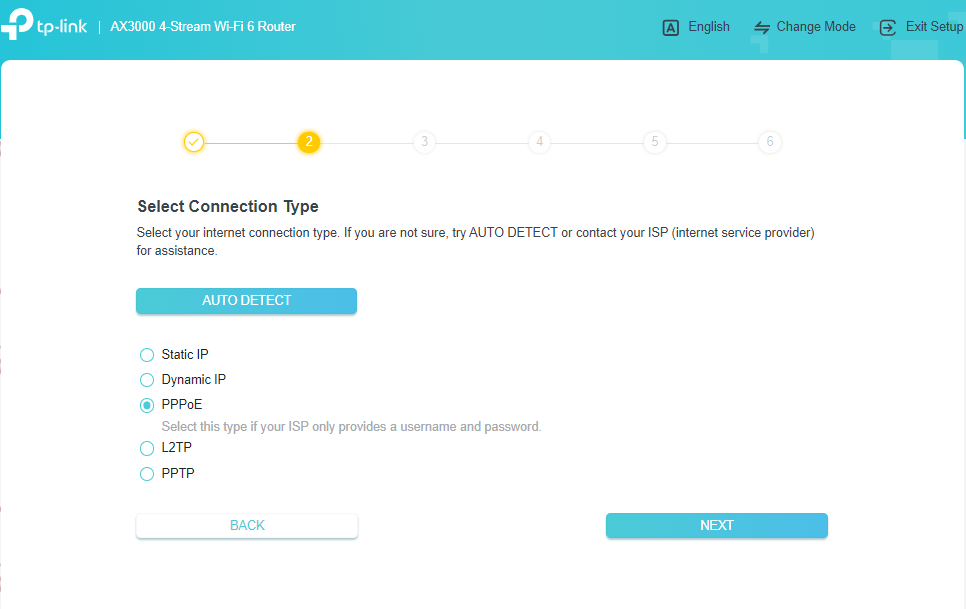
Step 4: Choose Your Internet Connection Type
On the Select Connection Type screen, choose the connection type that matches your ISP setup. You can also click AUTO DETECT to let the router identify the right type. If you are unsure, contact your ISP directly. The common connection types used by ISPs page may also be useful for reference.
Here is a quick guide to the most common options:
- Dynamic IP: Used by most cable Internet users. If your ISP does not provide login credentials, this is likely your connection type.
- PPPoE: Common for DSL users. Requires a username and password provided by your ISP.
- Static IP: Your ISP provides a fixed IP address and related settings.
If your connection type is Dynamic IP, select it and click Next.
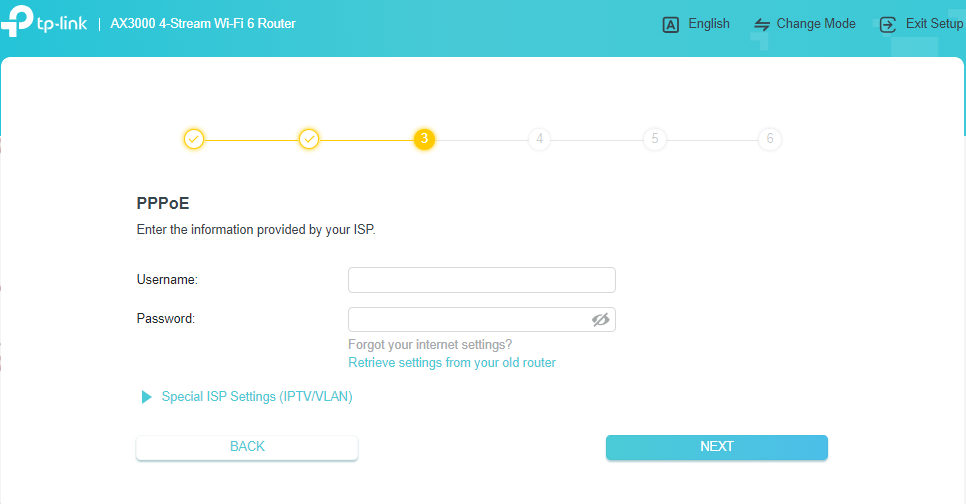
If your connection type is PPPoE, enter the username and password provided by your ISP, then click Next to continue.
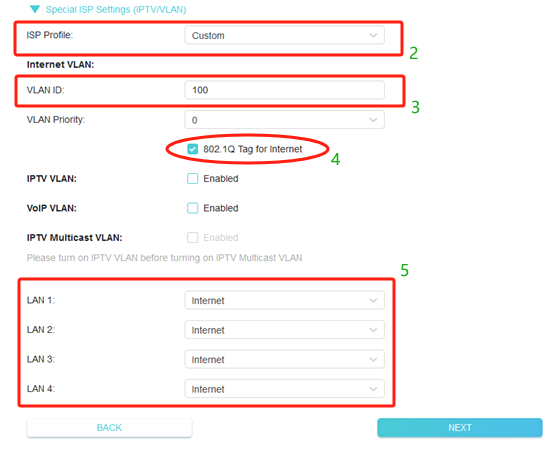
If your ISP requires a VLAN ID, click Special ISP Settings (IPTV/VLAN) and follow these steps:
- Select Custom if your ISP is not in the list.
- Enter the VLAN ID provided by your ISP.
- Check 802.1Q Tag and leave the priority at the default setting.
- Choose Internet for all LAN ports.
- Do not change other settings unless necessary, then click Next.
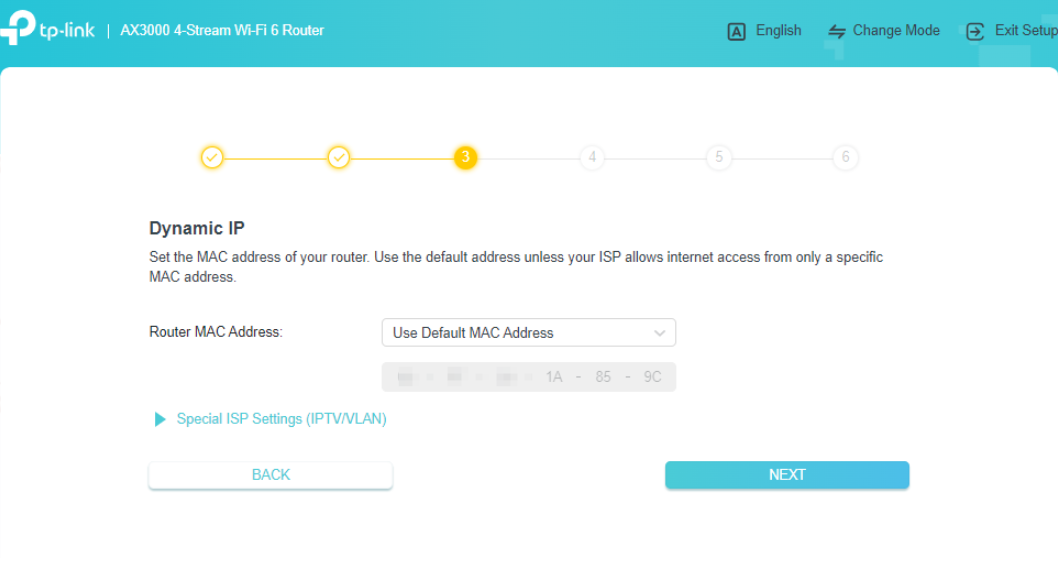
Step 5: Set Your Router's MAC Address
Choose the MAC address setting for your router. If you are unsure which option to pick, select Use Default MAC Address and click Next.
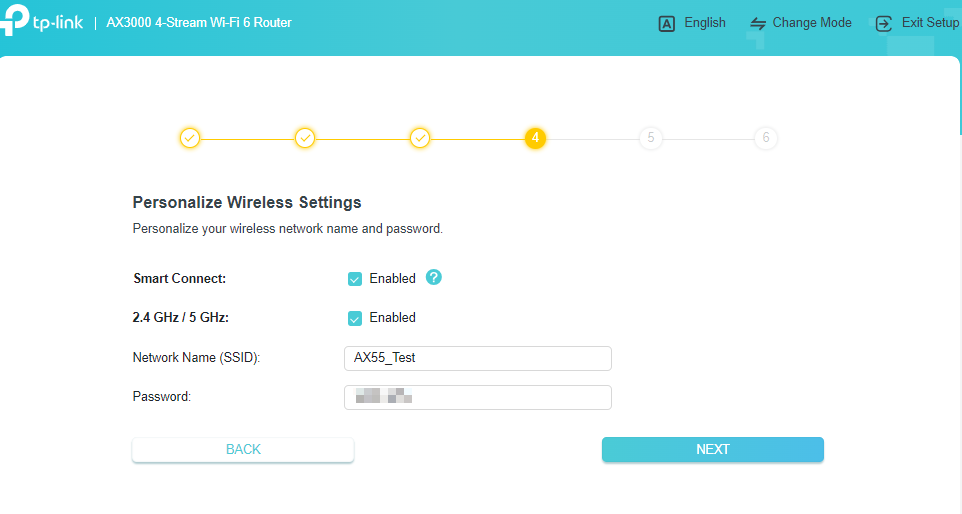
Step 6: Set Your Wi-Fi Name and Password
Customize your wireless network name and password for both the 2.4 GHz and 5 GHz bands. Click Next when finished.
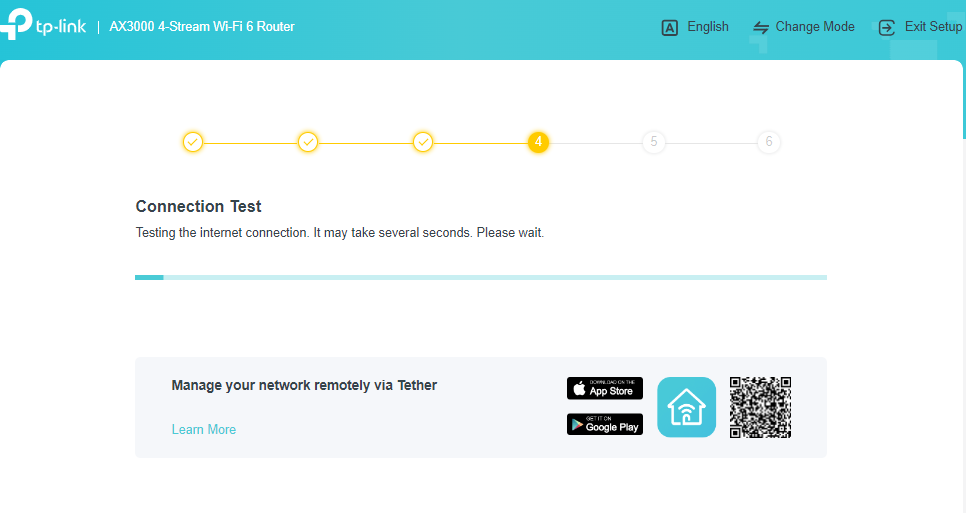
Step 7: Wait for the Internet Connection Test
The router will run a connection test automatically. This may take several seconds. Wait for it to complete before moving on.
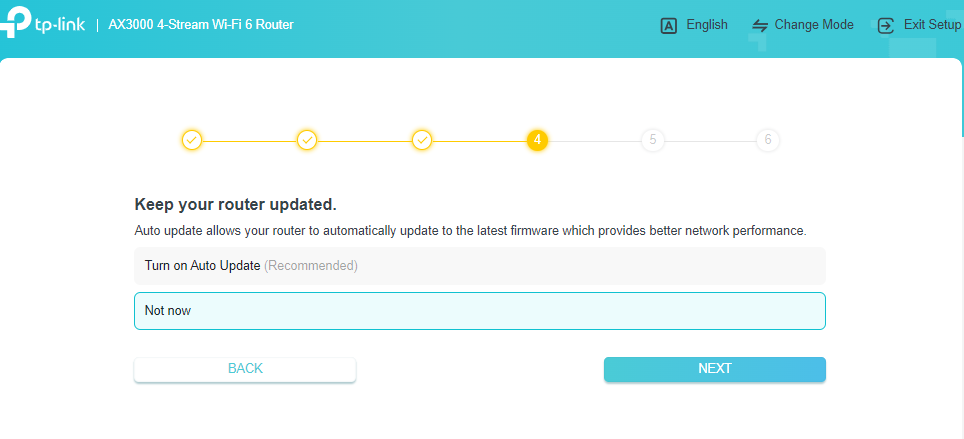
Step 8: Set Your Firmware Update Preference
Choose whether to turn on auto-update for your router's firmware, or skip for now. Enabling auto-update is recommended to keep your router performing well. Click Next to continue.
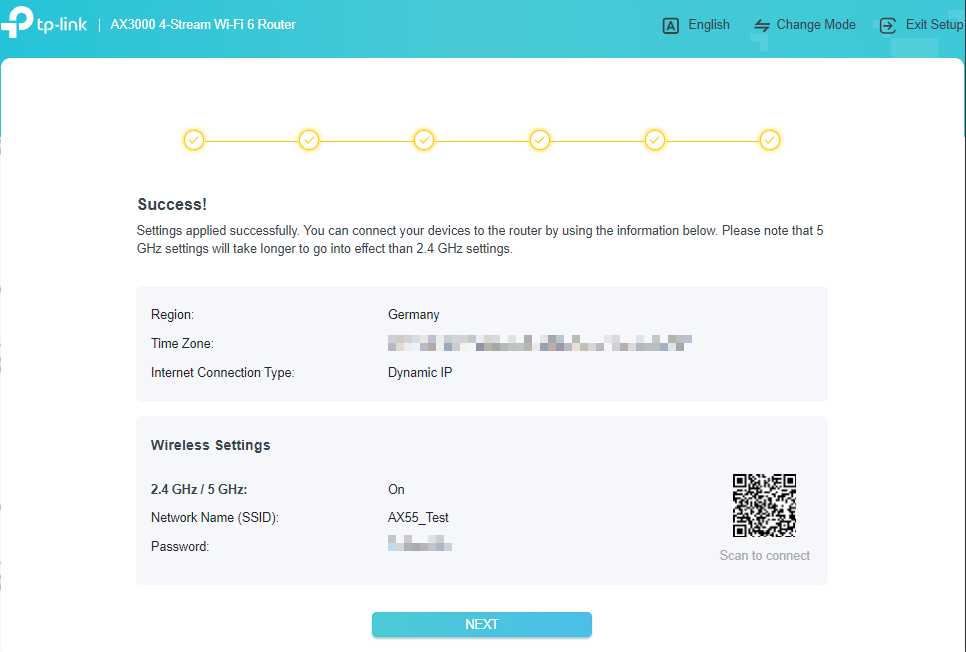
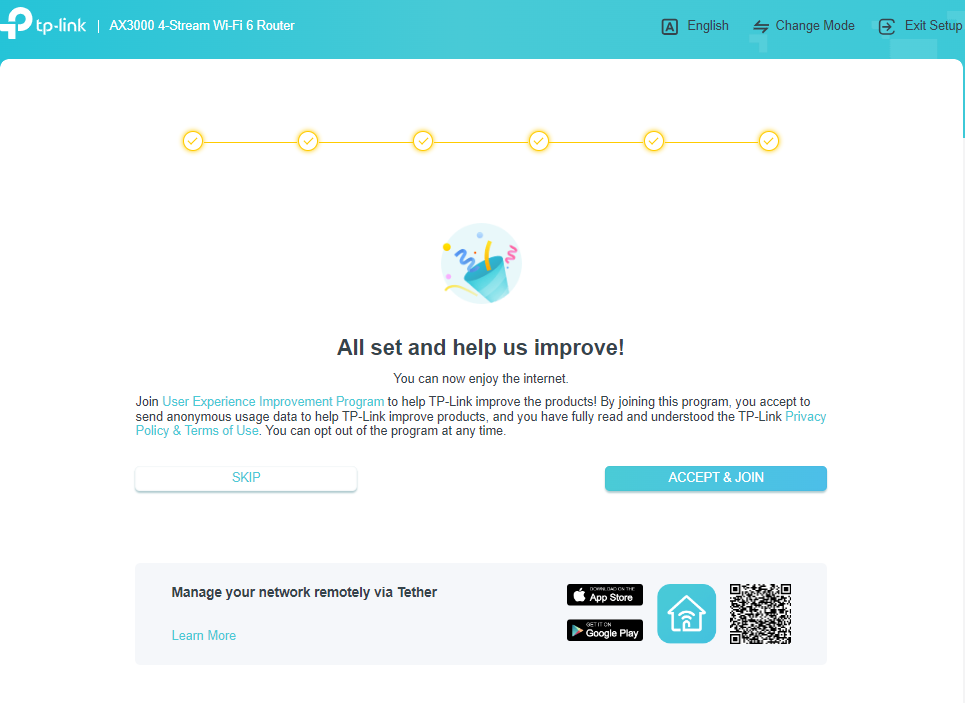
Step 9: Setup Complete
Your router setup is done. The confirmation screen shows your region, time zone, Internet connection type, and wireless settings. Click Next to finish.
Troubleshooting
Can't reach tplinkwifi.net? Try entering 192.168.0.1 or 192.168.1.1 directly in your browser's address bar instead. Make sure your device is connected to the router, not another network. See why you might fail to access tplinkwifi.net for more help.
Setup wizard not appearing? Clear your browser cache and try again. Confirm that your browser is Chrome, Firefox, or Edge, and that you typed the address into the address bar rather than a search bar.
Internet connection test fails? Double-check that your Ethernet cable is fully seated in both the modem and the router's WAN port. If your connection type is PPPoE, confirm your ISP credentials are correct. For further help, see what to do if you cannot access the Internet through your Wi-Fi router.
Looking For More
Is this faq useful?
Your feedback helps improve this site.


TP-Link Community
Still need help? Search for answers, ask questions, and get help from TP-Link experts and other users around the world.