How to Connect Your TP-Link Travel Router to a Hotel or Public Wi-Fi Captive Portal
A captive portal is the login page that appears when connecting to public Wi-Fi at hotels, airports, or coffee shops, requiring a username or password before granting Internet access.
With the TP-Link travel router captive portal setup on the TL-WR1502X, you only need to authenticate once during Quick Setup — then all your connected devices (laptops, smartphones, tablets, and more) can access the network without individual authentication.
The security benefit is that your devices connect to the router's private Wi-Fi rather than directly to the public hotspot. Your individual device IP and MAC addresses stay hidden from the public network.
For general setup instructions, see how to set up the TL-WR1502X travel router. If you run into issues, see what to do if your travel router cannot work well.
Key Takeaways
- A captive portal is a web page that appears when connecting to public Wi-Fi, requiring authentication before Internet access is granted.
- The TL-WR1502X lets you complete captive portal authentication once during Quick Setup, so all connected devices can access the network automatically.
- To begin setup, set the Mode Switch to Hotspot, power on the router, and wait for the LED to turn solid red before connecting your device.
- The default Wi-Fi network name and password for the TL-WR1502X are printed on the Wi-Fi info card and on the label at the bottom of the router.
- If the captive portal login page does not appear automatically, open any website in a browser, and you’ll be redirected to the portal login page.
- If the captive portal still does not appear, changing the router's MAC address to match that of a smartphone already connected to the public hotspot is an effective troubleshooting method.
How to Connect Your TL-WR1502X to a Captive Portal Hotspot
Follow the steps below to connect your travel router to a hotspot with a captive portal:
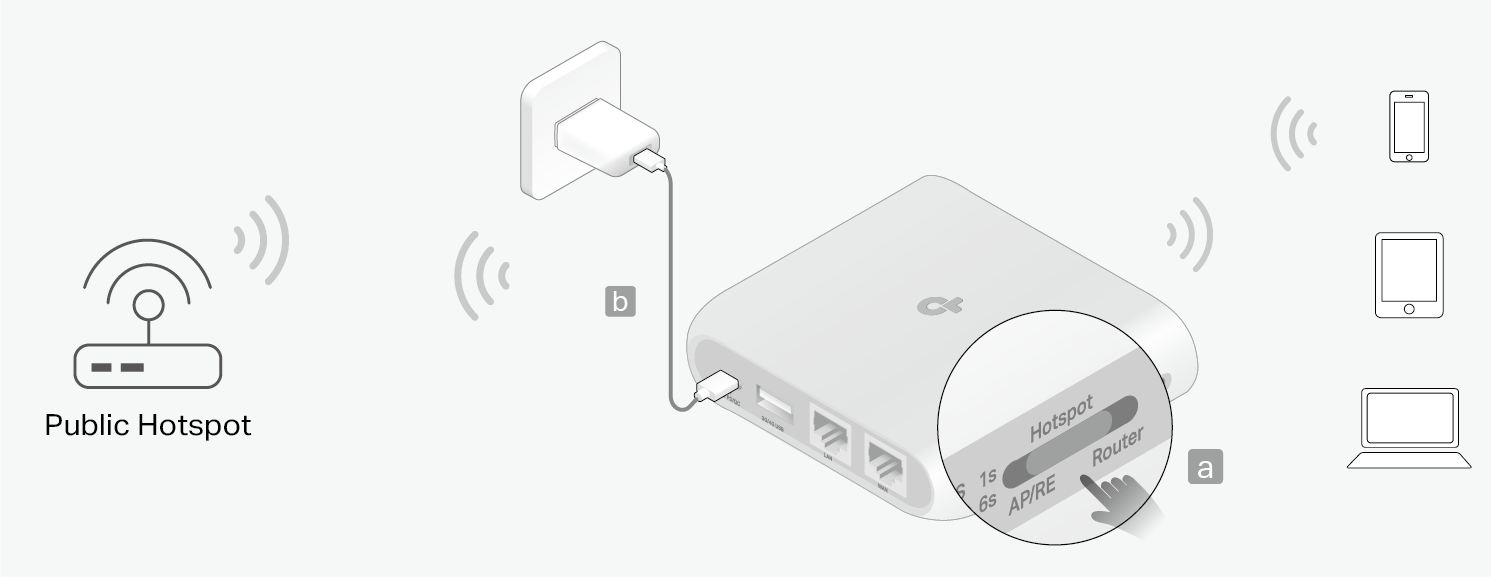
Step 1. Connect your router as shown below.
- Set the Mode Switch to Hotspot.
- Power on the router. Wait until the router’s LED turns into solid red.
Step 2. Connect your device to the router.
- Wireless: Connect your device to the router’s Wi-Fi. The default wireless network names (SSIDs) and wireless password are printed both on the Wi-Fi info card and the label at the bottom of the router.
- Wired: Turn off the Wi-Fi on your device and connect to the WAN or LAN port of the router with an Ethernet cable.
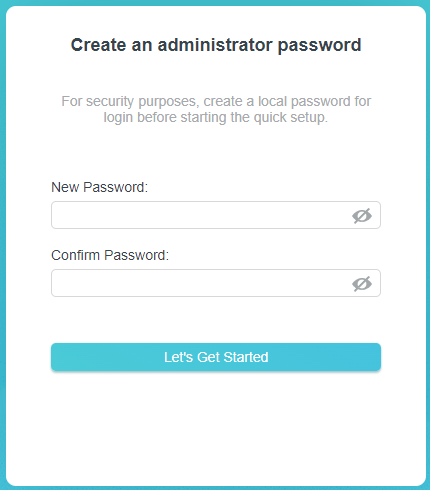
Open a web browser and go to http://tplinkwifi.net or http://192.168.0.1. Create a password to log in.
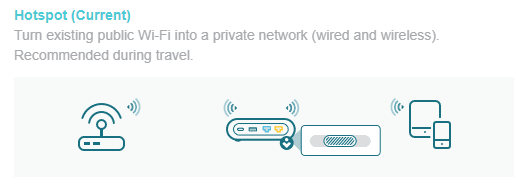
Step 4. Start the Quick Setup.
Make sure the operation mode is Hotspot, and click NEXT.
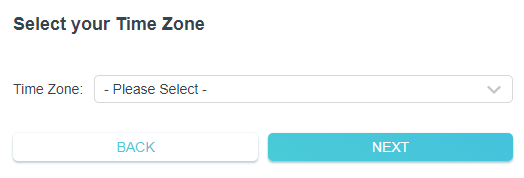
Step 5. Select your time zone.
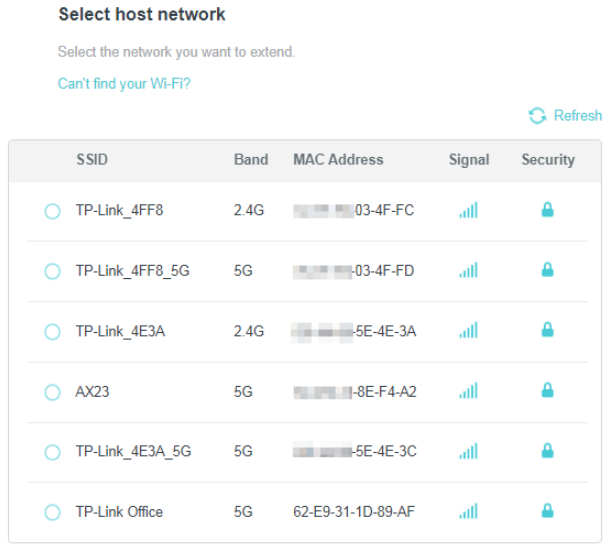
Step 6. Select the public network.
Enter the password if any to connect to the network want.
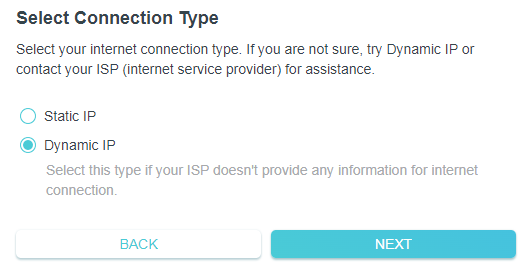
Step 7. Select Connection Type.
Select the internet connection type and complete the settings. If unsure, use Dynamic IP or contact your ISP (Internet Service Provider).
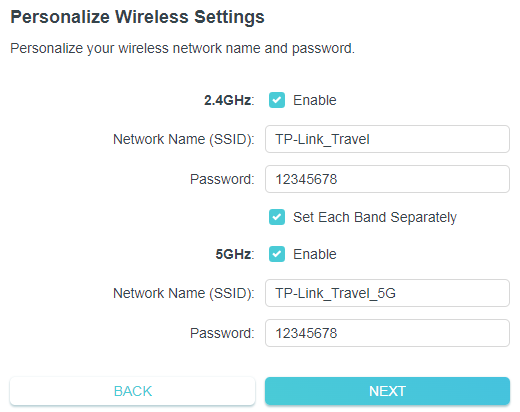
Step 8. Personalize the wireless settings.
You can keep the default wireless settings or customize a new one.
Step 9. Captive portal authentication.
If it requires captive portal authentication, a pop-up window will appear as below. Click Open Captive Portal Login Page to complete the authentication.
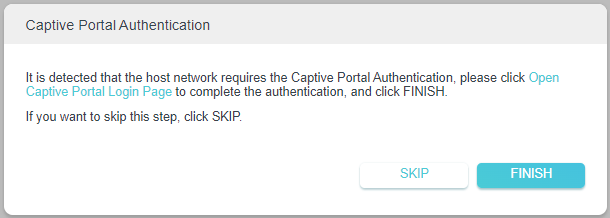
The following illustration is for example only, the actual pages may differ from actual networks.
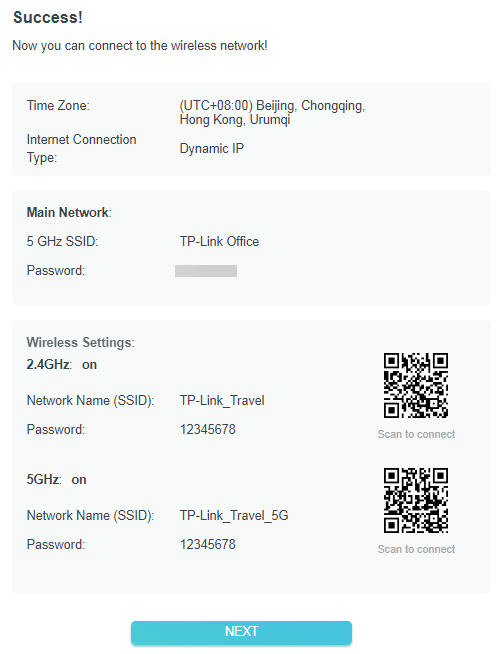
Step 10. Go back to your router’s web management page and click FINISH.

Your devices can now connect to the wireless network.
If you customized new wireless settings, reconnect your wireless devices to the new Wi-Fi network.
What to Do If the Captive Portal Doesn't Appear
If the captive portal does not appear, try the following methods:
Method 1. Open any web page
Connect your smartphone or computer to the router, then open any website, you will be redirected to the portal login page.
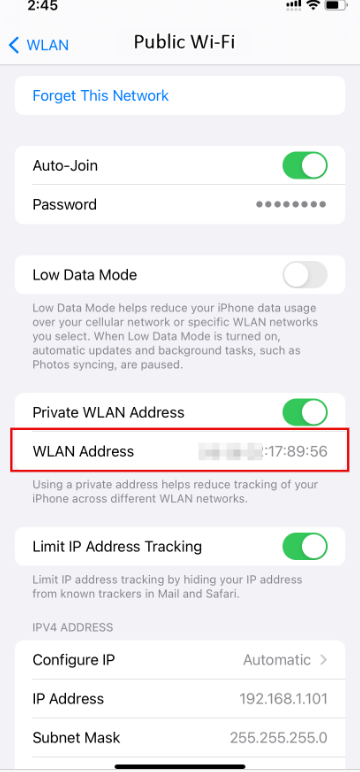
Method 2. Change the MAC address
- Connect your smartphone to the public hotspot’s Wi-Fi. Find the smartphone’s MAC address on its Wi-Fi list, and write the MAC address down.
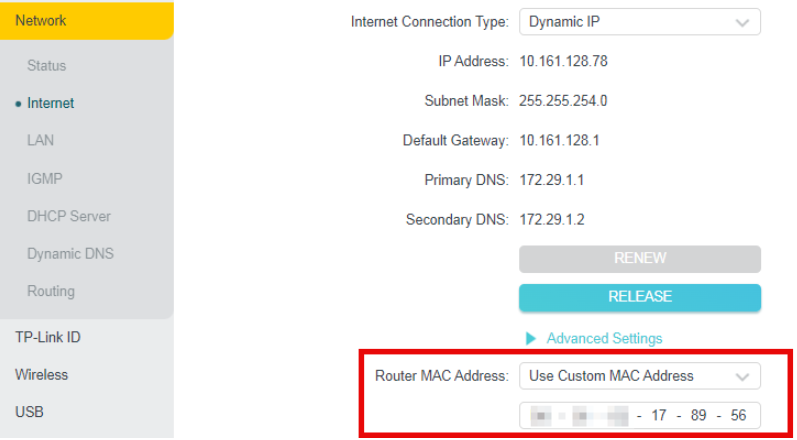
- Log in to the web management page of the router and go to Advanced > Network > Internet > Router MAC Address. Select Use Custom MAC Address, enter the MAC address of your smartphone you’re using to connect to the public hotspot’s Wi-Fi.
To learn more about each function and configuration, please visit the Download Center to download the manual for your product.
Looking For More
هل تجد هذه الأسئلة مفيدة؟
مشاركتك تساعدنا في تحسين الموقع
TP-Link Community
Still need help? Search for answers, ask questions, and get help from TP-Link experts and other users around the world.