How to get configuration files from an OpenVPN service provider
When setting up a VPN client on TP-Link Routers, configuration files from OpenVPN service providers are the key to accessing the VPN service. This article will guide you on how to get the configuration files from OpenVPN service providers. Please notice that you have to contact your service provider for the configuration file if they are not listed below.
For how to set up VPN Client on TP-Link Routers, please refer to:
1. For Deco: How to set up VPN Server/VPN Client on Deco router
2. For Wi-Fi router: How to install a VPN on TP-Link Wi-Fi Router
3. For Travel router: How to set up a VPN Server/VPN Client on TP-Link Travel Router
Note: Compatibility and support may vary due to software updates, changes in the vendor's service offerings, or technical adjustments in third-party systems. We cannot guarantee that all features will remain fully compatible with every version or model at all times. Furthermore, service interruptions or performance issues arising from vendor policy changes, technical limitations, or unforeseen external factors are beyond our control.
AirVPN
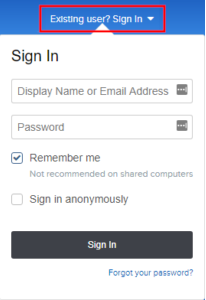
Step 1: Login to your AirVPN account.
Step 2: Go to Client Area > Config Generator > OpenVPN Configuration Generator > Router. Select Protocol under the Protocols section according to your needs.
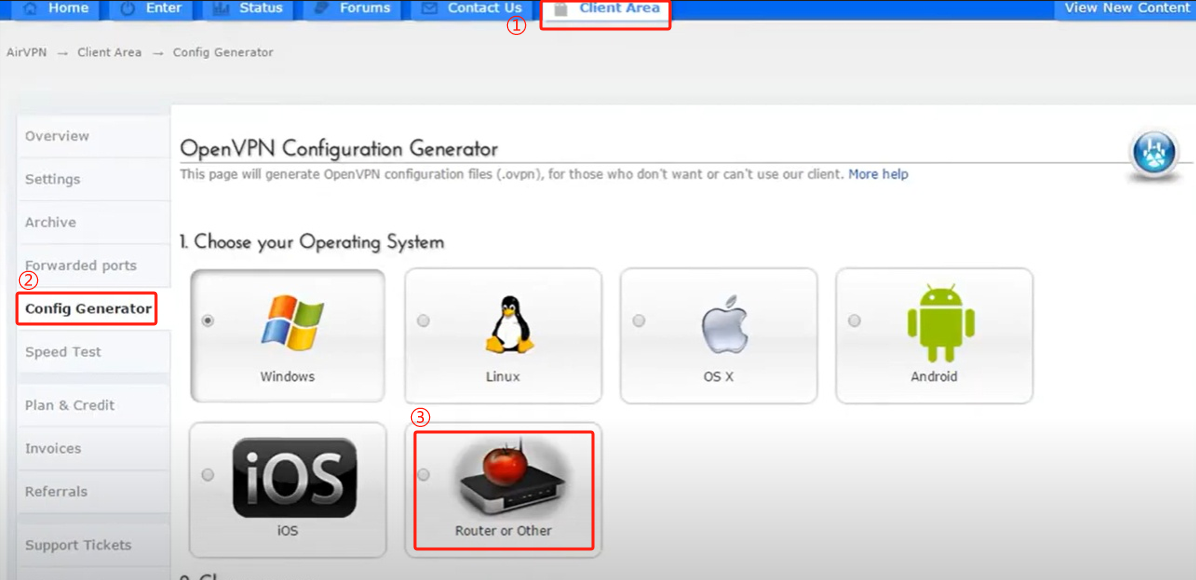
Step 3: Select a Protocol under the Protocols section and a server under Choose Servers section according to your needs.

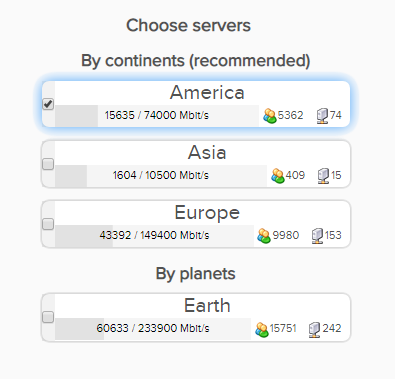
Step 4: Scroll down towards the bottom of the page and click on Generate, and get the configuration file.
BolehVPN
Step 1: Login into your BolehVPN account.
You will be prompted to enter your username and password. This is the same username and password that you use to log into your BolehVPN order page.

Step 2: Download your configuration files from your Dashboard.
By default, the configuration files and certificates will be updated on every startup.
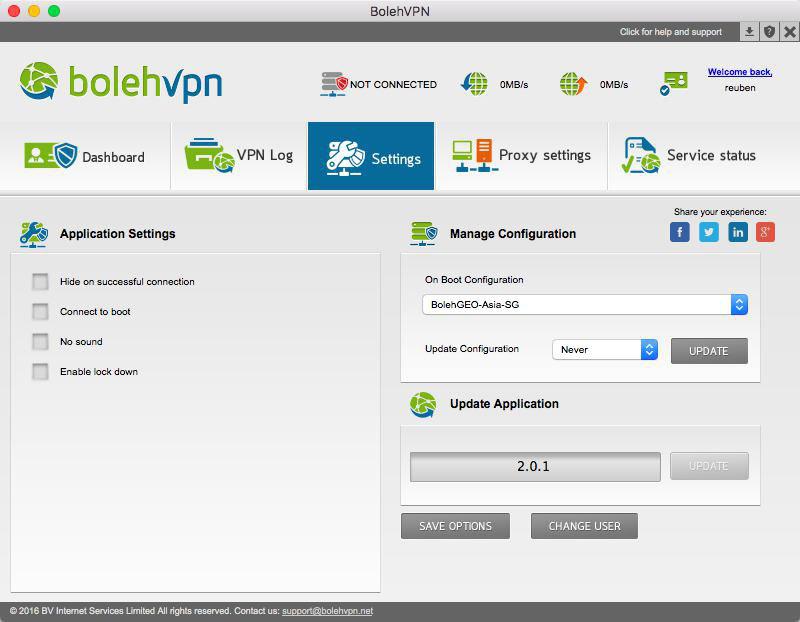
Step 3: Extract the zip files after completing the download.
Your configuration folder contains all the ovpn files as well as your keys and certificates. Alternatively, you can download them from your Control Panel by clicking on Download Key under My Order on the bolehVPN login page.
BulletVPN
Please directly download the configuration files here:
https://www.bulletvpn.com/account/download/BulletVPN-OpenVPN.zip
CactusVPN
Please directly download the configuration files here: https://www.cactusvpn.com/downloads/
Cryptostorm
Step1: Log into Cryptostorm with your account
Please download the configuration file here directly: https://cryptostorm.is/routers
Cyberghost
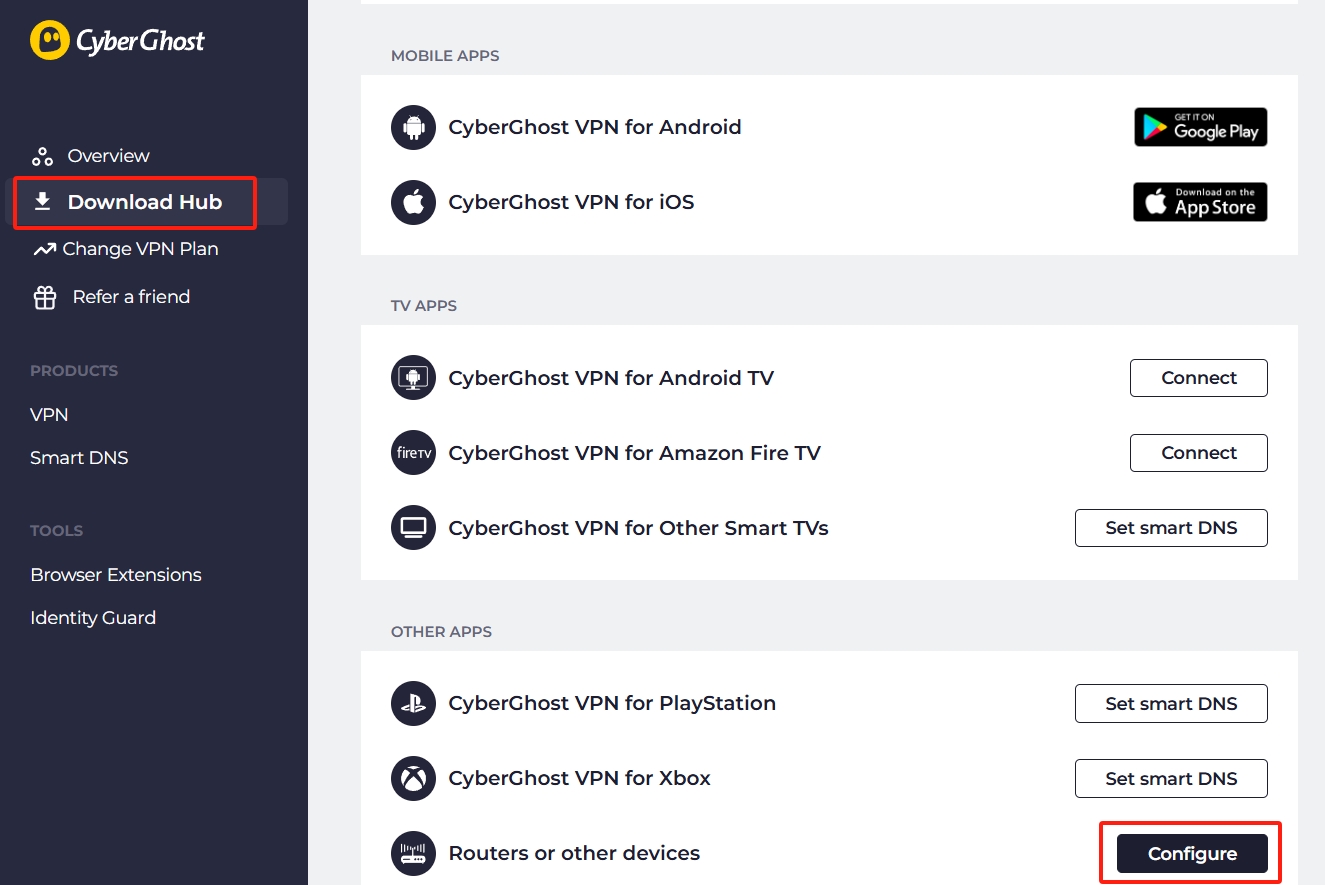
Step 1: Log into Cyberghost with your account and go to the Download Hub. Select Configure from the “Routers or other devices” option.
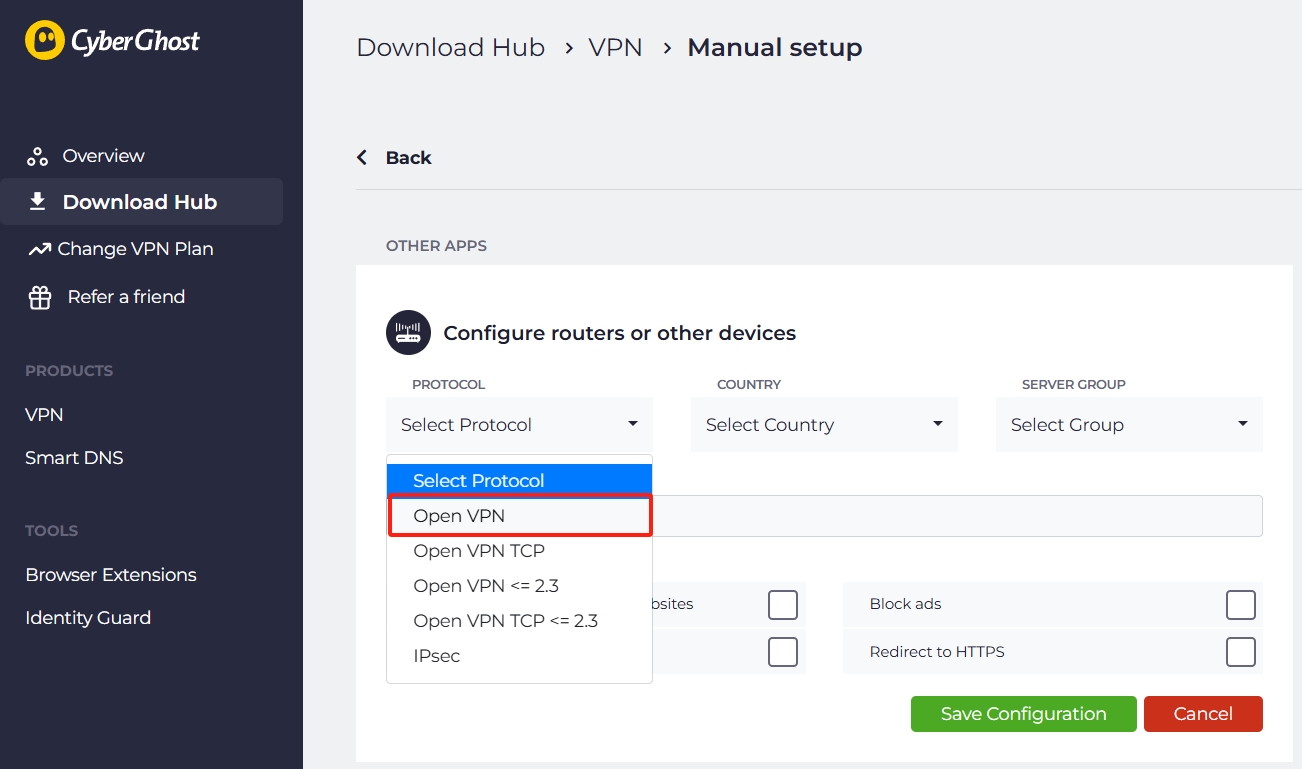
Step 2: Choose the VPN protocol of OpenVPN.
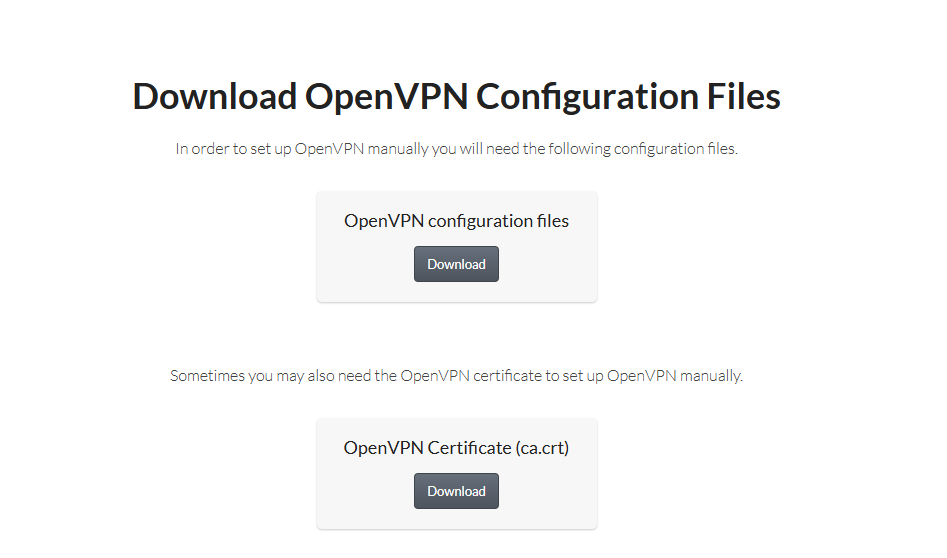
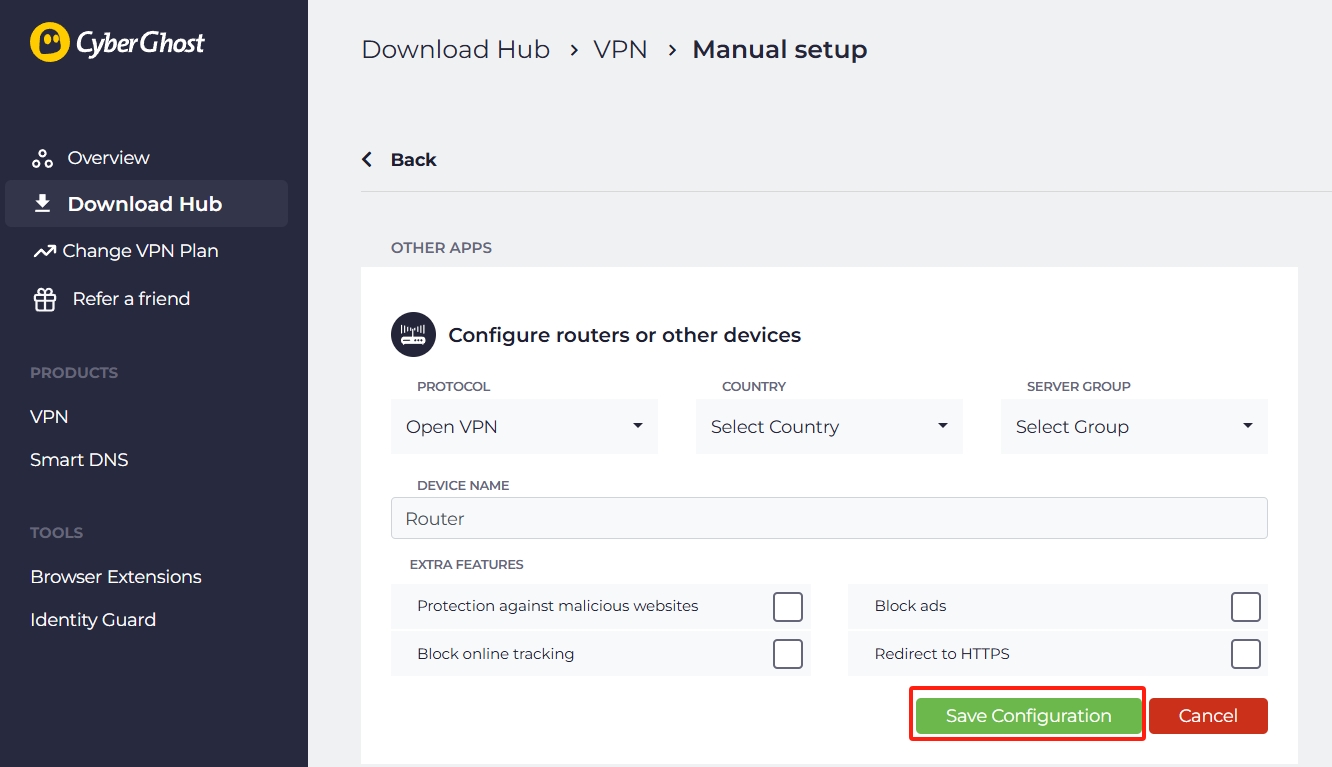
Step 3. Select the server country and server group. Enter the name of the device, turn on any extra features you want, and click Save Configuration. Then you can download it.
Step 4. After downloading, you will get a compressed package containing multiple files. You can merge the configuration files according to the following link:
Manually create the unified format for OpenVPN profile(CyberGhost OpenVPN Server)
FastestVPN
Step 1: Login with your FastestVPN account.
Step 2: Please download all the configuration files here: https://support.fastestvpn.com/download/fastestvpn_ovpn/
Step 3: Find the downloaded compressed file in the folder, unzip it, and choose the configuration file you want to use.
Hide.me VPN
Information quoted from Hide.me VPN official instruction: https://hide.me/en/knowledgebase/where-can-i-download-openvpn-configuration-files/
Step 1: Login with your Hide.me VPN account. Click on the Server Locations option on the left.
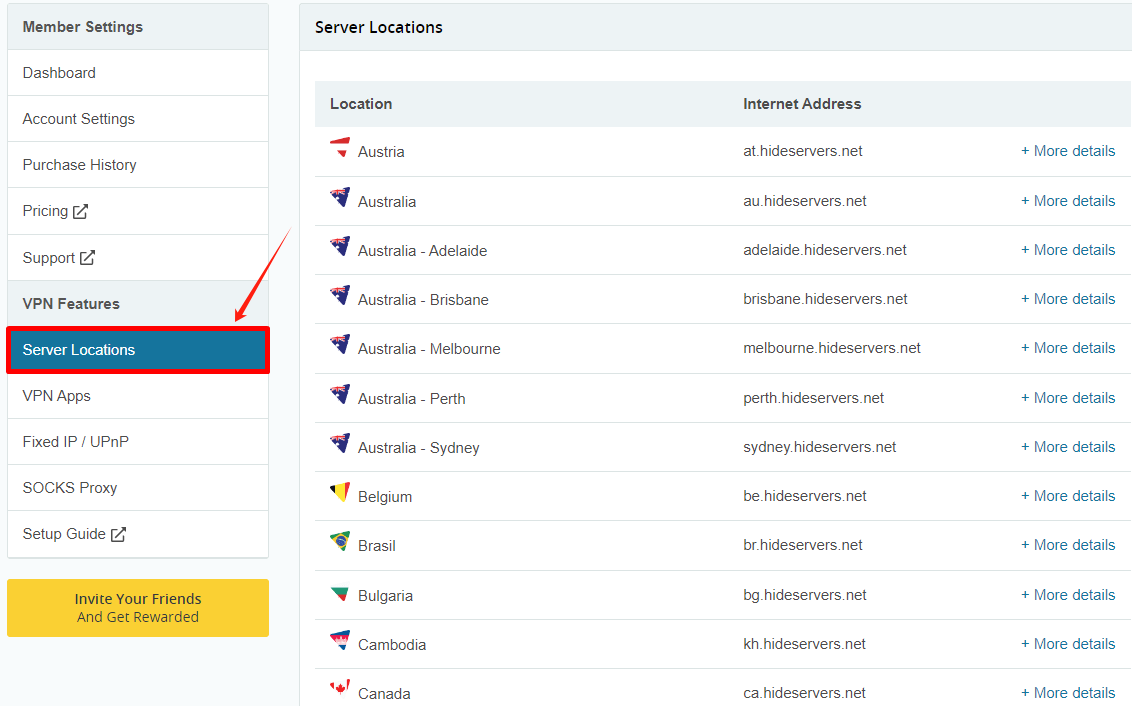
Step 2: Choose a server you want, click on the + More details, and choose according to your operating system. You will download your desired configuration file in zip format.

HideIPVPN
Information quoted from HideIPVPN official instruction: https://www.hideipvpn.com/setup/how-to-download-openvpn-config-files/
Step 1: Login to your HideIPVPN account. In your Client Area, select Package option from the left menu bar, then choose VPN tab.
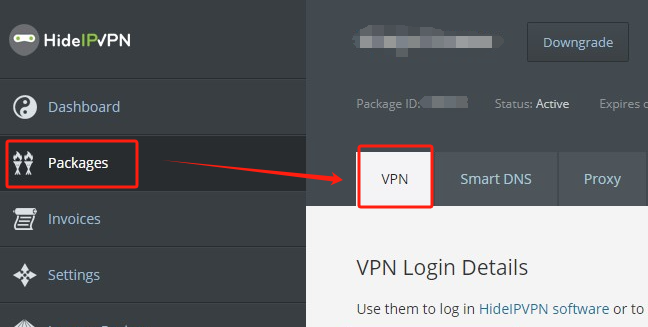
Step 2: Check the status and make sure it is active. On this page, you will see the detailed information, including username and password. Scroll down and find Useful Details.
Click on Download for all operating systems to download the configuration files.
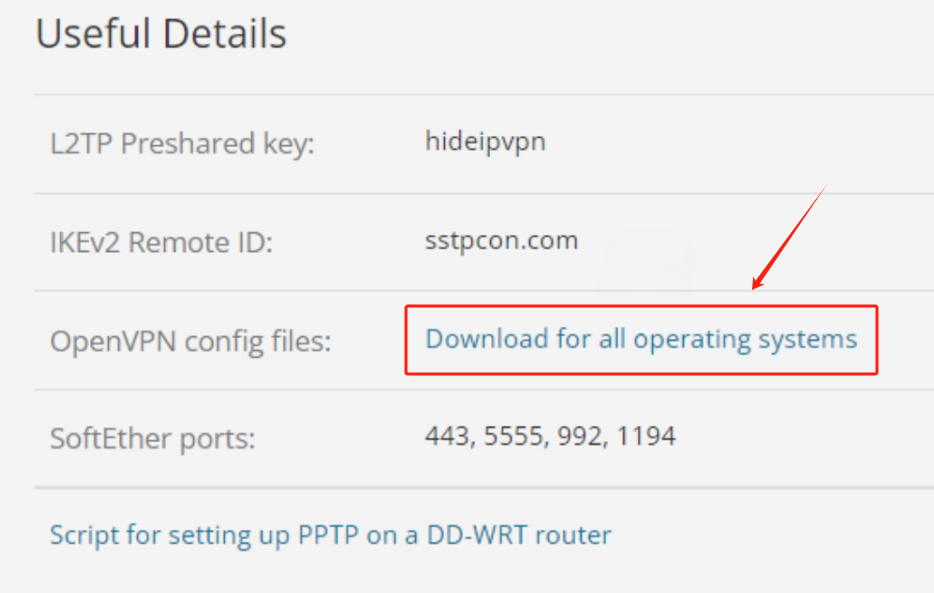
Step 3: Find the downloaded file in the folder and unzip it. You can now use the files here to build a VPN connection.
IVACY
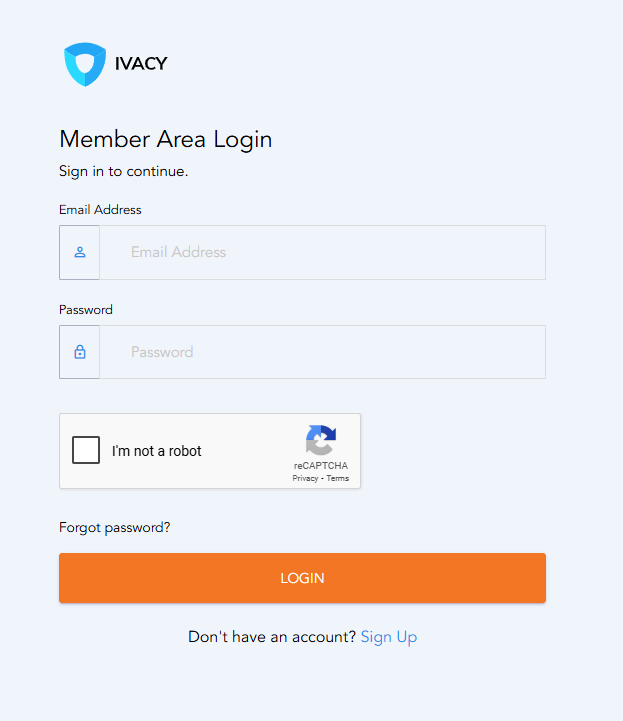
1. Log in with your IVACY credentials.
2. Download the OpenVPN config files here: https://support.ivacy.com/vpnusecases/openvpn-files-windows-routers-ios-linux-and-mac/
3. The username and password for the OpenVPN connection are the same as the one you use to log in to IVACY.
IVPN
1. Login with your IVPN account.
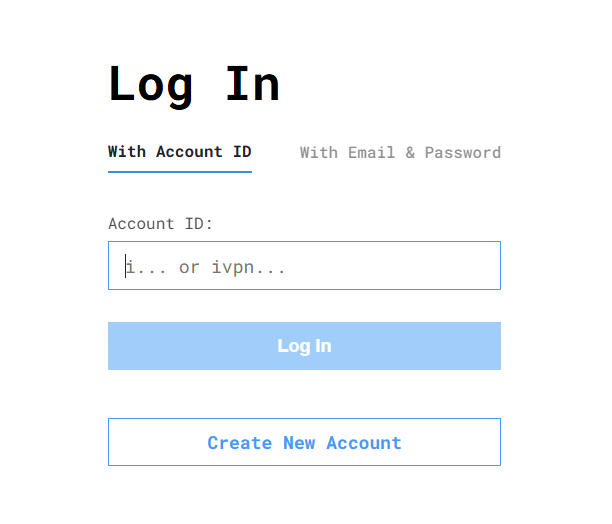
2. Download the OpenVPN config files here: https://www.ivpn.net/releases/config/ivpn-openvpn-config.zip
3. The User Name is your Account ID that begins with letters ivpn. The password can be anything, like ivpn
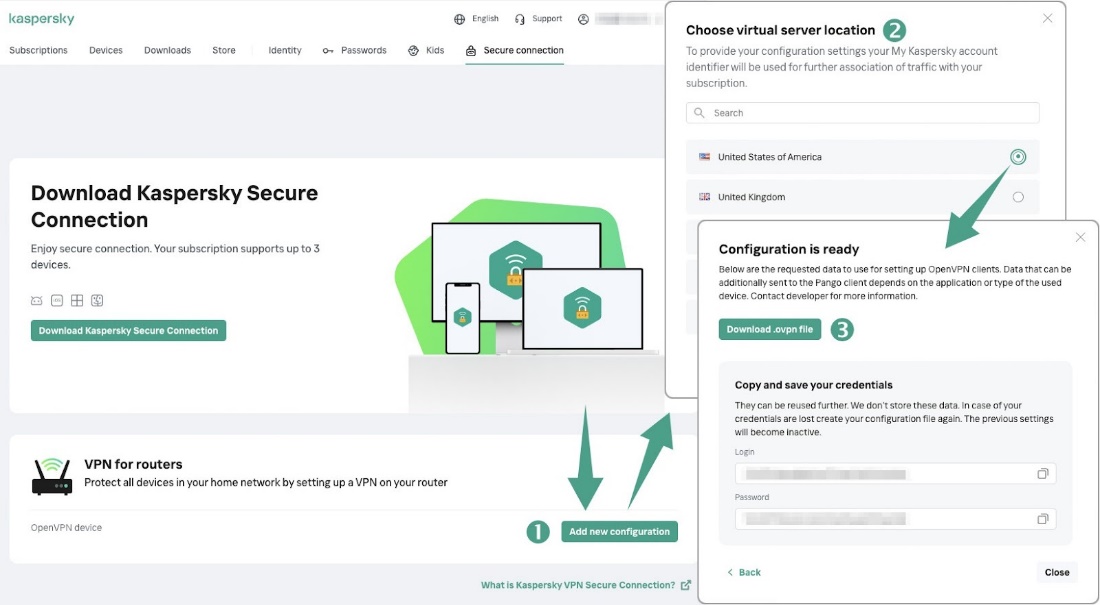
Kaspersky VPN Secure Connection
Kaspersky VPN Official Website
1. Log in with your Kaspersky credentials.
2. Go to Secure Connection section > Locate VPN for routers > Click on Add new configuration > Choose virtual server location > Click on Download .ovpn file
When adding a new profile to your personal account, you need to answer certain questions. These include the profile name, your choice of server, and so on. The same window often provides space for technical details — such as private keys, names, and passwords — but most providers support automatic generation of all this, in which case they can be left blank. Next, a link appears to download the .ovpn file for OpenVPN
OysterVPN
1. Log in with your OysterVPN credentials.
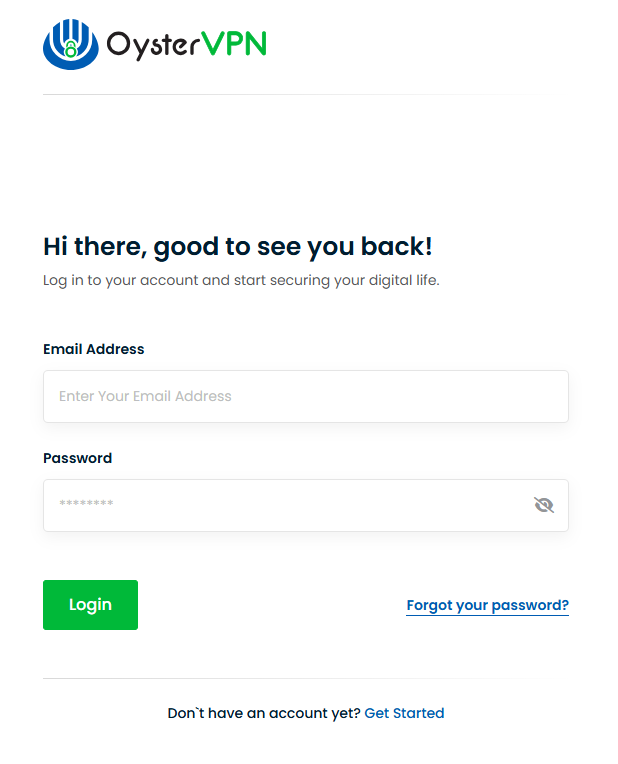
2. Go to the OysterVPN server list page and click Download .ovpn file to download the configuration file.

3. The username and password for the OpenVPN connection are the same as the ones you use to log in to OysterVPN.
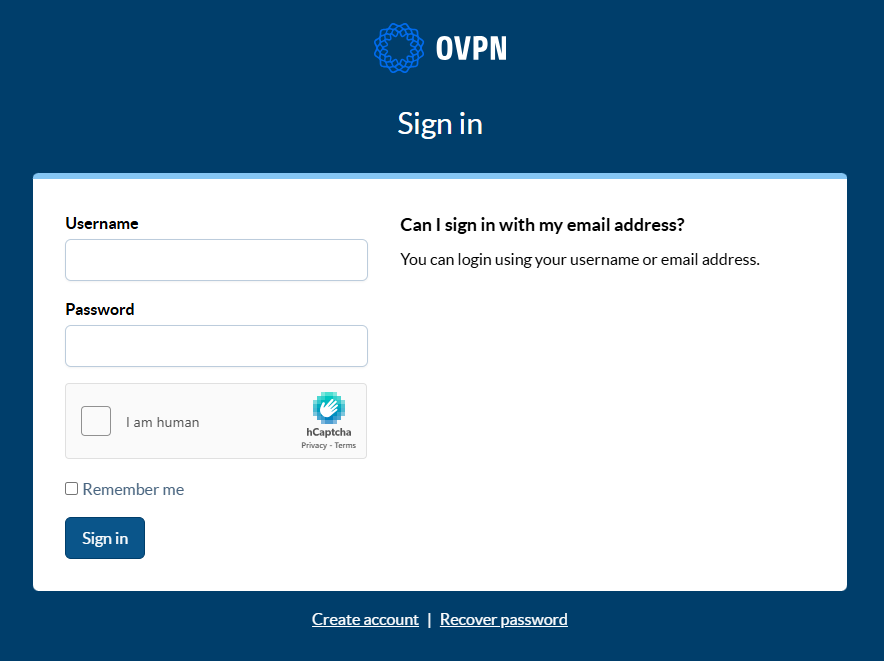
OVPN
1. Log in with your OVPN credentials.
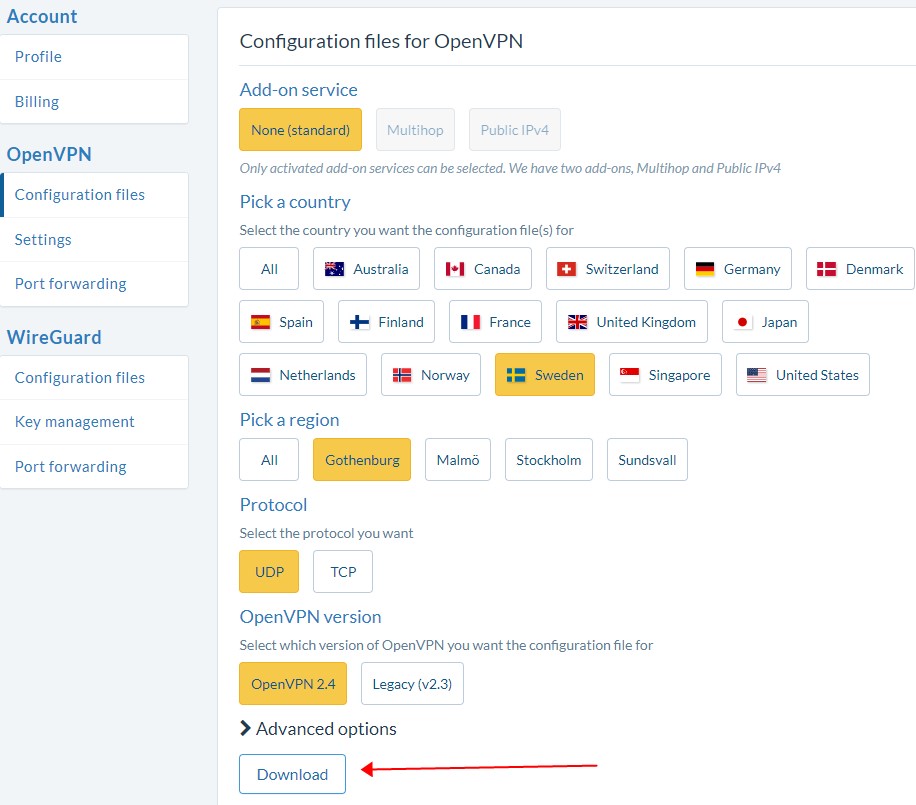
2. Go to Account > OpenVPN
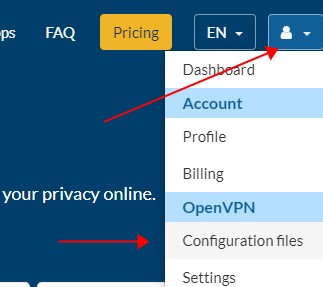
3. Choose the server and download.
3. The username and password are the same when you log in to OVPN.
PrivateVPN
1. Log in with your PrivateVPN credentials.
2. Download the PrivateVPN certificate here: https://www.privatevpn.com/client/ca.zip
3. The username and password are the same when you log in to PrivateVPN.
Proton VPN
1. Log in with your Proton VPN credentials.
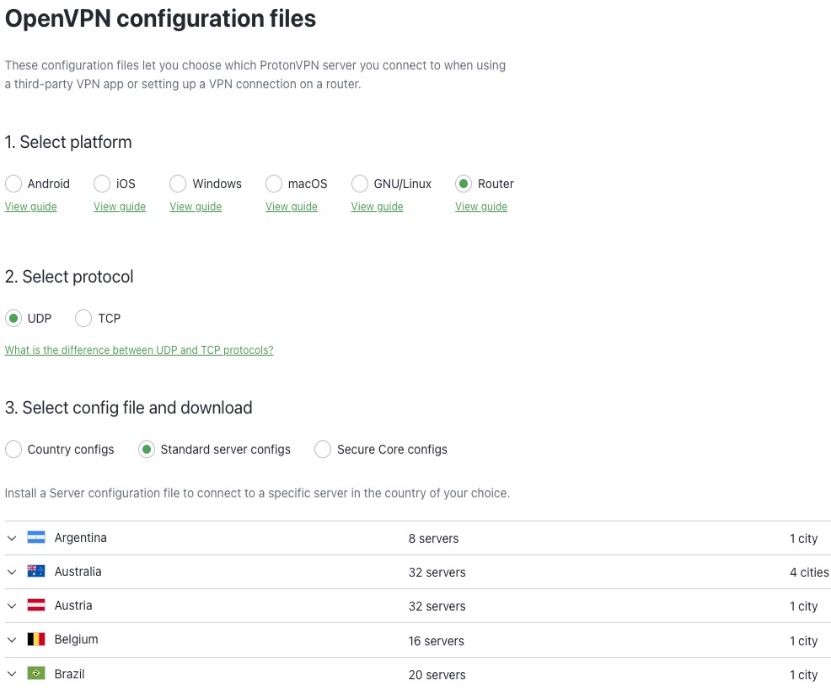
2. Click Download on the left-hand side > Click on OpenVPN configuration files and:
- Select Platform – Router
- Select Protocol – UDP (recommended) or TCP if you experience slow VPN speeds (this utilizes port 443)
- Select config file and download – choose whether you want to download a configuration file for a whole country, an individual server, or for a Secure Core server.
- Select a country or server and click the Download button next to it.
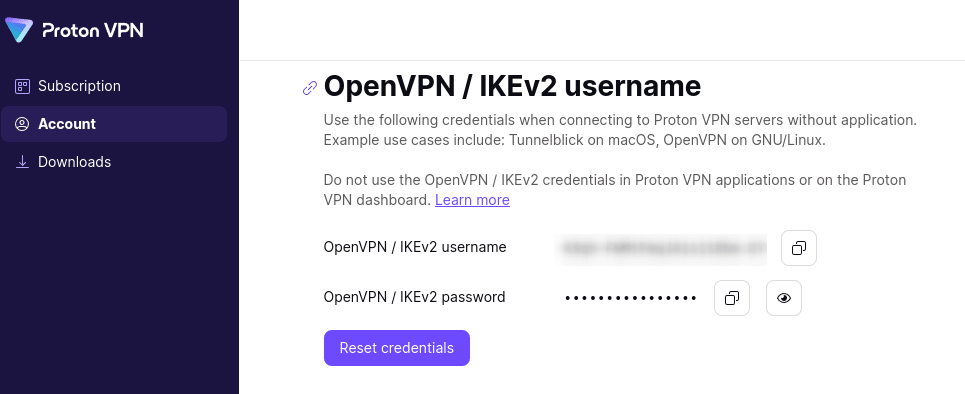
3. The credential for connecting to OpenVPN is not the one that login to the Proton website's dashboard. You can find the credential at Account -> OpenVPN/IKEv2 username and password
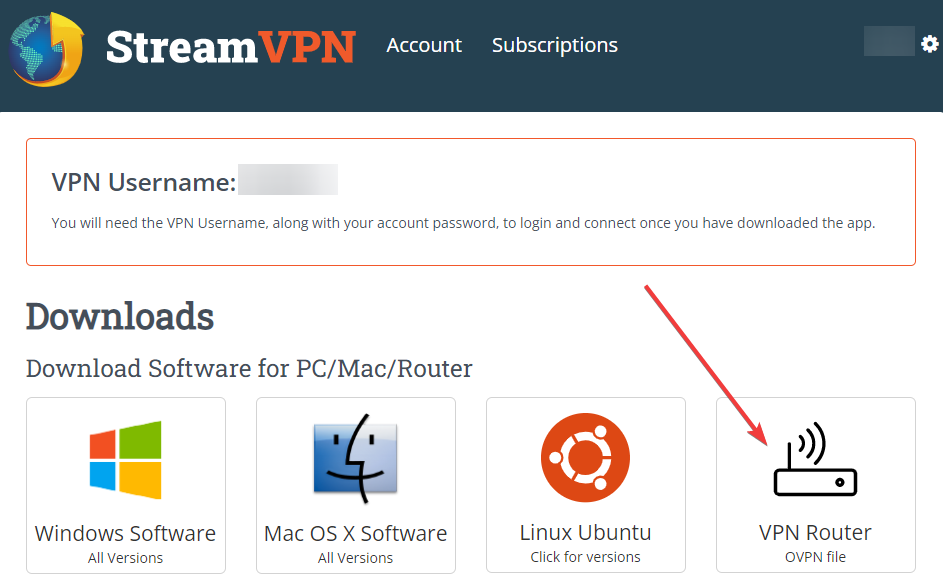
StreamVPN
1. Log in with your StreamVPN credentials.
2. Find the subscription information under your account. Click Install & Guides.

3. Click VPN Router, it will download a .zip archive file called StreamVPN.zip.
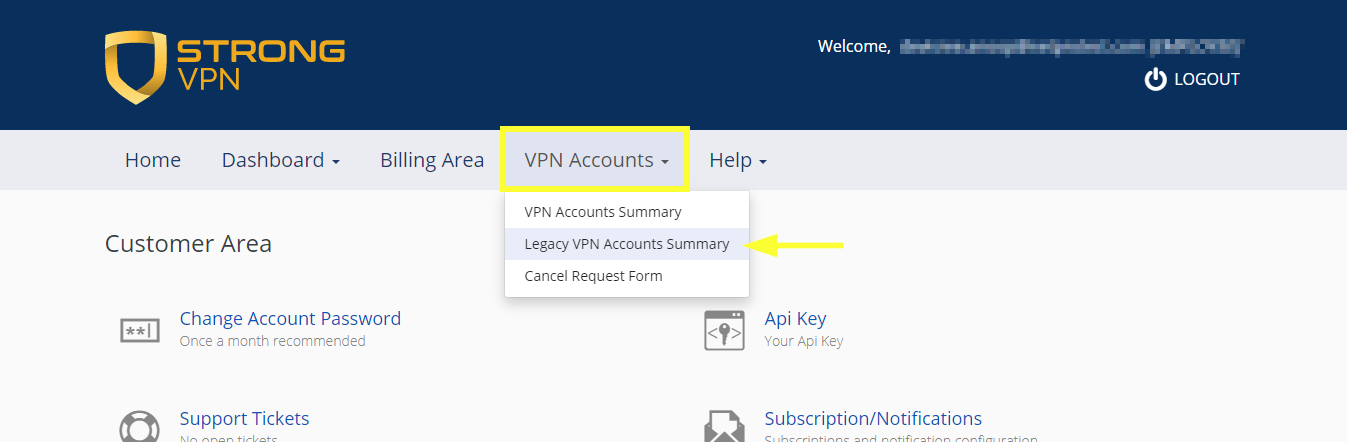
StrongVPN
1. Log in with your StrongVPN credentials.

2. Hover your mouse over the VPN Accounts tab, and select and click on the Legacy VPN Accounts Summary option.
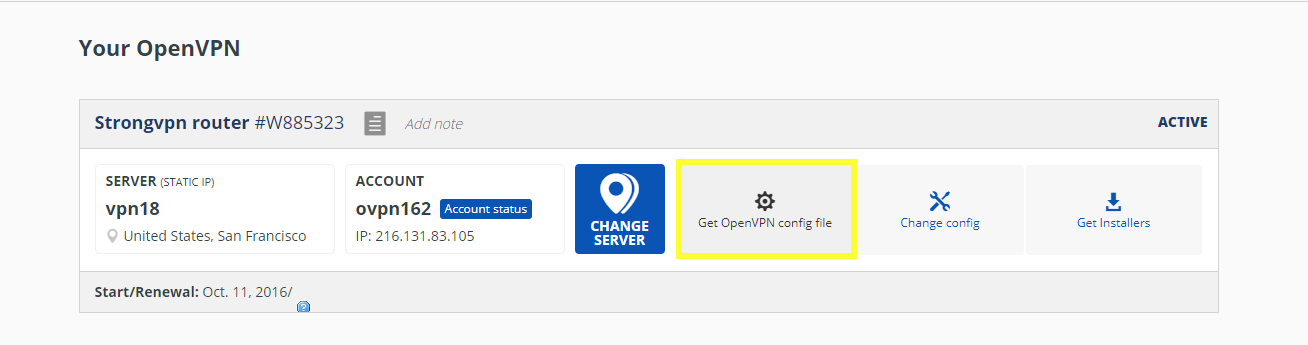
3. Select Get OpenVPN config file from Your OpenVPN section.
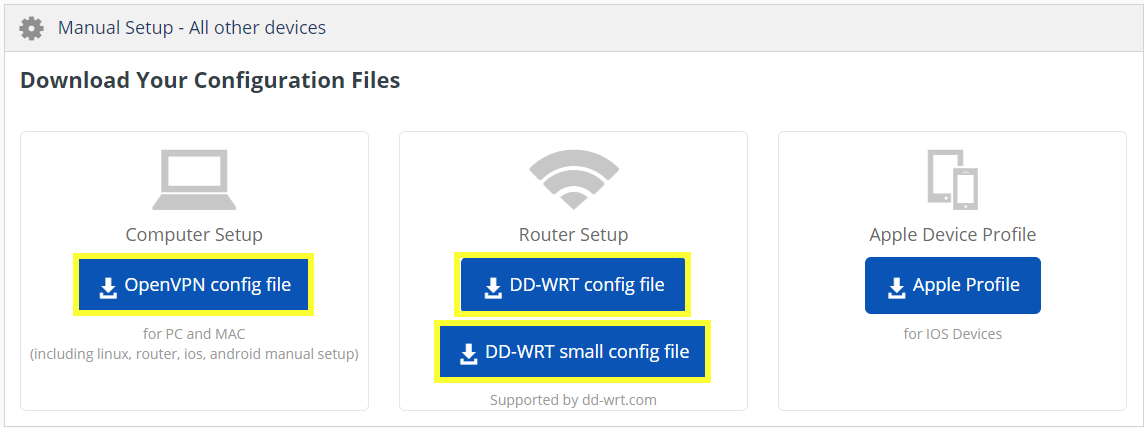
4. Download the OpenVPN configuration files from the Download Your Configuration Files section.
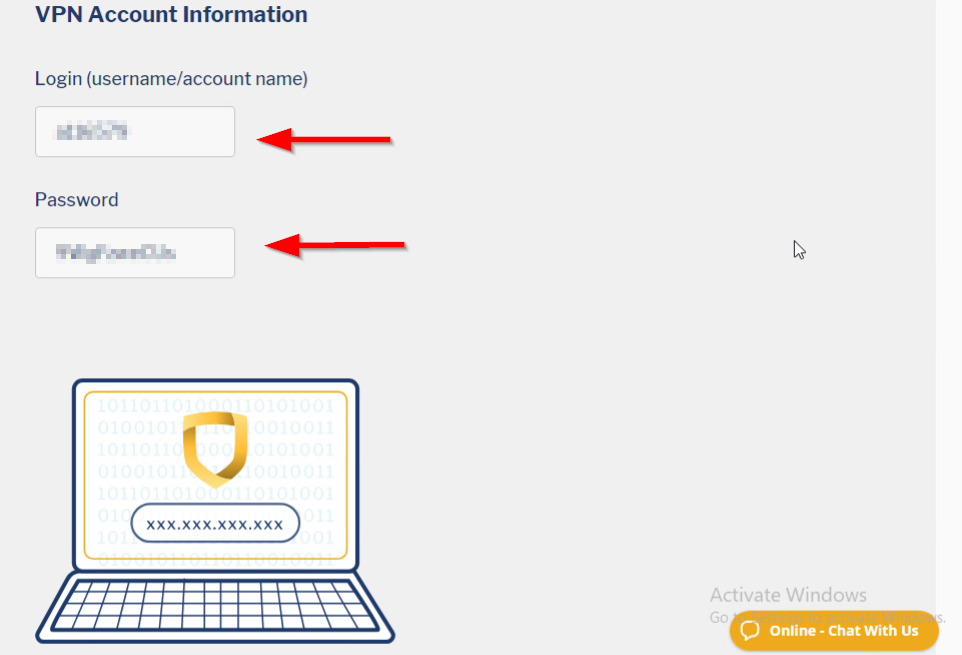
5. You can find the credential for connecting to OpenVPN at VPN Accounts > VPN Accounts Summary > Account Setup Instructions > VPN Account Information
VPN Unlimited (KeepSolid)
VPN Unlimited (KeepS) Official Website
Information quoted from VPN unlimited official instruction
1. Log in with your VPN Unlimited account and press Manage for the VPN Unlimited service.
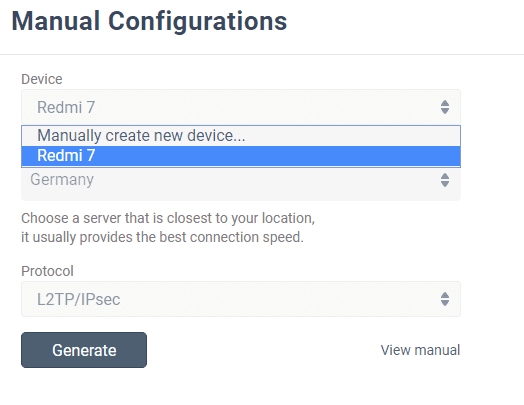
2. Select a device
Pick a device from the list or create a new one. If you are out of free slots, delete an old device or buy extra slots.
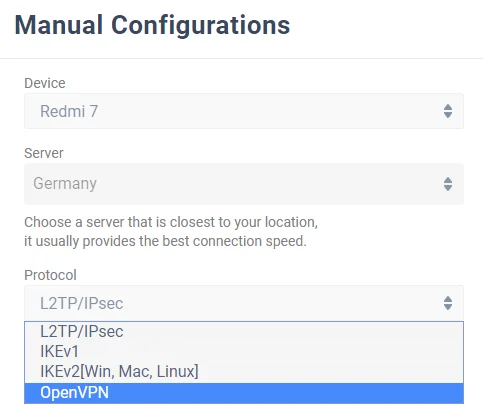
2. Choose the desired server location
VPN Unlimited offers a large variety of servers, namely 3000+ in 80+ locations. In this case, let it be Germany.
3. Select the VPN protocol
For the IKEv2 protocol, you will also need to specify your device’s platform.
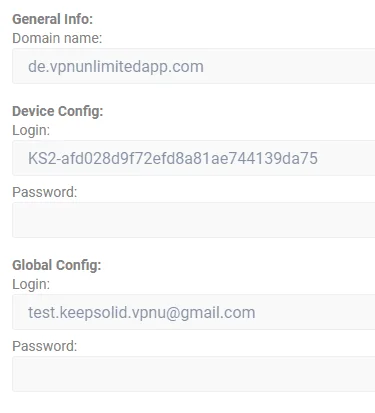
4. Create a configuration
Press Generate, and you will get all the data required to set up a VPN connection.
VPN.AC
Log in with your VPN.AC credentials, and download the OpenVPN configuration files from here: https://vpn.ac/ovpn/
VPNgate
Information quoted from VPNGate official instruction: https://www.vpngate.net/en/howto_openvpn.aspx
You have to download an OpenVPN connection setting file (.ovpn) in order to connect to a VPN Gate Public VPN Relay Server by using OpenVPN. OpenVPN connection setting files are downloadable on the Public VPN Relay Servers List page.
Select a VPN server which you want to connect to, and click the “. ovpn" file to download to your client device.
If you save the .ovpn file on the desktop, the file will be displayed as OpenVPN icon as the following figure. However, you cannot double-click this file to initiate a VPN connection.
You have to install the downloaded .ovpn file into the "config" folder of OpenVPN.
Open the "C:\Program Files\OpenVPN\config" folder, and copy the .ovpn file into this folder.
Get to know more details of each function and configuration please go to Download Center to download the manual of your product.
Câu hỏi thường gặp này có hữu ích không?
Phản hồi của bạn giúp cải thiện trang web này.

_Overview_normal_20211225093612j.png)
