How to Configure Standalone Mesh on an Omada Wi-Fi Gateway

ER706W-4G , ER706W
Recent updates may have expanded access to feature(s) discussed in this FAQ. Visit your product's support page, select the correct hardware version for your device, and check either the Datasheet or the firmware section for the latest improvements added to your product. Please note that product availability varies by region, and certain models may not be available in your region.
Contents
Configuration for Standalone Web
This article introduces how to configure Standalone Mesh on an Omada Wi-Fi Gateway via Standalone Web or Omada App interfaces.
- Omada Gateway series
- Omada AP
- Omada App
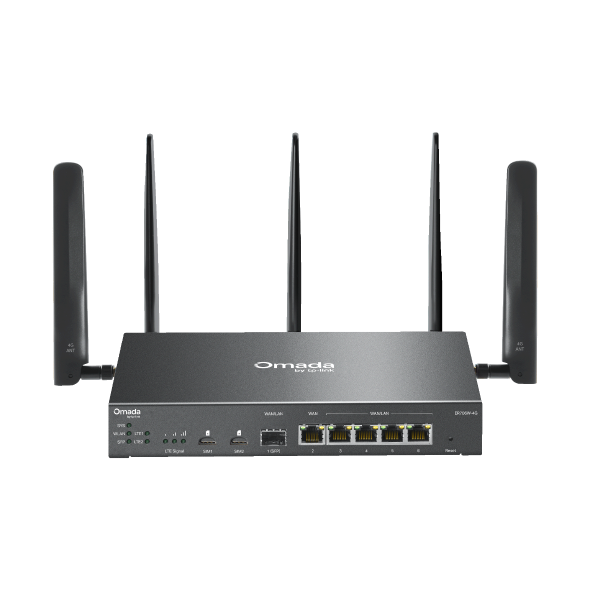
For an Omada Wi-Fi Gateway (such as ER706W) supporting Standalone Mesh, you can configure the mesh function via Standalone Web or Omada App. The detailed steps for the two configuration methods are as follows. Please note that you need to ensure that the Gateway works in standalone mode and is connected to the Internet.
Configuration for Standalone Web
Step 1. Before configuring the mesh function on an Omada Wi-Fi Gateway, first enable Cloud-Based Controller Management as follows: log in to the standalone web UI, go to System Tools > Controller Settings, enable Cloud-Based Controller Management, and tick the Privacy Policy checkbox. Save the settings; then the Connection Status should be online.
Step 2. Go to Wireless > Mesh. Click Go to Login and login with your TP-Link ID.
If you don't have a TP-Link ID, sign up for one first. After setting up the mesh network, you will be able to manage it remotely via the Omada App.
Step 3. Click Let’s Get Started. The Gateway will act as the mesh root to scan for available mesh APs.
Note: Your Omada APs may require a firmware update to support the Standalone Mesh feature and should be set to factory default settings.
Step 4. Select the Gateway and Mesh APs, then click Add Device. The Gateway will add the APs to form a mesh network.
Step 5. Create the Username and Password for the device account. Click Next. This username and password will be applied to all the mesh devices, including the Gateway, and overwrite their original usernames and passwords.
Step 6. Set the SSID, Password, and Band for the mesh network. If you have created a gateway, you can clone its original SSID. The default encryption method is WPA2-Personal.
Step 7. Click Next to apply the settings. You can now enjoy your mesh network.
Note: After the mesh network is created, all the wireless settings will be moved to the “Mesh” page, and the original “Wireless Settings” page will disappear.
Step 1. Download and install the Omada App on your phone.
The Omada App is available on the App Store and Google Play. The following steps use the iOS Omada App as an example.
Step 2. Log in with your TP-Link ID. If you don't have a TP-Link ID, sign up for one first.
Step 3. Go to Standalone Mode and tap Switch to Mesh Management.
Step 4. Tap Gateways, then tap Create. Set the Network Name and tap Next.
Step 5. Power on the Gateway and connect it to the Internet. Connect the phone to the Gateway’s wireless network using its default SSID, then tap I have connected. The app will scan for available APs nearby.
Note: Your Omada APs may require a firmware update to support the Standalone Mesh feature and should be set to factory default settings.
Step 6. Select the Gateway and mesh APs and add them to the mesh network. Then, create the username and password for these devices.
5
Step 7. Set the SSID and Password for the devices in this mesh network. Tap Next to apply settings and finish the setup. Now, you can enjoy your mesh network.
You have now successfully configured a Standalone Mesh on an Omada Wi-Fi Gateway.
To learn more about each function and configuration, please go to the Download Center to download the manual of your product.
Related FAQs
Looking for More
Is this faq useful?
Your feedback helps improve this site.
What’s your concern with this article?
- Dissatisfied with product
- Too Complicated
- Confusing Title
- Does not apply to me
- Too Vague
- Other
Thank you
We appreciate your feedback.
Click here to contact TP-Link technical support.

TP-Link Community
Still need help? Search for answers, ask questions, and get help from TP-Link experts and other users around the world.
As explained further in our website Privacy Policy, we allow certain advertising partners to collect information from our website through cookies and similar technologies to deliver ads which are more relevant to you, and assist us with advertising-related analytics (e.g., measuring ad performance, optimizing our ad campaigns). This may be considered "selling" or "sharing"/disclosure of personal data for "targeted advertising" as defined by certain U.S. state laws. To opt out of these activities, press "Opt Out" below. If the toggle below for "Targeted Advertising and 'Sale' Cookies" is to the left, you are already opted out and you can close these preferences.
Please note that your choice will apply only to your current device/browser. You must indicate your choice on each device and browser you use to access our website. If you clear your cookies or your browser is set to do so, you must opt out again.
Your Privacy Choices
As explained further in our website Privacy Policy, we allow certain advertising partners to collect information from our website through cookies and similar technologies to deliver ads which are more relevant to you, and assist us with advertising-related analytics (e.g., measuring ad performance, optimizing our ad campaigns). This may be considered "selling" or "sharing"/disclosure of personal data for "targeted advertising" as defined by certain U.S. state laws. To opt out of these activities, press "Opt Out" below. If the toggle below for "Targeted Advertising and 'Sale' Cookies" is to the left, you are already opted out and you can close these preferences.
Please note that your choice will apply only to your current device/browser. You must indicate your choice on each device and browser you use to access our website. If you clear your cookies or your browser is set to do so, you must opt out again.
These cookies are necessary for the website to function and cannot be switched off.
TP-Link
accepted_local_switcher, tp_privacy_banner, tp_privacy_base, tp_privacy_marketing, tp_top-banner, tp_popup-bottom, tp_popup-center, tp_popup-right-middle, tp_popup-right-bottom, tp_productCategoryType
Youtube
id, VISITOR_INFO1_LIVE, LOGIN_INFO, SIDCC, SAPISID, APISID, SSID, SID, YSC, __Secure-1PSID, __Secure-1PAPISID, __Secure-1PSIDCC, __Secure-3PSID, __Secure-3PAPISID, __Secure-3PSIDCC, 1P_JAR, AEC, NID, OTZ
These cookies allow targeted ads or the "sale" of personal data (toggle to the left to opt out).
Analytics cookies enable us to analyze your activities on our and other websites in order to improve and adapt the functionality of our website and our ad campaigns.
Advertising cookies can be set through our website by our advertising partners in order to create a profile of your interests and to show you relevant advertisements on other websites.
Google Analytics & Google Tag Manager
_gid, _ga_<container-id>, _ga, _gat_gtag_<container-id>
Google Ads & DoubleClick
test_cookie, _gcl_au
Meta Pixel
_fbp
Crazy Egg
cebsp_, _ce.s, _ce.clock_data, _ce.clock_event, cebs
lidc, AnalyticsSyncHistory, UserMatchHistory, bcookie, li_sugr, ln_or
Welcome to Our Website! If you stay on our site, we and our third-party partners use cookies, pixels, and other tracking technologies to better understand how you use our site, provide and improve our services, and personalize your experience and ads based on your interests. Learn more in your privacy choices.