How to setup my VoIP function on VoIP Modem Router (new UI)
Preparation: Only after you have Internet access on this router, you can set up your VOIP function successfully.
Here we take Archer VR2100v for demonstration.
Log in to the web interface of the modem. Refer to FAQ.
Step 1
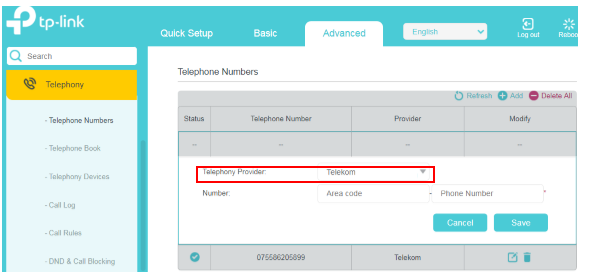
Go to Advanced>Telephony/VoIP>Telephone Numbers, and click Add.
Step 2
Choose your Telephony Provider and enter the necessary information as required, and click Save to make the settings effective. Different telephony provider has different parameters. Contact your provider if you don’t know what to put in.
Step 3
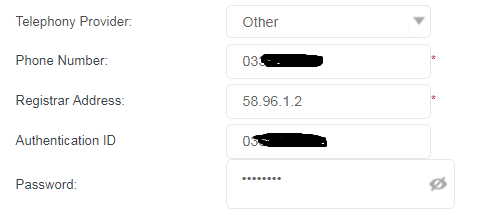
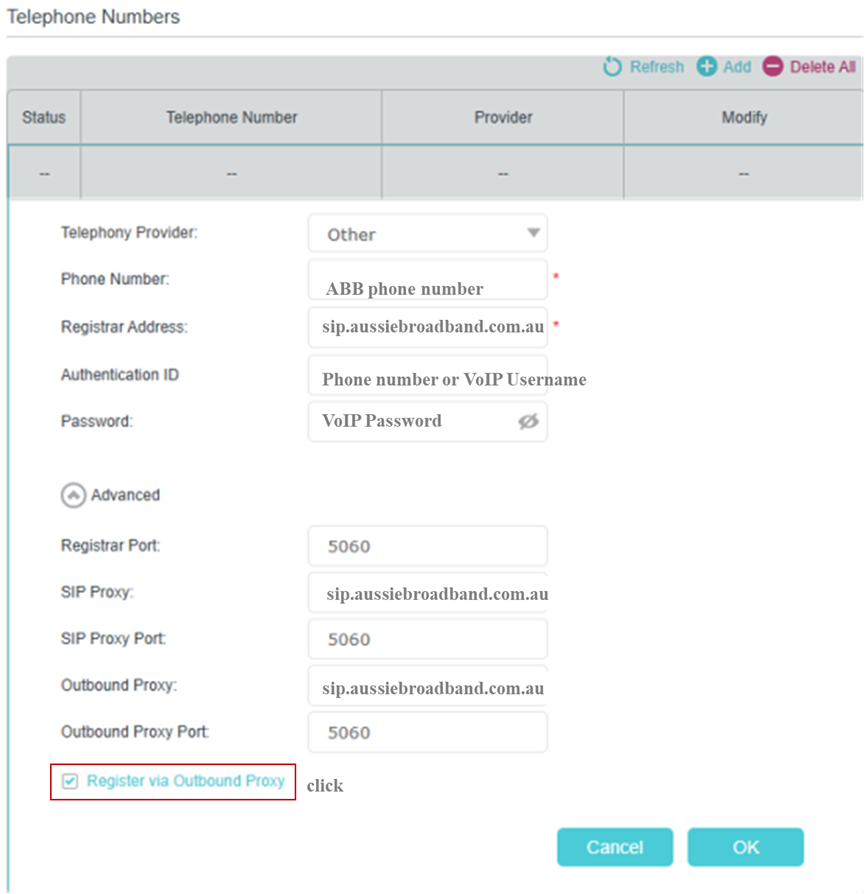
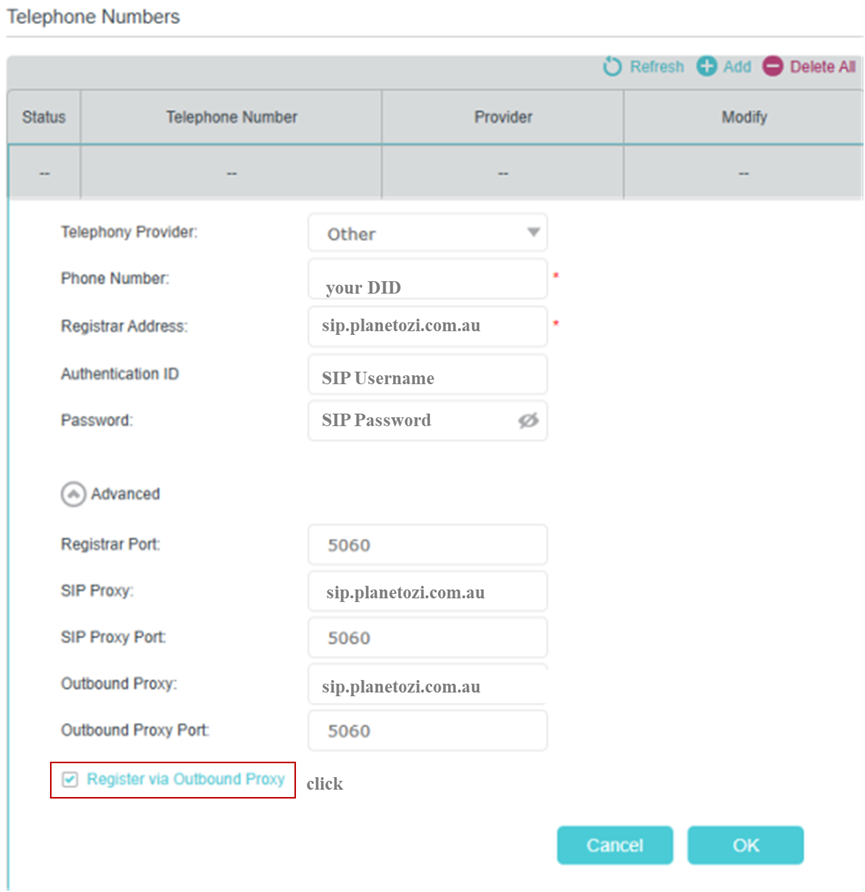
Choose Other as a telephony provider if yours is not listed and fill in the parameters required. Click Save to make the settings effective.

Phone Number: The number you use to dial and answer.
Registrar Address: Usually a domain name of the VoIP register server, if not, an IP address.
Authentication ID and Password: Not necessary information, but if you have them, fill them in.
If the VoIP provider also provides a SIP Proxy address and an Outbound Proxy address, you can click the Advanced option and fill in the content of the Advanced option. If the VoIP provider does not provide this information, please click Save directly.

Registrar Port: Typically 5060, unless the VoIP provider specifies a different port.
SIP Proxy: Usually the domain name of the SIP Proxy Server, if not, an IP address.
SIP Proxy Port: Typically 5060, unless the VoIP provider specifies a different port.
Outbound Proxy: Usually the domain name of the Outbound Proxy Server, if not, an IP address.
Outbound Proxy Port: Typically 5060, unless the VoIP provider specifies a different port.
Register via Outbound Proxy: Typically not required to enable.
Then please click on "Save" to see if the VoIP registration is successful. If it is successful, the status of the registration entry will be a checkmark (√). If the registration fails, it will be a cross (×).
![]()
![]()
What to do if the registration fails
1. Check if the information provided by the VoIP provider is filled in the correct fields and is entered accurately. Confirm with the VoIP provider if the information is correct.
2. In the "Advanced Settings" section of the VoIP registration page, find the "Bound interface" option. Select either "Any WAN" or the Internet connection interface you are using for Internet access, for example, "pppoe_xxx" or "ipoe_xxx".

3. Check if you have enabled the "Via IPv6" option. Please disable the "Via IPv6" option and try registering again.

4. Some VoIP providers may authenticate using the phone number, so please fill in the phone number field the same as the authentication ID. Then try registering again.

5. If you have other old modem routers that support VoIP, please test whether the VoIP can register successfully with the old modem routers.
For some ISPs in Australia
we have collected info from them. Please refer to the following picture to configure your VoIP function if you have one of the ISPs listed below.
TPG
TPG VoIP doesn’t support third-party devices, which there is a forum post on the TPG official website.
Only the modem provided by TPG such as Archer VR1600v or TPG has helped remove the limitation on the device, you can follow the below picture to configure it.

Notice: Where # is a number from 1 to 6 assigned by TPG.
Exetel
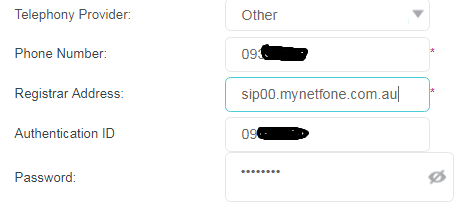
MynetFone
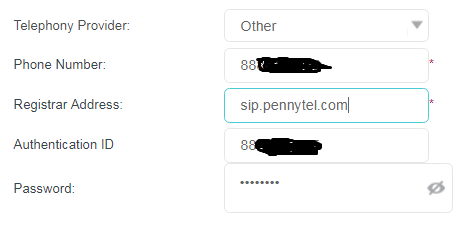
PennyTel
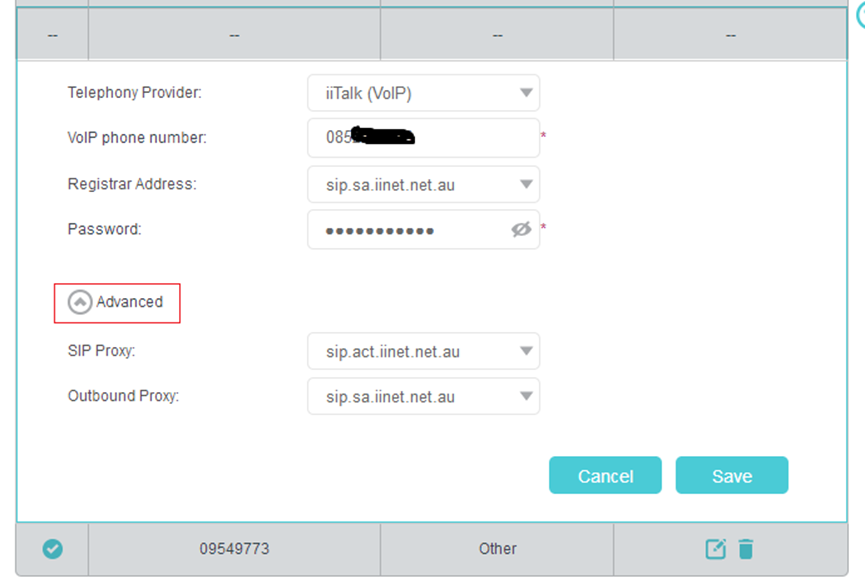
iiNet
iiNet uses state-specific SIP servers, and we recommend using your state's server whenever possible.
ACT: sip.act.iinet.net.au
NSW: sip.nsw.iinet.net.au
NT: sip.nt.iinet.net.au
QLD: sip.qld.iinet.net.au
SA: sip.sa.iinet.net.au
TAS: sip.tas.iinet.net.au
VIC: sip.vic.iinet.net.au
WA: sip.wa.iinet.net.au
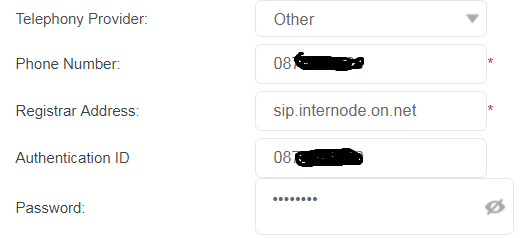
Internode
Spintel
Note: The Phone Number and Authentication ID are 6 numbers provided by your ISP, not your VOIP phone number.

Beagle
Beagle Eagle explicitly supports the third-party VoIP devices and publicly discloses SIP parameters.

Aussie Broadband(ABB)
Planet Ozi
Get to know more details of each function and configuration please go to Download Center to download the manual of your product.
Is this faq useful?
Your feedback helps improve this site.
TP-Link Community
Still need help? Search for answers, ask questions, and get help from TP-Link experts and other users around the world.