
How to get Token from NordVPN
Token-based authentication offers a secure way to verify user identity and protect their accounts. In this article, we will introduce how does user get the token from NordVPN.
On Phone
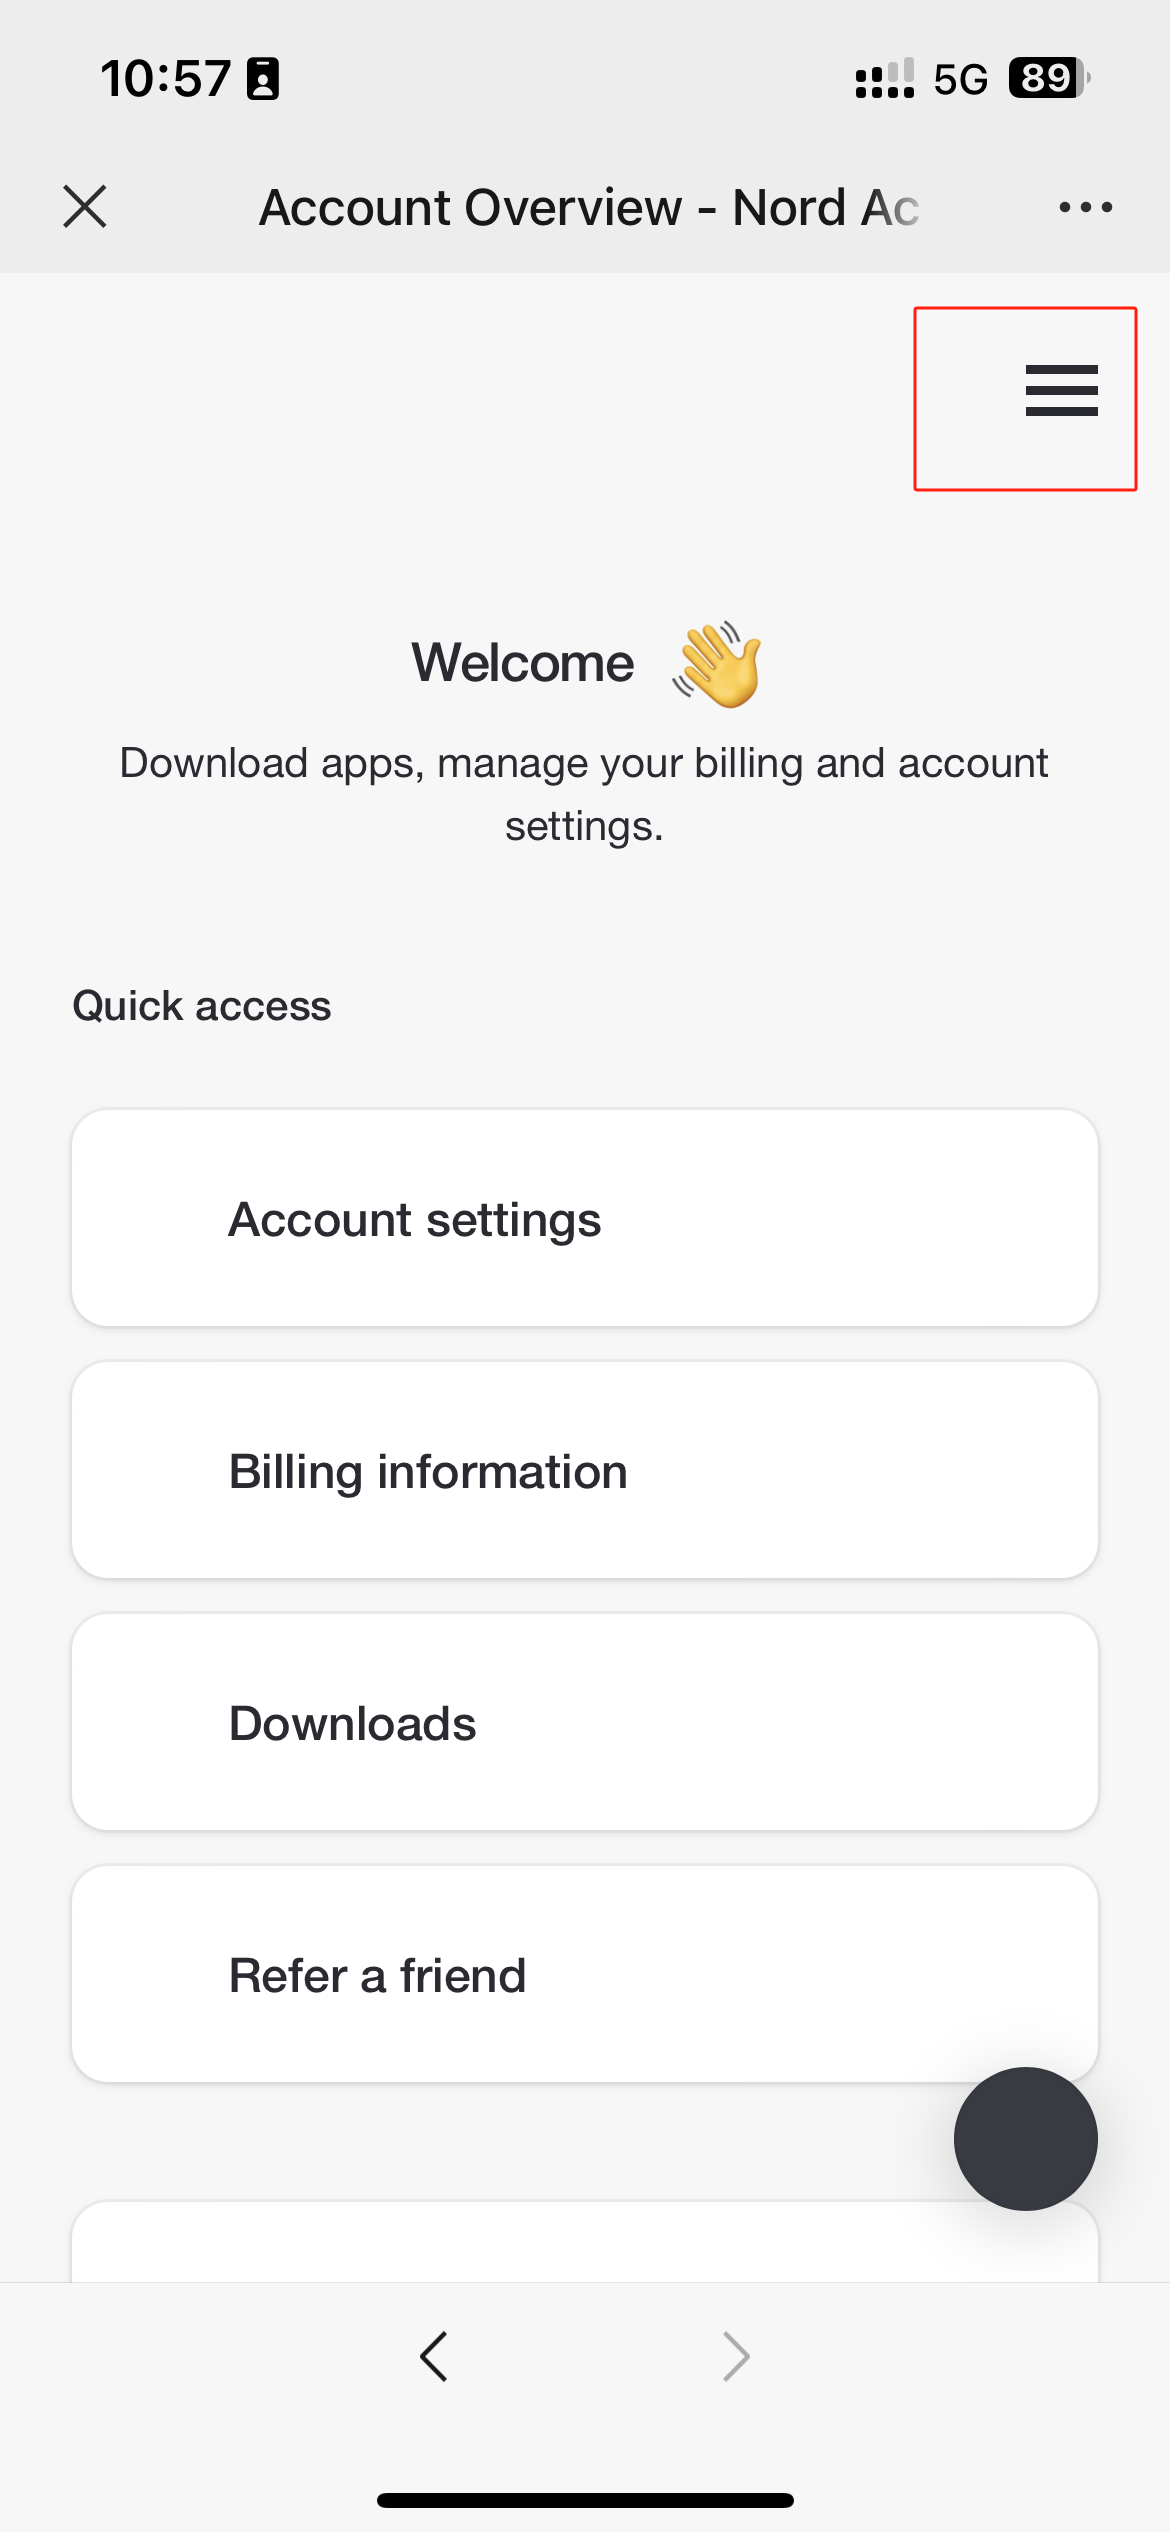
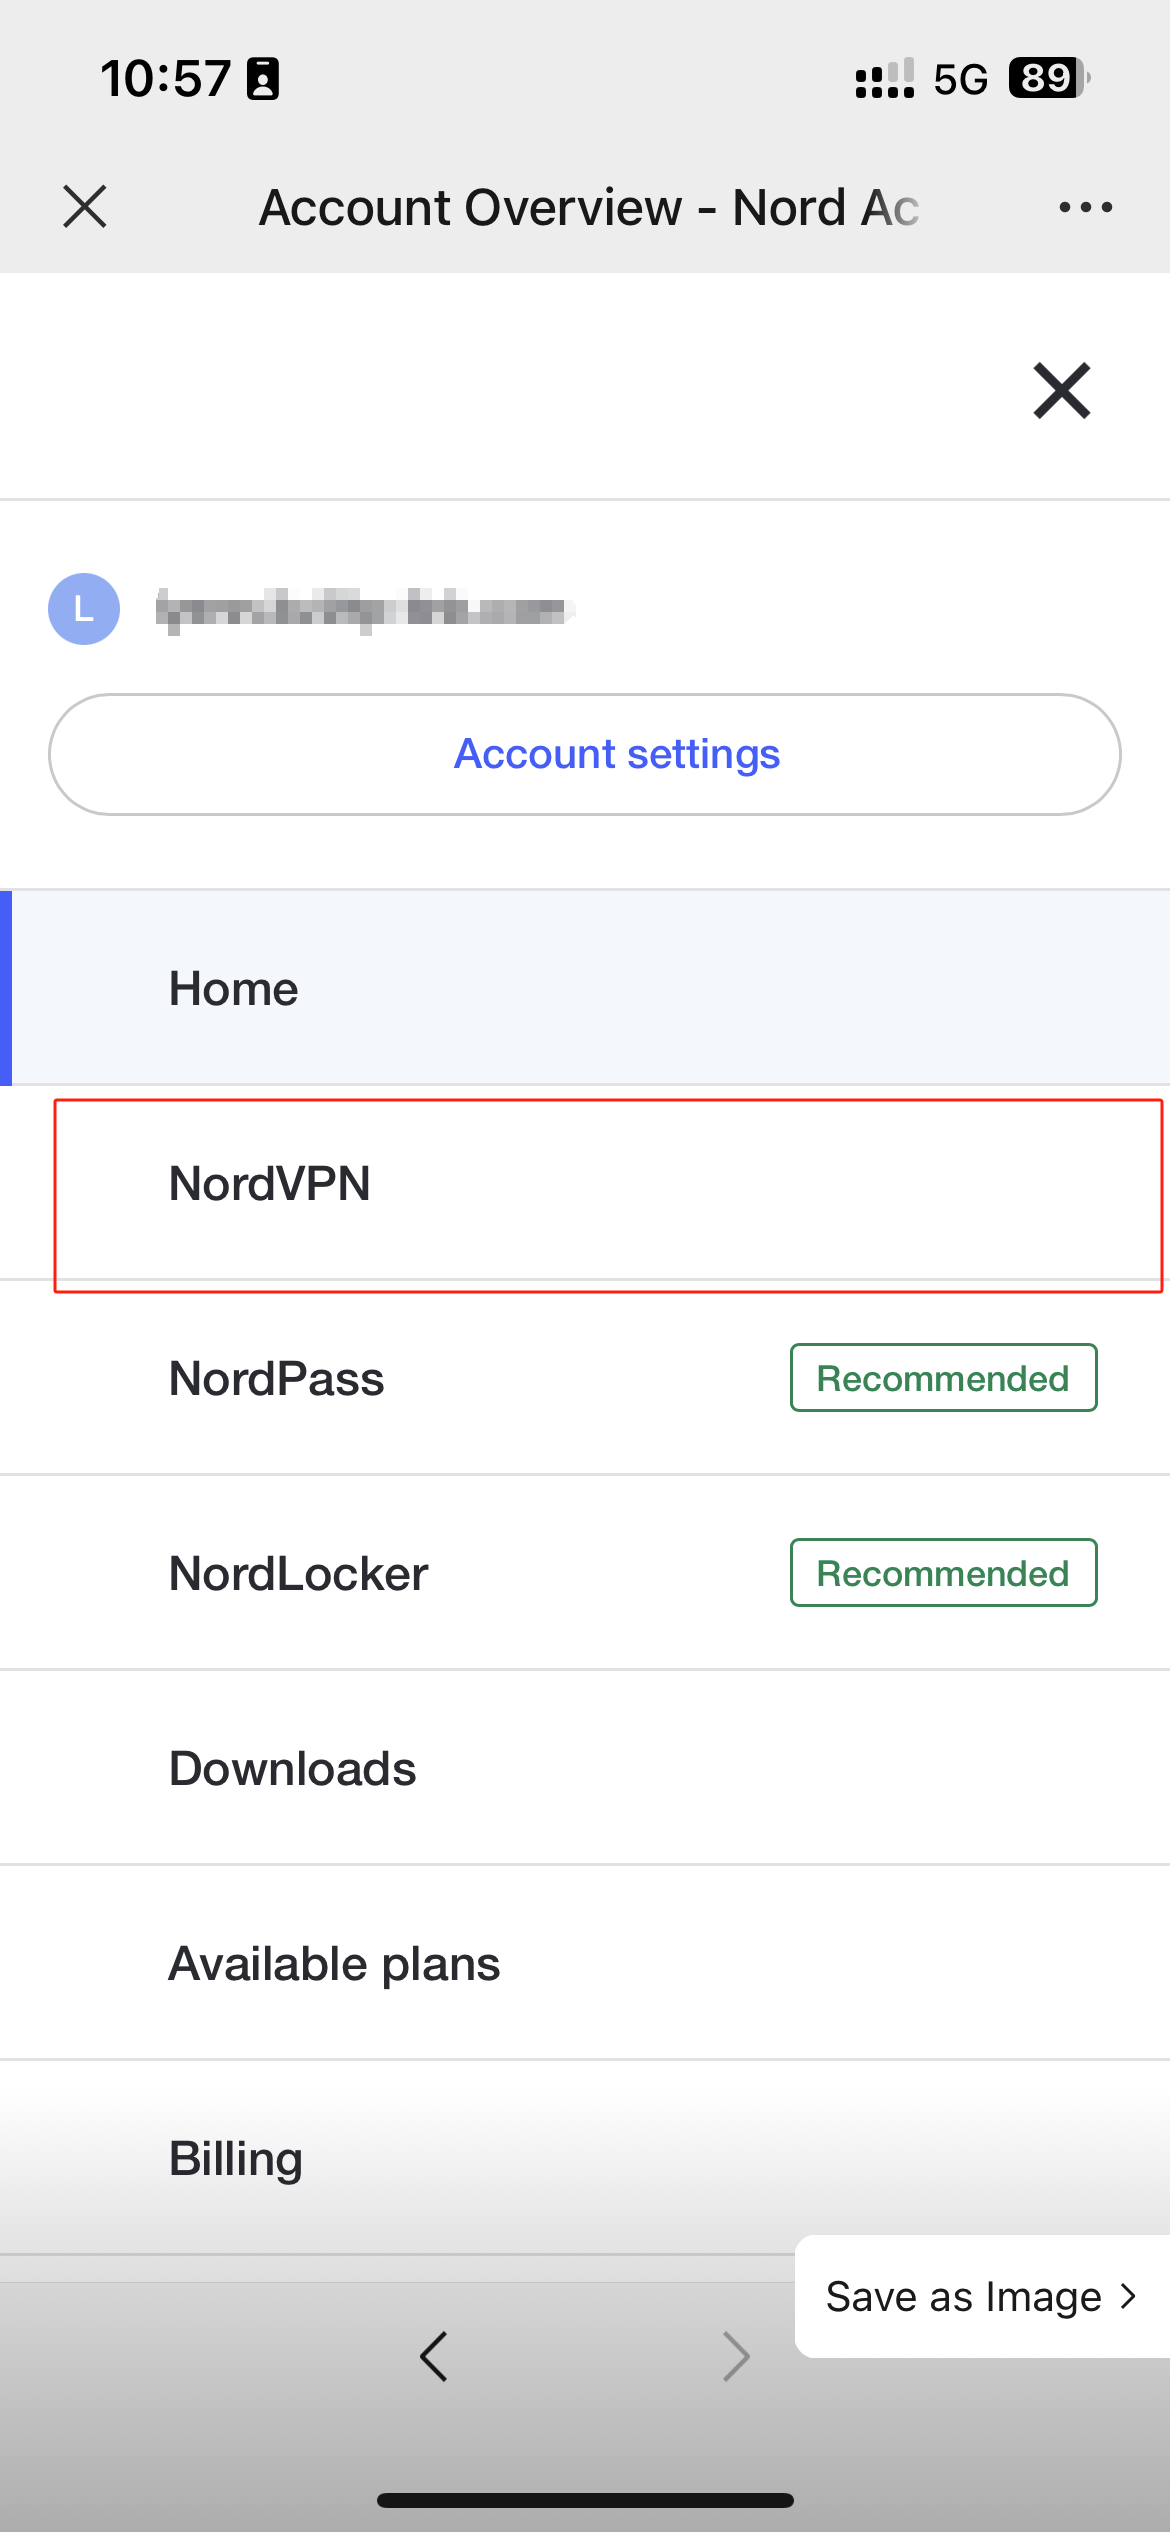
Step 1: Log in to Nord Account , tap the hamburger icon  at top right corner and select NordVPN under the Services menu.
If you don’t have an account, click here to get one.
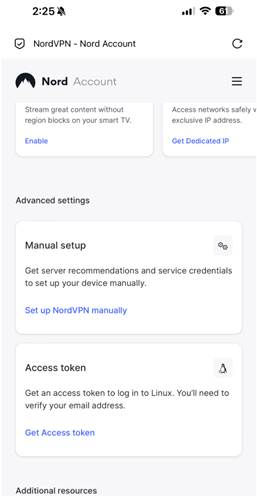
Step 2: Scroll down and tap Get Access token. A verification code will be sent to your NordVPN account email. Please review and enter the code.
Step 3: Navigate to Access Token and select Generate new token. Choose the expiration time to keep the token valid.


Step 4: Click Copy and close. Now you can paste the token on the place you need and continue your VPN settings.

On PC
Step 1: Log in to Nord Account and find NordVPN under the Services menu.
If you don’t have an account, click here to get one.
Step 2: Locate the Access token tab down below. Click on Generate new token.

Step 3: Pick either token: one that expires in 30 days or one that doesn’t expire. Proceed to Generate token.

Step 4: Click Copy and close. Now you can paste the token on the place you need and continue your VPN settings.
ค้นหาเพิ่มเติม
คำถามที่พบบ่อยนี้มีประโยชน์หรือไม่?
ความคิดเห็นของคุณช่วยปรับปรุงเว็บไซต์นี้

TP-Link Community
Still need help? Search for answers, ask questions, and get help from TP-Link experts and other users around the world.