
How to Set Up NordVPN on a TP-Link Deco Using the OpenVPN Protocol
Setting up Deco NordVPN as a VPN client routes all traffic from every device on your mesh network through NordVPN at the router level — no individual VPN apps needed on each device. This guide specifically covers the OpenVPN protocol. TP-Link Deco also supports WireGuard and other VPN protocols. A NordVPN account and access token are required before starting. For a general overview of Deco VPN options, see Deco VPN Setup: VPN Server and VPN Client.
Key Takeaways
- NordVPN can be set up on a compatible TP-Link Deco as a VPN client using the OpenVPN protocol via the Deco app under More > VPN > VPN Client.
- A NordVPN access token is required and is obtained from the NordVPN account console website.
- The NordVPN server config file must be downloaded from NordVPN and uploaded to the Deco app during setup.
- Once configured, VPN server details, including VPN Type, Server IP, Server DNS, Access Permission, and Client list, are displayed in the Deco app.
- VPN servers can be switched or additional VPN services added at any time via the Switch VPN option in the Deco app.
Steps to Set Up NordVPN on Deco
Step 1: Enable VPN Client and Select NordVPN
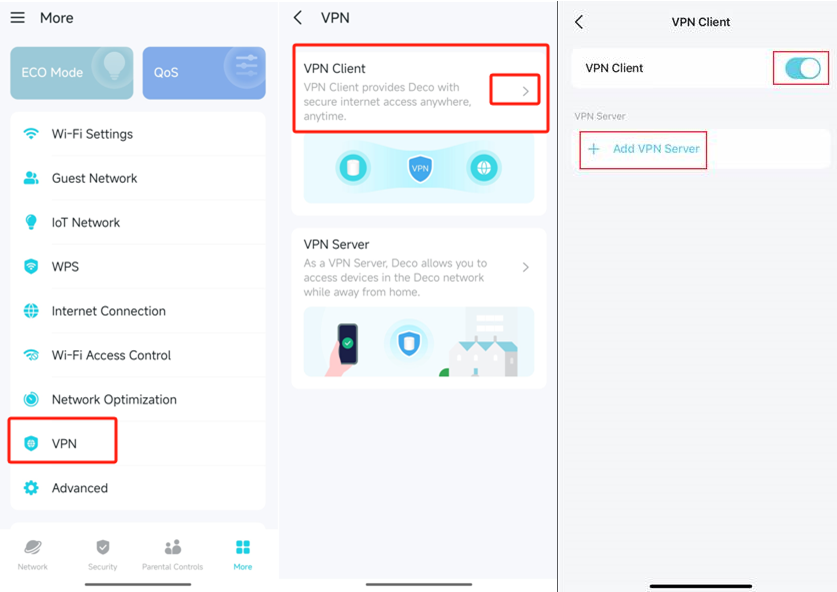
Launch the Deco APP, go to More> VPN >VPN Client > Enable VPN Client, tap Add VPN Server, and choose NordVPN.
Step 2: Log In with Access Token
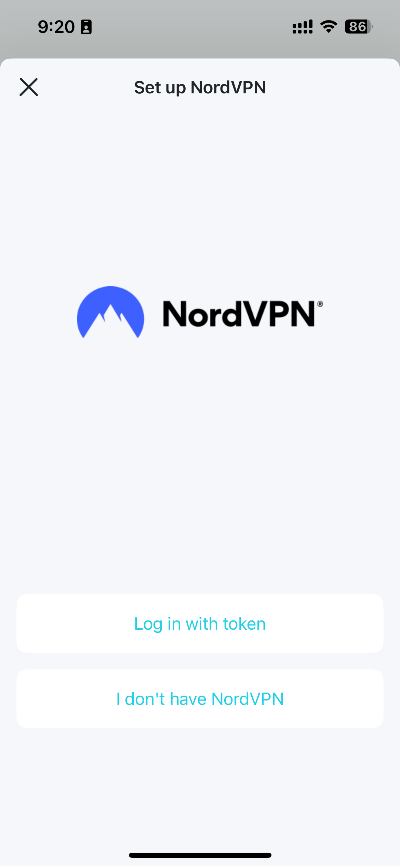
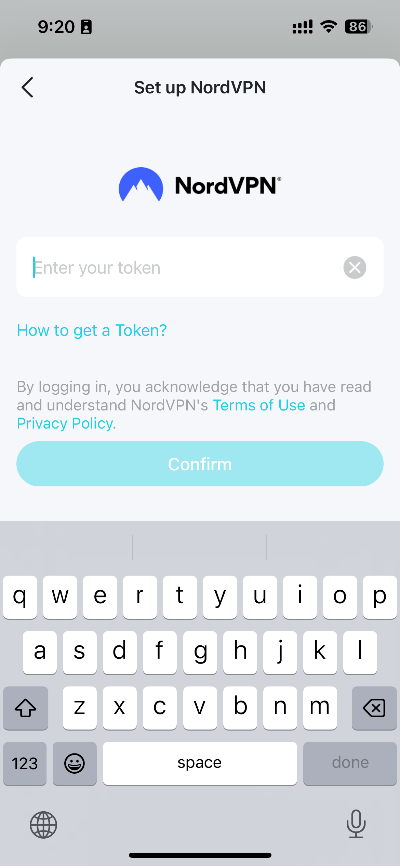
Tap “Log in with token”, fill in the token you got from your NordVPN account console website, then tap “Confirm”.
Otherwise, you should click on “How to Get a Token” to get an access token.
Step 3: Configure OpenVPN and Upload Server File
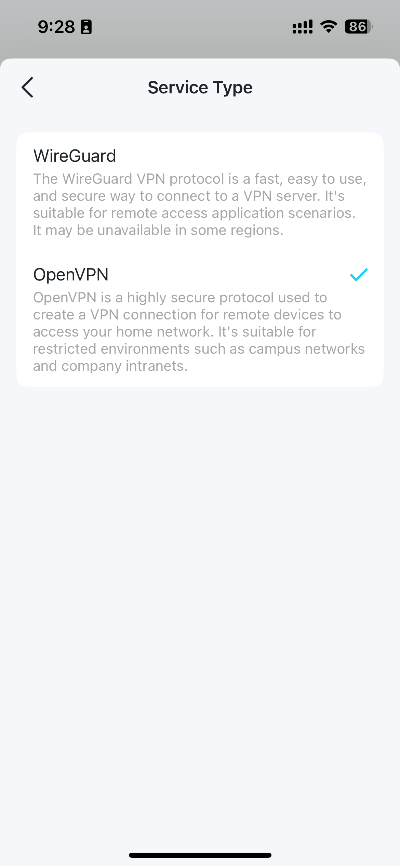
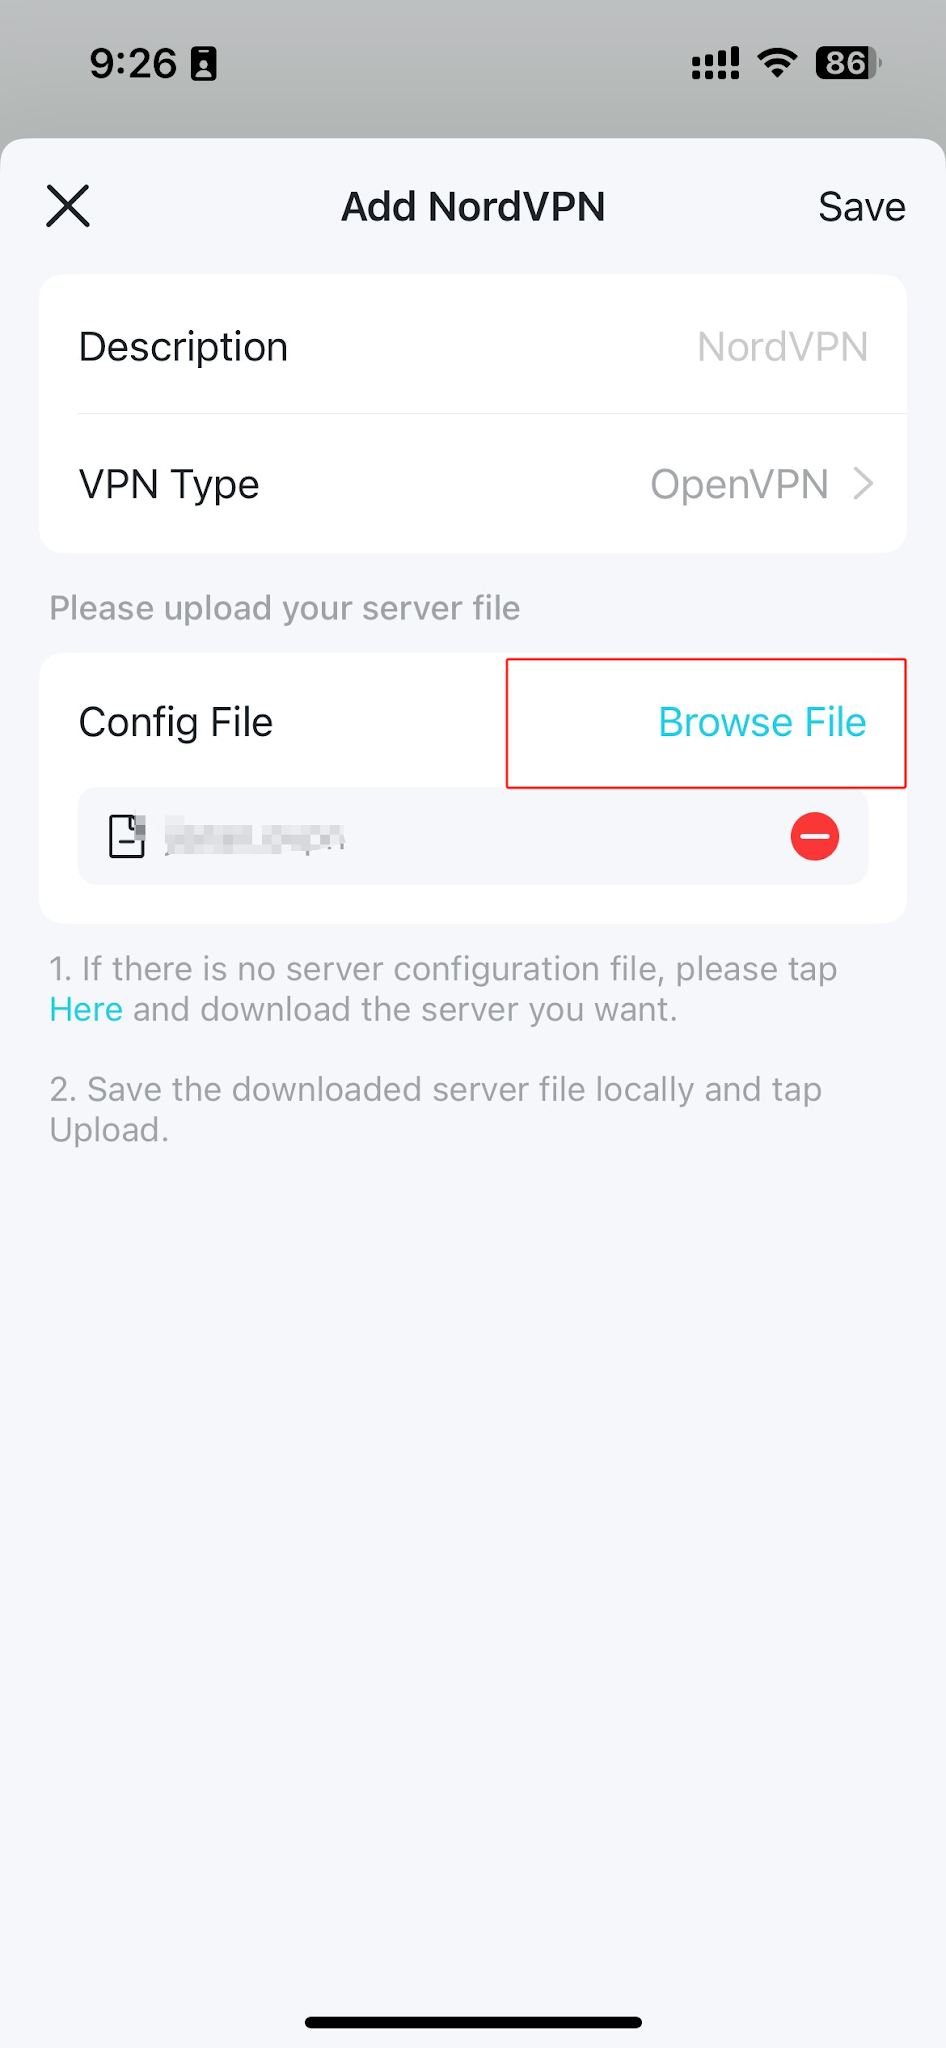
Fill in a description, choose OpenVPN as the VPN Type, tap Browse File to upload the server config file from NordVPN, then tap Save.
Note: for how to download the NordVPN server config file, you can refer to: https://www.tp-link.com/support/faq/3747/
Step 4: View and Switch VPN Server
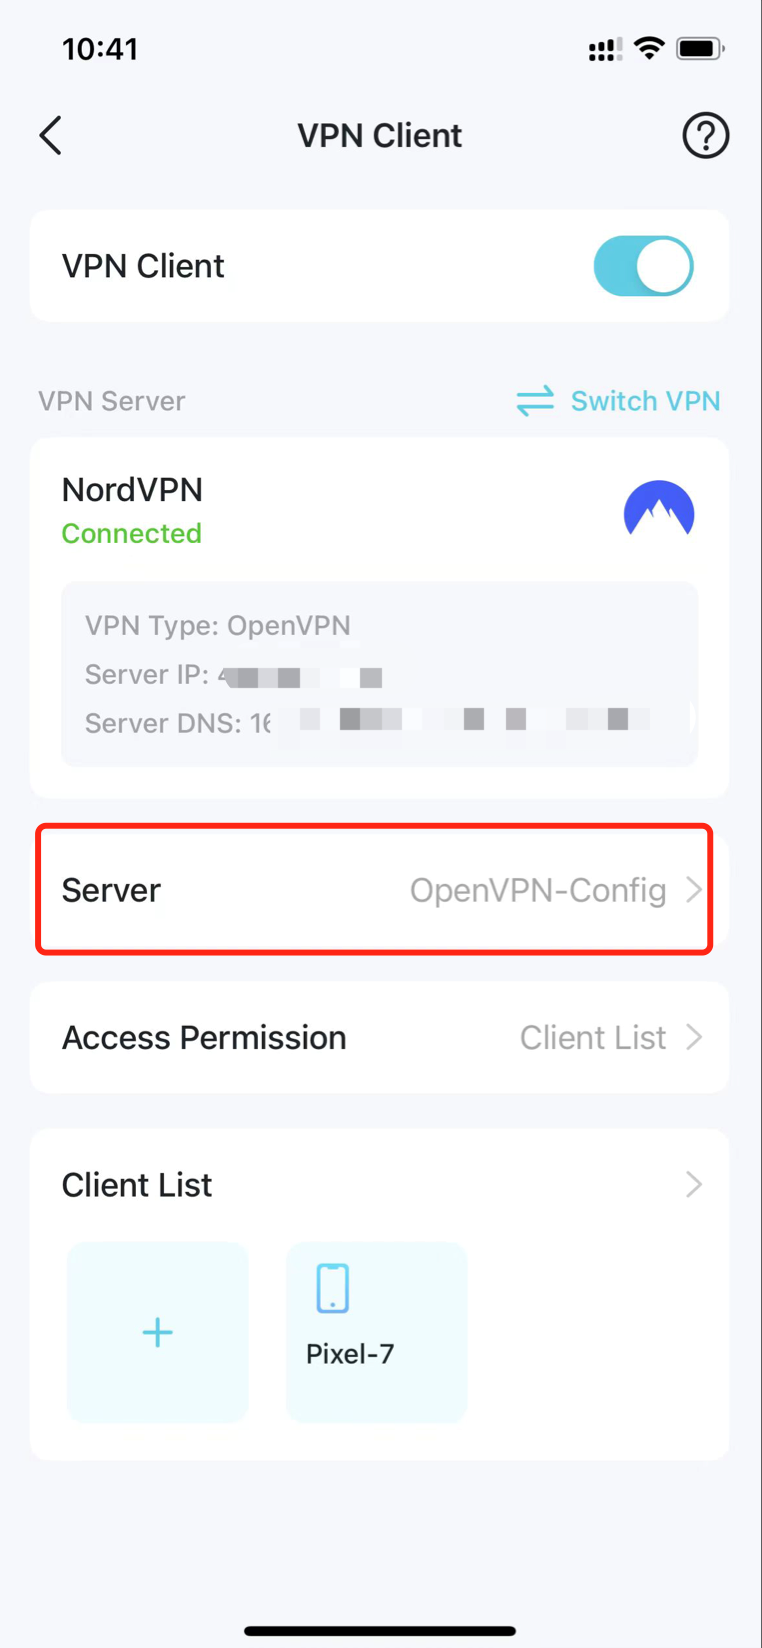
When a VPN Client is set up, the VPN Server can be displayed below, including information such as VPN Type, Server IP, Server DNS, Server name, Access Permission, and Client list. To switch NordVPN servers, tap Server and choose another server from the NordVPN server list.
Step 5: Switch Between VPN Services
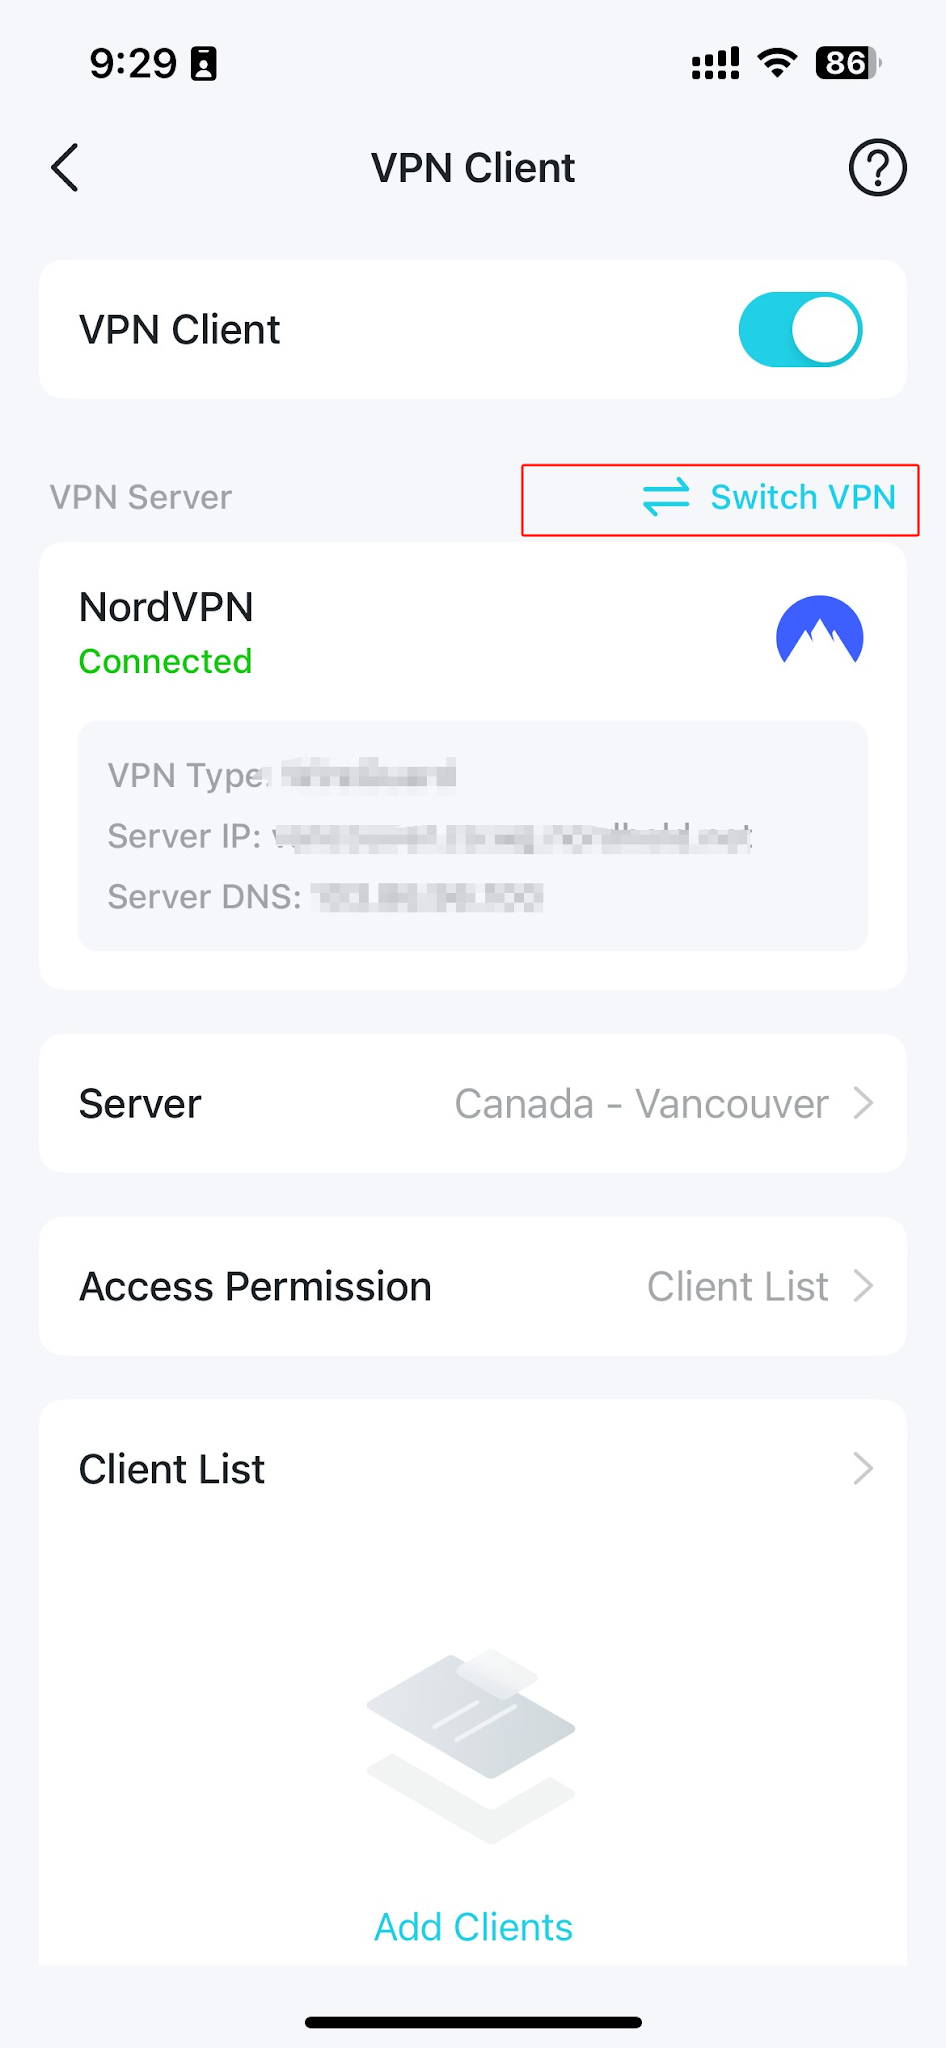
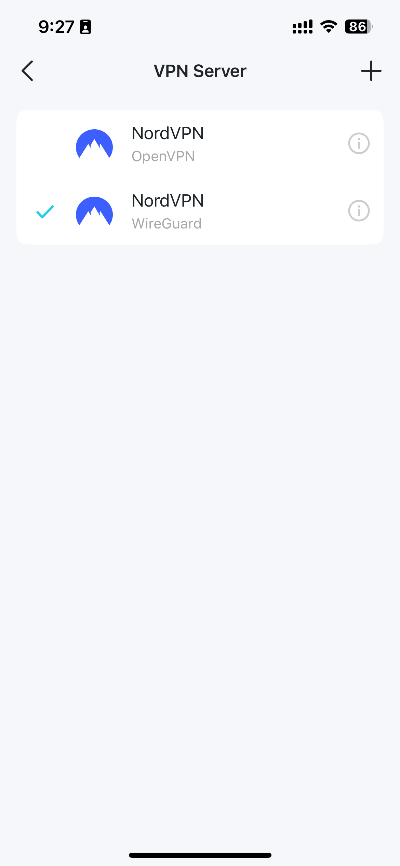
To switch to a different VPN service, tap Switch VPN and select a server you have already configured. You can also add a new VPN service here.
Is this faq useful?
Your feedback helps improve this site.



TP-Link Community
Still need help? Search for answers, ask questions, and get help from TP-Link experts and other users around the world.