How do I connect to wireless network by using Windows built-in Utility/Client(WZC)?
| Part 1: Exit the TP-Link Utility and start the Wireless Zero Configuration service on your computer Step 1 After exiting TP-Link Utility, select and right click on My Computer on desktop, select Manage to open Computer Management window. Step 2 Expand Services and Applications->Services, find and locate Wireless Zero Configuration in the Services list on the right side. 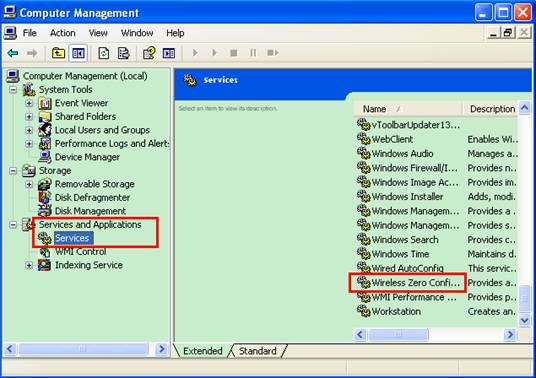 Step 3 Select Wireless Zero Configuration, right click, and then select Properties. 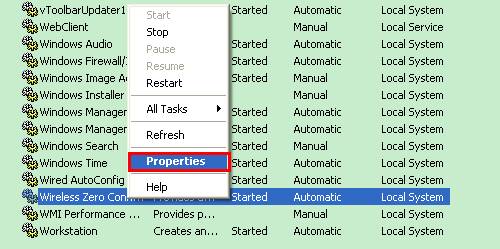 Step 4 Change Startup type to Automatic, click on Start button and make sure the Service status is Started. And then click OK. 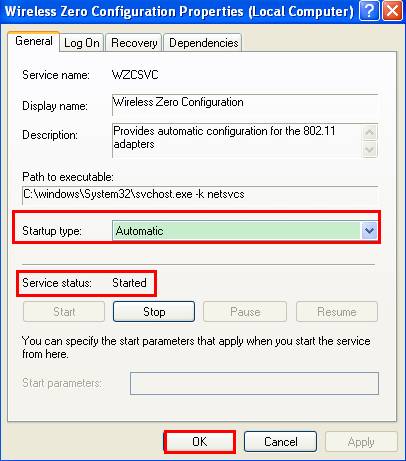 |
| Part 2: Connect to wireless network Step 1 Open Control panel, select and double click Network Connections. Step 2 Select Wireless Network Connection, right click it and select Properties. 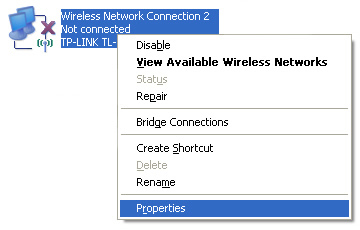 Step 3 Choose “Wireless Networks” tab and tick “Use Windows to configure my wireless network settings” check box then click OK. 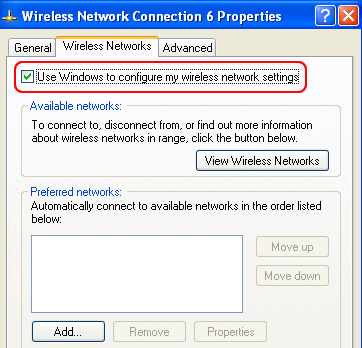 Step 4 Then Select Wireless Network Connection, right click it, select and click View Available Wireless Networks. 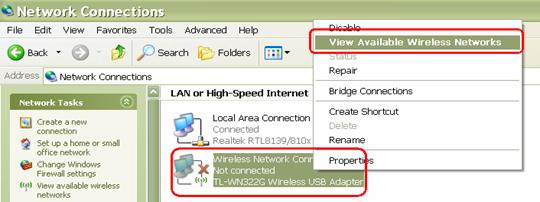 Step 5 Click Refresh Network list to view available wireless networks. Select the correct network which you want to connect, double click it or click Connect button. 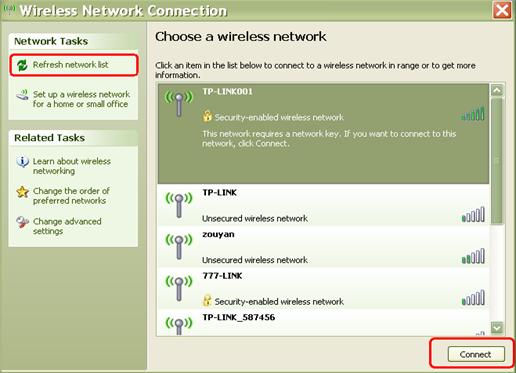 Step 6 If the wireless network is secured, it will pop up a window asking for the key/password. 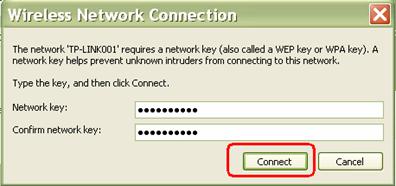 Step 7 Enter the correct Key/Password then click Connect, wait for a while, you will connect the wireless network. 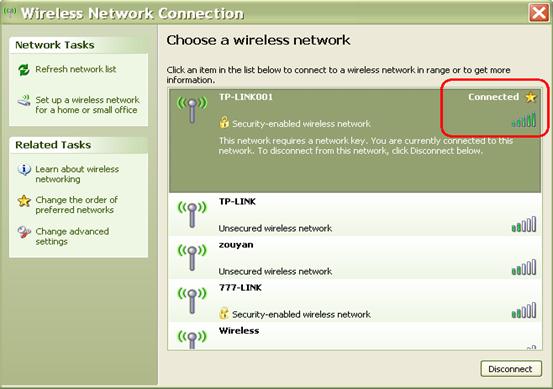 Note: 1. If it keeps connecting to the network or acquiring IP address, please check if you have entered the correct key/password. 2. If it shows that the connection is Limited or no connectivity, please ensure that you have enabled DHCP server on the wireless router/access point. |
Is this faq useful?
Your feedback helps improve this site.
TP-Link Community
Still need help? Search for answers, ask questions, and get help from TP-Link experts and other users around the world.