How to Rename Your TP-Link Router, Extender, and Other Devices in the Tether App
The Tether app lets you change the device name of any compatible TP-Link product, including routers, range extenders, and DSL modems. Whether you need to change a TP-Link router name to better organize your home network or want to rename TP-Link extender units to tell them apart, this guide covers two cases: one for Wi-Fi 6/6E/7 routers and Wi-Fi 7 range extenders, and one for all other compatible models. Note that the customized name only appears in your own Tether app. It will not change the Wi-Fi network name (service set identifier, or SSID) and will not be visible to other users on different phones.
This article applies to products that are compatible with the Tether app. Check the full compatibility list to confirm your device is supported before getting started.
Key Takeaways
- Renaming a TP-Link device in the Tether app makes it easier to identify and manage multiple devices on the same network, especially when you have several TP-Link products connected.
- This guide applies to TP-Link devices compatible with the Tether app, including routers, range extenders, powerline adapters, and DSL modems.
- The customized name only affects how the device appears in your own Tether app. The Wi-Fi network name (SSID) and the name visible to others on separate phones remain unchanged.
- For Wi-Fi 6/6E/7 routers and Wi-Fi 7 range extenders, tap the device, tap the device icon in the circle, then tap the edit icon to rename it.
- For older TP-Link router and extender models, tap the device, tap the device icon in the circle, then tap Name to rename it.
- After renaming, tap Save to confirm. The new name will appear in your Tether app immediately.
Rename Devices in Tether
Case 1: Wi-Fi 6/6E/7 Routers and Wi-Fi 7 Range Extenders
For example: Archer AX72/AXE95/BE800/BE900, RE800BE, Etc.
This guide uses the Archer AX72 as an example.
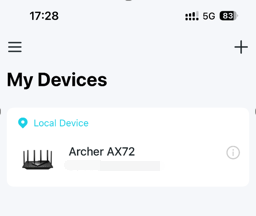
Step 1: Tap on the device that you want to change the name.
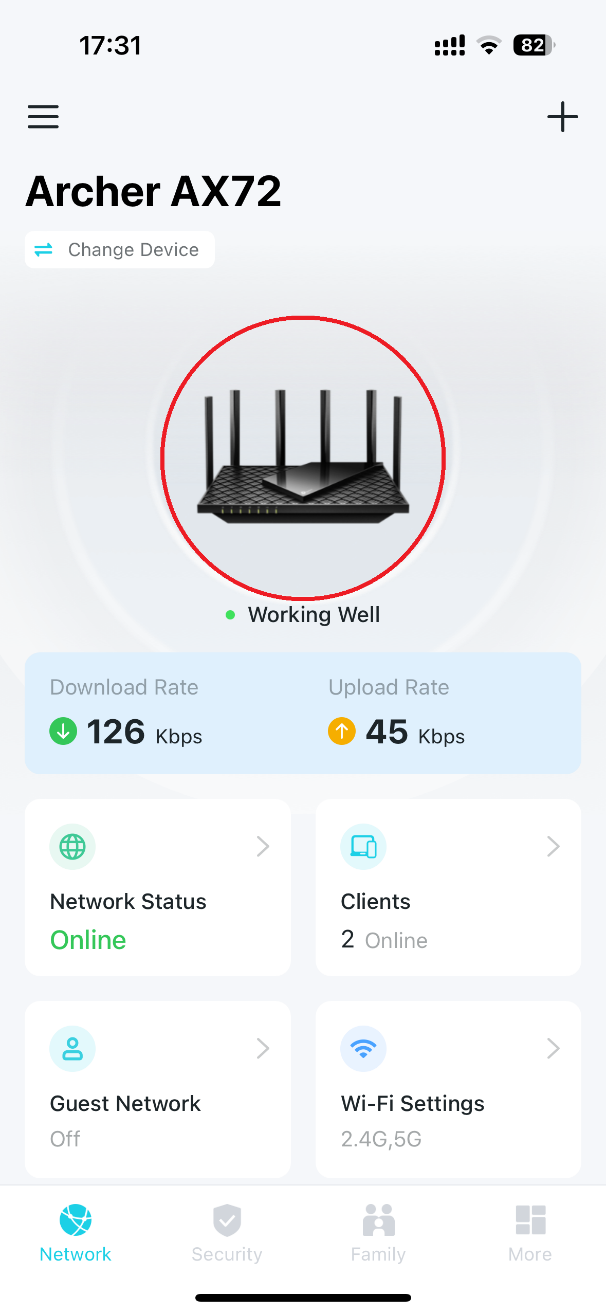
Step 2: Tap on the device in the circle.
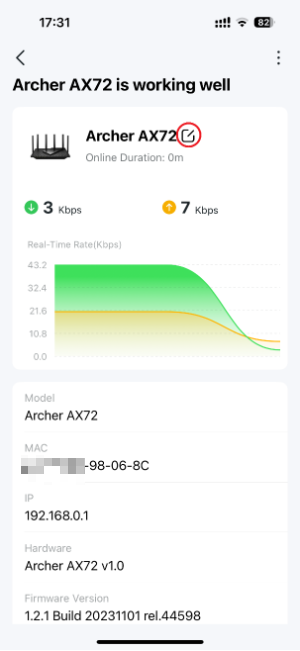
Step 3: Tap the edit icon.
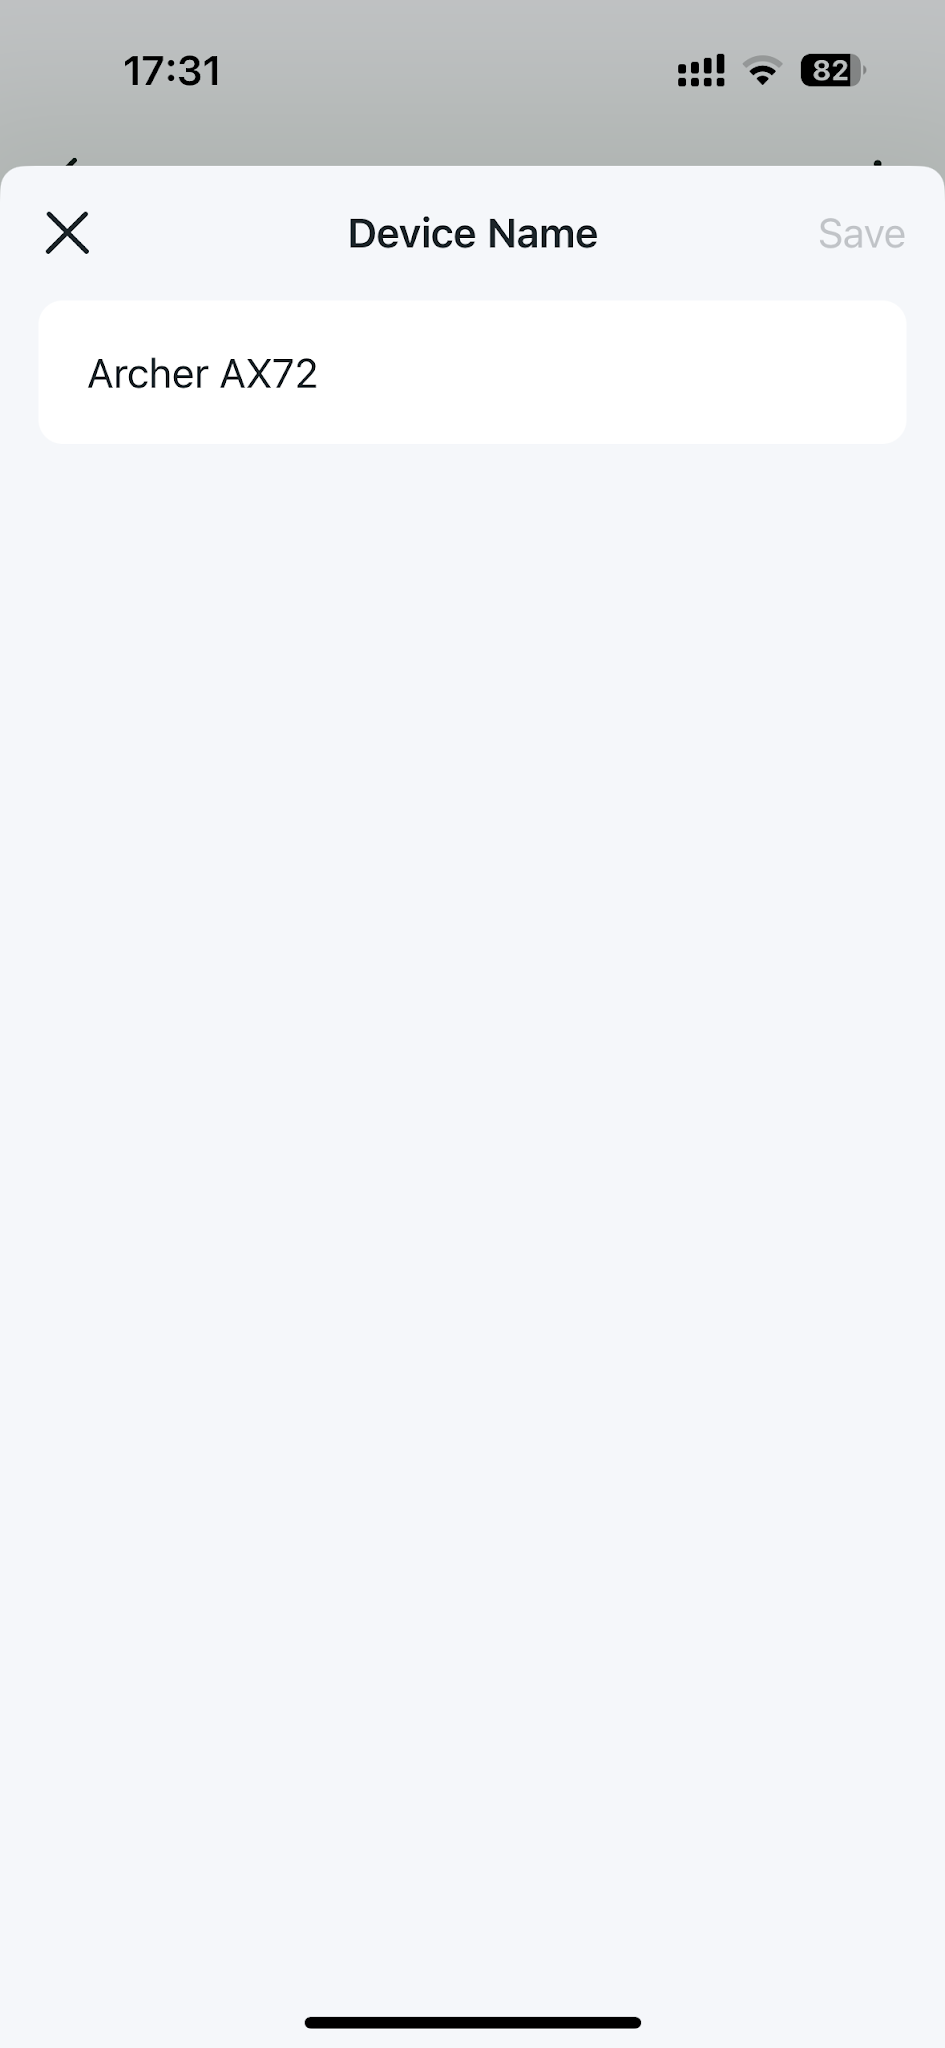
Step 4: Rename it and tap the Save button.
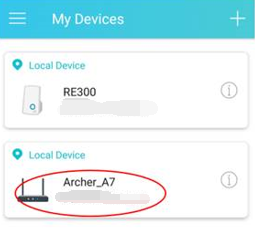
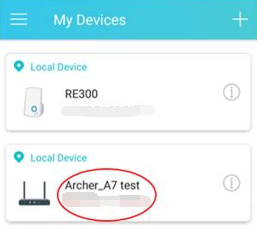
Case 2: Other Compatible TP-Link Models
For example: Archer A8/C54/C5400/VR900/MR600, RE500/TL-WA854RE, Etc.
This guide uses the Archer A7 V5 as an example.
Step 1: Tap on the device that you want to change the name.
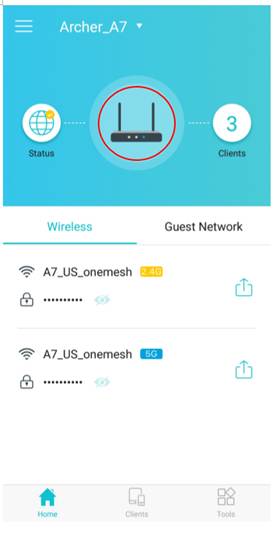
Step 2: Tap on the device in the circle.
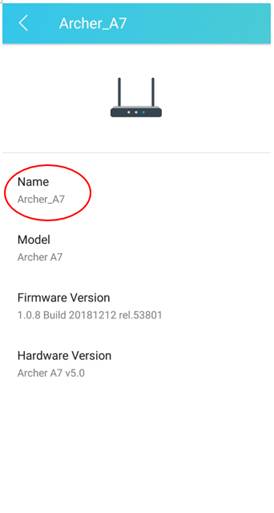
Step 3: Tap Name.
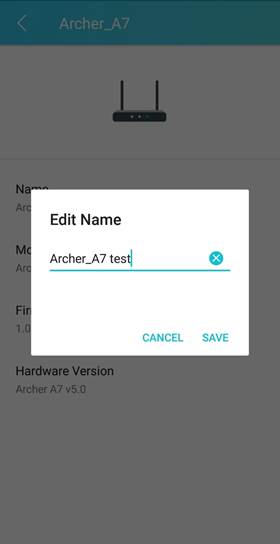
Step 4: Rename it and tap the Save button.
The new device name will now appear in your Tether app.
For more details on each function and configuration, visit the Download Center to find the manual for your product.
Looking For More
هل تجد هذه الأسئلة مفيدة؟
مشاركتك تساعدنا في تحسين الموقع
TP-Link Community
Still need help? Search for answers, ask questions, and get help from TP-Link experts and other users around the world.