How to create a network for guests on the TP-Link Wi-Fi ISP-customized router
Introduction
Guest Network provides secured Wi-Fi access for guests to share your home or office network. When you have visitors in your house, apartment, or workplace, you can enable the guest network for them. You can set different access options for Guest Network users, which is very effective in ensuring the security and privacy of your main network.
Requirement
If you want to modify guest network on your mobile phone, you may need to download Aginet APP from App Store, Google Play, or by scanning the QR code.

Configuration
Scenario 1. Via web-based interface
Step 1. Ensure your device is connected to the router's Wi-Fi or Ethernet port. Open a web browser and enter one of these addresses in the browser bar to access the web interface:
- For models starting with E/H: http://tplinkwifi.net
- For models starting with V/N/M: http://tplinkmodem.net
Step 2. Navigate to Advanced > Guest Network. Locate the Wireless section.
Step 3. Create a guest network as needed.
a. Tick the Enable Guest Network checkbox.
b. Customize the SSID. Don‘t select Hide SSID unless you want your guests to input the SSID for guest network access manually.
c. Set Security to WPA/WPA2 Personal, keep the default Version and Encryption values, and customize your own password.

Step 4. Click Save. Now your guests can access your guest network using the SSID and password you set!
To customize guest network options as needed.
Locate the Settings section.

• Allow guests to see each other: Tick this checkbox if you want to allow the wireless clients on your guest network to communicate with each other via methods such as network neighbors and Ping.
• Use the Following DNS Address: Tick this checkbox and fill out a DNS address if you want your guests to use a specific DNS address different from main network. This may help improve privacy and prevent clients on the guest network from visiting internal resources using the domain name.
Click Save. Now you can ensure network security and privacy!
Scenario 2. Via Aginet app
Step 1. Log in to the Aginet app.
Connect your smartphone to the router's default Wi-Fi network, launch Aginet app, and select your model from the Device List. Then, enter your login password to log in.
Note: The default password should be “admin”. You may also refer to What's the login/device password for TP-Link Customized Modem/Router? for further assistance.
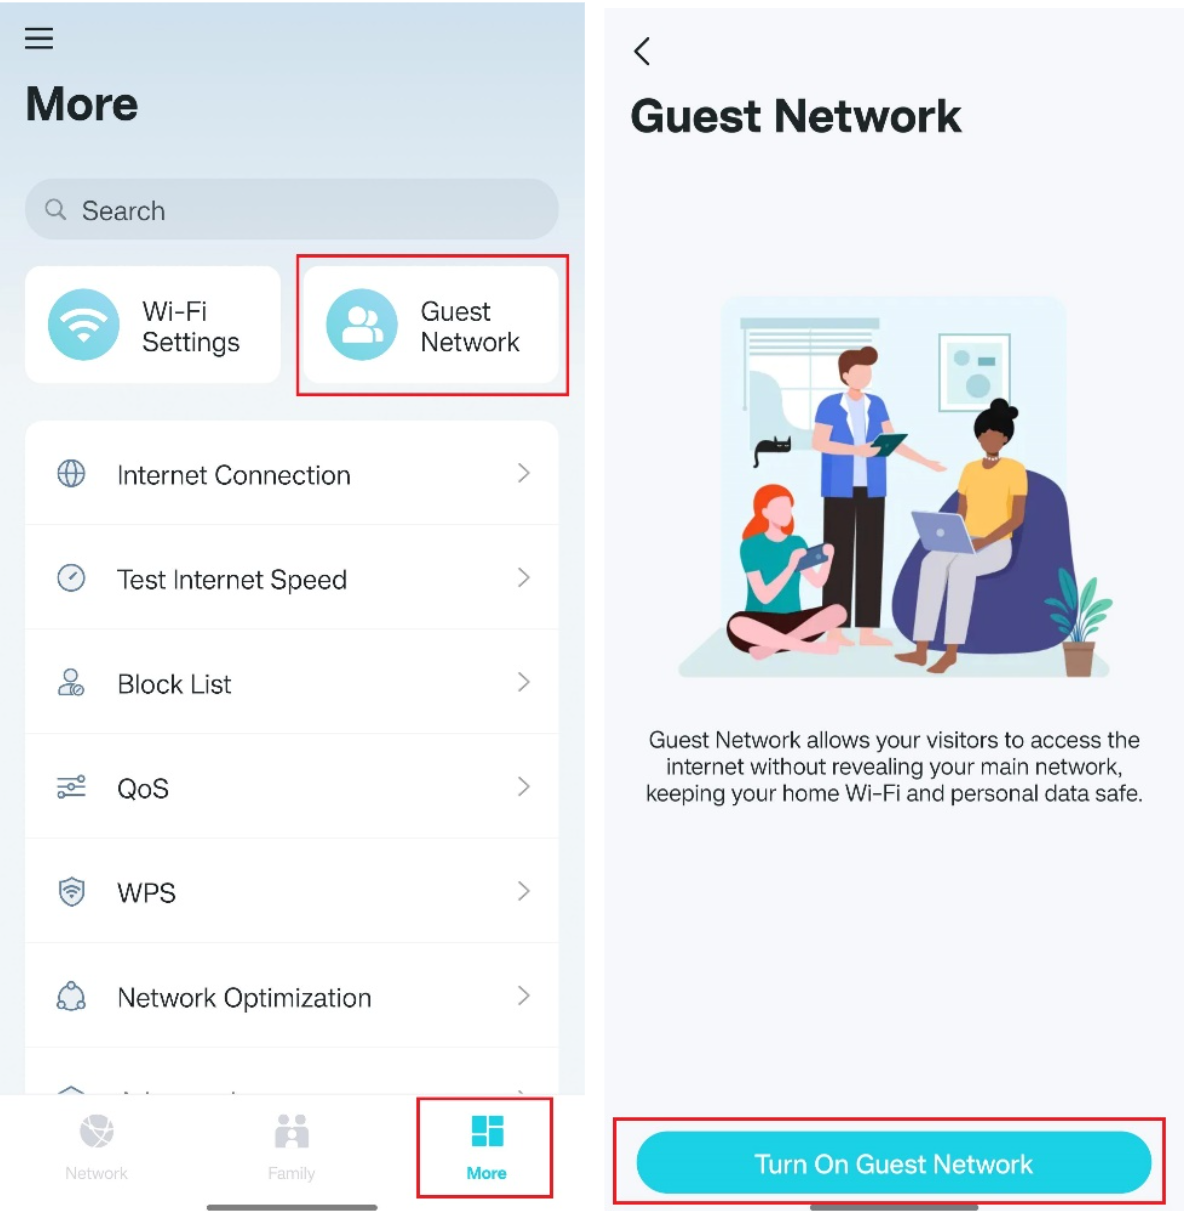
Step 2. Navigate to More > Guest Network and click Turn On Guest Network.
Step 3. (Optional) You may set up the password and security on Aginet app.
Get to know more details of each function and configuration please go to Download Center to download the manual of your product.
Finden Sie diese FAQ hilfreich?
Mit Ihrer Rückmeldung tragen Sie dazu bei, dass wir unsere Webpräsenz verbessern.

1_normal_20220824061744p.png)
Von United States?
Erhalten Sie Produkte, Events und Leistungen speziell für Ihre Region