How to install the TP-Link Archer Router
Introduction
This FAQ article is designed to guide users in configuring the TP-Link Archer router.
Requirements
- A Computer(recommended) or a mobile phone
- Get information about your Internet connection type from your Internet Service Provider (ISP). The internet connection type is usually one of the following three: Dynamic IP, Static IP, or PPPoE.
Configuration
Advanced Preparations:
1. Unplug your modem, and remove the backup battery if it has one.
2. Connect the powered-off modem to the router’s Internet port with an Ethernet cable.
3. Power on the modem, and then wait about 2 minutes for it to restart.
4. Connect the power adapter to the router and turn it on.
5. Connect your computer or phone to the router.
6. Check for the LEDs to confirm the hardware connection, then refer to the following step to set up.
Or you can refer to the Quick Installation Guide in the packet to connect the hardware.
Follow the appropriate instructions based on your Internet connection.
Note: Some routers may not have the same page situation as in the picture, but the path is consistent. Refer to the text description for the correct path.
Note: Make sure you can access the internet via a direct connection from the main computer to your cable modem. If the direct connection doesn’t work, contact your Internet Service Provider.
Step 1. Log in to the router’s web-based interface.
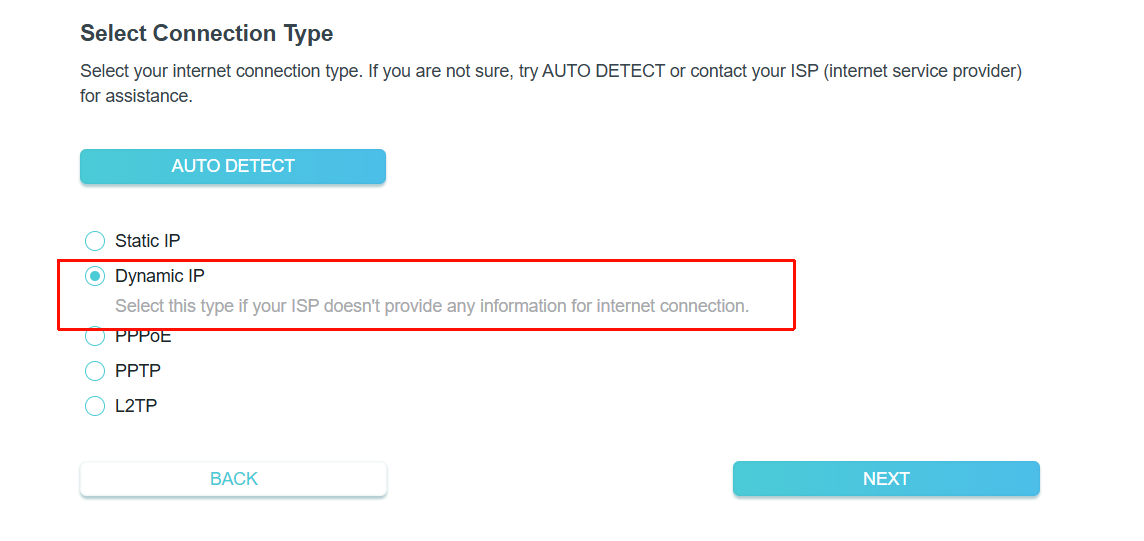
Step 2. Select Dynamic IP in the Internet Connection Type page (usually after selecting the time zone). Then continue and finish the Quick Setup.
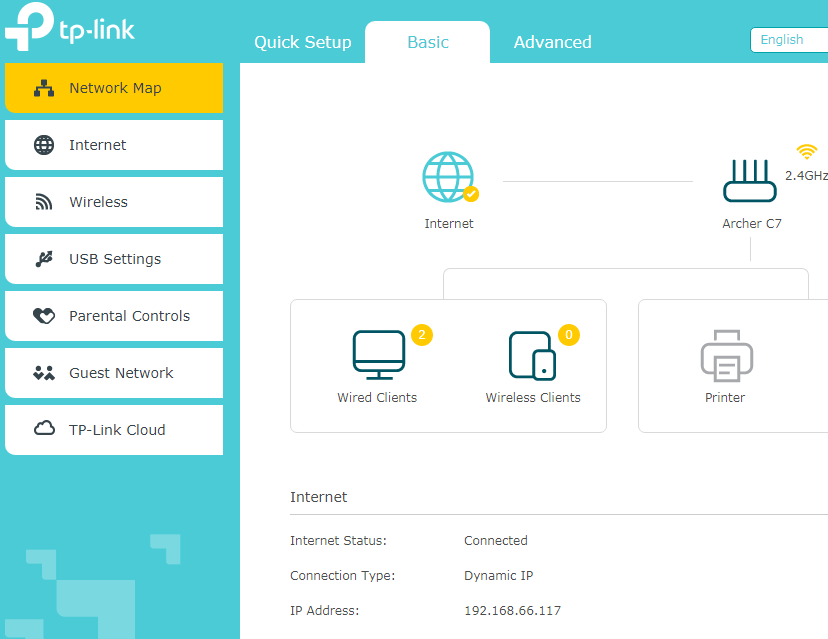
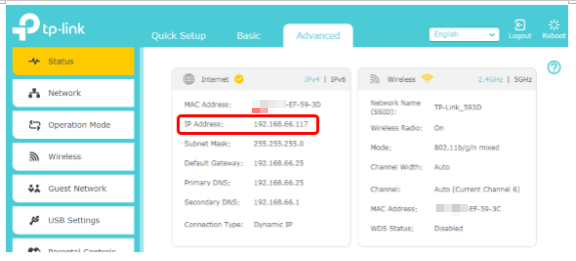
Step 3. Wait a few minutes, then check the Internet section on the Status page. If it shows any IP address (similar to the one below), that means the connection between the Router and the Modem is established.
Username and password provided by your ISP are needed for configuration.
Step 1. Log in to the router’s web-based interface.
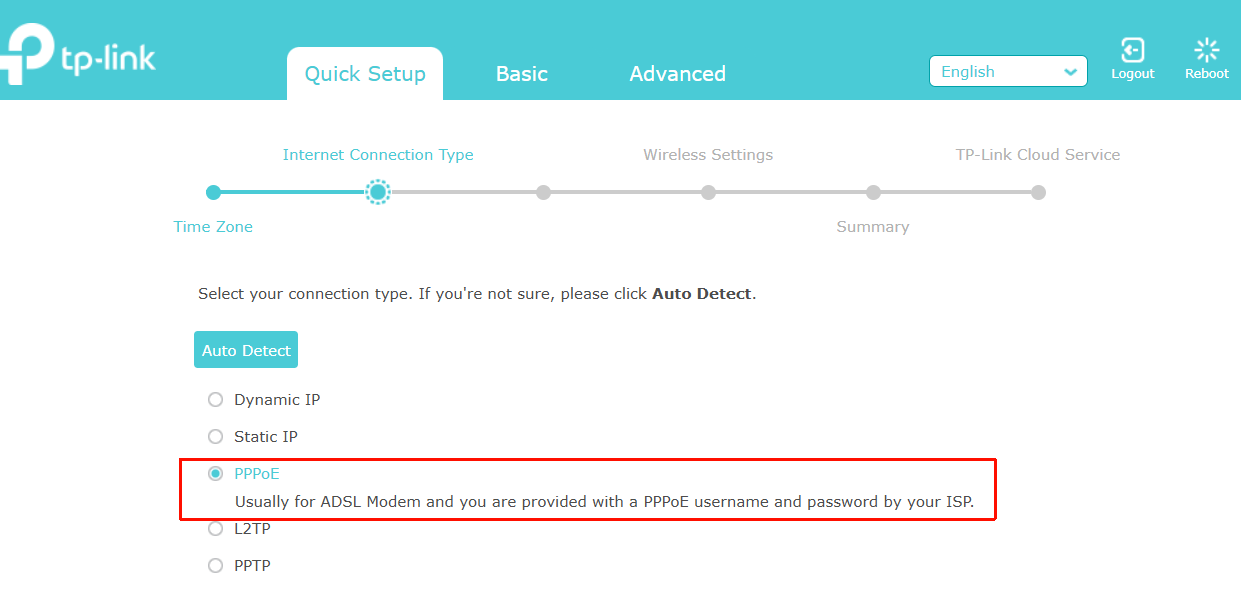
Step 2. Select PPPoE in the Internet Connection Type page (usually after selecting the time zone).
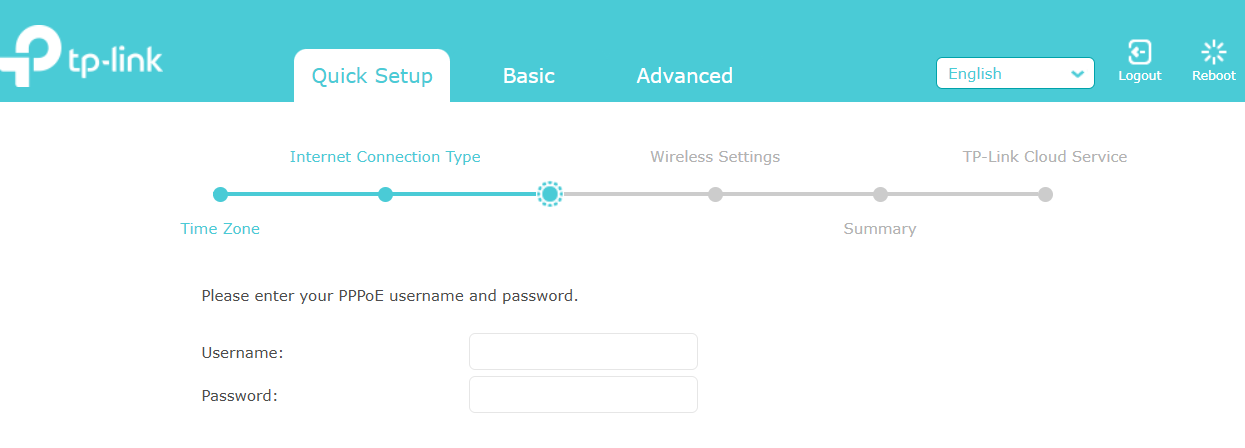
Then click Next and enter the username and password provided by your ISP. Click Next to continue and finish Quick Setup.
Step 3. Wait a few minutes. If it shows the Internet IPv4 IP address on Advanced > Status, the Internet is successfully set up.
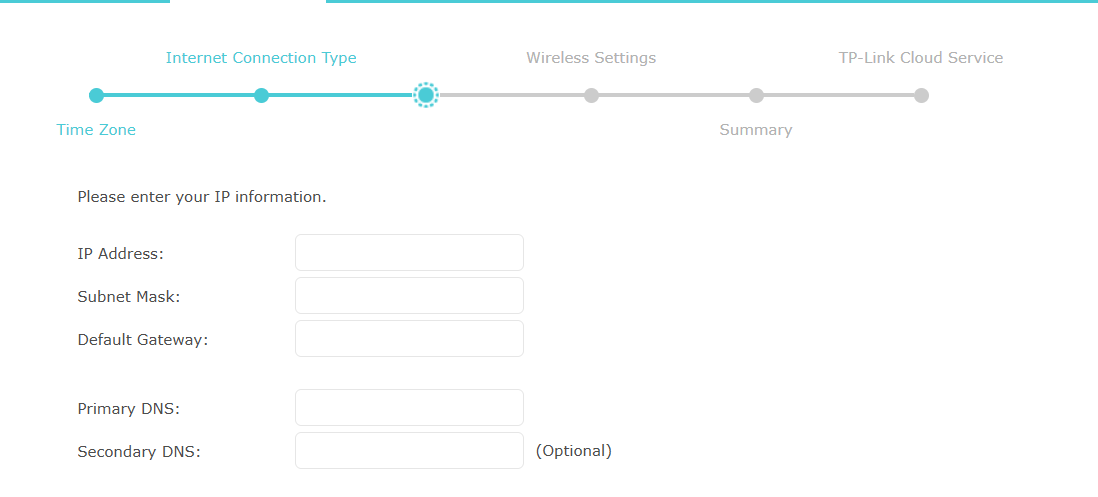
The Static IP Address, Subnet Mask, Default Gateway, Primary DNS, and Secondary DNS provided by your ISP are required for configuration.
Step 1. Log in to the router’s web-based interface.
Step 2. Select Static IP in the Internet Connection Type page (usually after selecting the time zone).
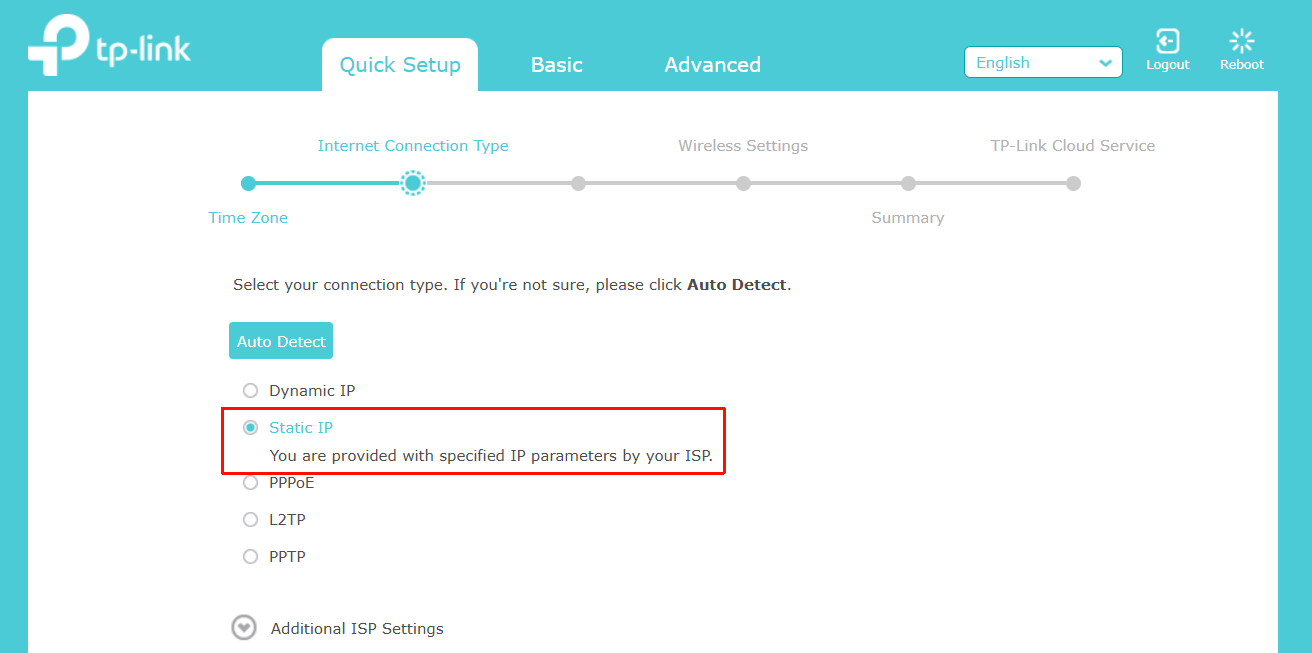
Then click Next and enter IP Address, Subnet Mask, Default Gateway, Primary DNS, and Secondary DNS provided by your ISP. Click Next to continue and finish Quick Setup.
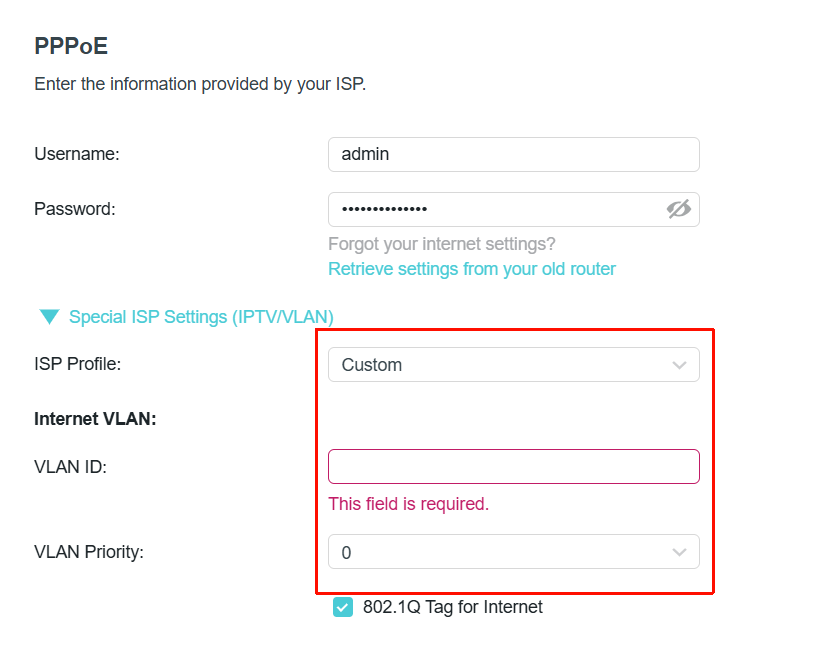
Some ISPs, like Singtel and NBN, need to configure a VLAN ID for the internet connection regardless of the internet connection type.
Check the information about the VLAN ID from the ISP. If the ISP informs you that you do need to fill in the VLAN ID, follow the steps below:
Step 1. After correctly filling in the relevant information of the internet connection type, click Special ISP Settings (IPTV/VLAN).
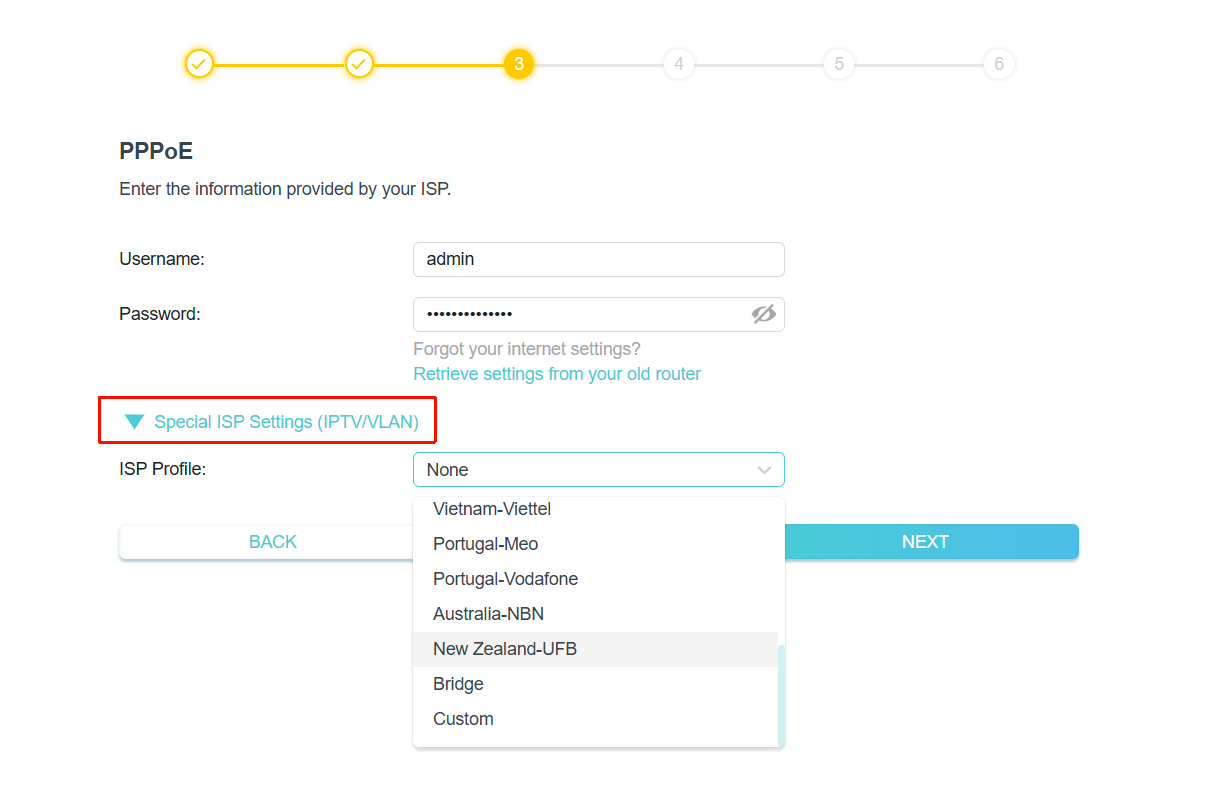
Step 2. Choose your ISP Profile.
If your ISP is on the list, select your ISP name, and the VLAN ID will be automatically entered on the VLAN page. Then click on Next to finish Quick Setup.
If your ISP is not in the list, select Custom, and enter the Internet VLAN ID and Internet VLAN Priority according to the information provided by your ISP. Then click on Next to finish Quick Setup.
If there is no IP address, you can try following the instructions:
1. Restart the router first, wait for about 10 seconds, and connect your end device, like a computer or laptop, to the router.
2. Power off the modem, and unscrew the coaxial cable
3. Power on the modem, check the LEDs on the Router, and make certain the WAN/Internet LED is on.
4. Reconnect the coaxial cable to the modem and check if you can access the internet.
Note: Some cable modems have a backup battery inside. To completely restart the cable modem, please remove the battery, then unplug the power supply.
5. Try to reset your router and install it again. You can refer to this FAQ for detailed instructions: How to reset TP-Link router to factory defaults
Get to know more details of each function and configuration please go to Download Center to download the manual of your product.
Câu hỏi thường gặp này có hữu ích không?
Phản hồi của bạn giúp cải thiện trang web này.
_normal_20250418093949d.png)

