How to configure WDS function on TP-Link Wireless Routers
What is WDS?
A Wireless Distribution System (WDS) is a system that enables the wireless interconnection of access points in an IEEE 802.11 network. It allows a wireless network to be expanded using multiple access points without the need for a wired backbone to link them, as is traditionally required. For more information about WDS, please refer to Wikipedia. The instructions below is a solution for SOHO WDS connection.
In order to build a successful WDS connection between different devices, it requires that both devices must use the same wireless MAC address format. For example, Site A uses a 4-address MAC Address format in passive WDS bridge mode, and Site B also uses a 4-address MAC Address format in active WDS bridge mode.
Is my router compatible with WDS?
WDS bridging only requires configuration on the extended router, and make sure your router supports WDS. It doesn't support this feature if it can’t be found on the web page with the latest firmware update.
WDS may be incompatible between different products (even occasionally from the same vendor) since the IEEE 802.11-1999 standard does not define how to construct any such implementations or how stations interact to arrange for exchanging frames of this format.
Notes:
1. LAN IP of the extended router should be different but in the same subnet as the root router;
2. The DHCP Server on the extended router should be disabled.
3. WDS bridging only requires the WDS setting on either the root router or the extended router.
Why do I need to configure WDS?
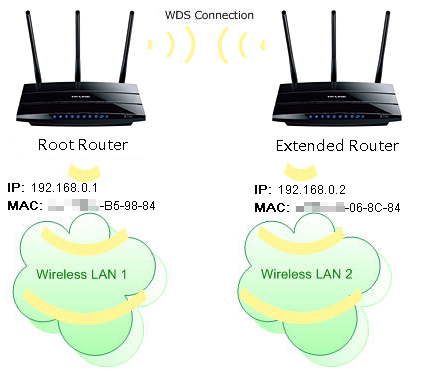
For example, my house covers a large area. The wireless coverage of the router I’m using (the root router) is limited. I want to use an extended router to extend the wireless network of the root router.
How to configure WDS
WDS bridging function can be enabled either in 2.4GHz frequency or 5GHz frequency for a dual-band router. We use the WDS bridging function at 2.4 GHz frequency as an example.
Step 1. Log in to the Router
Log in to the router management page by entering tplinkwifi.net in the browser’s address box after connecting to the router. For how to do that, please refer to How to Log In to Your TP-Link Router
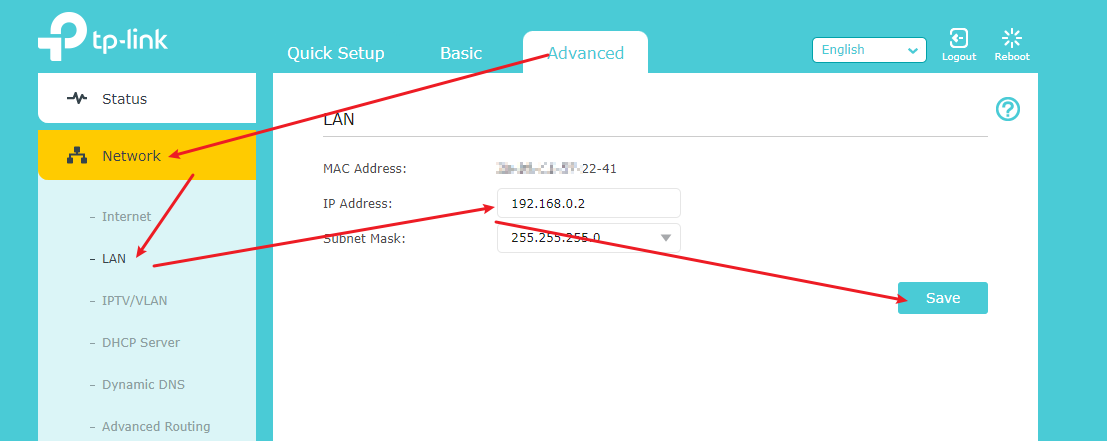
Step 2. Configure the LAN IP address of the router
Go to Advanced > Network > LAN, configure the IP address of the extended router to be in the same subnet as the root router. (For example, the IP address 101 of the root router is 192.168.0.1, and the IP address of the extended router can be 192.168.0.2~192.168.0.254. We take 192.168.0.2 as an example.)
2) Click Save.
Note: Log in to the web management page again if the IP address of the router is altered.
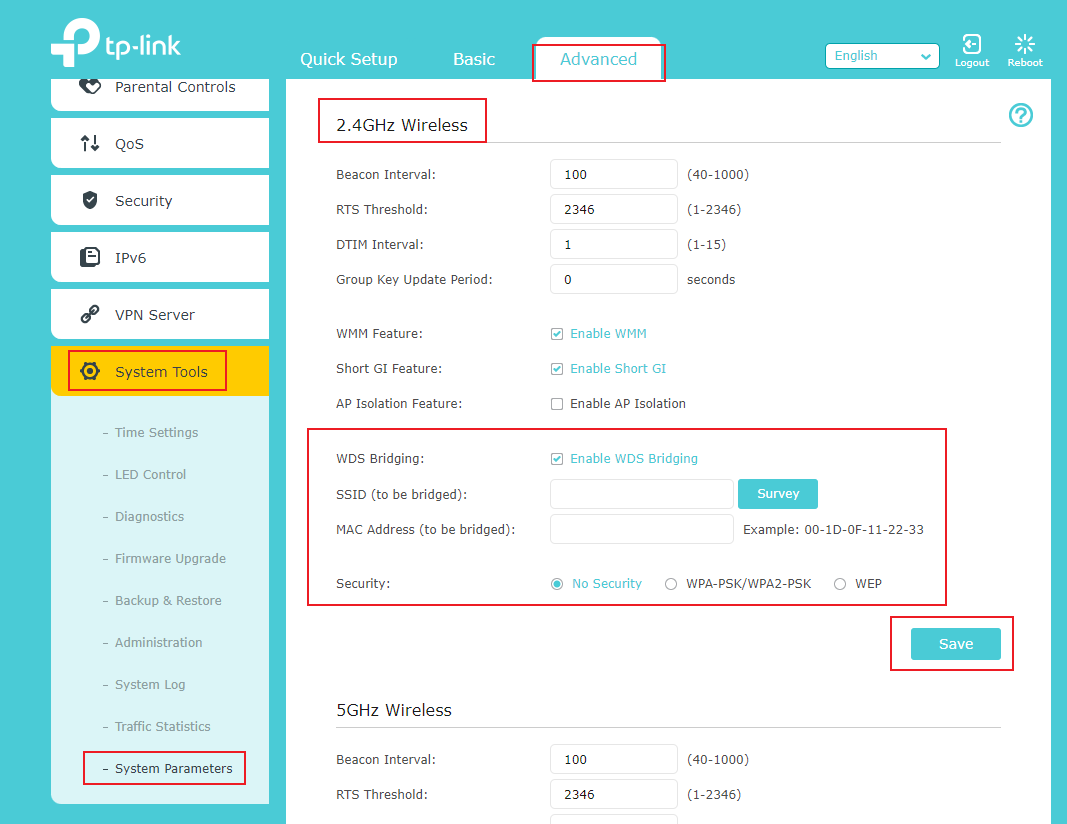
Step 3. Enable the WDS function
Go to Advanced > System Tools > System Parameters and focus on the 2.4GHz Wireless section, click Enable WDS Bridging.
Step 4. Survey the SSID to be bridged
1) Click Survey to view all detectable Wi-Fi signals, locate the root router’s SSID, and click Choose
2) If the root router has a wireless password, you should enter the wireless password of the root router.
3) Click Save.
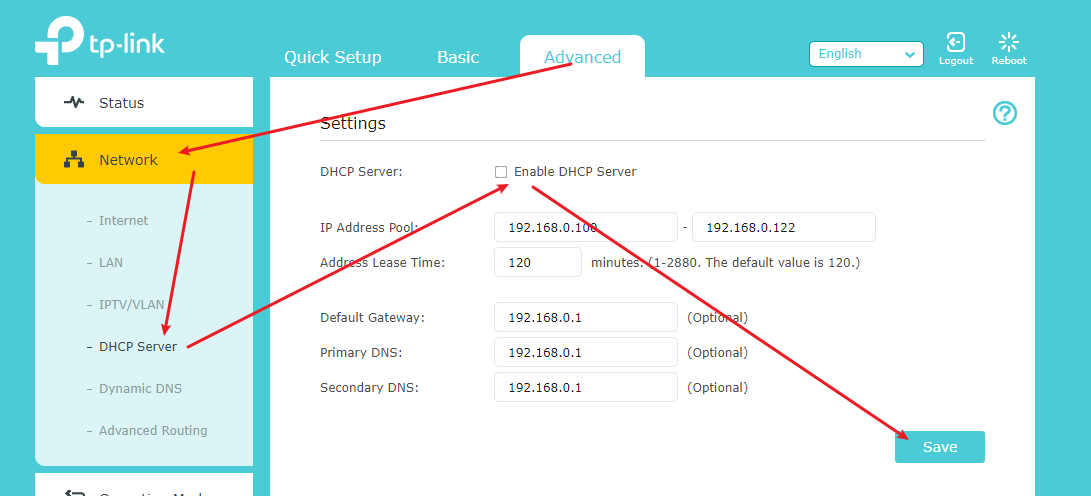
Step 5. Disable DHCP
1) Go to Network > DHCP Server.
2) Deselect Enable DHCP Server and click Save.
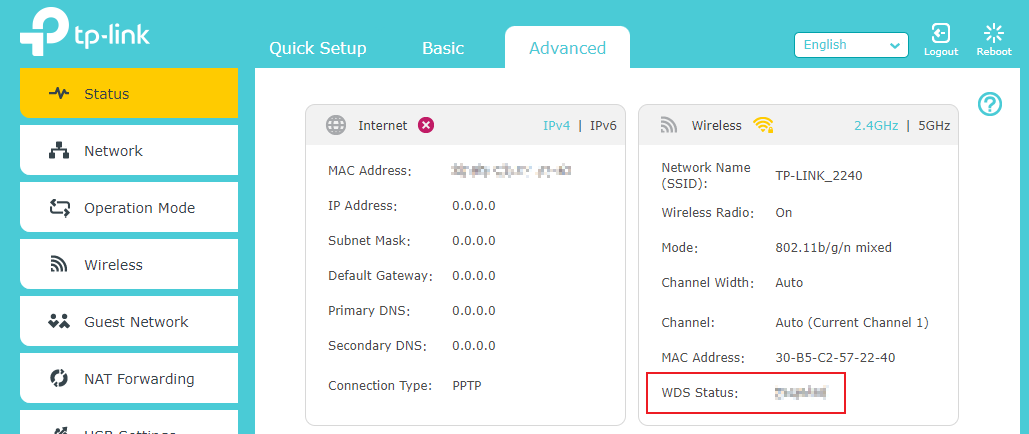
Step 6. Confirm WDS status
1) Now you can go to Advanced > Status > Wireless to check the WDS status. When the WDS status is Run, it means WDS bridging is successfully built.
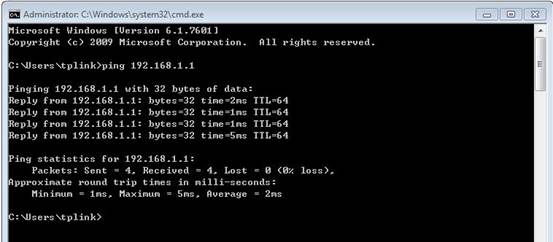
2) You can also make a simple check using the Ping command. If the ping proceeds successfully (which means the WDS performs properly), you will see a similar screen as below: (in this example, 192.168.1.1 is the IP address of the root router)
Please refer to How to Use the Ping Command.
Get to know more details of each function and configuration. Please go to the Download Center to download the manual for your product
Looking For More
Is this faq useful?
Your feedback helps improve this site.
3.0_A_RGB_normal_1584493572647x.png)
14.0-A_normal_1584497163963a.png)
6.0-A-2000px_normal_1584497345873p.png)
TP-Link Community
Still need help? Search for answers, ask questions, and get help from TP-Link experts and other users around the world.