How to configure WDS Bridging on the Archer C8_V1&V2, C9_V1, C5 V2,C1900 V1
This Article Applies to:
Note: 2.4GHz and 5GHz WDS Bridging cannot be used at the same time
For better guidance, let's assume there is a following demand for the network
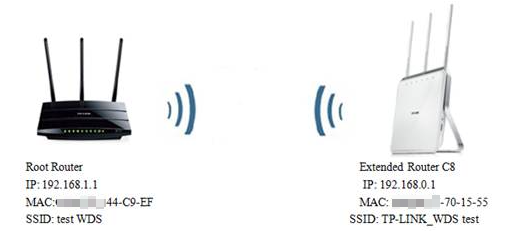
This article takes Archer C8 as an example.
Step 1
Please refer the following instruction to login to the web interface:
Step 2
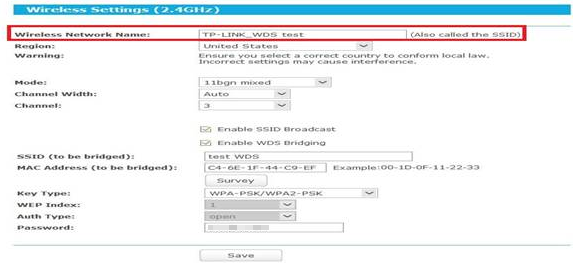
Go to Advanced-Wireless 2.4GHz -> Wireless Settings. Check Enable WDS Bridging. Then the page will show like below.
Note: 1.If there is no WDS which means your router might be using a different firmware please click here.
2. Here we use 2.4GHz wireless network as an example, if you want to WDS bridging the 5GHz wireless network, please go to Wireless 5GHz accordingly.

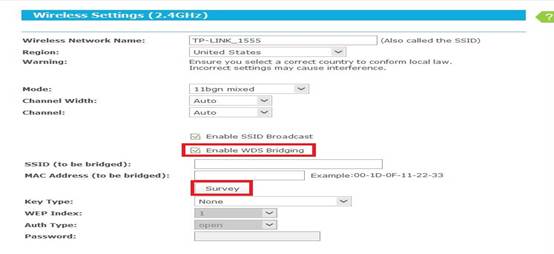
Step 3
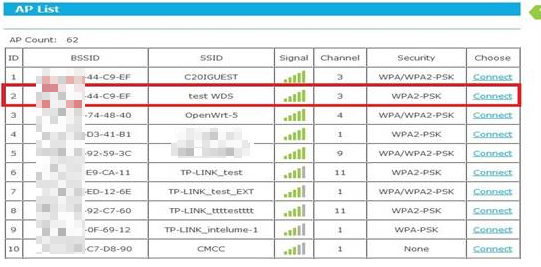
Click Survey. On the pop-up window, find the SSID (wireless network name) of your root router and click Connect.
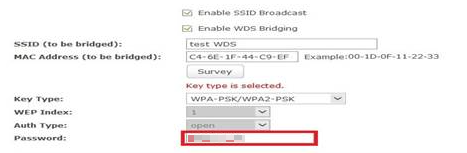
Step 4
The root router’s SSID and BSSID have been filled automatically. The Key type has been selected automatically. Then please configure the Password to match the ones on the root router (the same wireless password as your root router’s).
Step 5
The Wireless Network Name on the top of the page is the wireless network name of Archer C8, You can name whatever you like, be different or same with your root router’s.
Step 6
Click Save button, then a window will pop out to inform you to change the channel. Click OK, it will change automatically. Please do NOT reboot the router, because we haven't finish the settings.

Step 7
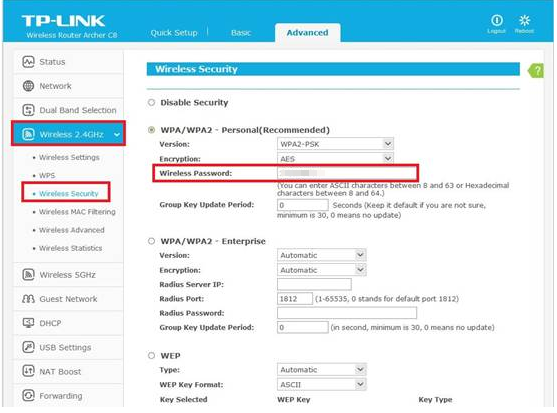
Go to Wireless 2.4GHz-Wireless Security page to secure Archer C8’s wireless network. The Encryption settings here could be different or same with your root router.
Step 8
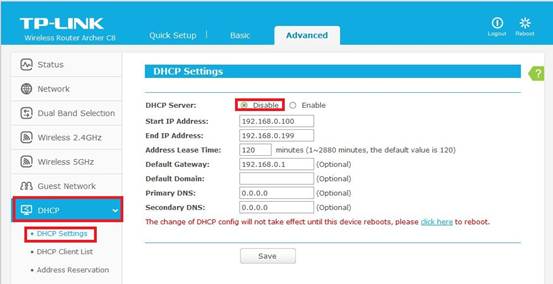
Go to DHCP-> DHCP Settings page. Select Disable DHCP Server, and click Save button, but do NOT reboot the router.
Step 9
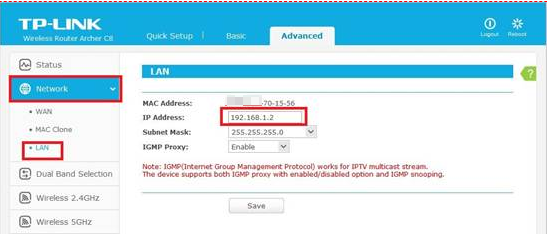
Go to Network -> LAN and change the LAN IP to a different IP address but still in the same subnet network as the root router. Save the setting and reboot the router. As example, your root router’s LAN IP is 192.168.1.1, please change the Archer C8’s to 192.168.1.X (X can be 2~254 but not 1).
Step 10
All settings required by WDS function are completed. Please check on the Advanced-Status page, the WDS Status is RUN.

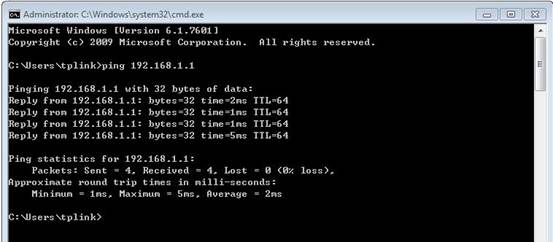
You can also make a simple check by the Ping command. If the ping proceeds successfully (which means the WDS performs properly), you will see the similar screen as below: (in this example, 192.168.1.1 is the IP address of the root router)
Please refer to How to Use the Ping Command
Get to know more details of each function and configuration please go to Download Center to download the manual of your product.
Is this faq useful?
Your feedback helps improve this site.

TP-Link Community
Still need help? Search for answers, ask questions, and get help from TP-Link experts and other users around the world.