How to configure Guest Network on the Archer C8, C9, C5 V2, router
This Article Applies to:
Guest Network provides secured Wi-Fi access for guests to share your home or office network. When you have visitors in your house, apartment, or workplace, you can enable the guest network for them. You can set different access options for Guest Network users, which is very effective to ensure the security and privacy of your main network.
Step 1
Access the web interface of Archer C8 as an example.
Step 2
Please go to Advanced on the top of the page,then on the left hand side menu click Guest Network. You can Enable either/both the Wireless 2.4GHz or the Wireless 5GHz network as your guest network on the page.
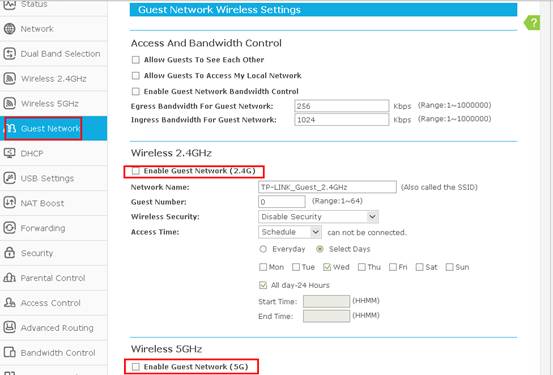
Note: WDS bridging is disabled by default, and this function will not be available when Guest Network is Enabled .That is to say ,if 2.4GHz Guest Network is Enabled, you cannot use the 2.4GHz WDS bridging function, and 5GHz is the same as well.
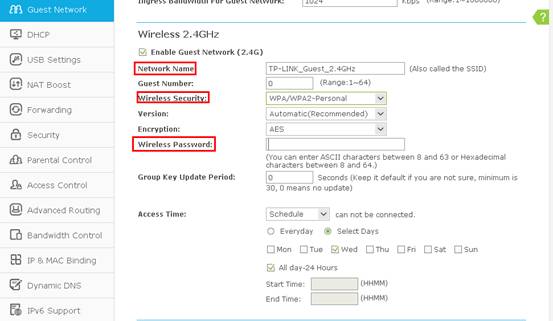
Then you can set up the Network Name, Wireless Security and Access Time that the guests are allowed to connect.
There are only two security types available, Disable Wireless Security & WPA/WPA2-Personnal. It is recommended to select WPA/WPA2_Personal as the security type. Then please type in a Wireless Password as you like.
There are two options for you to set up the access time, Timeout and Schedule. Timeout is to set connection timeout count value and Schedule is to set the available time and date for all of the visitors.
Timeout-- After this time the Guest Network will close.
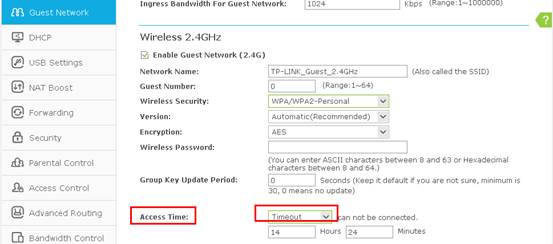
Schedule--You can specify the time frame when the Guest Network would be activated.

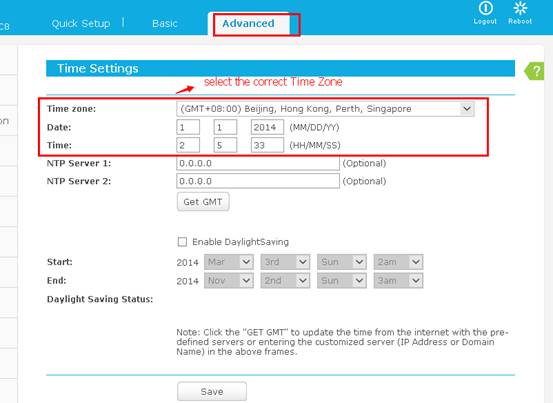
Note:If Schedule is selected as Access Time rule,please make sure the router’s Time Settings is right since the rule will take effect according to the router’s time.
Advanced →System Tools-Time Settings
Step 4
Advanced setting: If you want to configure some advanced settings, please see below. Enable the options you need, by default, they are all disabled.
NOTE: If the router is configured as an access point, then the second option, Allow Guest to access my Local Network, should be checked by all means. Otherwise, the guests cannot get Internet access.
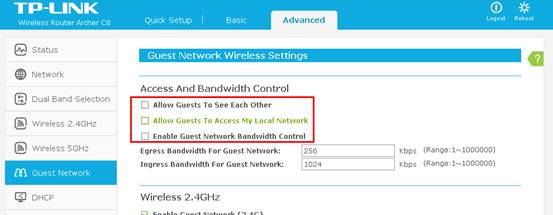
The explanation of the above 3 options:
1. Allow Guest to access To See Each Other:
If you want to allow the clients in the guest network to be able to communicate with each other, please check this option.
2. Allow Guest to access my Local Network:
If you want to allow the clients in the guest network to access the clients in your Local Network, please check this option.
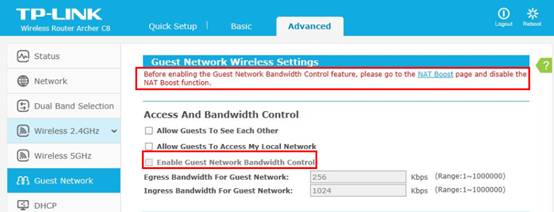
3. EnableGuest Network Bandwidth Control:
With this feature, you can limit the Bandwidth of the guest network.
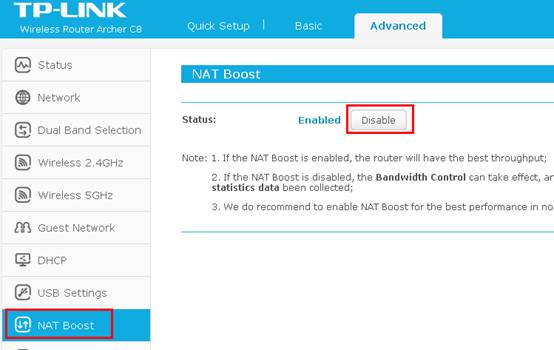
Before Enabling the Guest Network Bandwidth Control feature, please go to NAT Boost page and disable the NAT Boost function.
Get to know more details of each function and configuration please go to Download Center to download the manual of your product.
Is this faq useful?
Your feedback helps improve this site.

TP-Link Community
Still need help? Search for answers, ask questions, and get help from TP-Link experts and other users around the world.