How to connect to the WLAN-PS network of the TL-WPS510U on Windows 8.1
This Article Applies to:
Compared with Windows 7 and Windows 8, Windows 8.1 no longer shows Ad-hoc networks in the Wi-Fi list. As TL-WPS510U works on Ad-hoc mode as default, you cannot find the SSID “WLAN-PS” of TL-WPS510U on Windows 8.1. For how to connect to the WLAN-PS network of the TL-WPS510U on Windows 8.1 please follow steps below.
View the Ad-hoc wireless network
Step 1: Run cmd as administrator
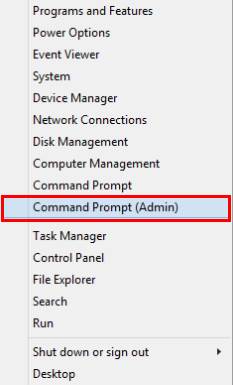
Right click on the Windows START icon at the left-hand corner in the task tray, left click on “Command Prompt (Admin) “
Step 2:View the name of wireless network(SSID)
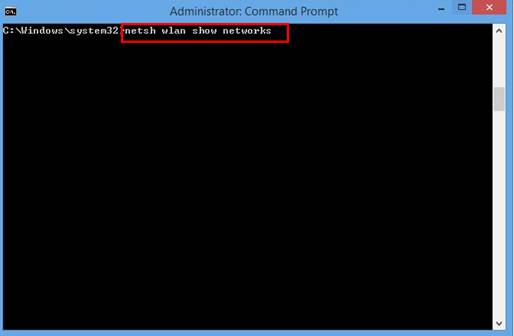
Run the following command as below to see all networks in range, including ad-hoc network:
>netsh wlan show networks
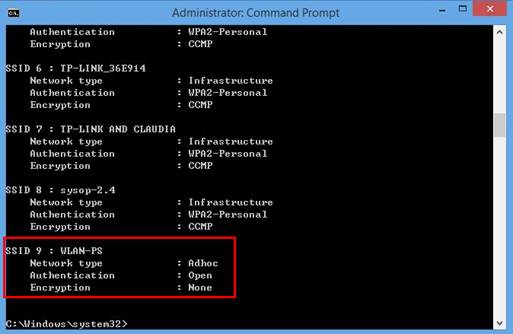
In this case, WLAN-PS is the ad-hoc wireless network name of the TL-WPS510U.Note down the detailed information of WLAN-PS.
Set up a visible ad-hoc wireless network and manually get it connected
Step1: Set up a new network
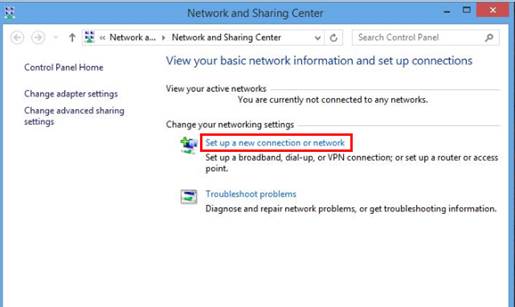
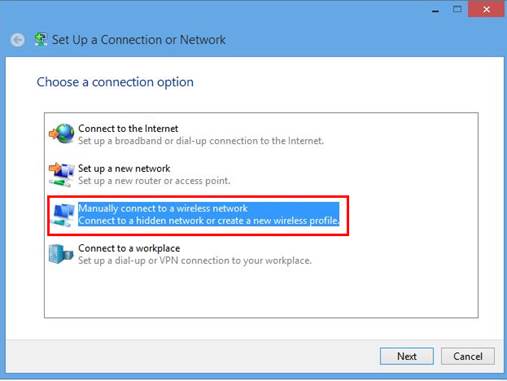
go to ‘control panel’→ ‘Network and Internet’→ ‘Network and Sharing Center’, click ‘Set up a new connection or network’
double click “Manually connect to a wireless network”
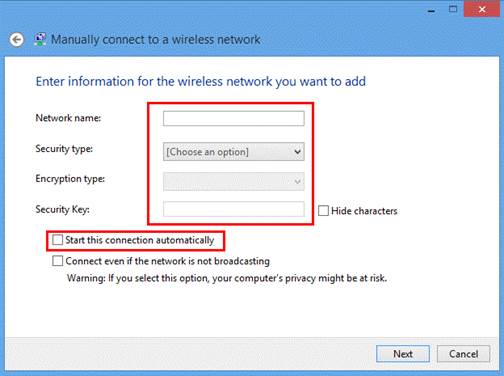
Enter the SSID, security settings of the ad-hoc network accordingly (you can find the detailed information in “view the ad-hoc wireless network”-setp2), uncheck “Start this connection automatically” (important)
click “Next”, then “close”
Note: The Network name of the TL-WPS510U is WLAN-PS, Security type of the TL-WPS510U is No authentication(open)
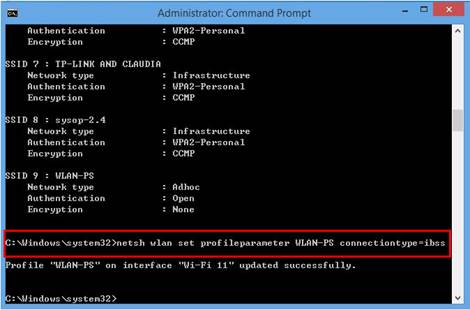
Step 2: Complete the parameter of the ad-hoc wireless network
Run the command as below (important):
>netsh wlan set profileparameter WLAN-PS connectiontype=ibss
Step 3: Run cmd and connect the ad-hoc network
After setting up, run this command whenever you want to connect the ad-hoc network:
>netsh wlan connect WLAN-PS
Then you can see that you are currently connected to WLAN-PS in “Network and Sharing Center” window
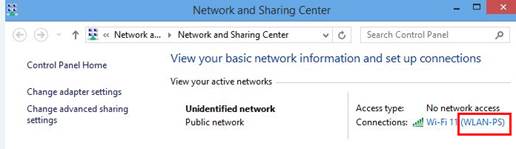
Now you can connect your Windows 8.1 PC to WLAN-PS and continue to install and configure the TL-WPS510U.
Is this faq useful?
Your feedback helps improve this site.
TP-Link Community
Still need help? Search for answers, ask questions, and get help from TP-Link experts and other users around the world.