Application Requirement/ Parental Control
Parental Control function is used to control internet activities of the child, limit the children to access certain websites and restrict the time of surfing internet.
Note: only websites based on http (port 80) protocol can be effective here, not applicable for https (port 443).
Scenario
Bob has a computer for his son, now he has such a requirement to control over his kid’s internet access:
1. The kid has his own computer, and is only allowed to visit only several websites during Monday to Friday, from 9.am to 5.pm.
2. The kid is not allowed to visit any website during other time.
3. Bob and his wife each has a computer, both them should have the ability to access to the internet at any time.
Here we take TL-WDR3600 as an example to realize this application.
Step 1:
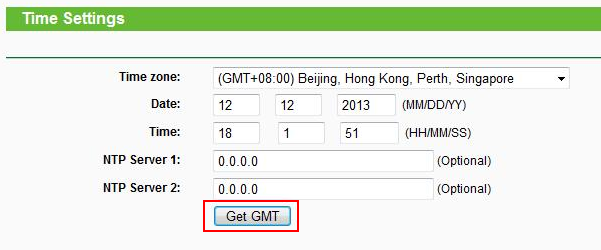
Set time manually or synchronize it with the Internet or NTP server automatically.
Step 2:
Go to Access Control ->Schedule section, set the time when you want the kid to have the access to the specified websites.
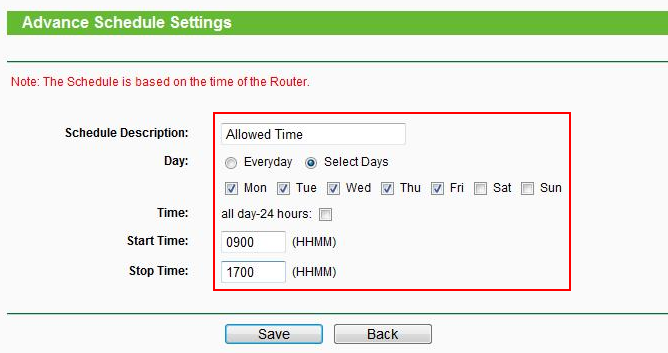
And check the settings

Step 3:
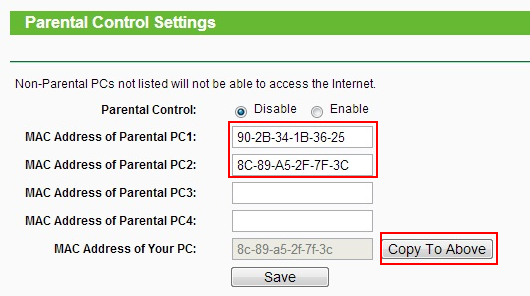
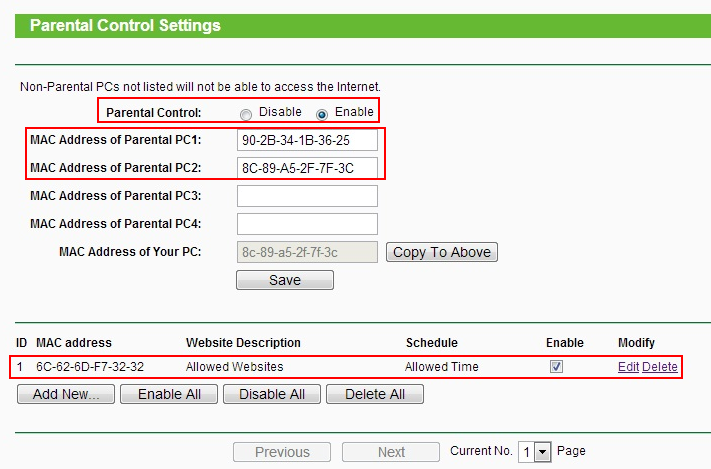
Go to Parental Control section, set the parental PC, whose internet access performance won’t be affected by the Parental Control settings. You can input or just copy the MAC address of the parental PC. Then click Save.
Step 4:
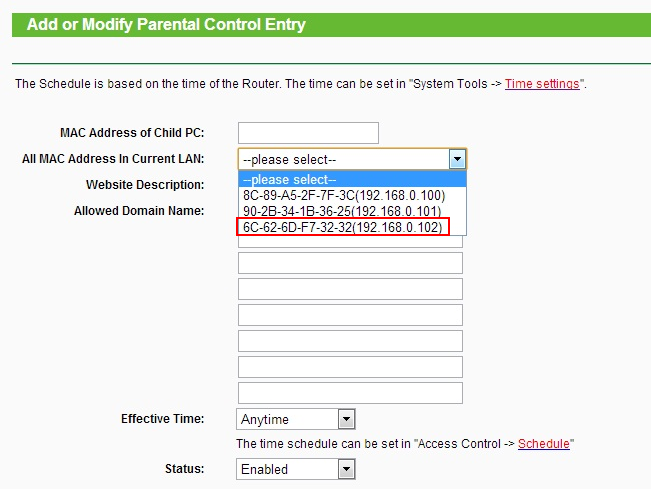
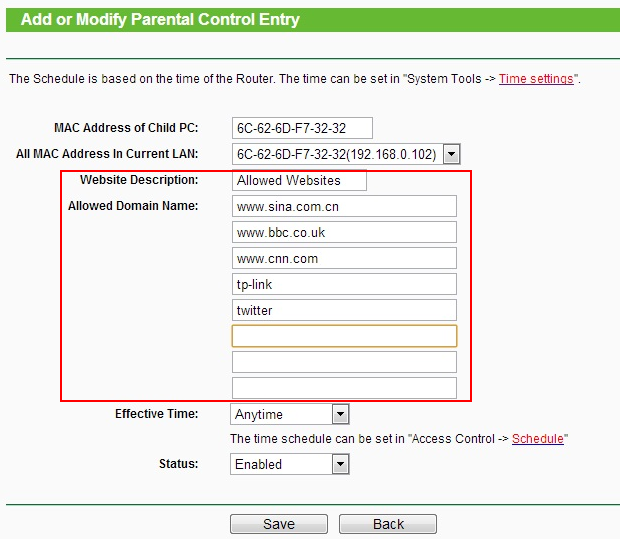
Set the child’s PC. You can input the MAC address manually or select the MAC address directly from the below dropdown menu if the child’s PC is connected to the router. Here we just select that from the dropdown menu.
Step 5:
Create the specified websites group name and input the corresponding websites’ full name or their keywords. As shown below
Step 6:
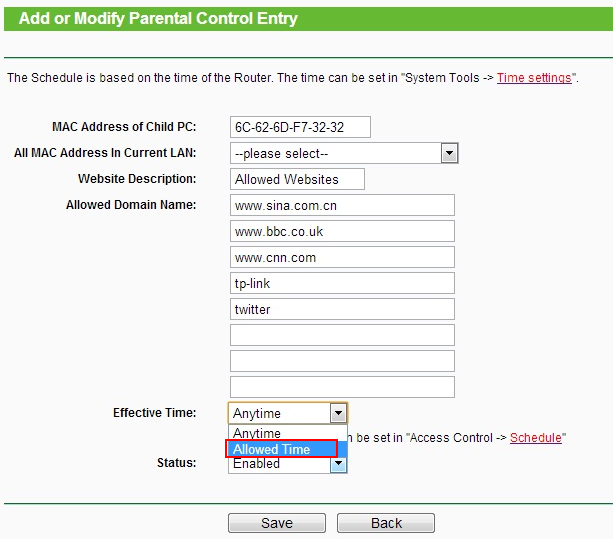
Set the effective time. By default it is any time, here we select the time “Allowed Time” which we have created in step 2. And ensure the status is enabled.
Step 7:
Check the settings again and enable the Parental Control function.
Is this faq useful?
Your feedback helps improve this site.
TP-Link Community
Still need help? Search for answers, ask questions, and get help from TP-Link experts and other users around the world.
14.0-A_normal_1584497163963a.png)
6.0-A-2000px_normal_1584497345873p.png)
3.0&4.0-F_normal_1584493102128p.png)