How to Send or Receive a Fax by TM-IP5600 in Windows 7
Note: The TM-IP5600 must be plugged into the PCI slot before installing the driver.
Step 1: Please go to the Computer Management->Device Manager and check whether the driver for the modem have been installed successfully.
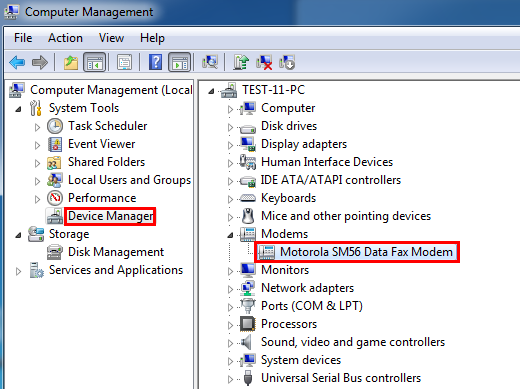
If the icon is showed as below, that means the driver has not been installed correctly.

Please perform the operations below to install the driver step by step.
Note: Before you install the driver, please make sure that your computer has connected to the Internet.
1. Please right click this icon, and select “Update Driver Software”.

2. Please select “Search automatically for updated driver software”, then the windows will install the driver automatically.

Step 2: After you have ensured that the driver has been installed, Please click Start->All Programs->Windows Fax and Scan.

Step 3: Click New Fax.

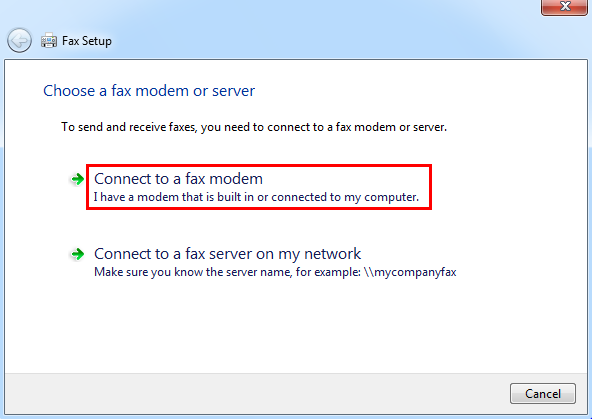
Step 4: Select “Connect to Fax modem”.
Step 5: Type in a name that will help you identify this modem when sending a fax, here we use “Fax Modem” for example. Click Next.

Step 6: In the new page, you need to choose how to receive faxes. If you choose “Answer automatically”, the windows will answer incoming fax calls automatically; if you choose “Notify me”, you need to choose whether to answer incoming fax calls manually. Here we select “Answer automatically” for example.

Note: If you can’t decide now, you can select the last one “I’ll choose later; I want to create a fax now”. After you make up your mind, please go to Tools->Fax Settings->General to set it.

In the General page, you can also set the rings to answer, it’s “5 rings” by default.

Step 7: After all the above settings, you can send a fax now.

In general, you will see the following process when you send a fax successfully.

Is this faq useful?
Your feedback helps improve this site.
TP-Link Community
Still need help? Search for answers, ask questions, and get help from TP-Link experts and other users around the world.