How to view cameras by running Remote live viewer
This Article Applies to:
Step 1
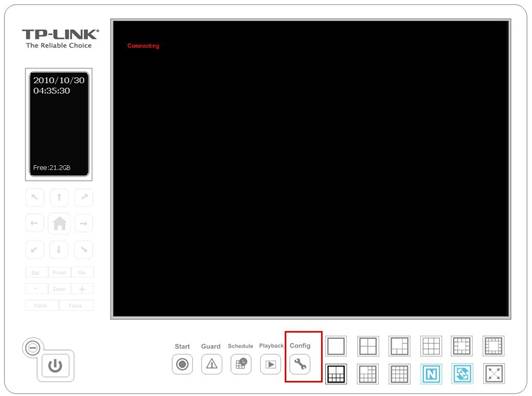
Click Config button on the main page and select Settings.
Step 2
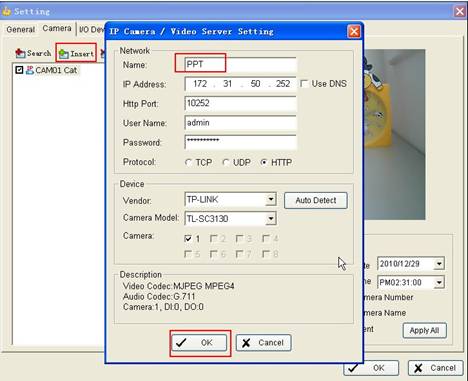
Choose the camera and then click on Insert , type in Name , IP Address and Http Port, then click OK.
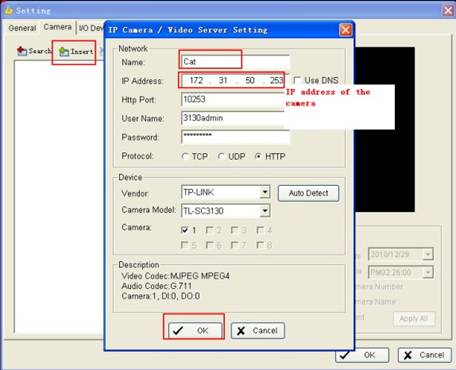
Note: If you have many cameras, please add them one by one.
Step 3
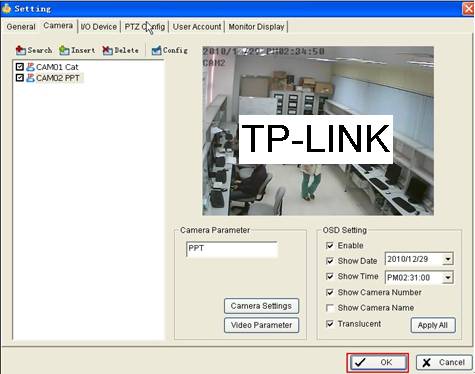
Please click OK if you have finished adding all the cameras.
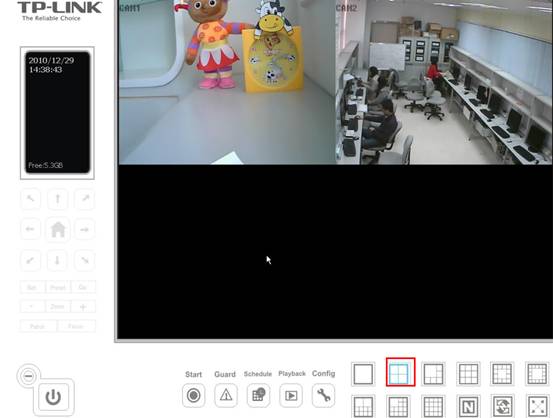
Step 4
Select the windows you want to view at the same time.
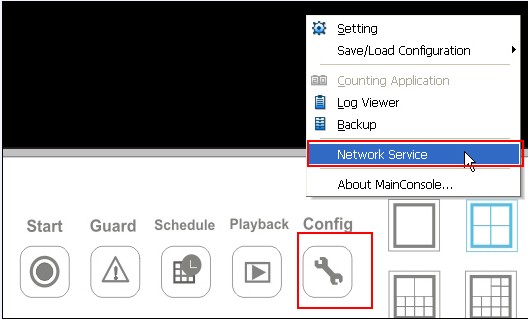
Step 5
Click Config button on the main page and select Network Service.
Step 6
Select Live Streaming and click Start, then click OK.
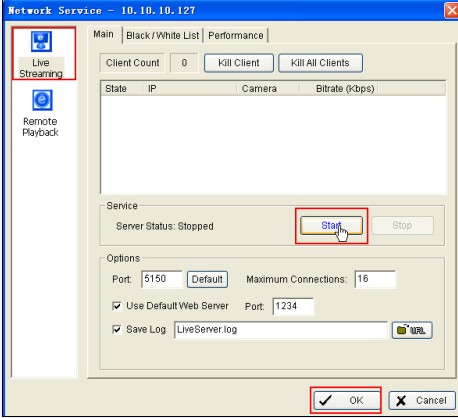
Now the settings are available for the Remote Live viewer.
We could view the cameras on the other computers which are connected to the same local network or even from remote access.
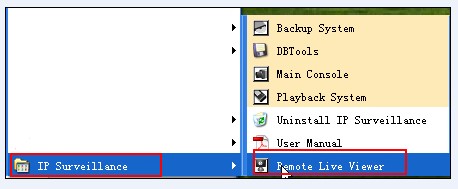
Step 7
On the other computers, please open the Remote Live Viewer.
Step 8
Click configure button and then configure the server name, type in the IP address of the remote computer, then click on add.
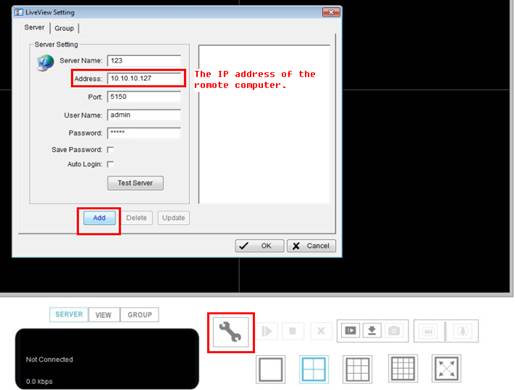
Note: If the two computers are in the different network, the IP address should be the WAN IP address of the remote router, and you need to open the port 5150(by default) for the PC which is running IP surveillance.
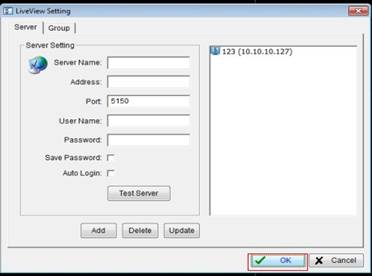
Step 9
Click OK to finish the settings
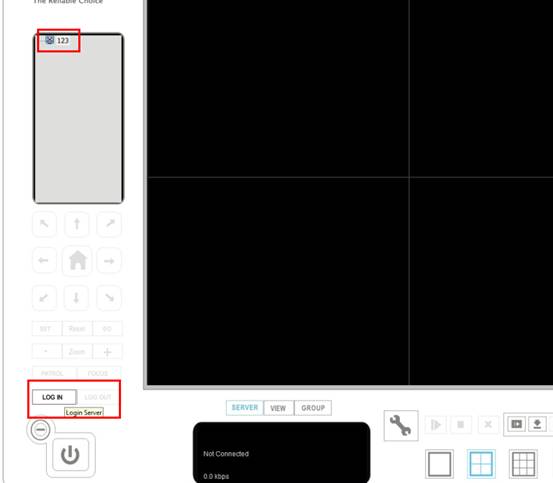
Step 10
Click the name of the server and then click Login.
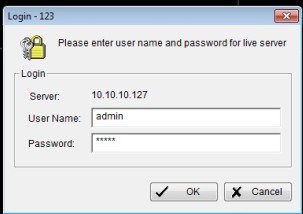
Step 11
Type the user name and the password for the live server, the default username and password are both admin.
Step 12
After the login, you will see the remote camera.
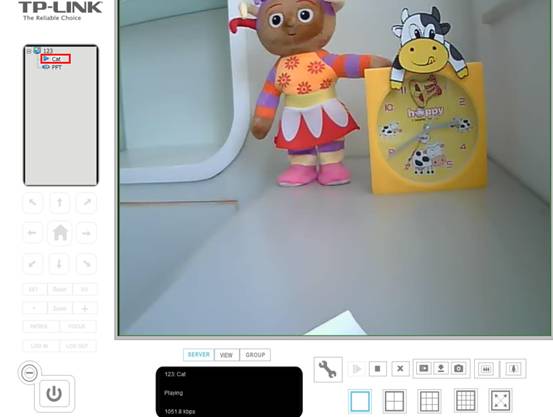
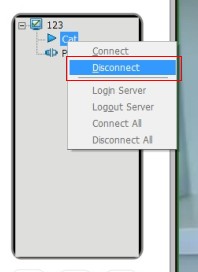
Note: You can see only one camera at a time, if you want to see the other cameras, you need to disconnect the previous one and then double click on the other one.
Is this faq useful?
Your feedback helps improve this site.
TP-Link Community
Still need help? Search for answers, ask questions, and get help from TP-Link experts and other users around the world.