How do I configure Dynamic DNS on TL-WR820N?
Dynamic DNS (Domain Name System) allows you to assign a fixed host and domain name to a dynamic Internet IP address. It is useful when you are hosting your own website, FTP server, or another server behind the router. To begin, you need to sign up with a Dynamic DNS service provider such as www.dyndns.com. Then, enter your registration information.
1. Visit http://tplinkwifi.net, and log in with the password you set for the router.
How do I log in web-based interface/utility of TL-WR820N?
2. Go to Advanced > Advanced Users > Dynamic DNS.
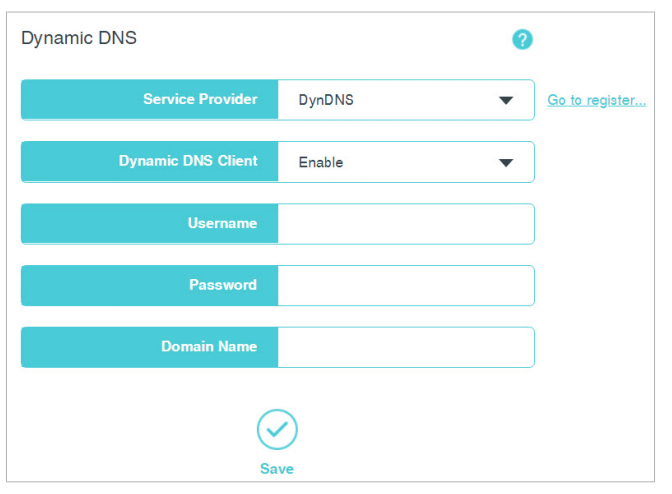
3. Select your Dynamic DNS service provider.
4. Enable the Dynamic DNS client.
5. Enter the username and password of your Dynamic DNS account. If you do not have an account, click Go to register… to register an account.
6. Enter domain name you registered with the Dynamic DNS service provider.
7. Click Save.
Get to know more details of each function and configuration please go to Download Center to download the manual of your product.
Is this faq useful?
Your feedback helps improve this site.
TP-Link Community
Still need help? Search for answers, ask questions, and get help from TP-Link experts and other users around the world.