Table of Contents
Configure Your 5G Mobile Wi-Fi on the Screen_Screen Features
About This Guide
This guide explains how to configure your 5G Mobile Wi-Fi on its screen. The features in this guide are supported by screen. You can enjoy more features by configuring your Mobile Wi-Fi on Tether APP or Web management page.
This guide uses M8550 as an example for illustration. In this guide, images in black represent Dark Mode enabled, while white represents Dark Mode disabled; there is no difference in functionality. Your actual product and interface may differ from those depicted here.
Chap 1. Manage Your Data Usage
This chapter explains how to manage the data usage of your Mobile Wi-Fi on the Screen. This chapter uses M8550 as an example for illustration. Your actual product and interface may differ from those depicted here.
1.1 Check Data Usage
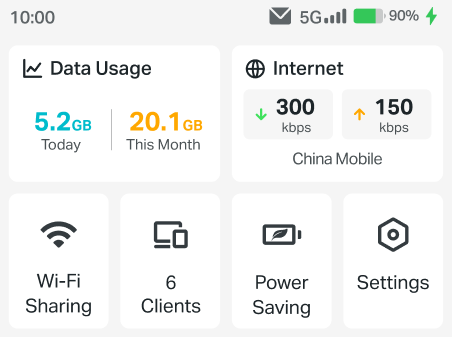
You can view Data Usage on the screen of your Mobile Wi-Fi.
Note: Actual data usage may vary from the estimated data usage displayed. Your mobile carrier can provide more accurate data usage information. To obtain it, you can send messages to your mobile carrier via web management page or Tether app.

1.2 Correct Data Usage
- Tap Data Usage on the home screen.
Note: You can also go to Settings > Data Settings.
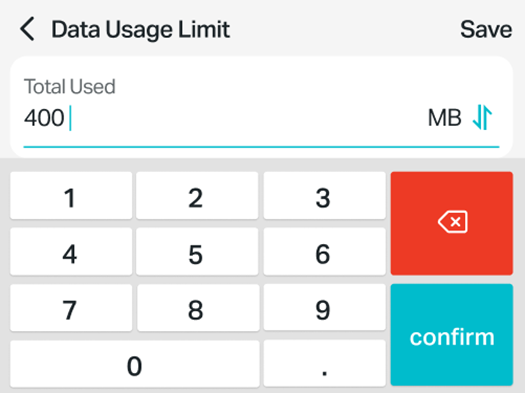
- Tap Correct.
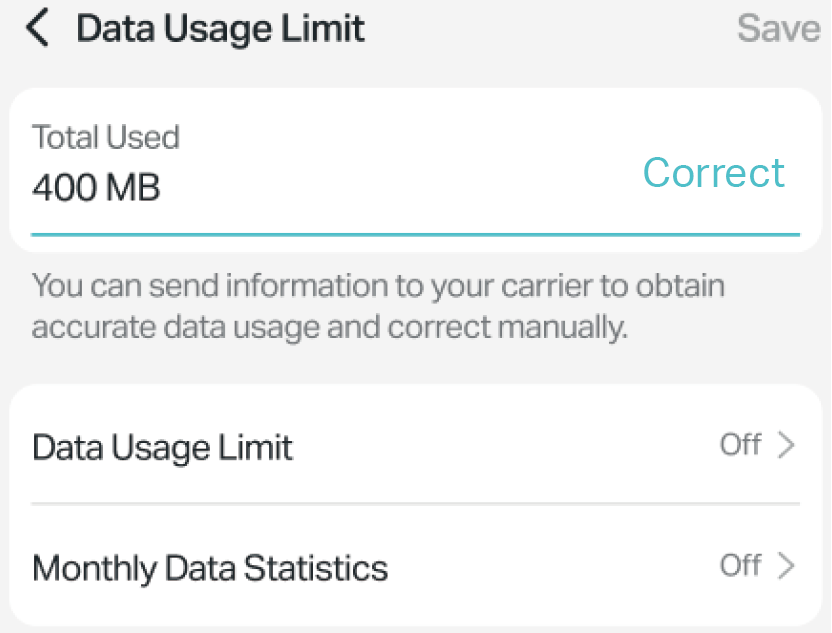
- Enter a more accurate value for the data usage. Tap Confirm. Tap Save.
1.3 Set Data Usage Limit
- From the home screen, go to Data Usage.
Note: You can also go to Settings > Data Settings.
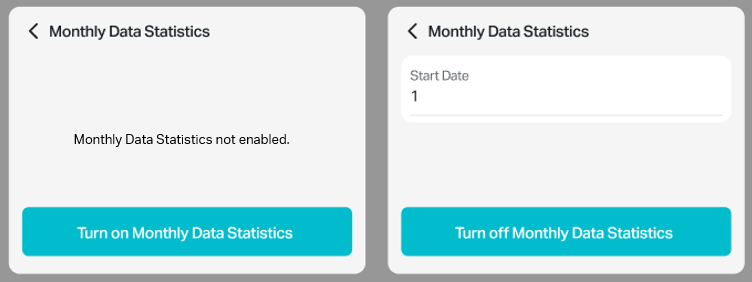
- You can set limit for total data usage or monthly data usage.
- To set limit for total data usage, make sure Monthly Data Statistics is Off. Then tap Data Limit to turn it on and set Total Allowance and the Usage Alert data percentage. Tap Save. You will be notified when the data usage exceeds the percentage you set.
- To set limit for monthly data usage, tap Monthly Data Statistics to turn it on and specify the Start Date. Tap Save. Then tap Data Limit to turn it on and set Monthly Allowance and the Usage Alert data percentage. Tap Save. You will be notified when the data usage exceeds the percentage you set.
Chap 2. Customize Your Internet Settings
This chapter explains how to manage the internet settings of your Mobile Wi-Fi on the Screen. This chapter uses M8550 as an example for illustration. Your actual product and interface may differ from those depicted here.
2.1 Check the Internet Status
You can view the current upload rate, download rate and your internet service provider of your Mobile Wi-Fi on Internet section of the home page.
Note: You can also go to Settings > Internet.
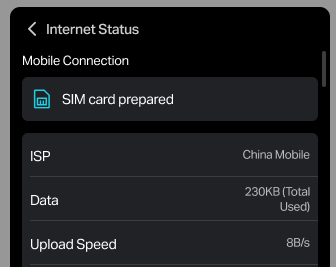
To check the internet status in detail:
- Go to Internet > Internet Status.

- Tap to check the SIM card mobile connection, IPv4 and IPv6 connection details as needed.
2.2 Enable or Disable Mobile Data
With Mobile Data (also known as cellular data) enabled, devices connected to the Mobile Wi-Fi can access the internet. This feature is enabled by default.
- Tap Internet on the home page.
Note: You can also go to Settings > Internet.
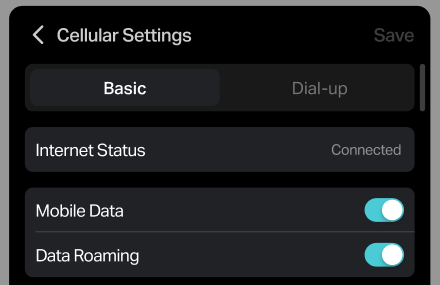
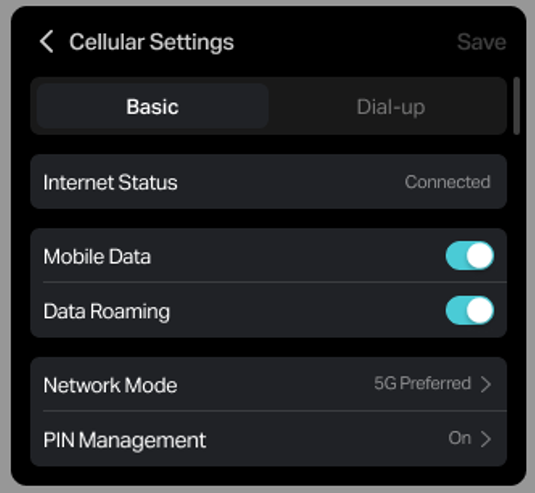
- Tap Cellular Settings.
- Focus the Basic tab. Toggle on to enable or disable Mobile Data.
- The Internet Status will become Connected/Disconnected when mobile data is enabled/disabled.

2.3 Enable or Disable Data Roaming
If you are out of the network service area, you can use this feature as needed.
- Tap Internet on the home page.
Note: You can also go to Settings > Internet.
- Tap Cellular Settings.
- Focus the Basic tab. Toggle on to enable or disable Data Roaming.
2.4 Specify Network Mode
This Mobile Wi-Fi supports three modes of network connection: 5G Preferred, 5G Only and 4G Only. If your SIM card supports FDD-LTE or TDD-LTE, select 4G Only; if your SIM card supports 5G NR or 5G SA, you can select 5G Preferred or 5G Only as needed. In general, the 5G network is faster than the 4G one. Tap Internet on the home page.
- Tap Internet on the home page.
Note: You can also go to Settings > Internet.
- Tap Cellular Settings.
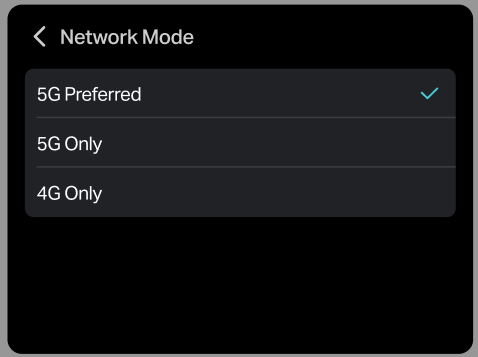
- Focus the Basic tab. Tap Network Mode.
- Select 5G Preferred, 5G Only, or 4G Only as needed.
Note: When selecting 5G Only, please make sure 5G SA networks are supported in your area. Otherwise, please select 5G Preferred mode to ensure normal connection.
2.5 Use PIN Management Feature to Lock the SIM Card
This feature allows you to lock your SIM card with the PIN lock. Once the PIN lock is enabled, every time you start your Mobile Wi-Fi with your SIM card inserted, you need to enter the PIN code to access the internet.
- Tap Internet on the home page.
Note: You can also go to Settings > Internet.
- Tap Cellular Settings.
- Focus the Basic tab. Tap PIN Management.
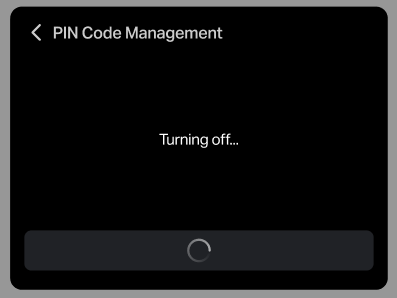
- Tap to turn on PIN management and enter the correct PIN code of your SIM card. Tap Done.
- To disable PIN management code, tap the Turn off PIN Code button.
2.6 Configure the Dial-up Settings
If you are in a location beyond your mobile carrier’s service area, you may need to configure the dial-up settings to access the internet provided by a local mobile carrier.
- Tap Internet on the home page.
Note: You can also go to Settings > Internet.
- Tap Cellular Settings.
- Focus the Dial-up tab. You can view the dial-up details of the current profile.
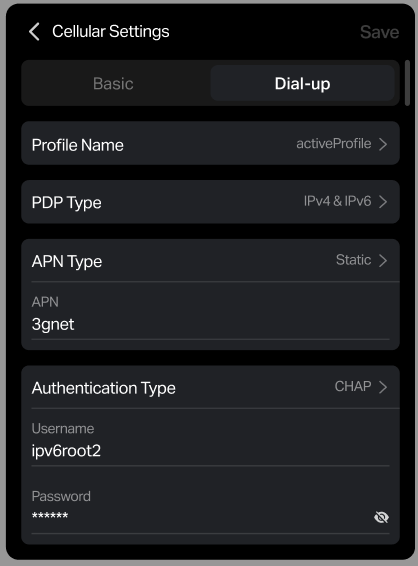
- To change a profile, tap Profile Name, and select a Profile Name on the list.
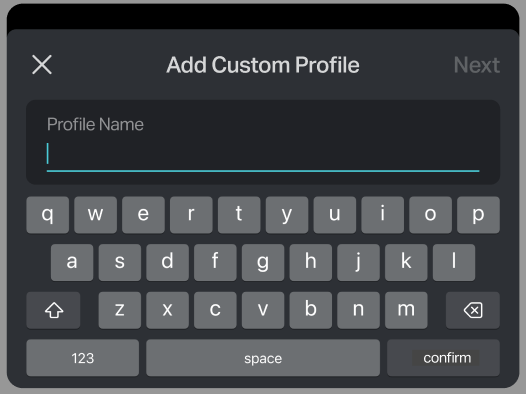
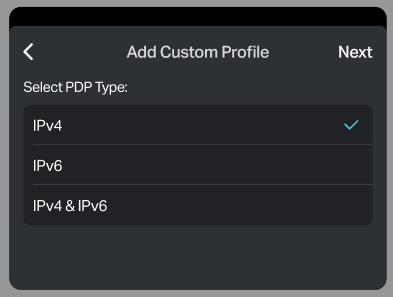
- To create a new dial-up profile, tap Add Custom Profile to enter a profile name, tap Next to select the PDP Type (IPv4, IPv6, IPv4&IPv6), APN Type (Static, Dynamic), Authentication Type (PAP, CHAP, None). Enter the username if needed. Click Finish.
2.7 Change the Internet Access Mode
This feature allows the mobile Wi-Fi device to connect to the internet using either a cellular network or an Ethernet connection. When set to Ethernet, the device can function as an access point, distributing internet access from a wired connection to connected devices.
1. Tap Internet on the home page.
Note: You can also go to Settings > Internet.
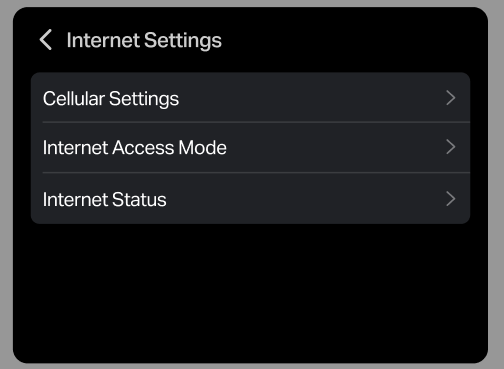
2. Tap Internet Access Mode.
3. Select Cellular or Ethernet as needed.
Note: In Cellular mode, the LAN port is disabled to save power. When set to Ethernet, the device can function as an access point, distributing internet access from a wired connection to connected devices. In Ethernet mode, if Ethernet connection is disconnected, Cellular will automatically active as a backup.
4. Tap Save.
Chap 3. Customize Your Wi-Fi Settings
This chapter explains how to customize the Wi-Fi settings of your Mobile Wi-Fi on the Screen. It explains how to share the network name and password, enable or disable Wi-Fi, specify the Wi-Fi band, adjust Wi-Fi power settings, and configure Wi-Fi sleep settings. These functions help optimize the device's performance and energy efficiency. This chapter uses M8550 as an example for illustration. Your actual product and interface may differ from those depicted here.
3.1 Share or Change the Network name and Password
You can view the current network name and password, and share the network to more devices.
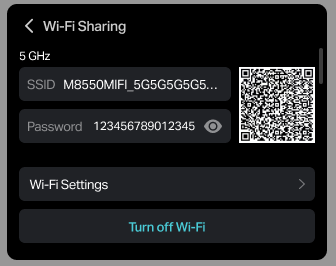
- Tap the Wi-Fi icon (Wi-Fi Sharing) on the home page.
- You can use the SSID/Password or QR code shown on the screen to connect more devices to your Mobile Wi-Fi.

To change the network name and password:
- go to Settings > Wi-Fi.
Note: You can also go to Settings > Wi-Fi.
- Tap and enter the SSID (Network name) or Password you want to set and click Save.
3.2 Enable or Disable Wi-Fi
To turn off Wi-Fi:
- When Wi-Fi is on, tap the Wi-Fi icon (Wi-Fi Sharing) on the home page.
- Scroll to the bottom and tap the Turn off Wi-Fi Button.
To turn on Wi-Fi:
- When Wi-Fi is off, Tap the Wi-Fi icon (Turn on Wi-Fi) on the home page.
- Wait a few second. You can view the SSID/Password or QR code shown on the screen and use it to connect more devices to your Mobile Wi-Fi.
3.3 Specify Wi-Fi Band
This Mobile Wi-Fi supports 2.4GHz, 5GHz and 6GHz wireless bands. In general, the 5GHz and 6GHz band performs better, but covers a smaller area.
- Tap the Wi-Fi icon (Wi-Fi Sharing) on the home page. Then tap Wi-Fi Settings > Advanced.
Note: You can also go to Setting > Wi-Fi > Advanced.
- Tap Wi-Fi Band and select 2.4GHz, 5GHz, 6GHz or a combination as needed.
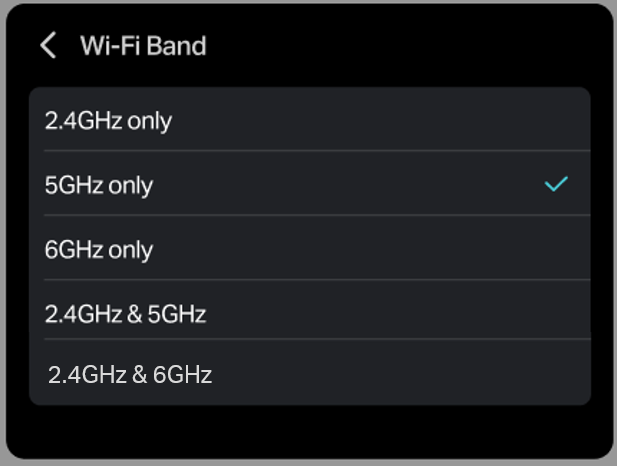
Note: If you have specified 5GHz/6GHz Only, devices that only support 2.4GHz can’t connect to the Mobile Wi-Fi.
3.4 Change the Wi-Fi Power to Save Power
The higher Wi-Fi Power, the greater power consumption. Generally, the Standard mode offers stronger signals and faster speeds but consumes more power, while the Balanced mode strikes a balance between performance and battery life, making it more energy-efficient. Balanced mode is better for extending battery usage.
- Tap the Wi-Fi icon (Wi-Fi Sharing) on the home page. Then tap Wi-Fi Settings > Advanced.
Note: You can also go to Setting > Wi-Fi > Advanced.
- Tap Wi-Fi Power and select Standard or Balanced as needed.
Note: You can select Boost in AC Power Mode for even higher Wi-Fi power.
- Tap Save.
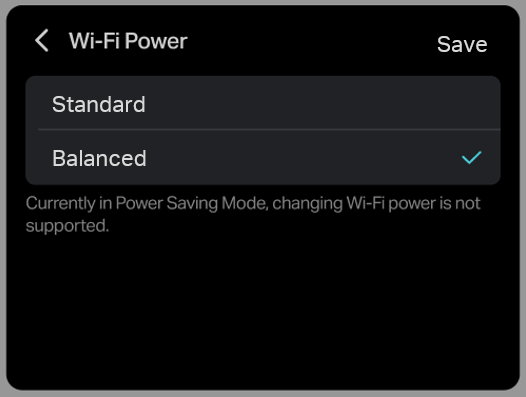
Note: Power Saving Mode does not support changing Wi-Fi Power and Sleep Time. Follow instructions of turn off Power Saving Mode first.
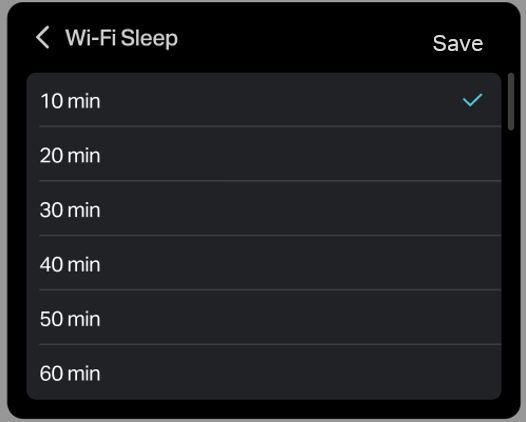
3.5 Specify Wi-Fi Sleep Settings
By default, the Mobile Wi-Fi will turn off the Wi-Fi connection if no wireless devices are connected to the Mobile Wi-Fi for 10 minutes.
- Tap the Wi-Fi icon (Wi-Fi Sharing) on the home page. Then tap Wi-Fi Settings > Advanced.
Note: You can also go to Setting > Wi-Fi > Advanced.
- Tap Wi-Fi Sleep and select a sleep time or select Never as needed. Tap Save.
Note: Power Saving Mode does not support changing Wi-Fi Power and Sleep Time. Follow instructions of turn off Power Saving Mode first.
Chap 4. Manage Your Client Devices
This chapter discusses how to manage connected devices on your Mobile Wi-Fi. It details how to view the number of clients, monitor their download and upload rates, and manage their access by blocking or unblocking devices. These features enhance control over network usage and security. This chapter uses M8550 as an example for illustration. Your actual product and interface may differ from those depicted here.
4.1 View or Block Unwelcome Client Devices
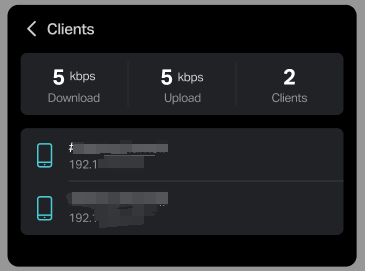
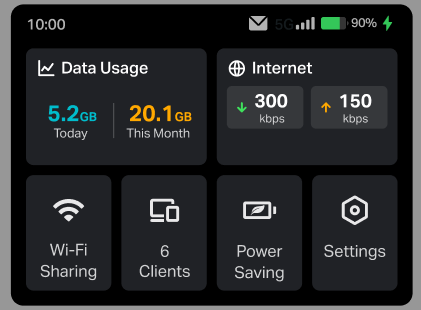
You can view the number of devices connecting to your mobile Wi-Fi on the home page.
- To view details of the clients, tap the Clients icon on the homepage. You can see the download and upload rate of the clients and the clients’ IP address and name.
Note: You can also go to Settings > Clients.
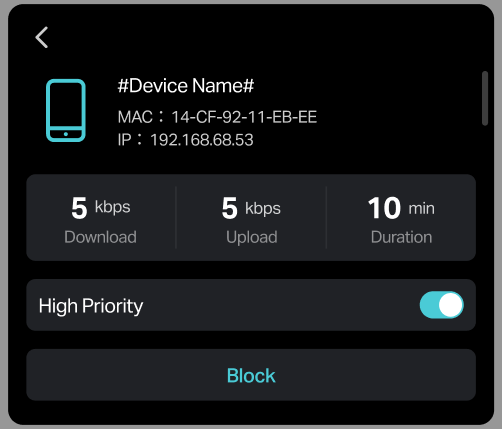
- Tap a client device you want to manage to check its download and upload rate, connecting duration.
- If you want to block this device, tap Block.
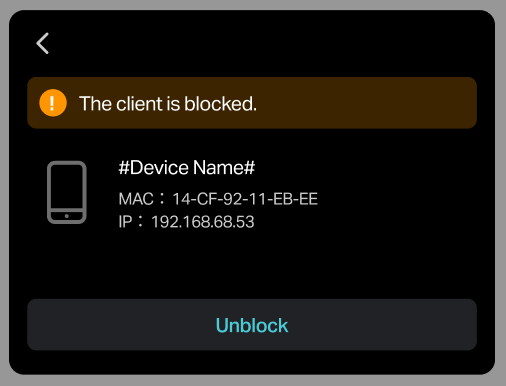
4.2 Unblock Client Devices
- Tap the Clients icon on the homepage. You can view the blocked devices list.
Note: You can also go to Settings > Clients.

- To unblock a device, tap the device and tap Unblock.
Chap 5. Manage Your Mobile Wi-Fi
This chapter introduce the device and system settings of the mobile Wi-Fi. It includes instructions for enabling power-saving modes, using AC power, managing SMS, adjusting screen settings, updating firmware, and rebooting or resetting the mobile Wi-Fi. This chapter uses M8550 as an example for illustration. Your actual product and interface may differ from those depicted here.
5.1 Enable the Power Saving Mode
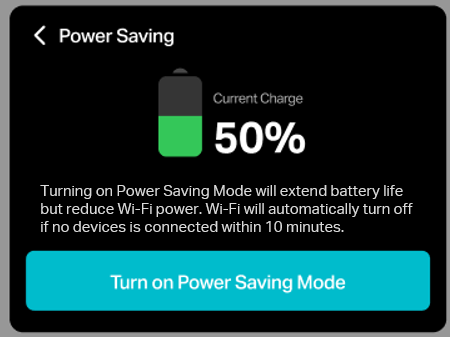
The Power Saving feature allows you to slow down the power consumption of your Mobile Wi-Fi. Turning on Power Saving Mode will extend battery life but reduce Wi-Fi power and disable the LAN Port. Wi-Fi will automatically turn off if no devices are connected within 10 minutes. By default, Power Saving is disabled.
Note: The actual Wi-Fi sleep time may differ between product models.
You can check the device battery level in the status bar at the top of the home page.
- Tap the Battery icon (Power Saving) on the homepage. Or, go to Settings > Power Saving Mode. You can view the power saving status.
- To enable power saving, tap the Turn on Power Saving Mode button.
Note: The actual Wi-Fi sleep time may differ between product models.
- To disable power saving, tap the Turn off Power Saving Mode button.
5.2 Use AC Power
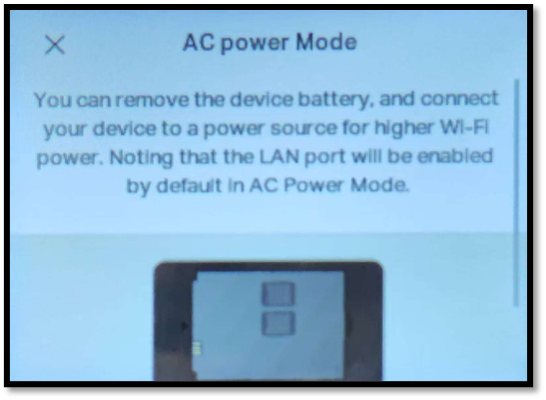
The mobile Wi-Fi supports Alternating Current Power. You can remove the battery and connect it to a power source for higher Wi-Fi Power.
Note: The Wi-Fi power will be automatically set to the highest level (Boost) in AC Power Mode.
Note: The LAN port will be enabled by default in AC Power mode.
AC Power refers to the type of electrical power supplied by wall outlets, allowing the Mobile Wi-Fi device to operate continuously without relying solely on battery power. This feature is useful for extended use in stationary settings.
To know more about AC Power Mode:
- Tap the Battery icon (Power Saving) on the homepage. Or, go to Settings > Power Saving Mode. You can view the power saving status.
- Scroll to the bottom, and tap Switch to AC Power for further guidance.
5.3 Airplane Mode
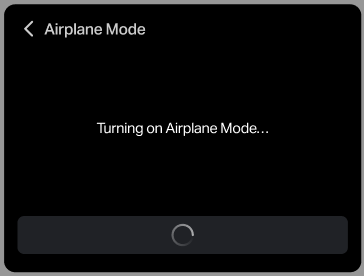
Airplane mode disables all wireless communications, turning off both Wi-Fi and cellular networks. This feature is essential for preventing interference with aircraft systems during flights.
To turn on or off Airplane mode:
Pull down the notification shade from the top edge of the screen and tap the Airplane icon to turn it blue to activate airplane mode.

- Or, go to Settings > Airplane Mode.
- Tap the button to enable or disable airplane mode.
5.4 Manage SMS Inbox and Outbox
The SMS feature allows users to manage their messages when a SIM card is inserted. You can check or delete the messages in the inbox and outbox.
Note: Sending new messages is not supported using the screen, please go to web management page or Tether app.
To manage SMS inbox:
- Pull down the notification shade from the top edge of the screen and tap the Envelope icon. Or you can go to Settings > SMS Inbox.
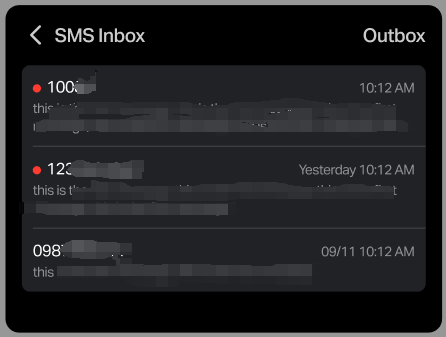
- Tap the sender's number you want to view to check the messages details.
- To delete a message, tap the Delete icon in the lower right corner.

To manage SMS outbox:
- Pull down the notification shade from the top edge of the screen and tap the Envelope icon. Or you can go to Settings > SMS Inbox.
- Tap Outbox in the top right corner.
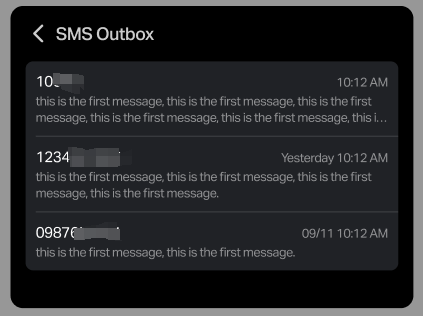
- Tap the receiver’s number you want to view to check the messages details.
- To delete a message, tap the Delete icon in the lower right corner.
5.5 Enable LAN Port to Build Cable Connection
Enabling the LAN port allows users to connect the mobile Wi-Fi to share network to devices like computers and gaming controllers via a wired connection.
Note: The LAN port will be automatically disabled to save power if no network cable connection is detected within 3 minutes. It is recommended to disable it if no wired clients connected.
- Go to Settings > Device Settings > Port Status.
- Toggle on to enable LAN Port.
- Select a port transmit rate.
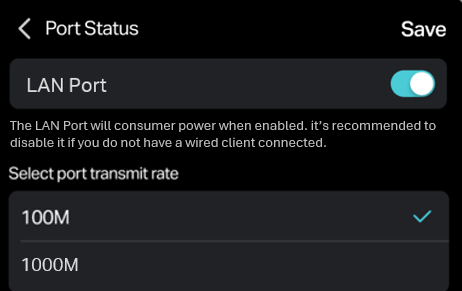
- Tap Save. The port status will become On. You can connect a wired device to the LAN port of the mobile Wi-Fi via an ethernet cable.
5.6 Use External Antennas
The mobile Wi-Fi features internal antennas as well as antenna ports that allows for the installation of an external antenna as needed. Please follow the steps below to switch to Internal or External according to your antenna type:
- Go to Settings > Device Settings > Antennas.
- Select External if you need to use an external antenna; otherwise, select Internal.
- Tap Save.
5.7 Adjust the Screen Brightness
Pull down the notification shade from the top edge of the screen and adjust the brightness slider.
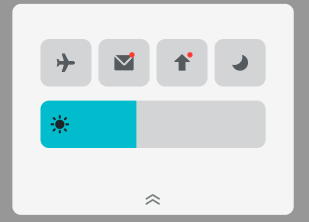
Or, go to Settings > Device Settings > Screen Brightness.
5.8 Screen Sleep
Screen Sleep is a feature that automatically turns off the display after a specified period of inactivity. This helps conserve battery life and prevents screen burn-in.
- Go to Settings > Device Settings > Screen Sleep.

- Select a time period or select Never.
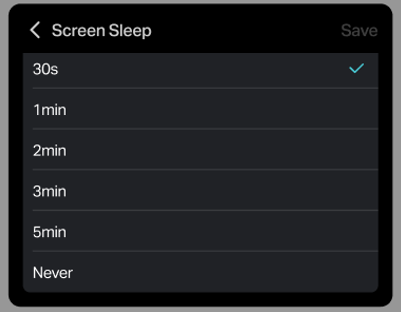
- Tap Save.
5.9 Touchscreen Lock
Turning on Touchscreen Lock can make sure that only users your authorized can access to the mobile Wi-Fi.
Turn on touchscreen lock:
- Go to Settings > Device Settings > Touchscreen Lock.

- Tap the button to turn on the touchscreen Lock.
- Specify a Touchscreen Lock passcode. Enter it again for verification.
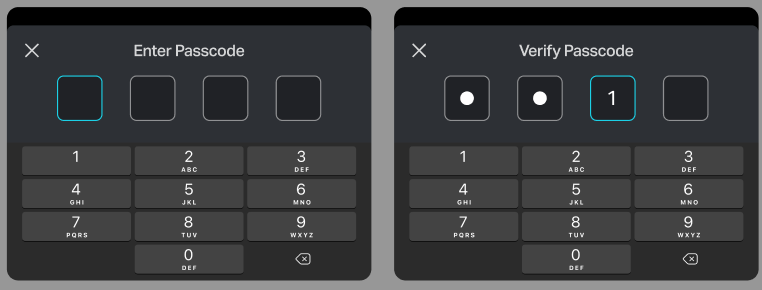
Change the touchscreen lock passcode:
- When touchscreen lock is enabled, go to Settings > Device Settings > Touchscreen Lock.
- Tap Change Passcode.
- Specify a new passcode. Enter it again for verification.
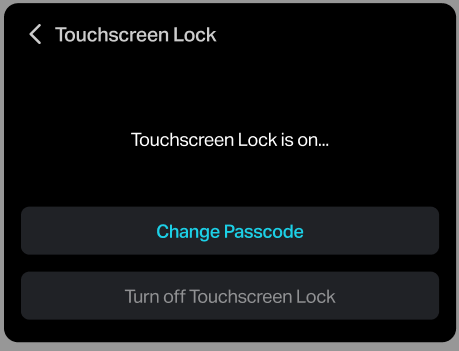
Turn off touchscreen lock:
- Go to Settings > Device Settings > Touchscreen Lock.
- Tap the button to turn off the touchscreen Lock.
5.10 Set System Time and Language
To synchronize the system time via internet:
- Go to Settings > System Settings > System Time > Set Time.
- Select Sync via the Internet.
- Tap Time Zone to select your time zone.
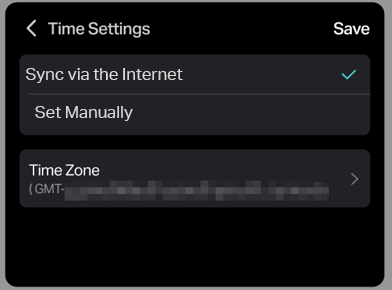
- Tap Save.
To synchronize the system time manually:
- Go to Settings > System Settings > System Time > Set Time.
- Select Set Time Manually.
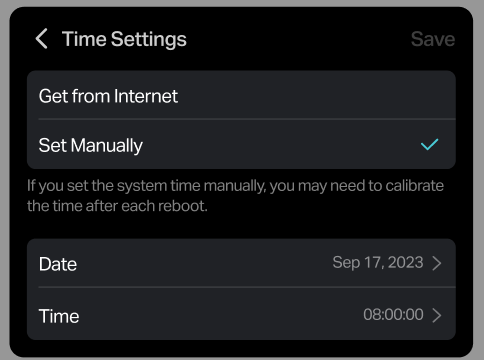
- Tap Date to specify the date.
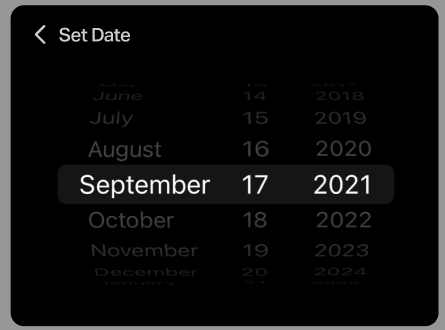
- Go back and tap Time to specify the current time.
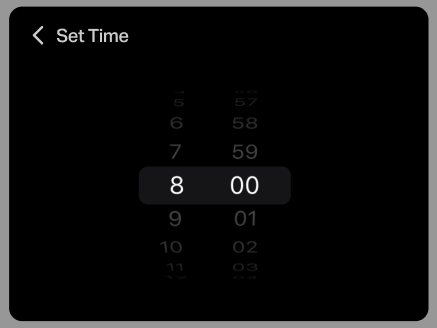
- Tap Save.
To set Daylight Saving Time:
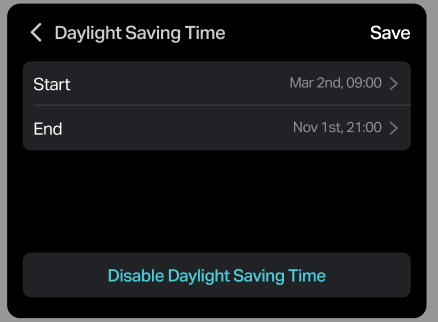
- Go to Settings > System Settings > System Time > Daylight Saving Time.
- Tap the button to enable.
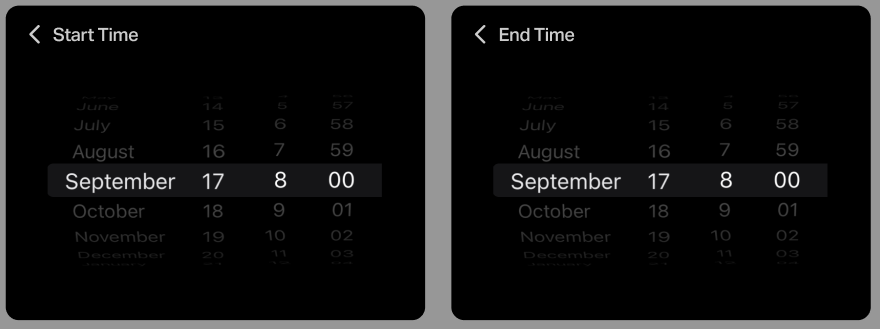
- Select the correct Start date and time when daylight saving time starts at your local time zone.
- Select the correct End date and time when daylight saving time ends at your local time zone.
- Tap Save.
To disable Daylight Saving Time:
- When Daylight Saving Time is enabled, go to Settings > System Settings > System Time > Daylight Saving Time.
- Tap the button to disable.
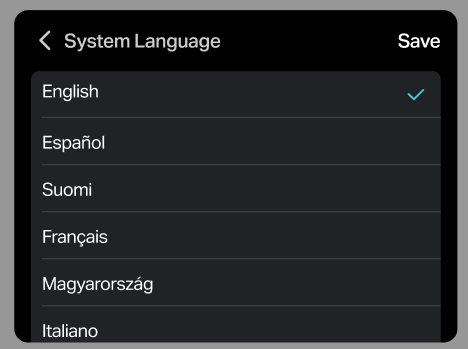
To set system language:
- Go to Settings > System Settings > System Language.
- Select a language from the list.
- Tap Save.
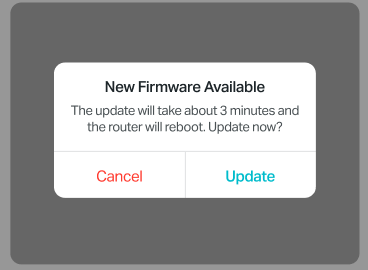
5.11 Update the Firmware
TP-Link aims at providing better network experience for users. Firmware Update allows you to keeping your mobile Wi-Fi up-to-date to ensure optimal performance, enhanced security, and access to new features.
We will inform you through the web management page if there’s any new firmware available for your router. Also, the latest firmware will be released at the TP-Link official website
https://www.tp-link.com/support/download/, and you can download it from the Support page for free.
- Pull down the notification shade from the top edge of the screen and tap the Upward Arrow icon. Or go to Settings > System Settings > Firmware Upgrade.

- Follow instructions to upgrade the firmware.
5.12 Dark Mode
Dark Mode is a visual theme that uses a dark background and light text, helping to reduce eye strain and improve visibility in low-light conditions.
To turn on or off Dard Mode, pull down the notification shade from the top edge of the screen and tap the Moon icon.
5.13 Reboot or Reset the Mobile Wi-Fi
To reboot the Mobile Wi-Fi:
- Long press the Power Button on your Mobile Wi-Fi.
- Tap Reboot.
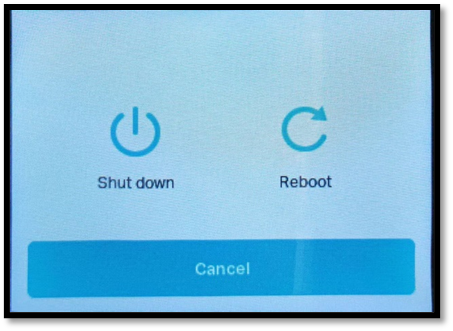
To power off the Mobile Wi-Fi:
- Long press the Power Button on your Mobile Wi-Fi.
- Tap Shut down.
You can also go to Settings > System Settings > Power off.
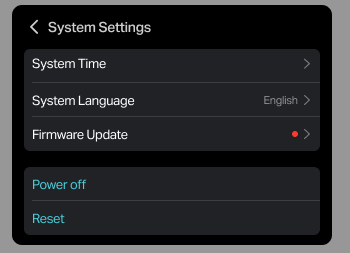
To reset the Mobile Wi-Fi to the default factory settings:
- go to Settings > System Settings > Reset.
Note: You can also use the physical Reset button of your device to reset your mobile Wi-Fi. Please refer to the user guide of your product model.