How to Reset Your Kasa Camera and Doorbell Using the Button or App
Knowing how to reset a Kasa camera can help when your camera is not connecting, experiencing issues, or being moved to a new network. This includes Kasa video doorbells. This guide covers two methods: using the physical reset button on the camera and removing the camera through the Kasa Smart app. Both methods will remove the camera from your TP-Link account and restore it to factory default settings.
Key Takeaways
- There are two ways to reset a Kasa camera: using the physical reset button on the camera or removing the camera through the Kasa Smart app.
- For most Kasa camera types, press and hold the reset button for at least 15 seconds until the LED blinks amber quickly. The camera will then reset and reboot.
- Resetting via the Kasa Smart app will remove the camera from your TP-Link account and restore it to factory default settings.
- The reset button location varies by camera type. Consult the relevant section below to find the reset button location for your specific model.
- If the camera cannot be reset, make sure it is powered on, wait 10 minutes without operating it, and then try again.
Method 1: Reset Your Kasa Camera or Doorbell Using the Reset Button
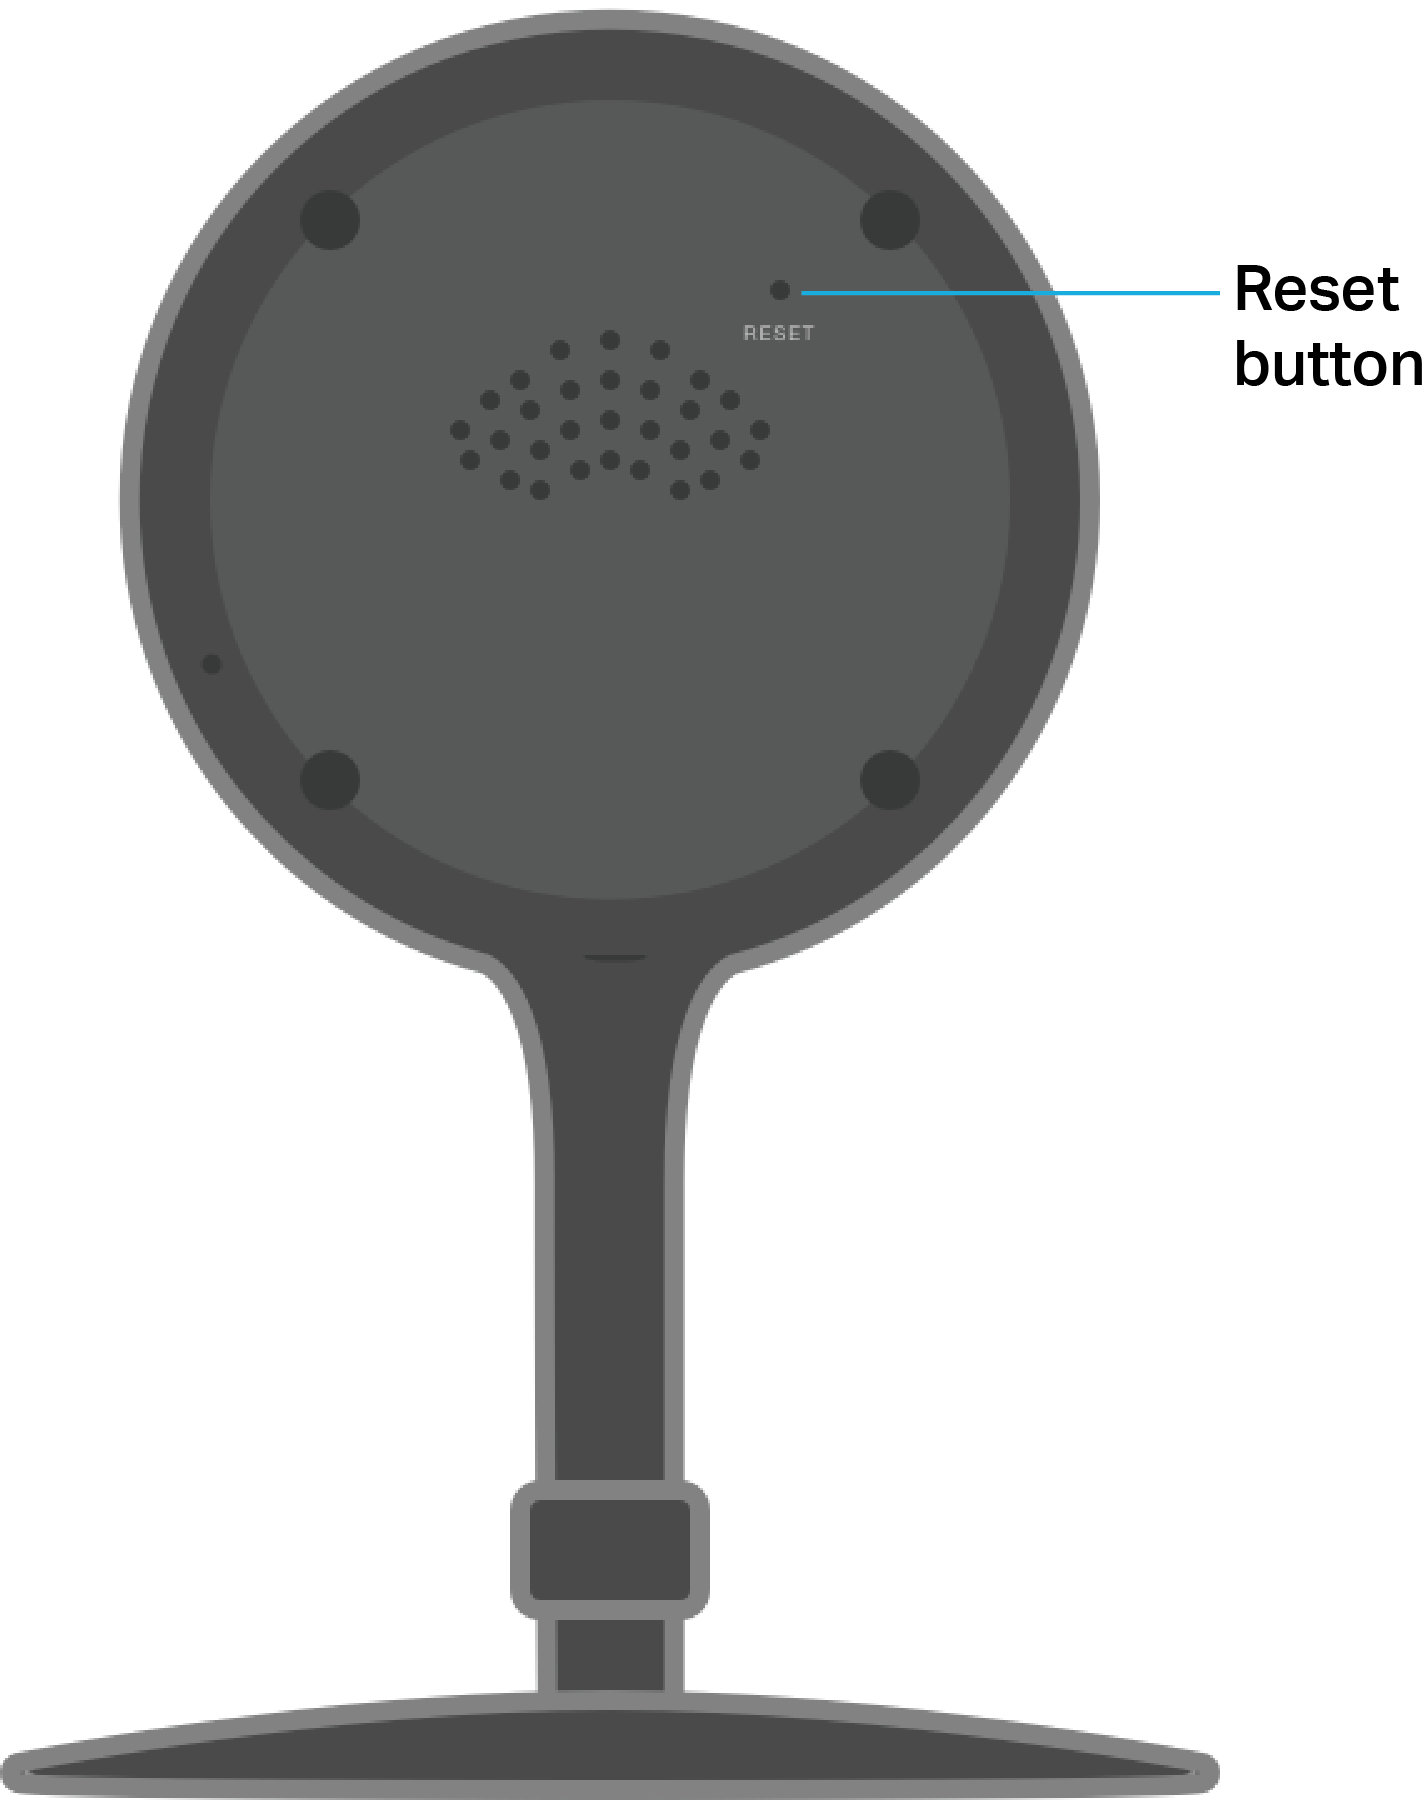
Type 1: For Security Camera 1
While the camera is powered on, press and hold the Reset button for at least 15 seconds until the LED blinks amber quickly. The camera will reset and reboot.
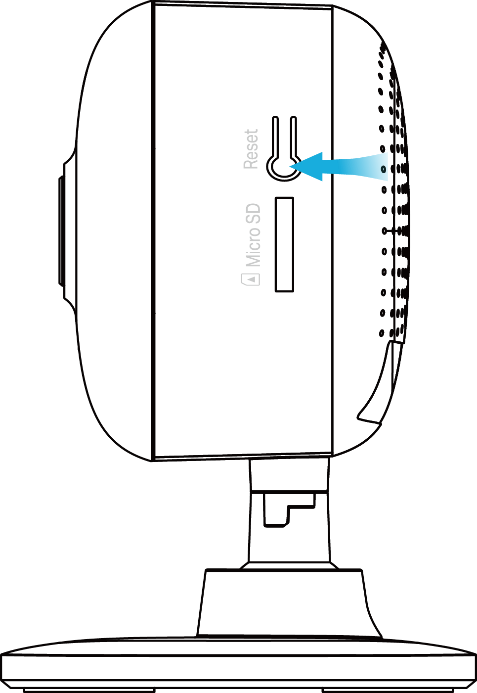
Type 2: For Security Camera 2
Remove the magnetic housing on the back of the camera first, then you can find the RESET button. While the camera is powered on, press and hold the RESET button for at least 15 seconds until the LED blinks amber quickly. The camera will reset and reboot.
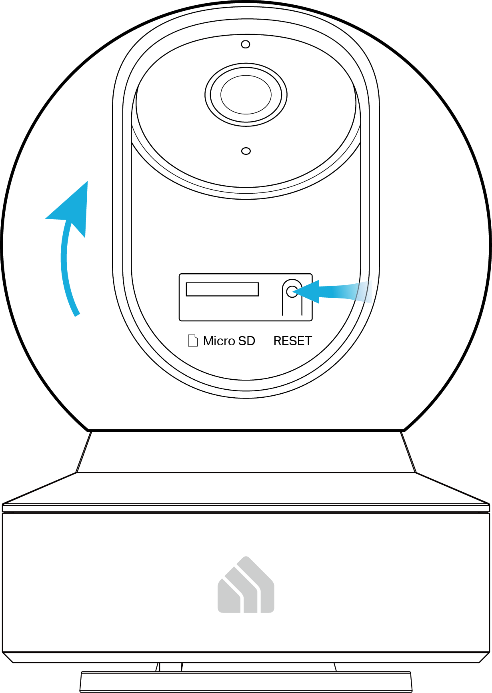
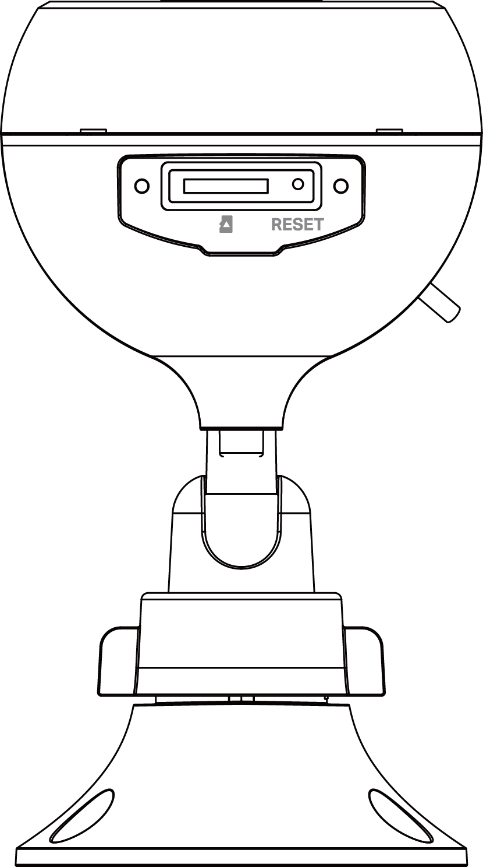
Type 3: For Pan and Tilt Security Camera
While the camera is powered on, tilt the camera lens up, then press and hold the RESET button for at least 15 seconds until the LED blinks amber quickly. The camera will reset and reboot.
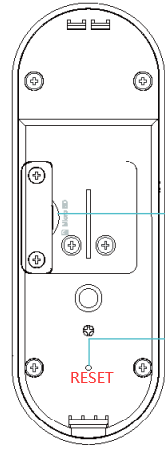
Type 4: For Wired-Outdoor Security Camera-1
1. Loosen the screws on the back panel and remove the cover.
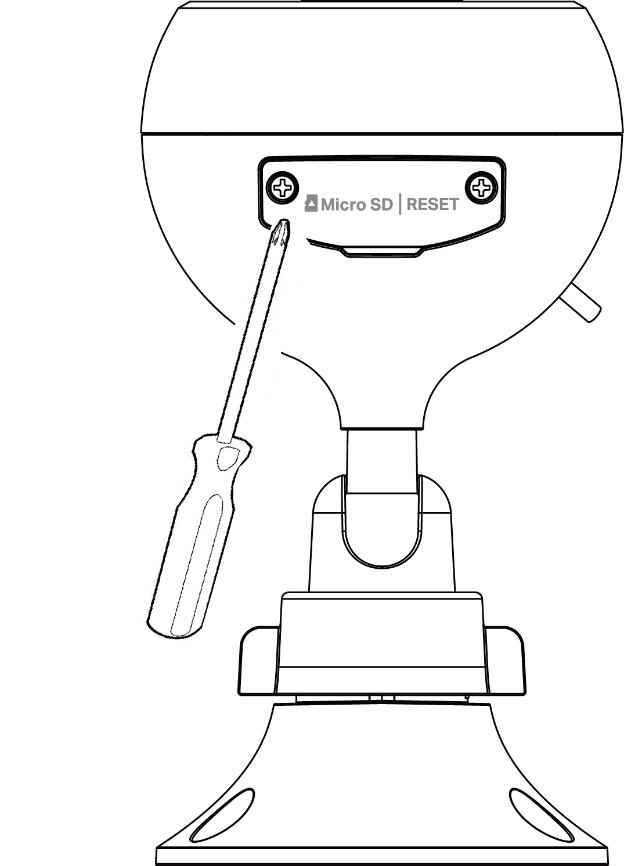
2. Press and hold the RESET button for at least 15 seconds until the LED blinks amber quickly.

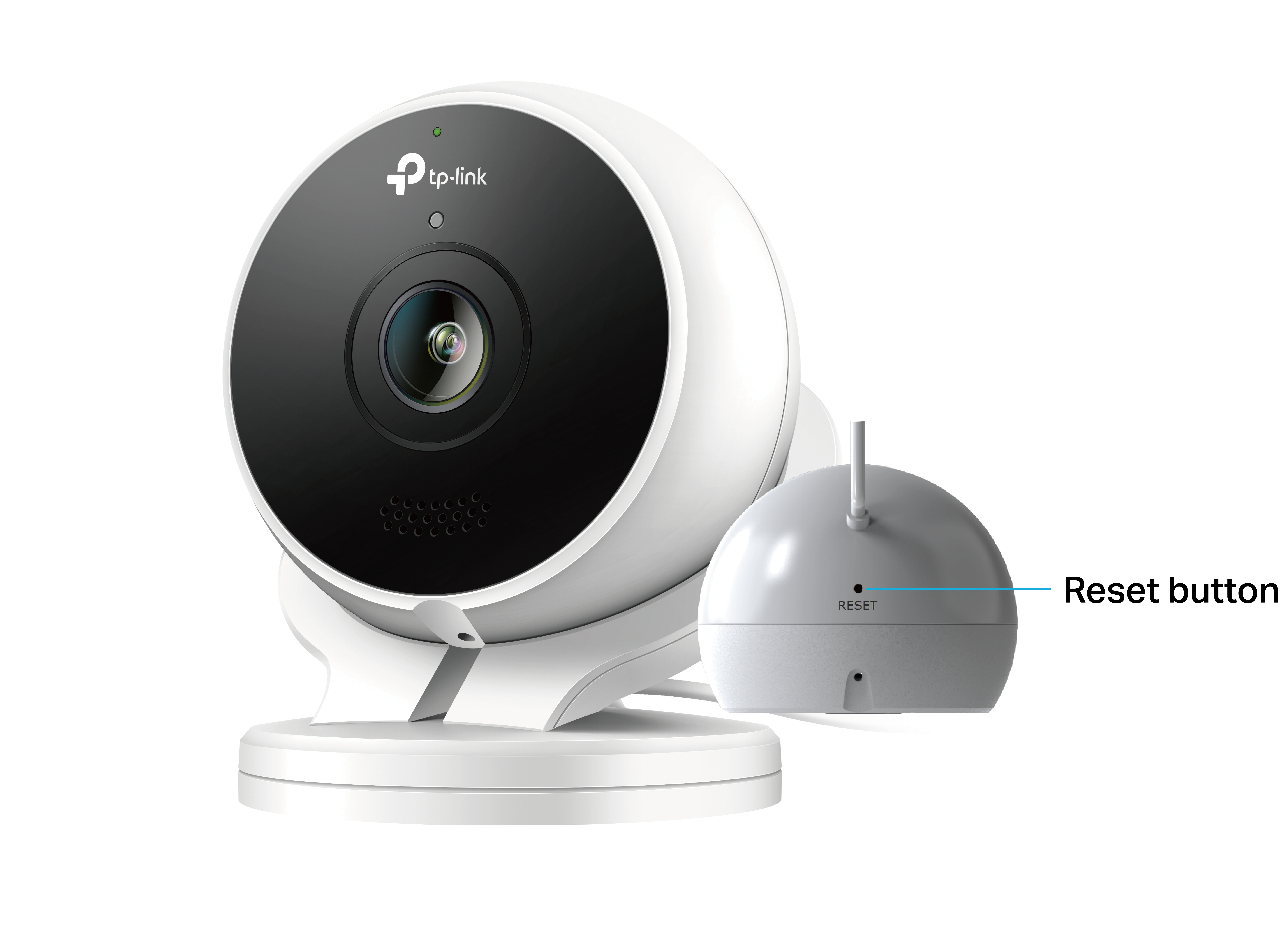
Type 5: For Wired-Outdoor Security Camera-2
1. Remove the magnetic mount first. And the RESET button is on the bottom of the camera, near the power USB cable.
2. Press and hold the RESET button for at least 15 seconds until the LED blinks amber quickly.
Type 6: For Wire-Free Outdoor Security Camera-1
While the camera is powered on, press and hold the SYNC button on the back of the camera for at least 15 seconds until the LED blinks amber quickly. The camera will reset and reboot.

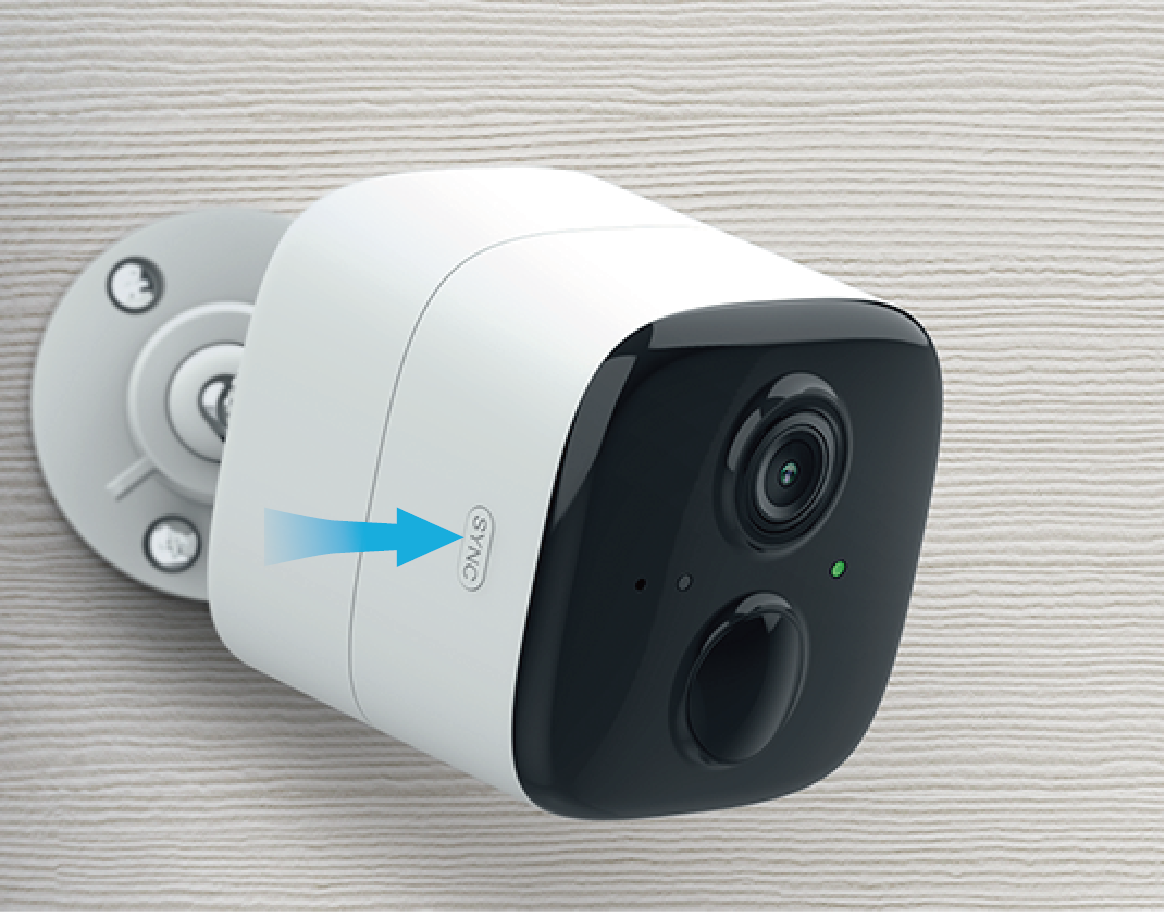
Type 7: For Wire-Free Outdoor Security Camera-2
While the camera is powered on, press and hold the SYNC button on the side of the camera for at least 15 seconds until the LED blinks amber quickly. The camera will reset and reboot.
Type 8: For Kasa Doorbell
Press and hold for 3s until the status LED blinks orange slowly to reset the Wi-Fi connection. Press and hold for 15s until the status LED blinks orange quickly to restore to factory default settings.
Method 2: Reset Your Kasa Camera or Doorbell Using the Kasa Smart App
Option 1: From the Home page
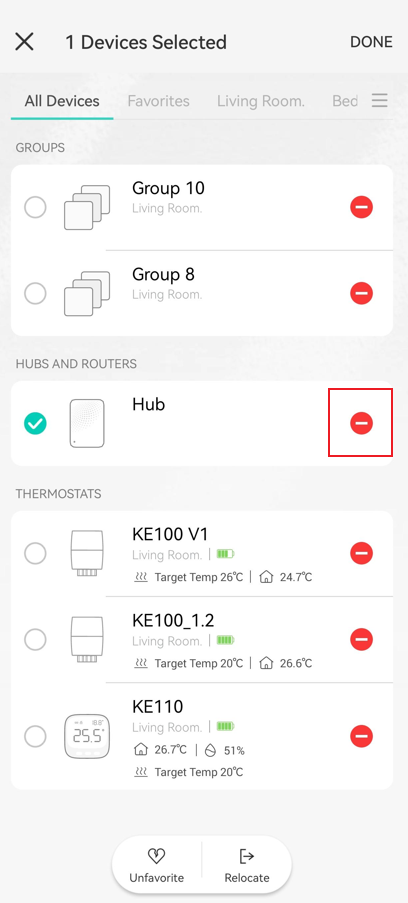
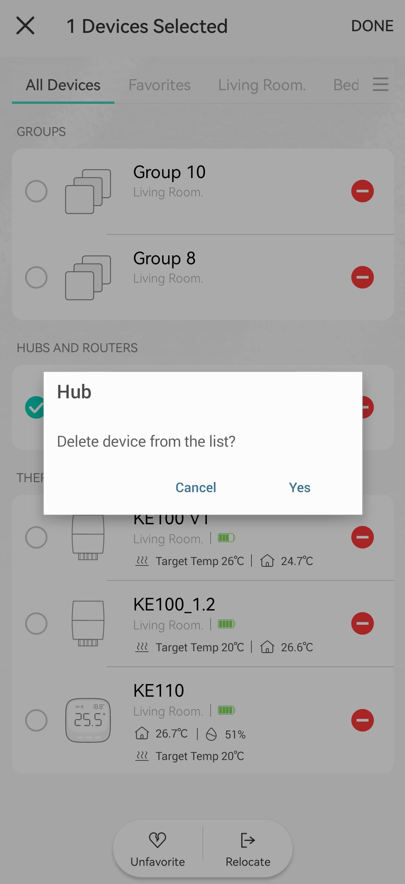
On the Kasa app Home page, long press the device card, then tap the minus icon and confirm deleting the device from the list. The device will be removed from your TP-Link account and reset to the default settings.
Option 2: From Device Settings page
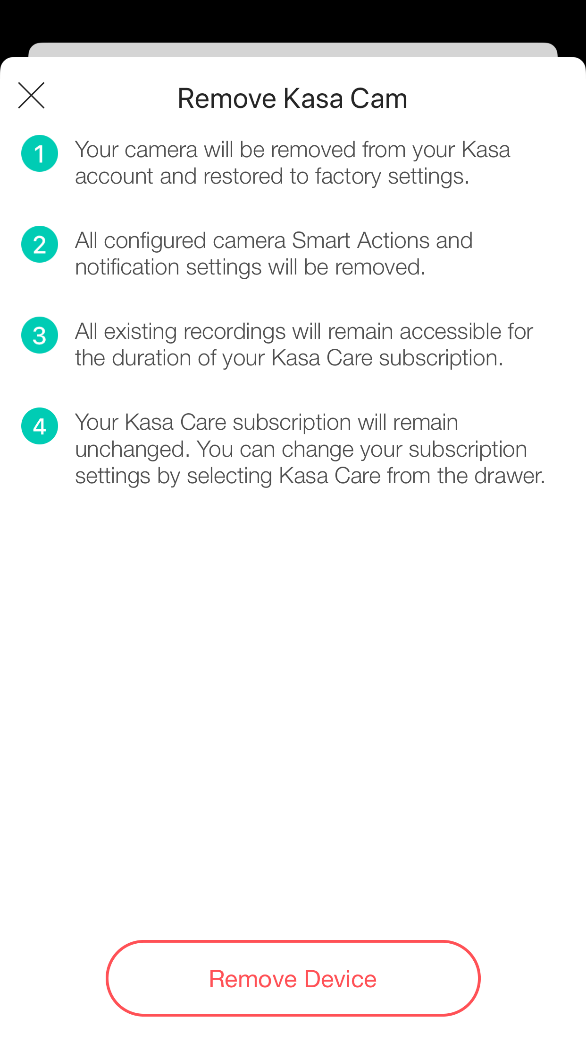
On the Kasa app Home page, tap the device card to enter the Live View page, then tap the gear icon in the top right to enter Device Settings page. Scroll down and tap Remove Device, then confirm. The device will be removed from your TP-Link account and reset to the default settings.

If you cannot reset your device successfully, please try the following steps:
- Make sure your device can be powered on
- Please do not operate after power-on, wait 10 minutes, and try to reset it again
If the issue is still the same, please contact TP-Link technical support.
Get to know more details of each function and configuration. Please go to the Download Center to download the manual for your product.
ค้นหาเพิ่มเติม
คำถามที่พบบ่อยนี้มีประโยชน์หรือไม่?
ความคิดเห็นของคุณช่วยปรับปรุงเว็บไซต์นี้
TP-Link Community
Still need help? Search for answers, ask questions, and get help from TP-Link experts and other users around the world.