How to setup and share a printer on your local network with the TD-W8968/8970/8980/9970,Archer D2/D5/D7/D9
This Article Applies to:
If your printer has Ethernet port or Wi-Fi function please ignore this article, and contact technical support of your printer's company.
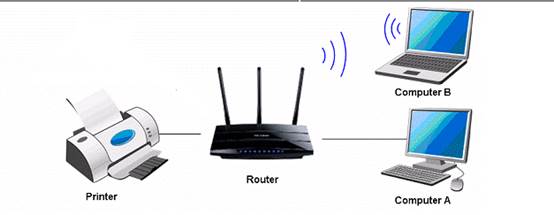
Definition: Print server is a function embedded in your Router. It allows you to share your printer with computers that are connected to the Router.
Preparation:
TP-Link Modem Router with USB port which supports print server function
USB printer and USB cable
Computer with Windows XP/ Windows Vista/ Windows 7/ Windows 8/ Windows 8.1/ Mac
Note:
Make sure you have already installed the printer’s driver on your computer. Otherwise, please install it first.
Any computer in your LAN must first install the software if it wants to share the print server via the Modem.
Print Server Function is not compatible with MAC and Linux systems since there is no Printer Controller Utility for MAC and Linux systems at the moment.
Installation - For Windows 7, Vista & XP,Windows 8
Step 1
Download the setup software TP-Link USB Printer Controller Utility from our website (http:www.tp-link.com):
Go to Download Center to download the utility of your product.
Step 2
Double-click TP-Link USB Printer Controller Setup.exe you’ve downloaded.
Step3
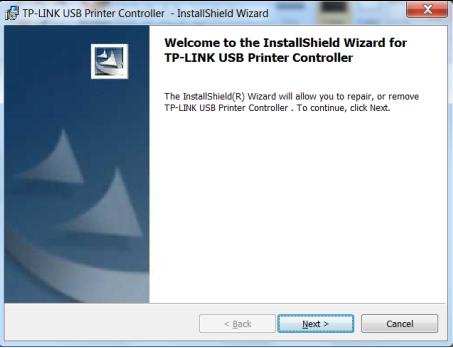
Click NEXT to start installing the printer share software.
Step 4
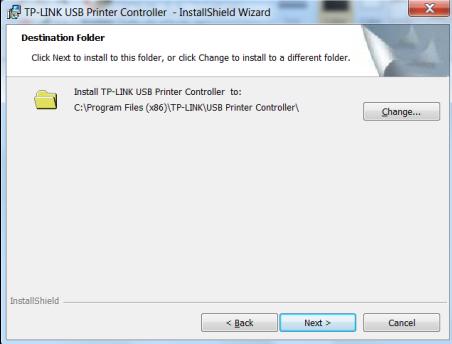
Click Change…to select another destination folder, or leave it default and click Next
.

Step 5
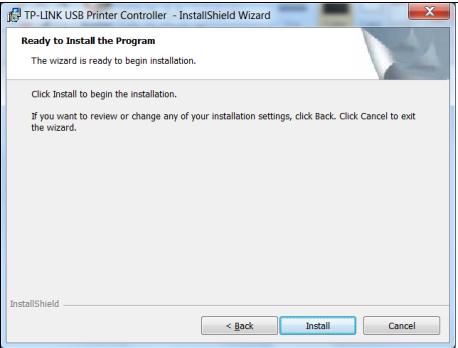
Click Install to begin the installation.
Step 6
Please wait a while, Click Finish to complete and exit the Install Shield Wizard.
Application -For Windows 7, Vista & XP ,Windows 8, Windows 8.1, Mac OS 10.6 to 10.10.
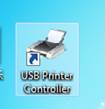
After successful installation, the icon will appear on the desktop of your computer.
Step 1
Double-click the icon To Launch the TP-Link USB Printer Controller
Step 2
Highlight the printer you want to set as auto-connect printer.
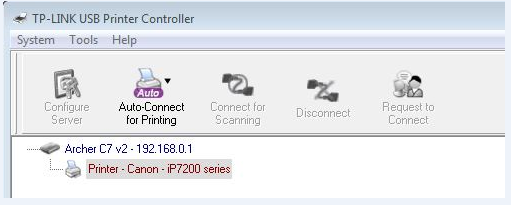
Step 3
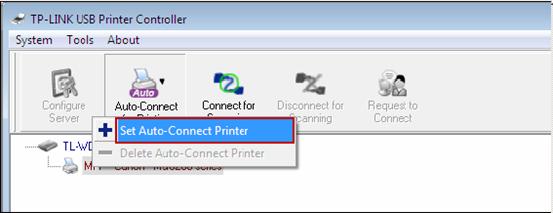
Click the inverse triangle mark on the Auto-Connect for printing tab to pull down the list, where you can select Set Auto-Connect Printer.
Step 4
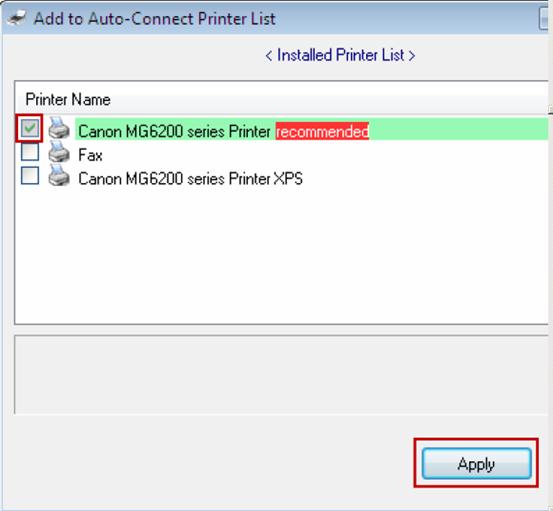
Tick the name of the printer you would like to set as auto-connect printer, and then click Apply.
After successful setting, you will see the printer marked as Auto-Connect Printer. You can execute your printing tasks automatically.
Step 5
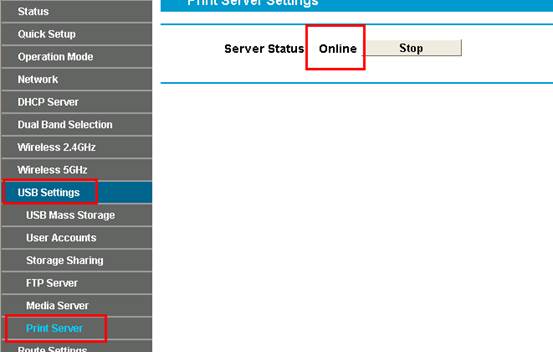
If it can not print,please log into the management page of the modem and make sure the Pinter Server Status is Online.
Is this faq useful?
Your feedback helps improve this site.
