How to install Print Server manually on MAC OS
Note: TL-PS110U is used for demonstration in this article.
System Information: Mac OS X EI, Version 10.11.5
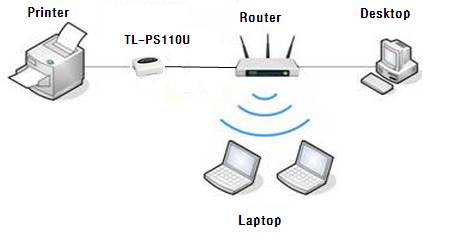
Below is a topology of normal network and taken as example in this guidance.
The Default IP of the print server is 192.168.0.10. Before doing the settings, please prepare the IP of the router. Normally, it’s the gateway of your computer.
In this guidance, 192.168.1.1 is assumed as the IP of the router. If your router’s IP is 192.168.0.x (x is between 1~254), you can skip to step 4.
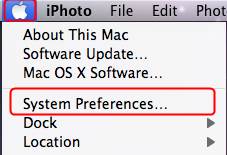
Step 1 Connect your MAC PC to the print server with an Ethernet cable directly. On your MAC PC, click Apple icon and go to System Preferences.
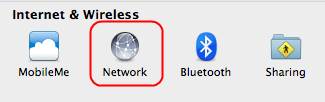
Then click Network.
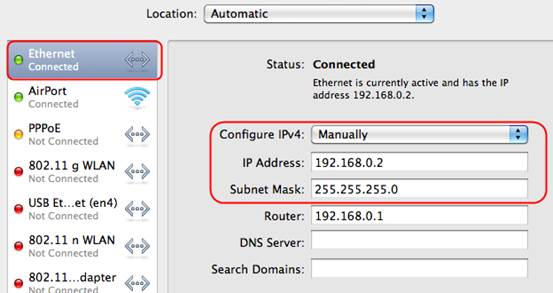
Step 2 Go to Ethernet, Advanced, select Manually on Configure IPv4 field and set the IP address & Subnet Mask like the following. Click Apply button.
Step 3 Open the Safari and type http://192.168.0.10 in the address bar. Then please go to Setup->TCP/IP page, change the IP to 192.168.1.10 and click Save & Restart button.
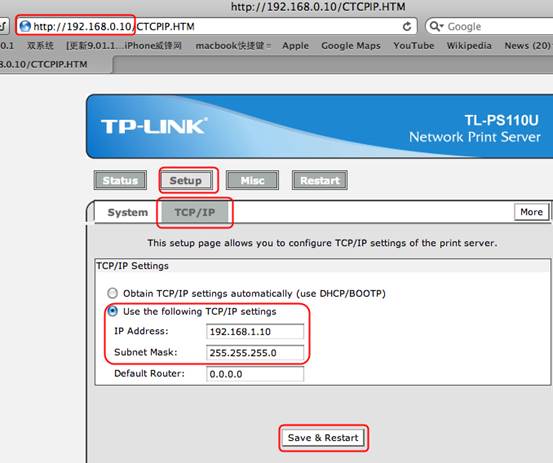
Note: The TL-PS110U is produced without password by default.
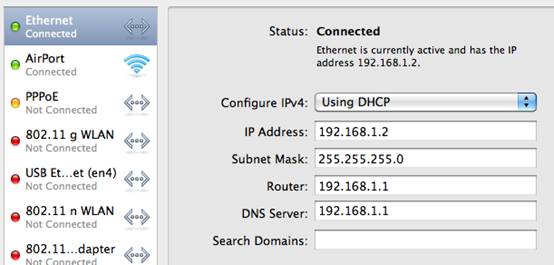
Step 4 Connect the printer to Print Server and Print Server to one LAN port of your router. Connect your MAC PC to your router with wire or wireless.
Click Apple icon, go to System Preferences->Network. Click Ethernet and select Configure IPv4 as Using DHCP. Then click Apply button.
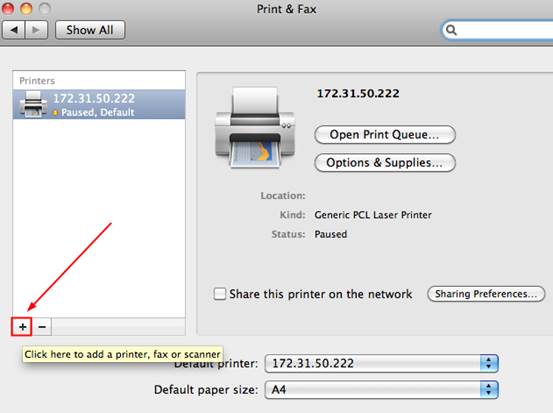
Step 5 Click Apple icon, go to System Preferences ->Printer & Scanner.

In the new window, please click “+” to add a printer.
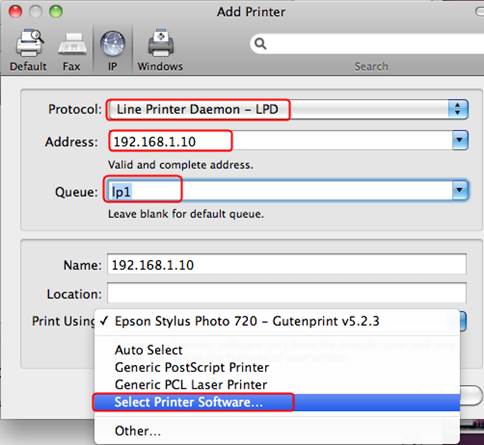
Step 6 Choose IP at the top bar and configure the options as the following:
- Protocol: Line Printer Daemon - LPD
- Address: 192.168.1.10 or 192.168.0.10 ( which depends on the IP of printer server)
- Queue: lp1
At last, select the driver of your printer and click Add to finish the process.
If can’t find the driver of your printer, please try Generic PostScript Printer / Generic PCL Laser Printer or Auto Select.
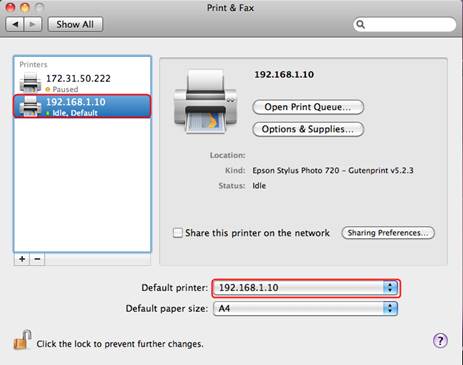
Step 7 Your printer will be displayed in the box. If you want to set it as default printer, please select it as the default printer.
Until now,all the configuration are finished.
Get to know more details of each function and configuration please go to Download Center to download the manual of your product.
Is this faq useful?
Your feedback helps improve this site.
