How to configure TL-WR802N TL-WR810N working on WISP Client Router Mode
Scenario
Here takes TL-WR802N as the example:
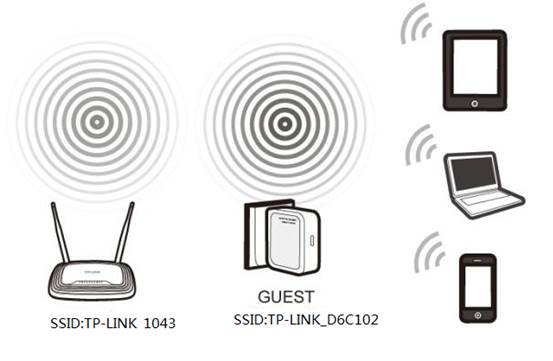
Definition: The TL-WR802N borrows existing wireless Internet and broadcasts it using a different network name (SSID) and password. This application can create two individual networks for two groups of users sharing one Internet.
Application: Small restaurant, shop, bar, home, office and others where Internet service needs to be provided for guests without revealing the password of the existing network for hosts.
Information of Root Router:
· LAN IP:192.168.0.1
· SSID:TP-LINK_1043
· Encryption Type:WPA2-PSK
· Passphrase:11111111
Configuration on WISP Client Router:
Step 1:
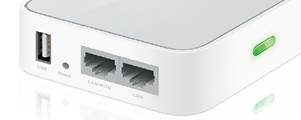
Connect your computer to the Wi-Fi of TL-WR802N. The default wireless network name and password are printed on the label of this device itself. Power on the TL-WR802N
Step 2:
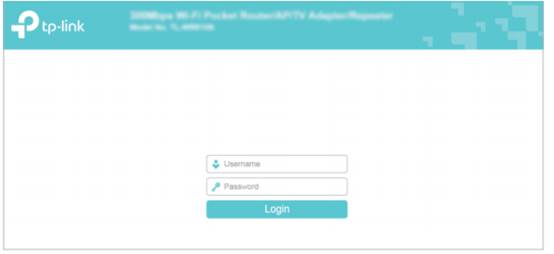
Open a Web Browser -> Type http://tplinkwifi.net or 192.168.0.254 in the address bar -> Press Enter

Enter the default User Name: admin
Enter the default Password: admin
Click OK
Step 3:
Go to Quick Setup-> Click Next
Step 4:
Select Wireless WISP Client Router-> Click Next
Step 5:
Choose the WAN Connection your ISP is using. In most cases, it will be Dynamic IP.
If you’re not sure, please consult with your ISP customer service or refer to the link below:
Application Requirement Choose WAN Connection Type on my TP-LINK router
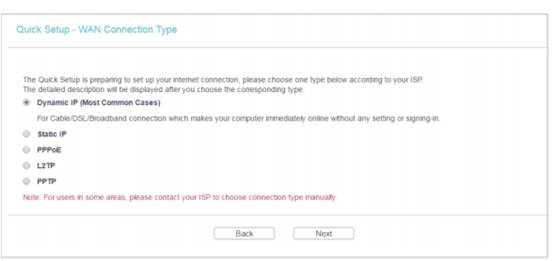
Procedures are different according to the Connection Type you choose.
1) Select Dynamic IP, and click Next;
2) Select PPPoE, input the Username and Password provided by ISP and then click Next;
3) Select Static IP, input the IP parameters provided by ISP and then click Next;
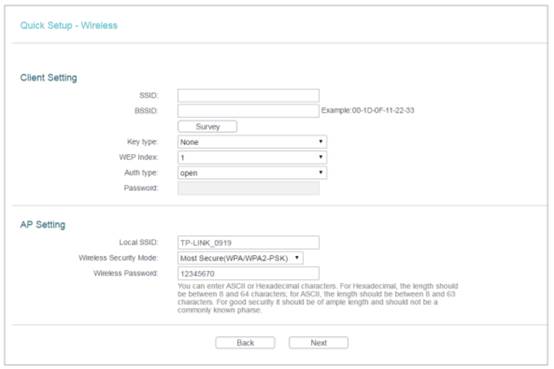
Step 6:
Click Survey to find the public Wi-Fi network and click Connect.
Client Setting:
Confirm the Wireless security mode and input exactly the same Wireless Password of your root router.
AP Setting:
Create a Local SSID for TL-WR802N, select the Wireless Security Mode and create a Wireless Password for the local wireless connection.
Click Next.
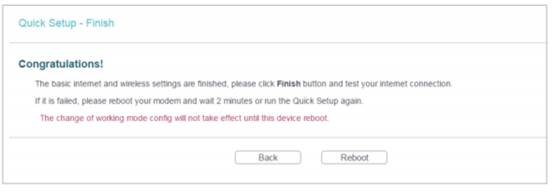
Step 7:
Click on Reboot, and wait until it goes to 100%
Step 8:
Now all the basic configurations have been finished. Please go to Status page. Then you can check the information under WAN to see whether you have successfully connected to your WISP.
Get to know more details of each function and configuration please go to Download Center to download the manual of your product.
Is this faq useful?
Your feedback helps improve this site.
3.0-L-D-2000px_normal_1584496942417r.png)