
Comment utiliser la carte thermique Wi-Fi sur un système TP-Link Deco
Cet article présente la fonctionnalité de carte thermique Wi-Fi de l'application Deco, et aborde toutes les étapes, de la création du plan d'étage au placement des éléments de décoration, en passant par la simulation et le test du signal.
Avant de commencer
- Téléchargez l'application Deco depuis le Google Play Store, l'App Store ou en scannant le code QR ci-dessous. Suivez ensuite les instructions de l'application pour configurer votre réseau Deco.

- Vérifiez que votre appareil et la version de l'application prennent en charge cette fonctionnalité. Une mise à jour du micrologiciel peut être nécessaire pour certains modèles.
Remarque : Les étapes peuvent varier selon le système d’exploitation de votre appareil. Nous prenons ici l’exemple d’iOS.
Carte thermique Wi-Fi
- Qu'est-ce qu'une carte thermique Wi-Fi ?
- Comment créer votre carte thermique Wi-Fi pour toute la maison
- Comment interpréter votre carte thermique Wi-Fi
- Comment mettre en évidence les zones clés sur votre carte thermique
Générer un plan d'étage
- Comment générer rapidement une carte thermique Wi-Fi à partir d'un plan d'étage existant
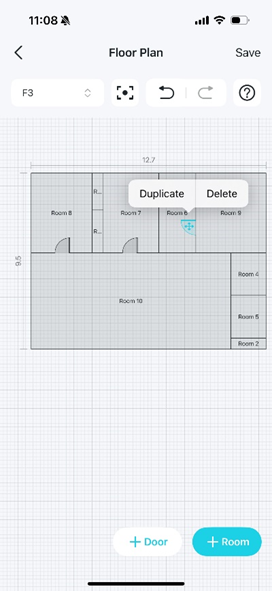
- Comment modifier une pièce sur votre plan d'étage
- Comment diviser un mur sur votre plan d'étage
- Comment fusionner des pièces sur votre plan d'étage
Placement de l'appareil
- Comment positionner précisément les appareils sur une carte thermique
- Comment prévisualiser votre carte thermique Wi-Fi
Simulation de placement
- Qu'est-ce qu'une simulation de placement ?
- Comment optimiser le placement des appareils grâce aux suggestions de cartes thermiques
- Comment ajouter un périphérique virtuel pour la simulation sur une carte thermique
- Comment comparer des données simulées avec les données réelles de votre réseau sur une carte thermique
Test de signal
- Quels appareils sont compatibles avec la fonction de test du signal ?
- Pourquoi le test de signal est important pour des cartes thermiques précises
- Comment effectuer un test de signal sur une carte thermique
Carte thermique Wi-Fi
Qu'est-ce qu'une carte thermique Wi-Fi ?
Grâce à une vue d'ensemble claire, vous pouvez rapidement identifier les zones de faible couverture ou les zones blanches qui pourraient nécessiter une unité Deco supplémentaire ou un repositionnement des appareils existants. La carte thermique vous permet de tester différentes configurations, de réduire les interférences et d'optimiser la distribution de la bande passante, garantissant ainsi une performance Wi-Fi fiable dans tout votre espace.
Pour créer une carte thermique, commencez par dessiner ou importer votre plan d'étage. Marquez ensuite les obstacles physiques, tels que les murs et les portes, afin de simuler leur influence sur le signal Wi-Fi. Une fois vos unités Deco placées sur le plan, la carte thermique illustre la propagation du signal et vous permet d'optimiser l'emplacement des appareils pour une meilleure couverture.
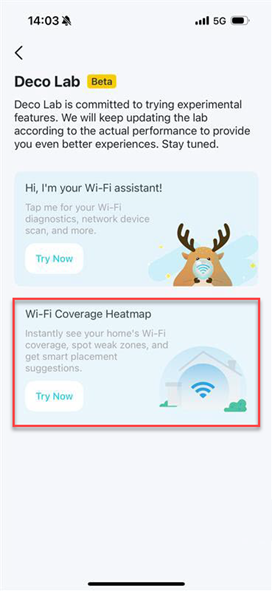
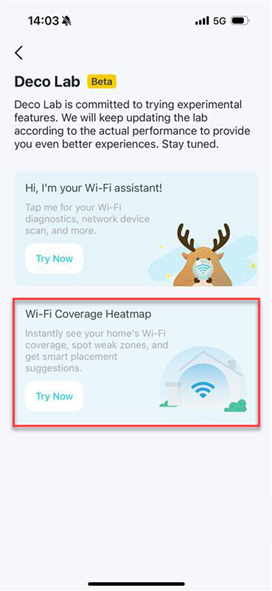
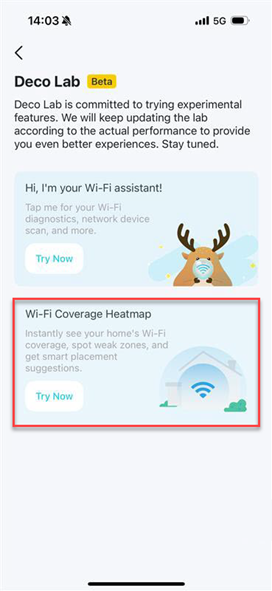
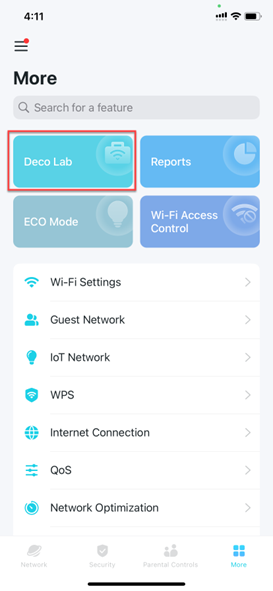
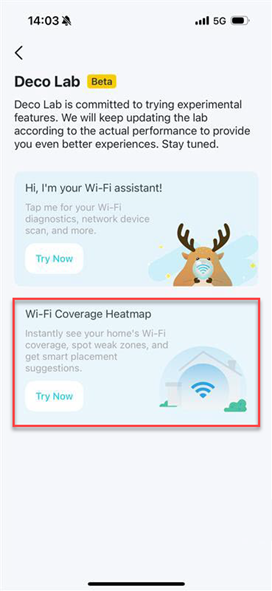
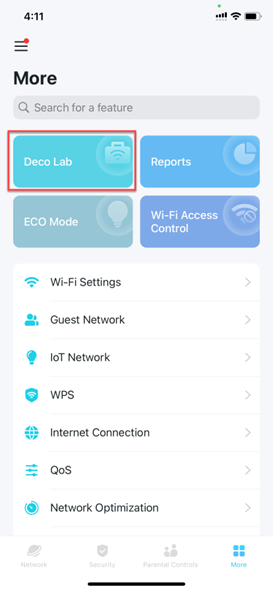
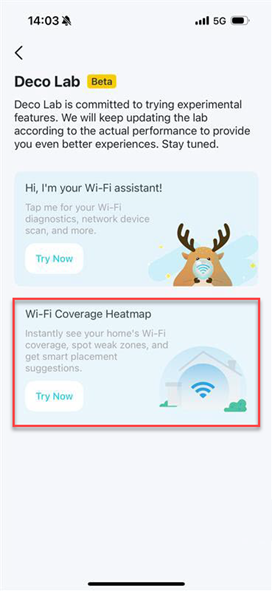
Pour trouver cette option, ouvrez l' application Deco , allez dans Plus > Deco Lab et sélectionnez la carte de couverture Wi-Fi .
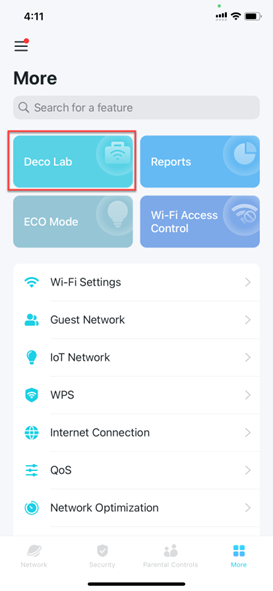
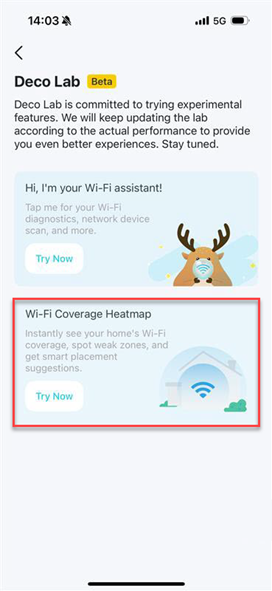
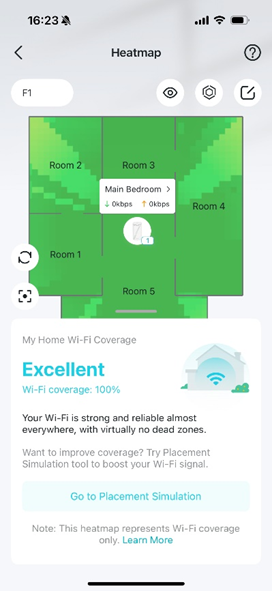
Comment créer votre carte thermique Wi-Fi pour toute la maison
Étape 1. Ouvrez l' application Deco , accédez à Plus > Deco Lab et sélectionnez la carte de couverture Wi-Fi . Commencez par appuyer sur Créer un plan d'étage .
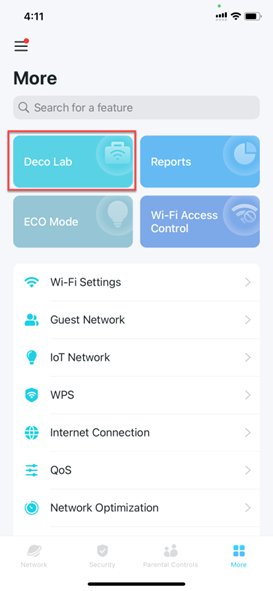
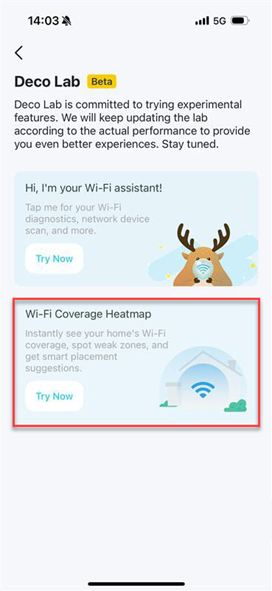
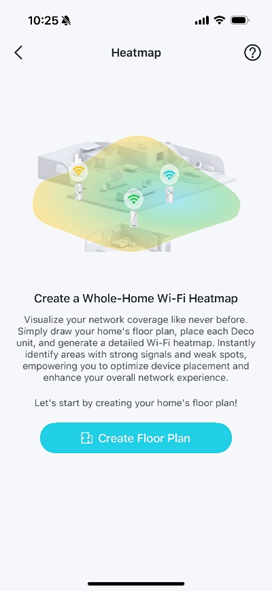
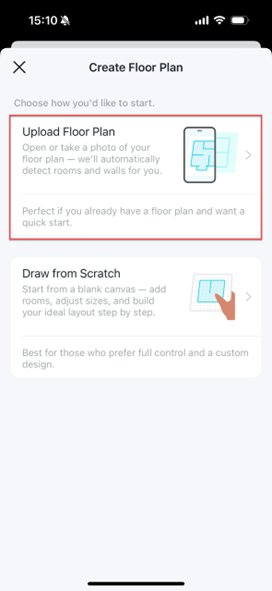
Étape 2. Choisissez une méthode de démarrage. Vous pouvez importer un plan d'étage existant ou en créer de nouveaux à partir de zéro.
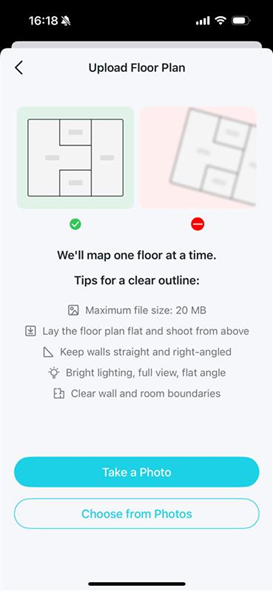
- Upload floor plan: Quickly start by uploading an existing floor plan photo.
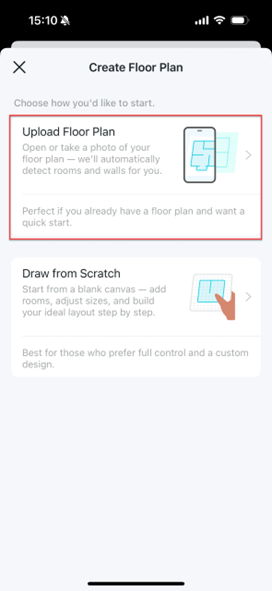
- Draw from scratch: Start from a blank canvas and build your ideal layout step by step.
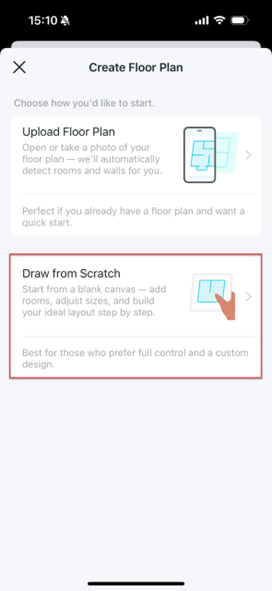
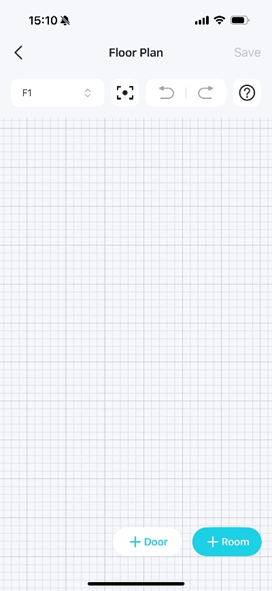
Step 3. Customize your floor plan including adding floors, rooms and doors.
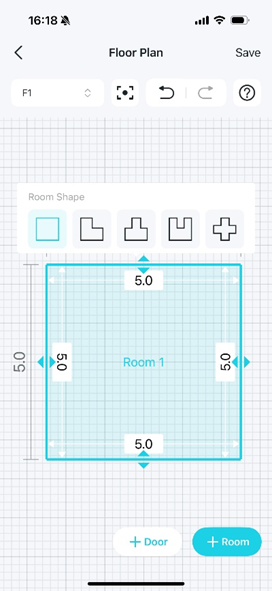
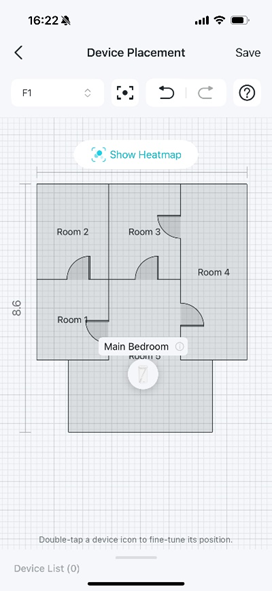
Step 4. Place your devices on the floor plan and save. Then the heatmap is created successfully. You can check the Wi-Fi signal status on the heatmap.
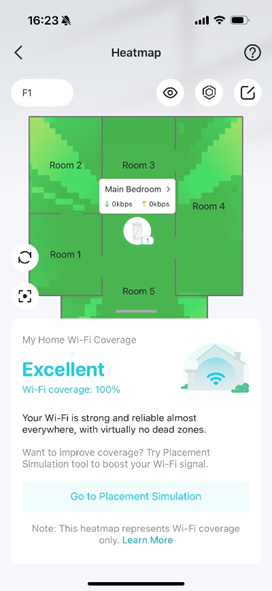
How to Read Your Wi-Fi Heatmap
Step 1. Open the Deco app, go to More > Deco Lab and select the Wi-Fi Coverage Heatmap card.
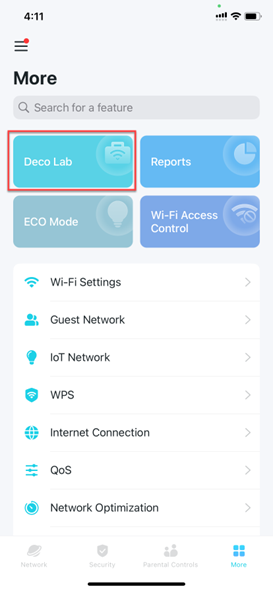
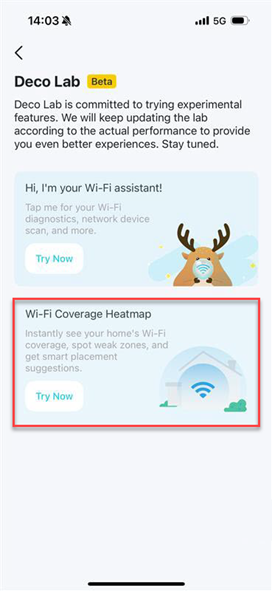
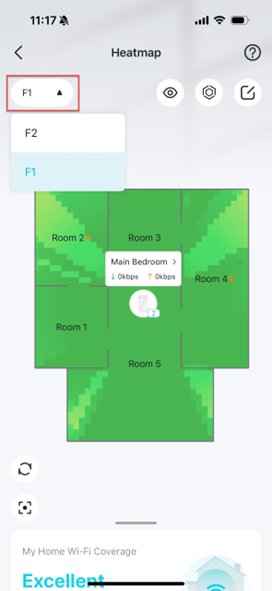
Step 2. On the heatmap, you can perform the following actions:
- Tap the floor button to switch floor views.
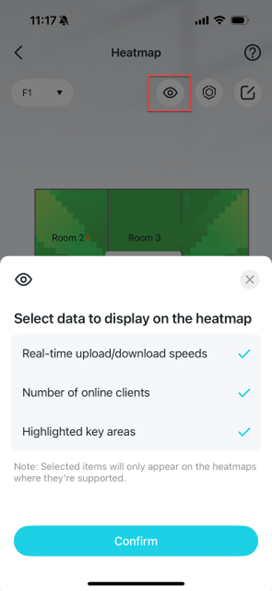
- Tap the View icon
 and select the content you want to display on the heatmap.
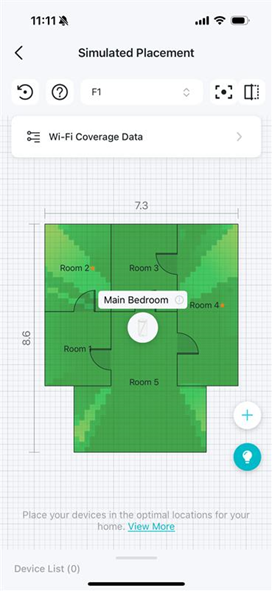
- Tap the icon
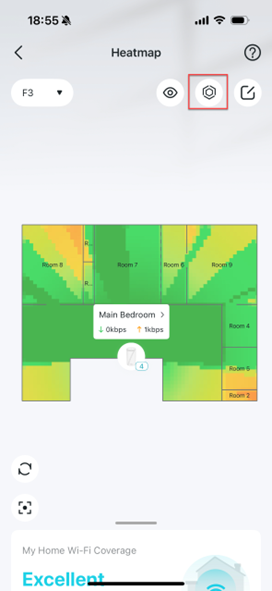
 to enter the Simulated Placement page.
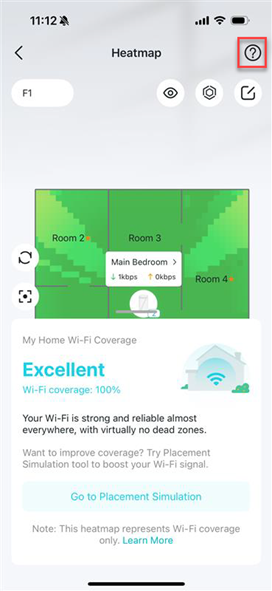
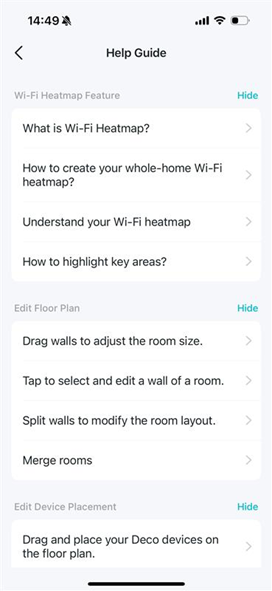
- Tap the icon
 to find the Help Guide.
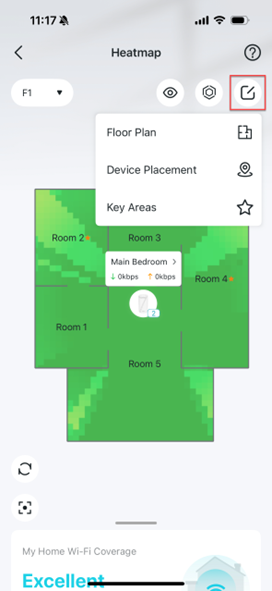
- Tap the Edit icon
 to configure the floor plan, place devices, and highlight key areas.
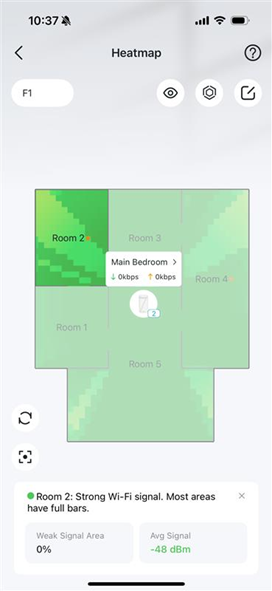
- Tap a room to check the room Wi-Fi signal status.
- Tap the icon
 to refresh the heatmap page.
 - Tap the icon
 to position the heatmap in the center of the screen.
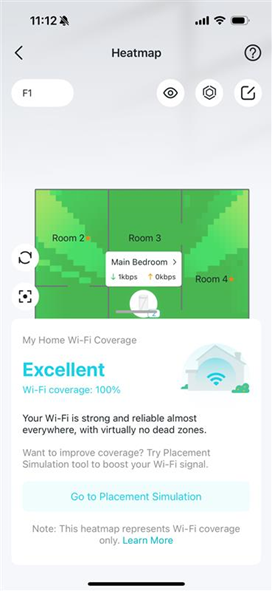
 - Slide up on the Heatmap page to check the current Wi-Fi coverage status.
How to Highlight Key Areas on Your Heatmap
Step 1. Open the Deco app, go to More > Deco Lab and select the Wi-Fi Coverage Heatmap card.
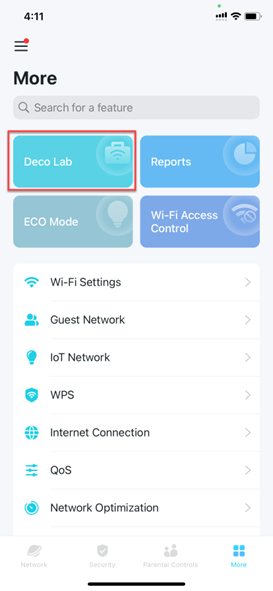
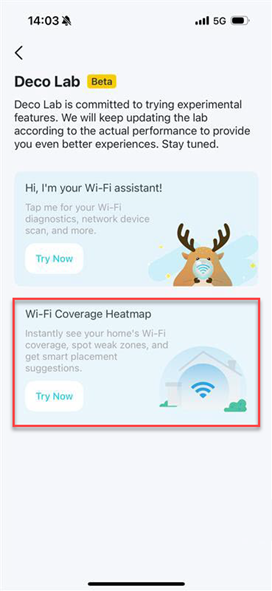
Step 2. On the heatmap, tap the Edit icon  and select Key Areas.
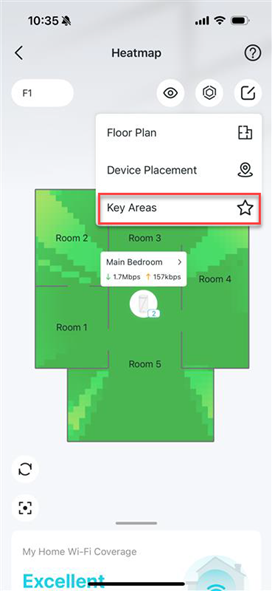
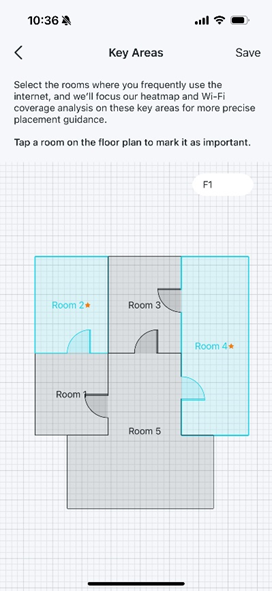
Step 3. Tap the rooms where you frequently use the internet to mark them as key areas (with a star symbol). Then the Wi-Fi coverage analysis will focus on these areas to provide more accurate placement guidance.
Generate A Floor Plan
How to Quickly Generate a Wi-Fi Heatmap from an Existing Floor Plan
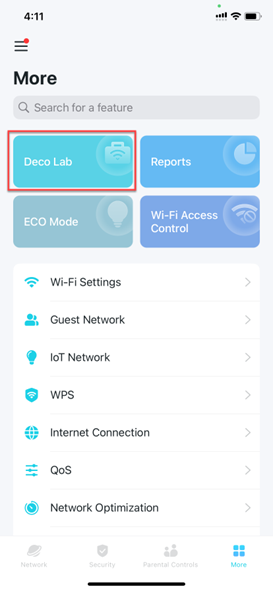
Step 1. Open the Deco app, go to More > Deco Lab and select the Wi-Fi Coverage Heatmap card. Get started by tapping Create Floor Plan.
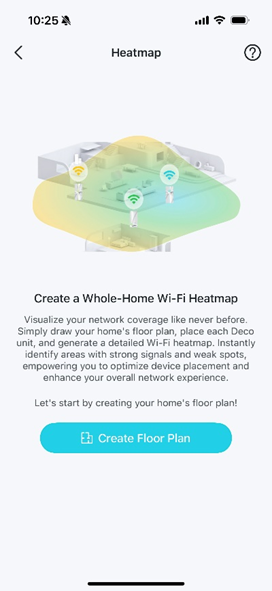
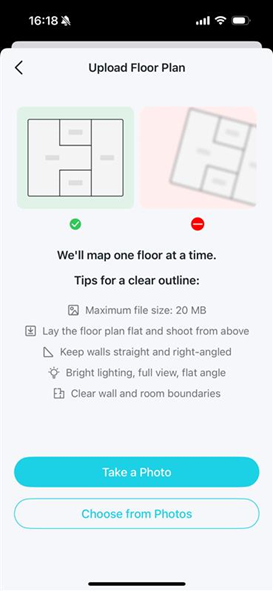
Step 2. Select Upload Floor Plan and upload an existing floor plan photo of an existing floor plan that meets the requirements. Then it’ll automatically detect and draw the floor plan based on the uploaded image.
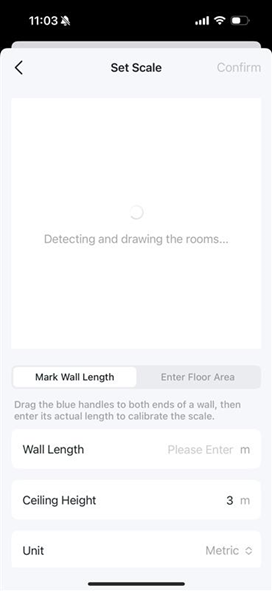
Step 3. Select the units and set the scale according to the actual situation, including wall length, ceiling height, and floor area.
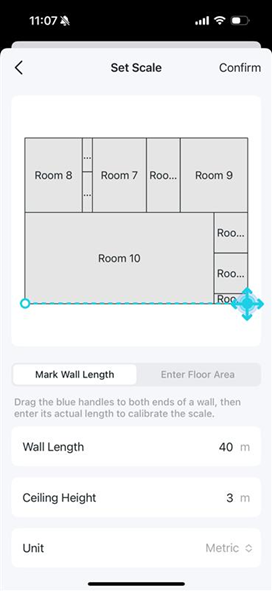
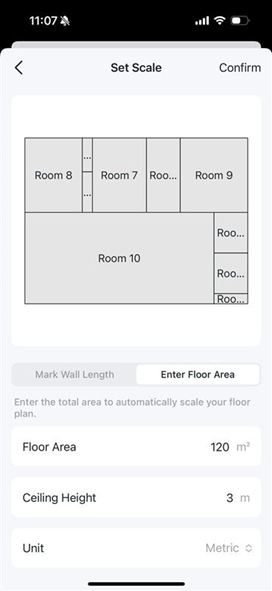
Step 4. Customize your floor plan, including adding floors, rooms, and doors.
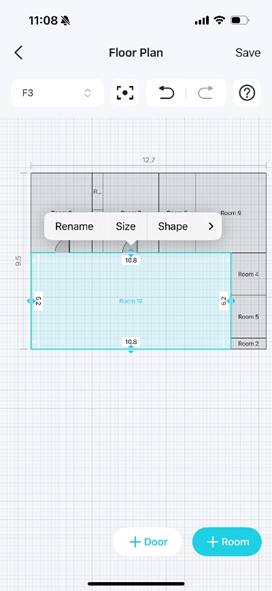
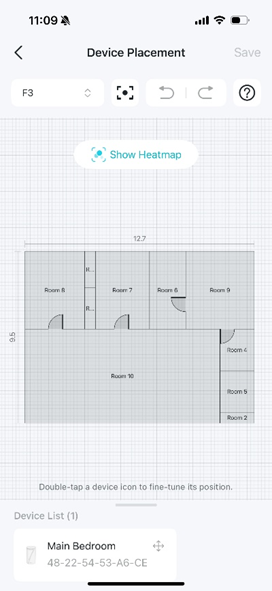
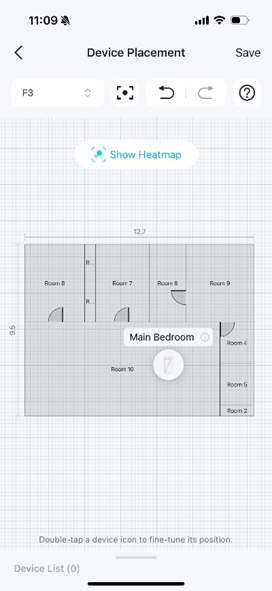
Step 5. Double-tap a device icon to place your devices on the floor plan and save. Then the heatmap is created successfully. You can check the Wi-Fi signal status on the heatmap.
How to Edit a Room On Your Floor Plan
Step 1. Open the Deco app, go to More > Deco Lab and select the Wi-Fi Coverage Heatmap card.
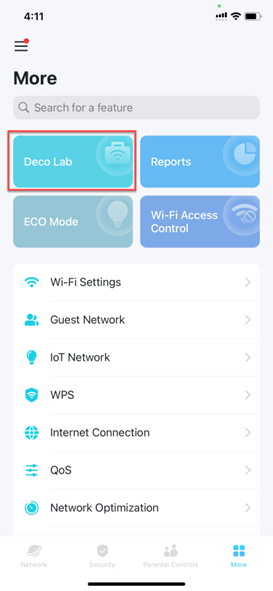
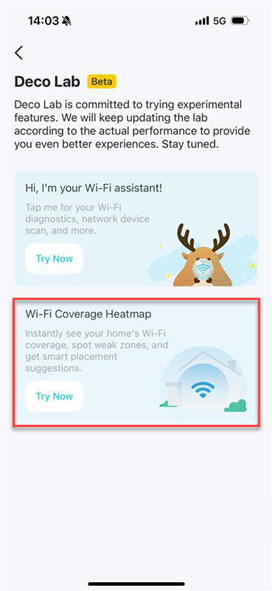
Step 2. On your heatmap, tap the Edit icon and select Floor Plan.
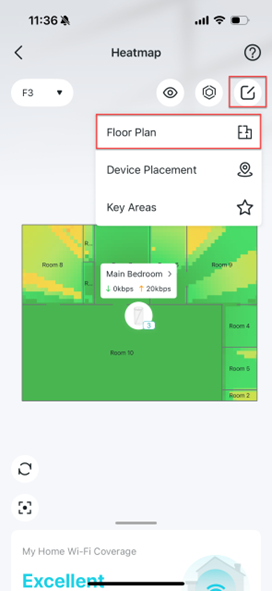
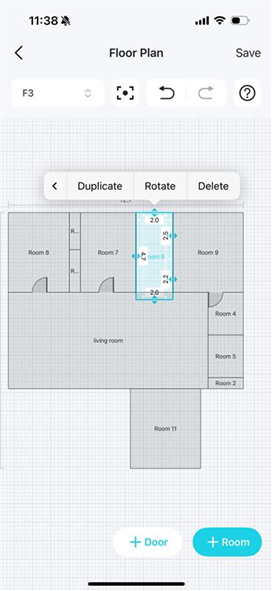
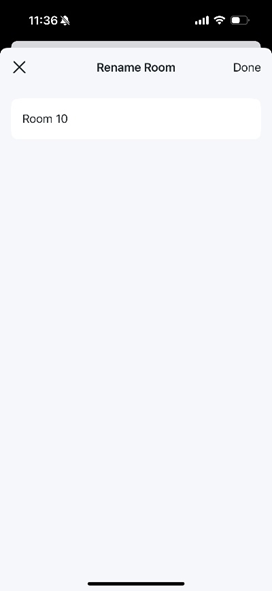
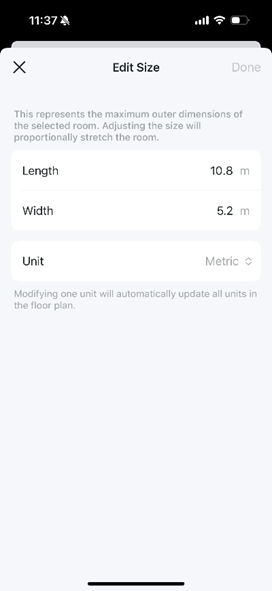
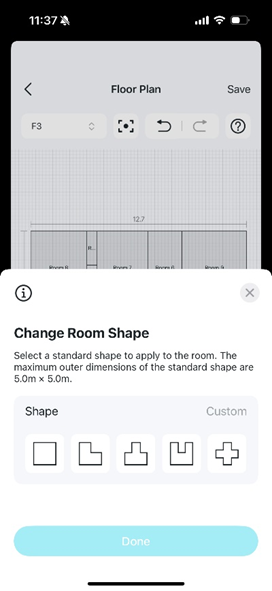
Step 3. Tap a room and you can edit the following:
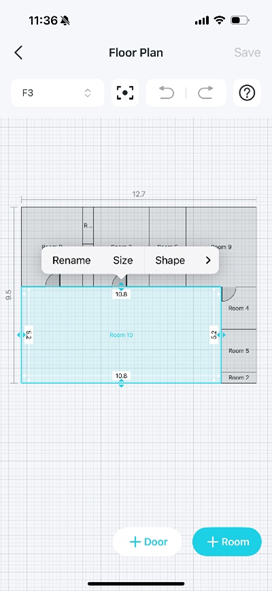
- Rename a room.
- Edit room size.
- Change room shape.
- Duplicate room.
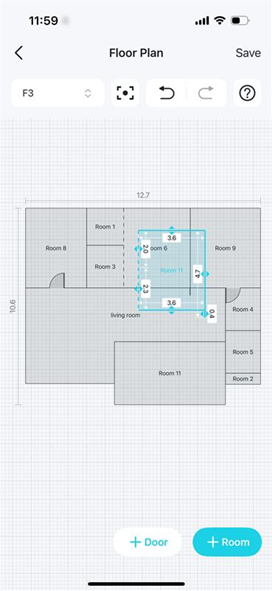
- Rotate room.
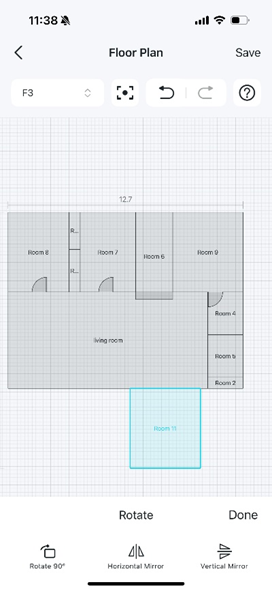
- Delete room.
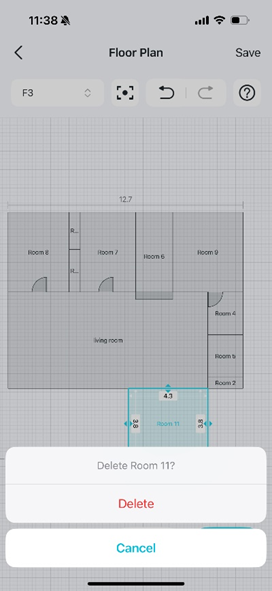
Step 4. Tap the wall between two adjacent rooms allows you to merge rooms.
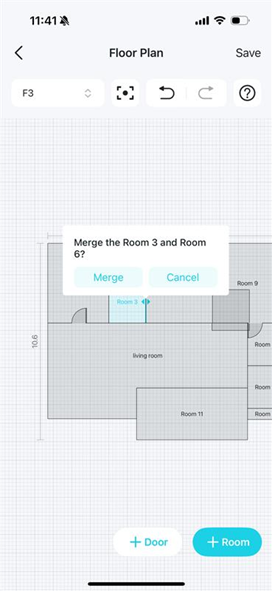
How to Split a Wall On Your Floor Plan
Step 1. Open the Deco app, go to More > Deco Lab and select the Wi-Fi Coverage Heatmap card.
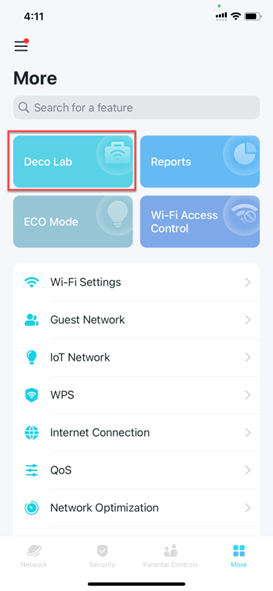
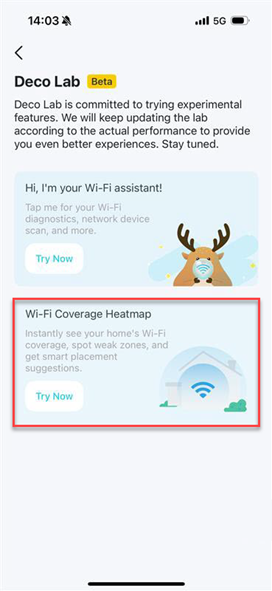
Step 2. On your heatmap, tap the Edit icon  and select Floor Plan.
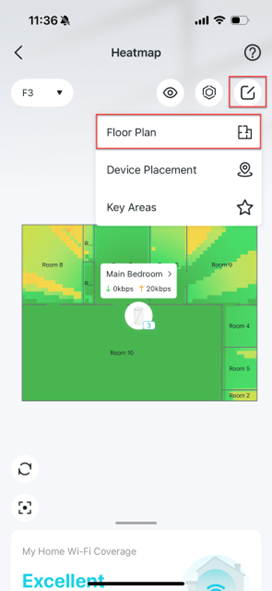
Step 3. Tap a wall of a room and tap Split.
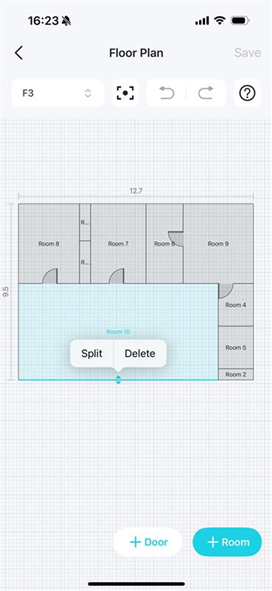
Step 4. Drag the handle or enter a value to set the wall length and tap Done.
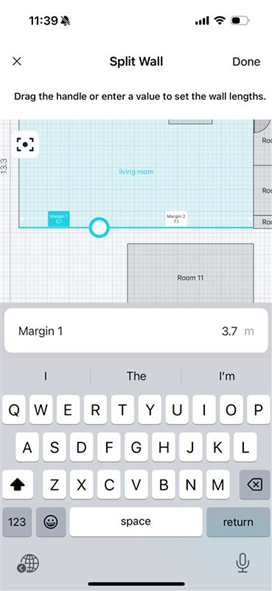
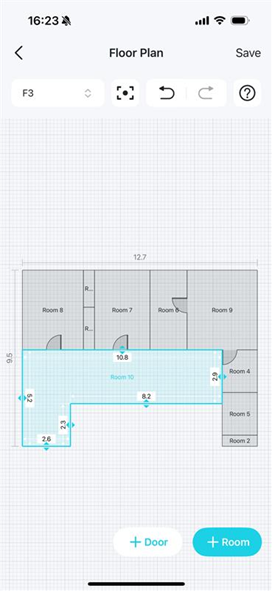
Step 5. Then you can set the two walls separately.
How to Merge Rooms On Your Floor Plan
Step 1. Open the Deco app, go to More > Deco Lab and select the Wi-Fi Coverage Heatmap card.
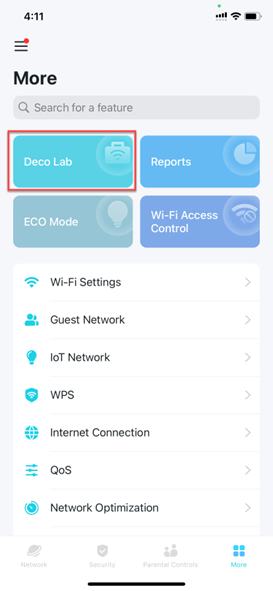
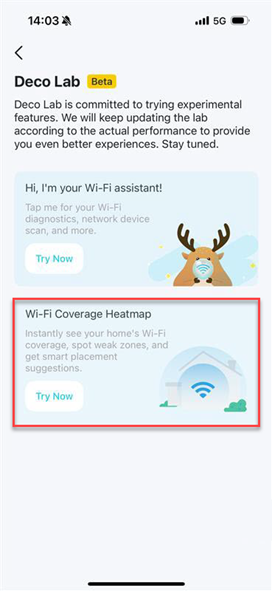
Step 2. On your heatmap, tap the Edit icon  and select Floor Plan.
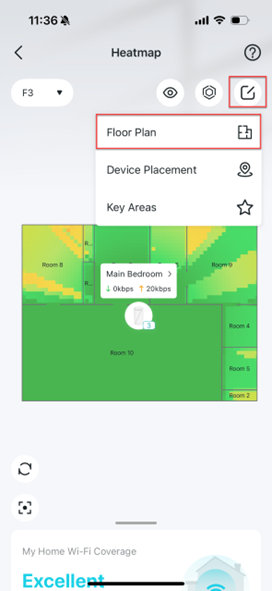
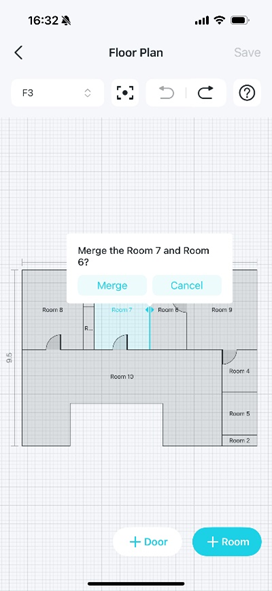
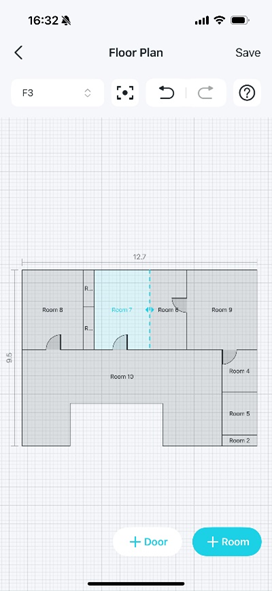
Step 3. Tap the wall between two adjacent rooms and select Merge. Then the solid line between the two rooms will turn into a dashed line, indicating that the rooms are merged successfully.
Device Placement
How to Place Devices Accurately On a Heatmap
Step 1. Open the Deco app, go to More > Deco Lab, and select the Wi-Fi Coverage Heatmap card.
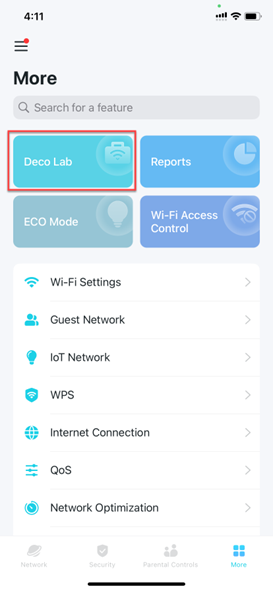
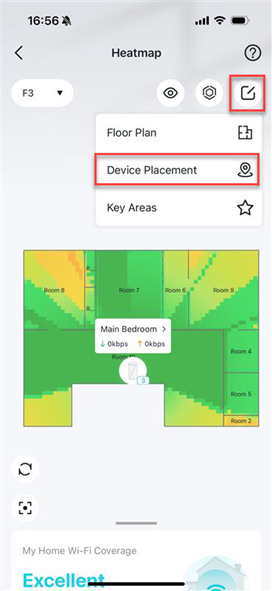
Step 2. On the heatmap, tap the Edit icon  and select Device Placement.
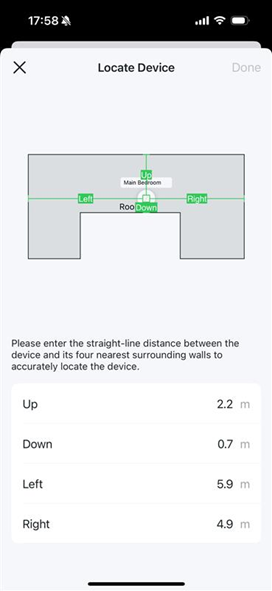
Step 3. Double tap the device icon to locate the device accurately by entering the straight-line distance between the device and its four nearest surrounding walls. Then tap Done and save the settings.
How to Preview Your Wi-Fi Heatmap
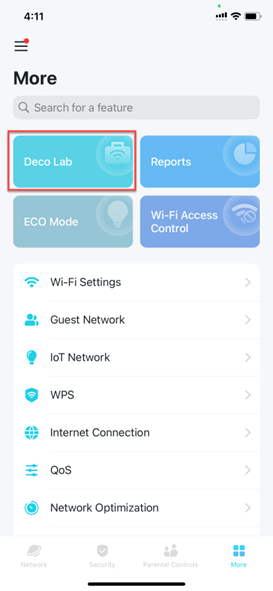
Step 1. Open the Deco app, go to More > Deco Lab, and select the Wi-Fi Coverage Heatmap card.
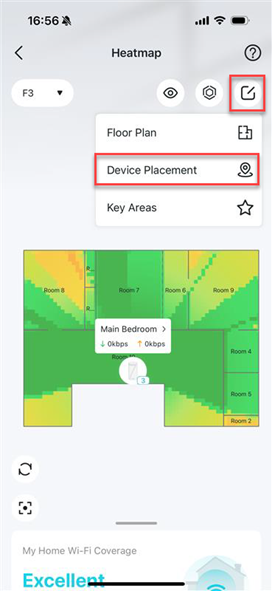
Step 2. On the heatmap, tap the Edit icon  and select Device Placement.
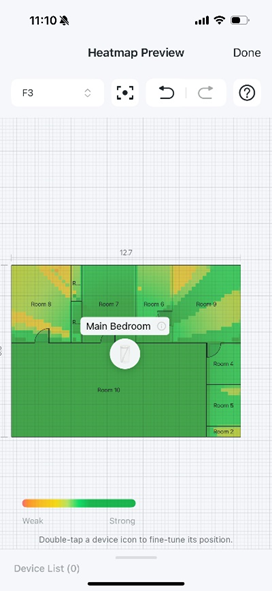
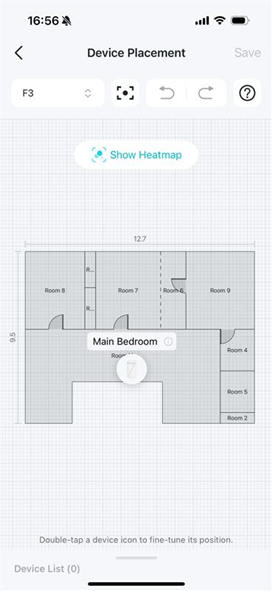
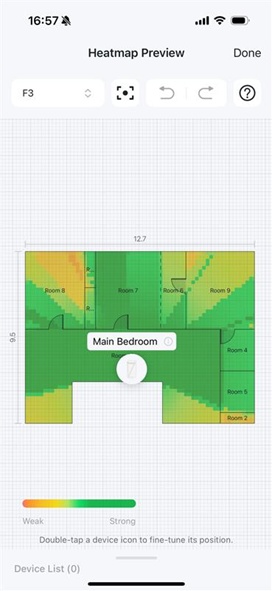
Step 3. Tap Show Heatmap to preview the current heatmap. Then you can adjust the device position according to the real-time heatmap status.
Placement Simulation
What is Placement Simulation
Step 1. Open the Deco app, go to More > Deco Lab, and select the Wi-Fi Coverage Heatmap card.
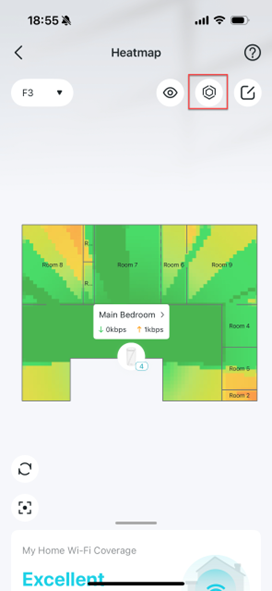
Step 2. On the heatmap, tap the icon  to enter the Simulated Placement page.
Step 3. On the Simulated Placement page, you can perform the followings:
- Ajouter des appareils virtuels : appuyez sur l’icône Ajouter pour qu’un appareil virtuel apparaisse sur la carte thermique. Vous pouvez le déplacer pour observer les changements sur la carte thermique et choisir son emplacement optimal.
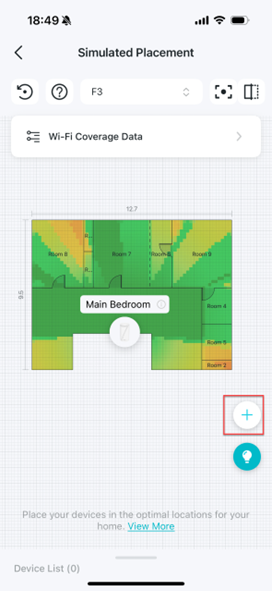
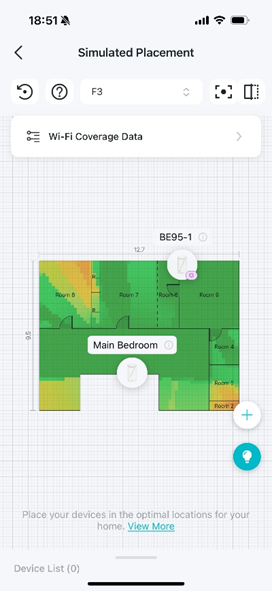
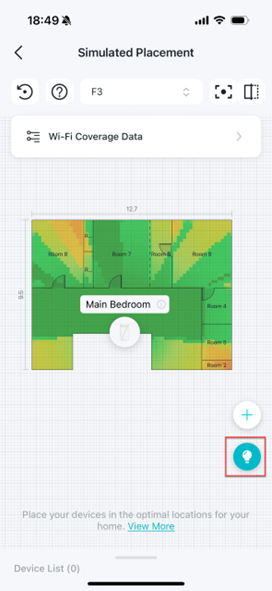
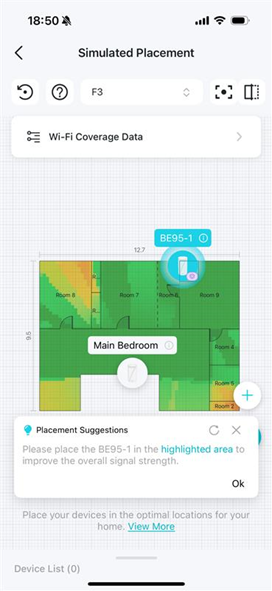
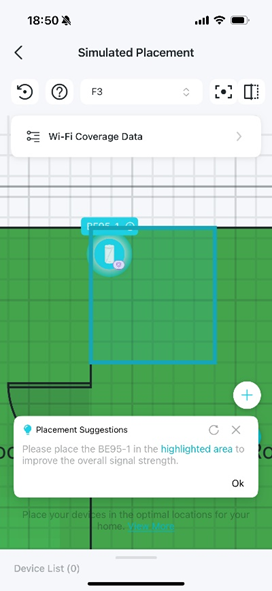
- Suggestions d'emplacement : Appuyez sur l'icône Ampoule pour afficher les suggestions d'emplacement pour cet étage. Appuyez sur l'icône Appareil pour afficher les suggestions concernant l'appareil. Vous pourrez ensuite ajuster son emplacement en conséquence.
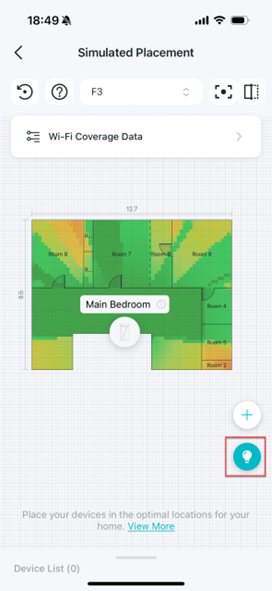
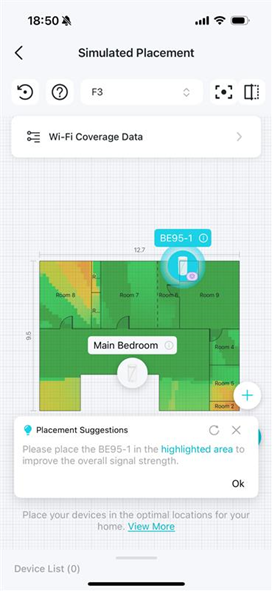
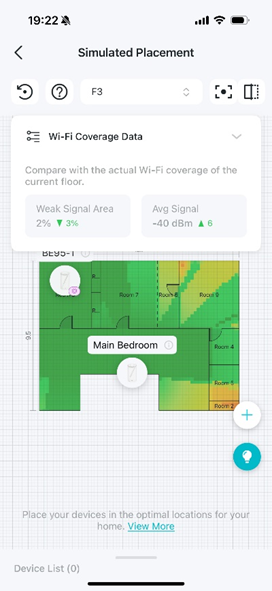
- Consultez les cartes thermiques comparatives : appuyez longuement sur l’icône
 pour afficher la couverture Wi-Fi réelle du réseau actuel.
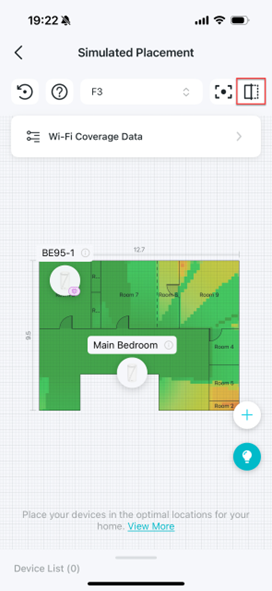
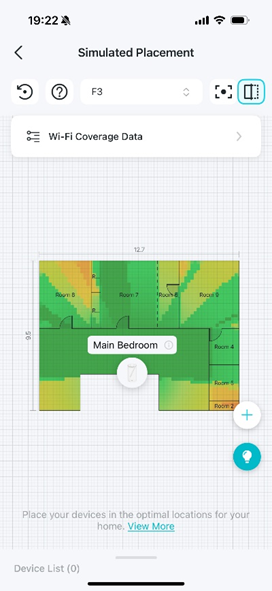
- Consulter les statistiques comparatives : appuyez sur Données de couverture Wi-Fi pour afficher les données comparatives concernant la couverture Wi-Fi réelle de l’étage actuel.
Comment optimiser le placement des appareils grâce aux suggestions de cartes thermiques
Étape 1. Ouvrez l' application Deco , allez dans Plus > Deco Lab et sélectionnez la carte de couverture Wi-Fi .
Étape 2. Sur la carte thermique, appuyez sur l'icône  pour accéder à la page de placement simulé .
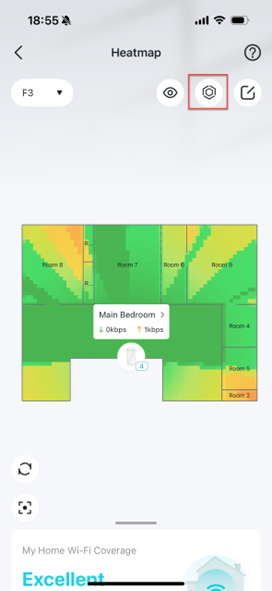
Étape 3. Appuyez sur l'icône Ampoule pour afficher les suggestions de placement. Appuyez sur l'icône Appareil pour afficher les suggestions concernant l'appareil. Appuyez ensuite sur la zone mise en surbrillance pour ajuster votre appareil.
Comment ajouter un périphérique virtuel pour la simulation sur une carte thermique
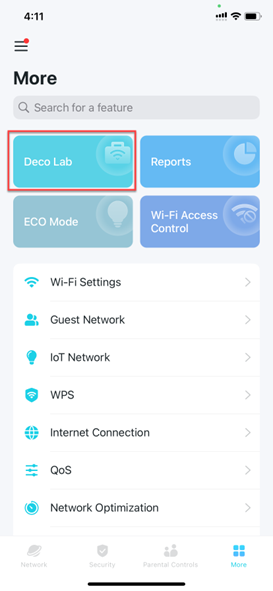
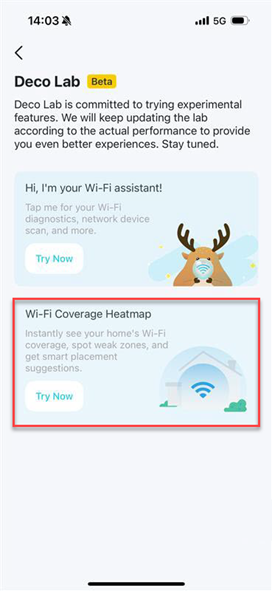
Étape 1. Ouvrez l' application Deco , allez dans Plus > Deco Lab et sélectionnez la carte de couverture Wi-Fi .
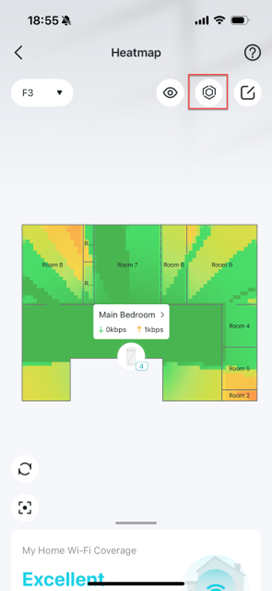
Étape 2. Sur la carte thermique, appuyez sur l'icône  pour accéder à la page de placement simulé .
Étape 3. Appuyez sur l'icône Ajouter, puis un appareil virtuel apparaîtra sur la carte thermique.
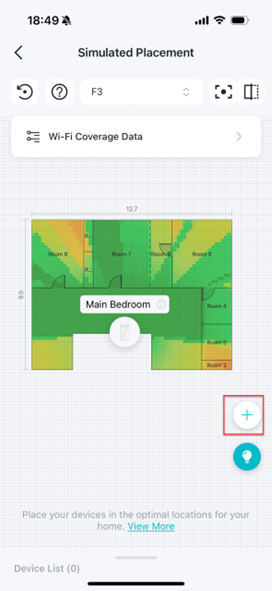
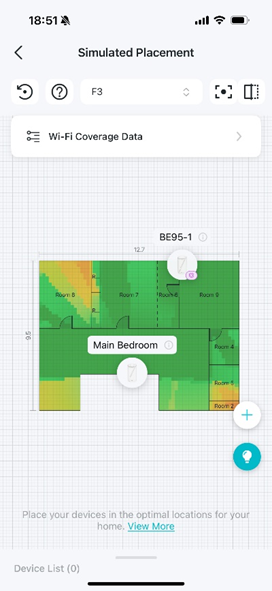
Étape 4. Vous pouvez effectuer les actions suivantes pour le périphérique virtuel :
- Touchez l'icône de l'appareil virtuel pour afficher les suggestions d'emplacement.
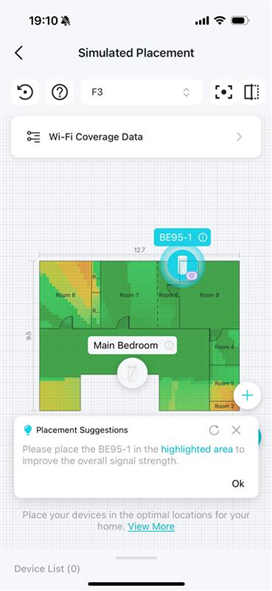
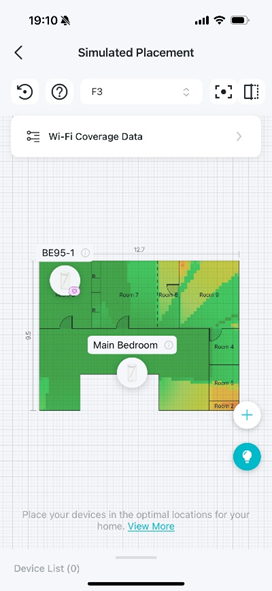
- Appuyez longuement sur l'appareil pour le déplacer en fonction de la carte thermique.
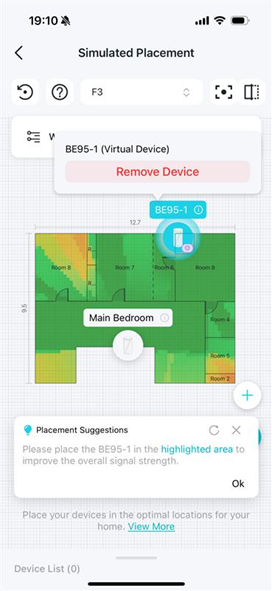
- Appuyez sur l'icône
 pour supprimer le périphérique virtuel. Texte alternatif :
Comment comparer des données simulées avec les données réelles de votre réseau sur une carte thermique
Étape 1. Ouvrez l' application Deco , allez dans Plus > Deco Lab et sélectionnez la carte de couverture Wi-Fi .
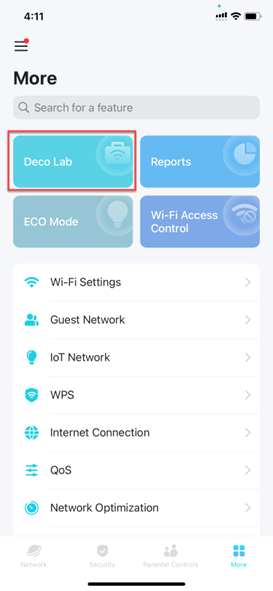
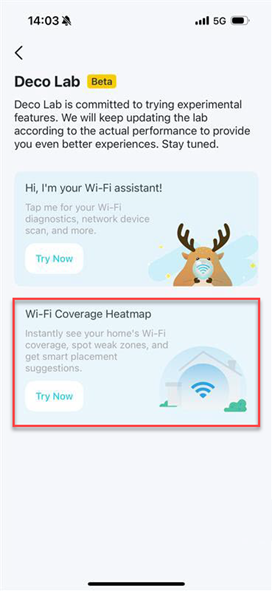
Étape 2. Sur la carte thermique, appuyez sur l'icône  pour accéder à la page de placement simulé .
Étape 3. Appuyez longuement sur l'icône  pour afficher la couverture Wi-Fi réelle du réseau actuel.
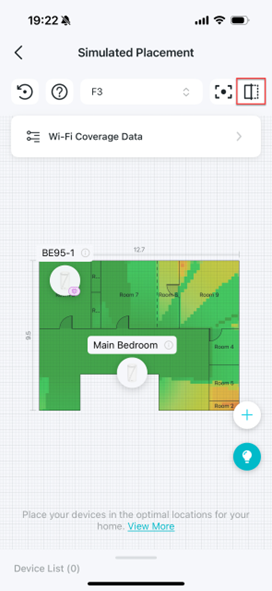
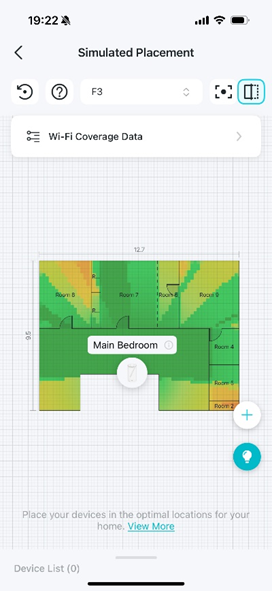
Étape 4. Appuyez sur Données de couverture Wi-Fi pour afficher les données comparatives concernant la couverture Wi-Fi réelle de l'étage actuel.
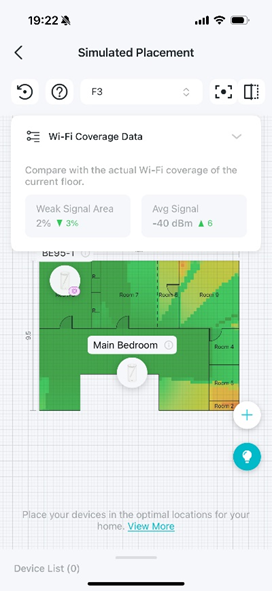
Test de signal
Quels appareils sont compatibles avec la fonction de test du signal ?
Notre fonctionnalité de carte thermique de test de signal est désormais vérifiée et prise en charge sur plusieurs modèles d'appareils grand public, notamment l'iPhone 13 mini, le Samsung Galaxy S23 Ultra et le Google Pixel 9 Pro XL.
Remarque : Dans certains cas, la fonction de mesure pratique de la carte thermique peut être indisponible. Cela peut se produire avec les versions récentes d’appareils iOS et de systèmes d’exploitation, ou en présence de stations d’itinérance autonomes ne répondant pas aux requêtes 11k du point d’accès.
Pourquoi le test de signal est important pour des cartes thermiques précises
Bien que nous puissions générer une carte thermique du Wi-Fi domestique à partir des plans d'étage et de simulations prédictives, les performances réelles du signal sont influencées par de nombreux facteurs environnementaux. Des tests de signal sur site sont donc essentiels pour saisir le comportement réel du signal et garantir la précision et la fiabilité de la carte thermique finale.
Les obstacles physiques tels que les murs en béton, les structures métalliques ou les briques épaisses peuvent affaiblir considérablement les signaux Wi-Fi, un phénomène que les simulations ne prennent pas toujours en compte. Un test de terrain permet de mesurer l'impact réel de ces matériaux et de fournir des données qui peuvent différer des paramètres de simulation. Ce test transforme un modèle prédictif en une carte thermique validée et exploitable, vous assurant ainsi que votre réseau Wi-Fi fonctionnera comme prévu en conditions réelles.
Les tests sur site permettent d'identifier précisément les zones faibles ou non couvertes. On peut ainsi ajuster de manière ciblée et éclairée le positionnement des appareils, réduisant les chevauchements, éliminant les zones blanches et optimisant au final les performances du réseau.
Comment effectuer un test de signal sur une carte thermique
Étape 1. Ouvrez l' application Deco , allez dans Plus > Deco Lab et sélectionnez la carte de couverture Wi-Fi .
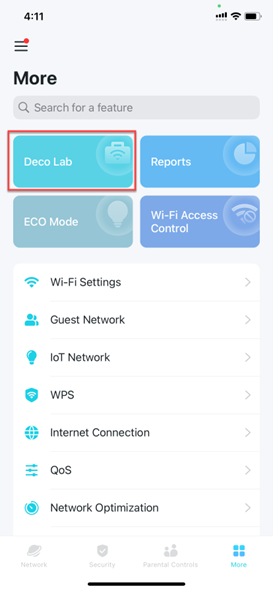
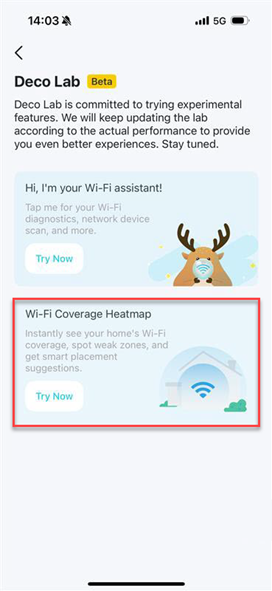
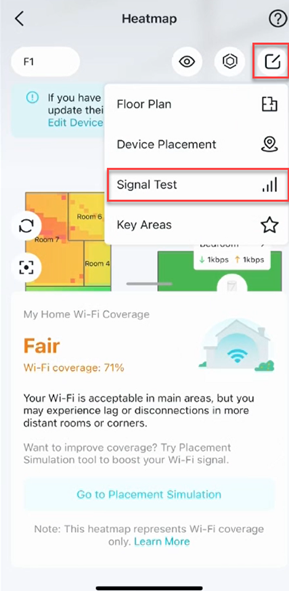
Étape 2. Sur la carte thermique, appuyez sur l'icône Modifier  et sélectionnez Test de signal . Texte alternatif :
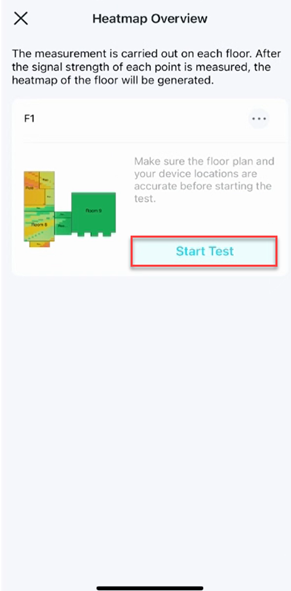
Étape 3. Assurez-vous que votre plan d'étage et l'emplacement de vos appareils sont corrects, puis appuyez sur Démarrer le test .
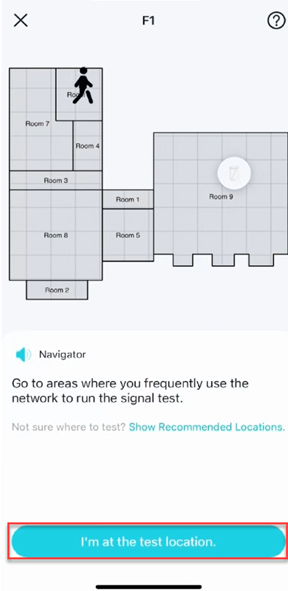
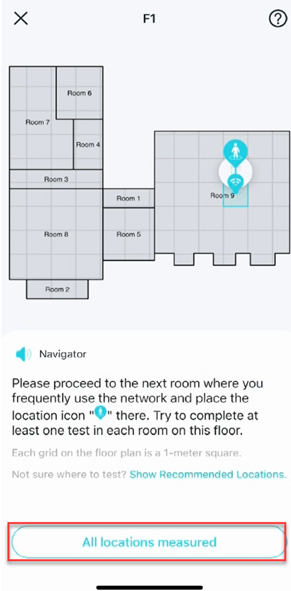
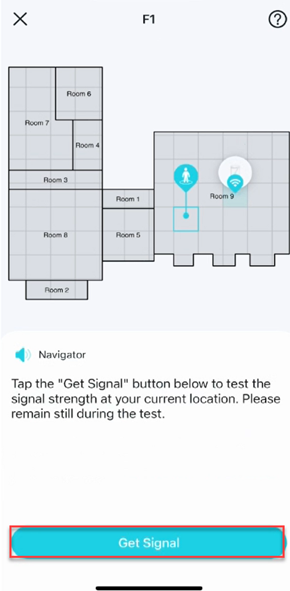
Étape 4. Rendez-vous dans les zones où vous utilisez fréquemment le réseau et placez l'icône de localisation sur votre position actuelle. Appuyez ensuite sur « Obtenir le signal » pour lancer le test à cet endroit. Veuillez rester immobile pendant le test.
Remarque : Si vous ne savez pas où effectuer le test, appuyez sur « Afficher les emplacements recommandés » pour obtenir plus de suggestions.
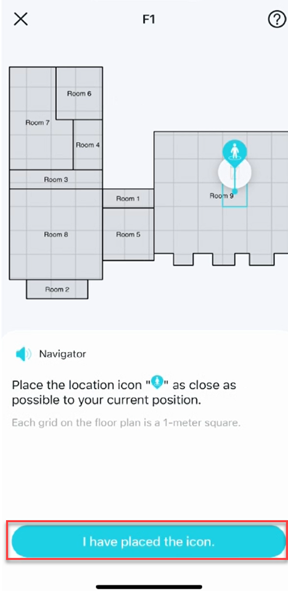
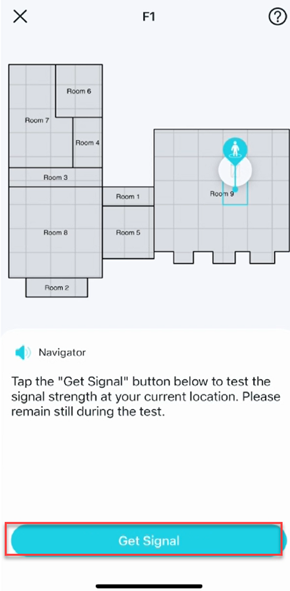
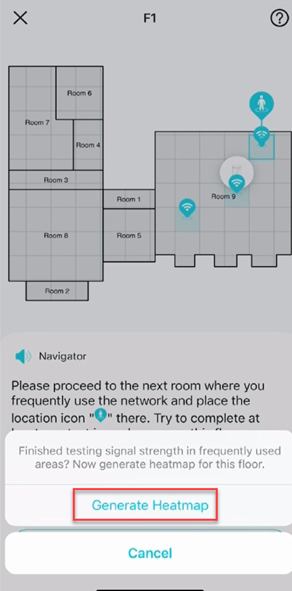
Étape 5. Passez aux autres pièces et effectuez le test de signal en suivant les mêmes étapes que précédemment. Une fois tous les tests effectués à chaque étage, générez une carte thermique.
Pour en savoir plus sur chaque fonction et configuration, veuillez vous rendre dans le Centre de téléchargement pour télécharger le manuel de votre produit.
Pour en savoir plus
Est-ce que ce FAQ a été utile ?
Vos commentaires nous aideront à améliorer ce site.

_US_1.0_F_normal_20250208094019q.png)


TP-Link Community
Still need help? Search for answers, ask questions, and get help from TP-Link experts and other users around the world.