How to install Palm Vein & Fingerprint Recognition Tapo Smart Lock (Tapo DL130)
Introduction
This FAQ article provides users with step-by-step instructions for installing the door lock effectively.
Requirements
Prepare the accessories included in the package and any other necessary auxiliary tools, such as a screwdriver.
Installation
You can follow this installation video or steps below to install the door lock, which are the same as those in the app guide.
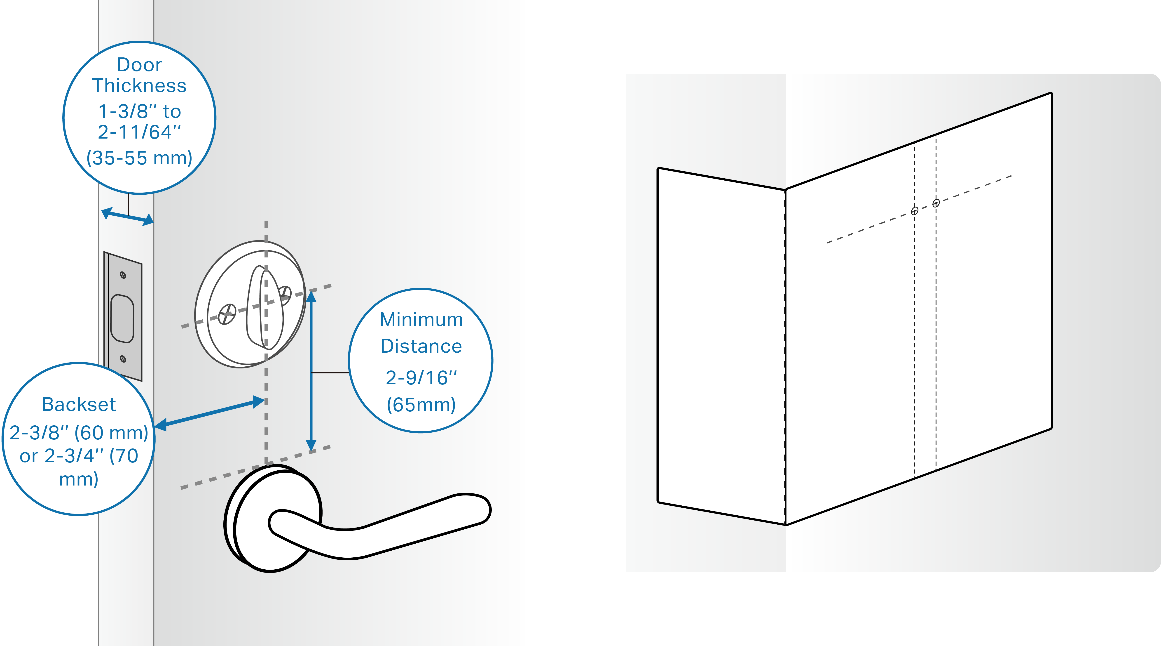
Step 1. Check door lock compatibility
Your existing lock should be a single-cylinder deadbolt that meets the following dimensions. You can use the provided template to measure your door.
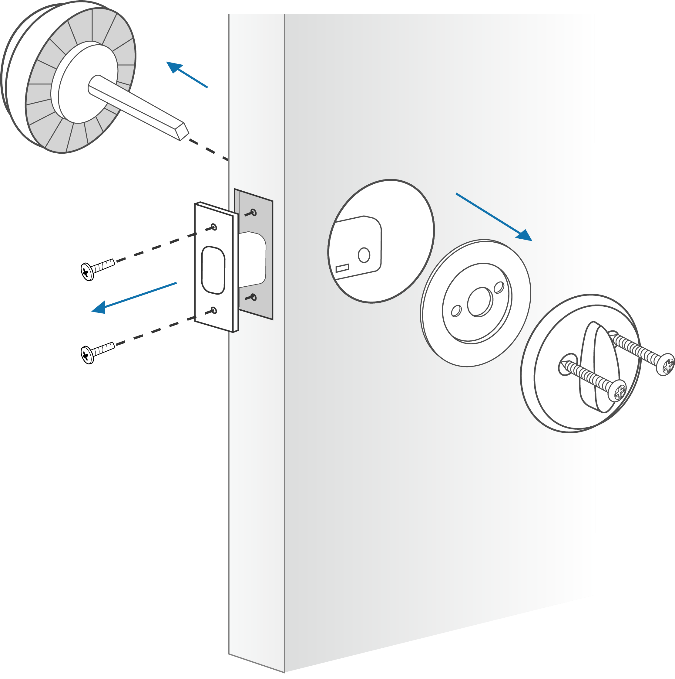
Step 2. Remove your existing door lock and bolt
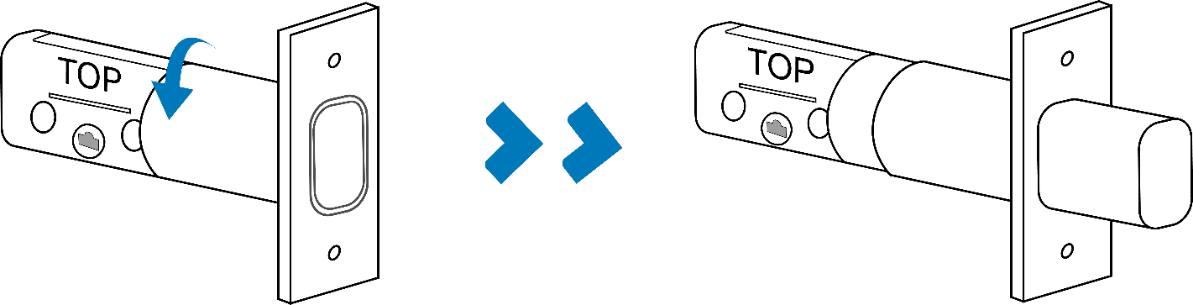
Step 3. Install the new bolt
1) Ensure the word TOP is facing up.

2) If the backset of your door is 2-3/8’’ (60 mm), install the bolt directly.
If the backset of your door is 2-3/4’’ (70 mm), rotate the bolt to extend it before installation.
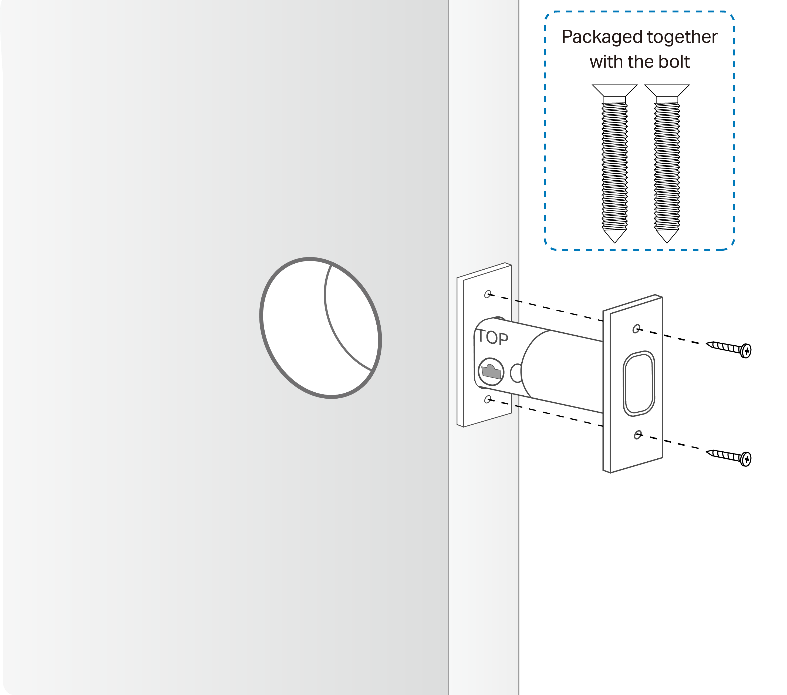
3) Insert the bolt into the door hole and use two mounting screws to affix it. The bolt mounting screws are packaged together with the bolt.
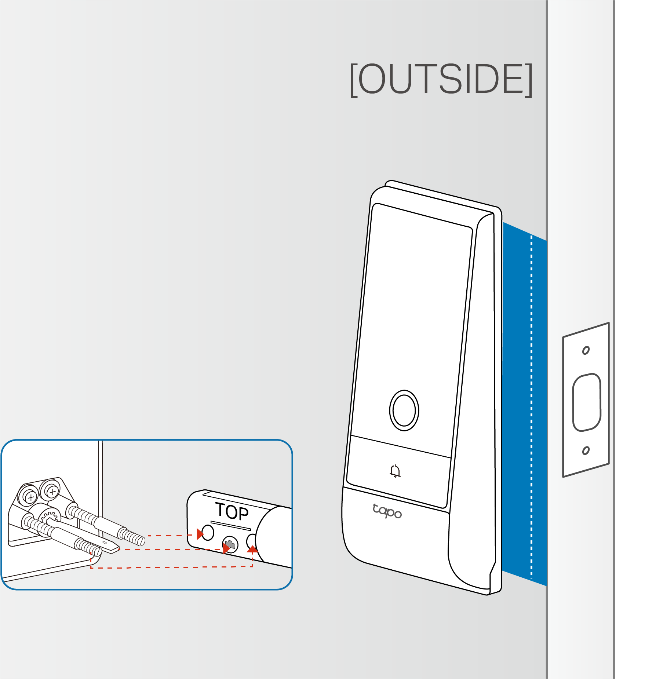
Step 4. Install the exterior assembly
1) Place the exterior assembly sticker on the door’s exterior side by aligning its door edge line with the door’s edge. Ensure you use the correct door edge line based on your backset distance.

2) Route the cable under the bolt.
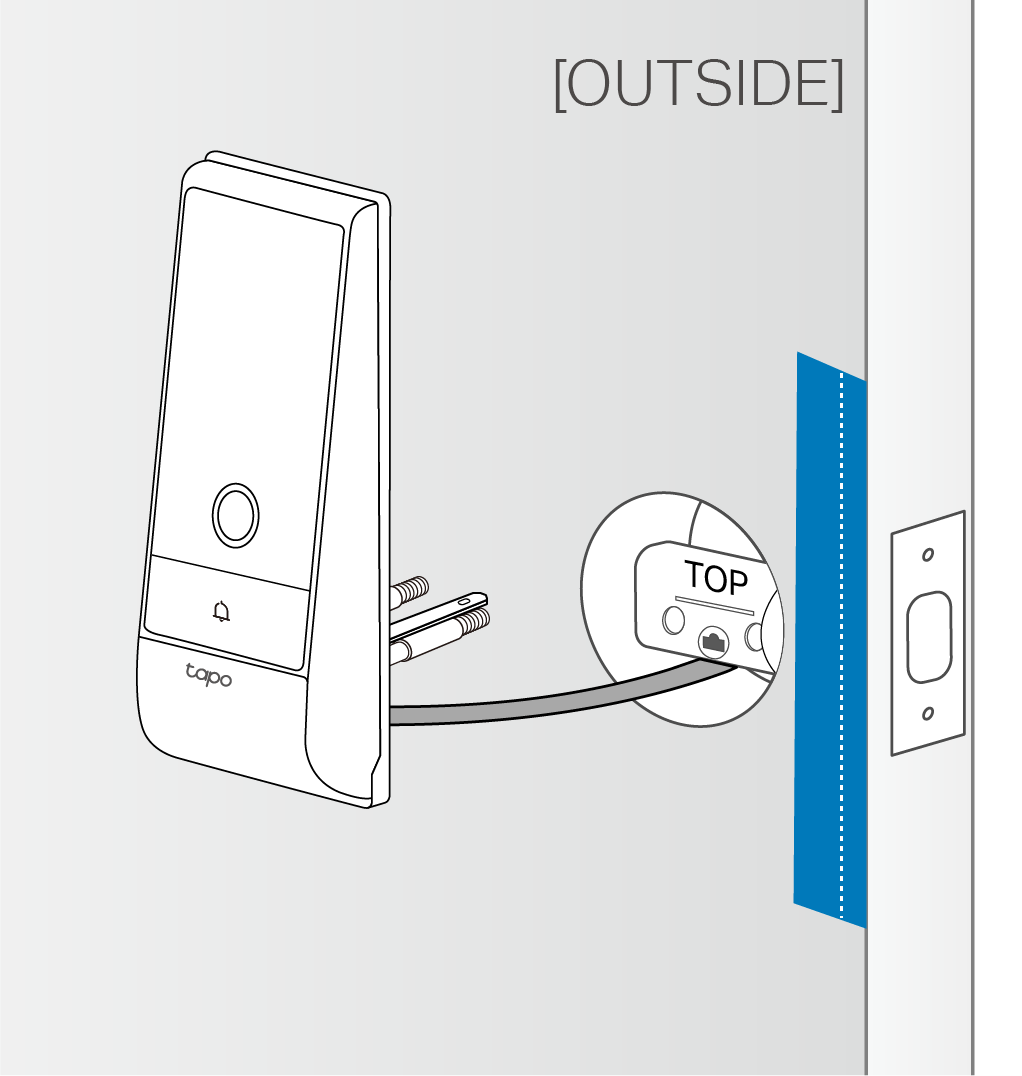
3) Insert the tailpiece and two prongs into the corresponding holes on the bolt and align the exterior assembly with the sticker.
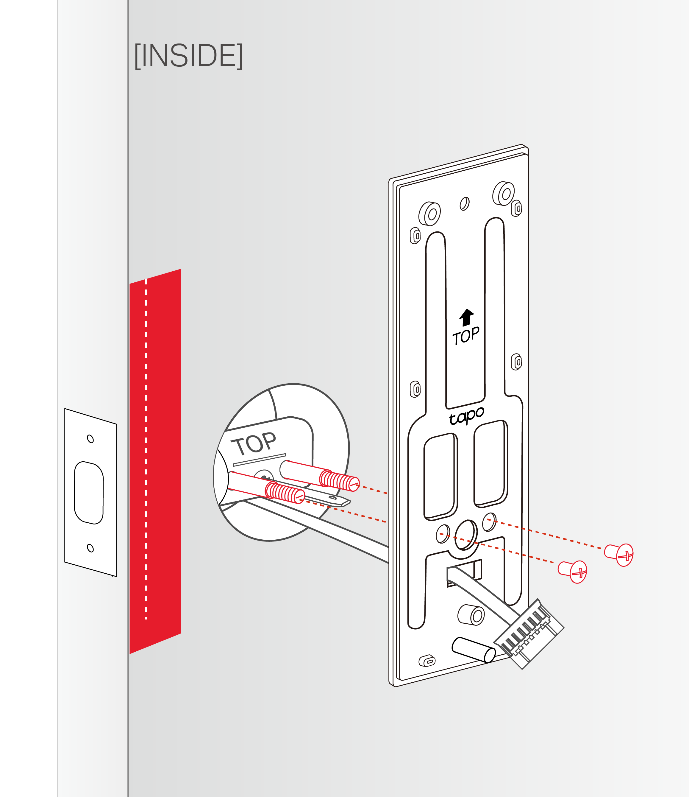
Step 5. Install the mounting plate
1) Place the interior assembly sticker on the door’s interior side by aligning its door edge line with the door’s edge. Ensure you use the correct door edge line based on your backset distance.

2) Route the cable through the mounting plate’s rectangular hole. Insert the tailpiece into the center round hole and the prongs into the two holes next to the center hole. Align the mounting plate with the sticker. Secure it with the screw caps.
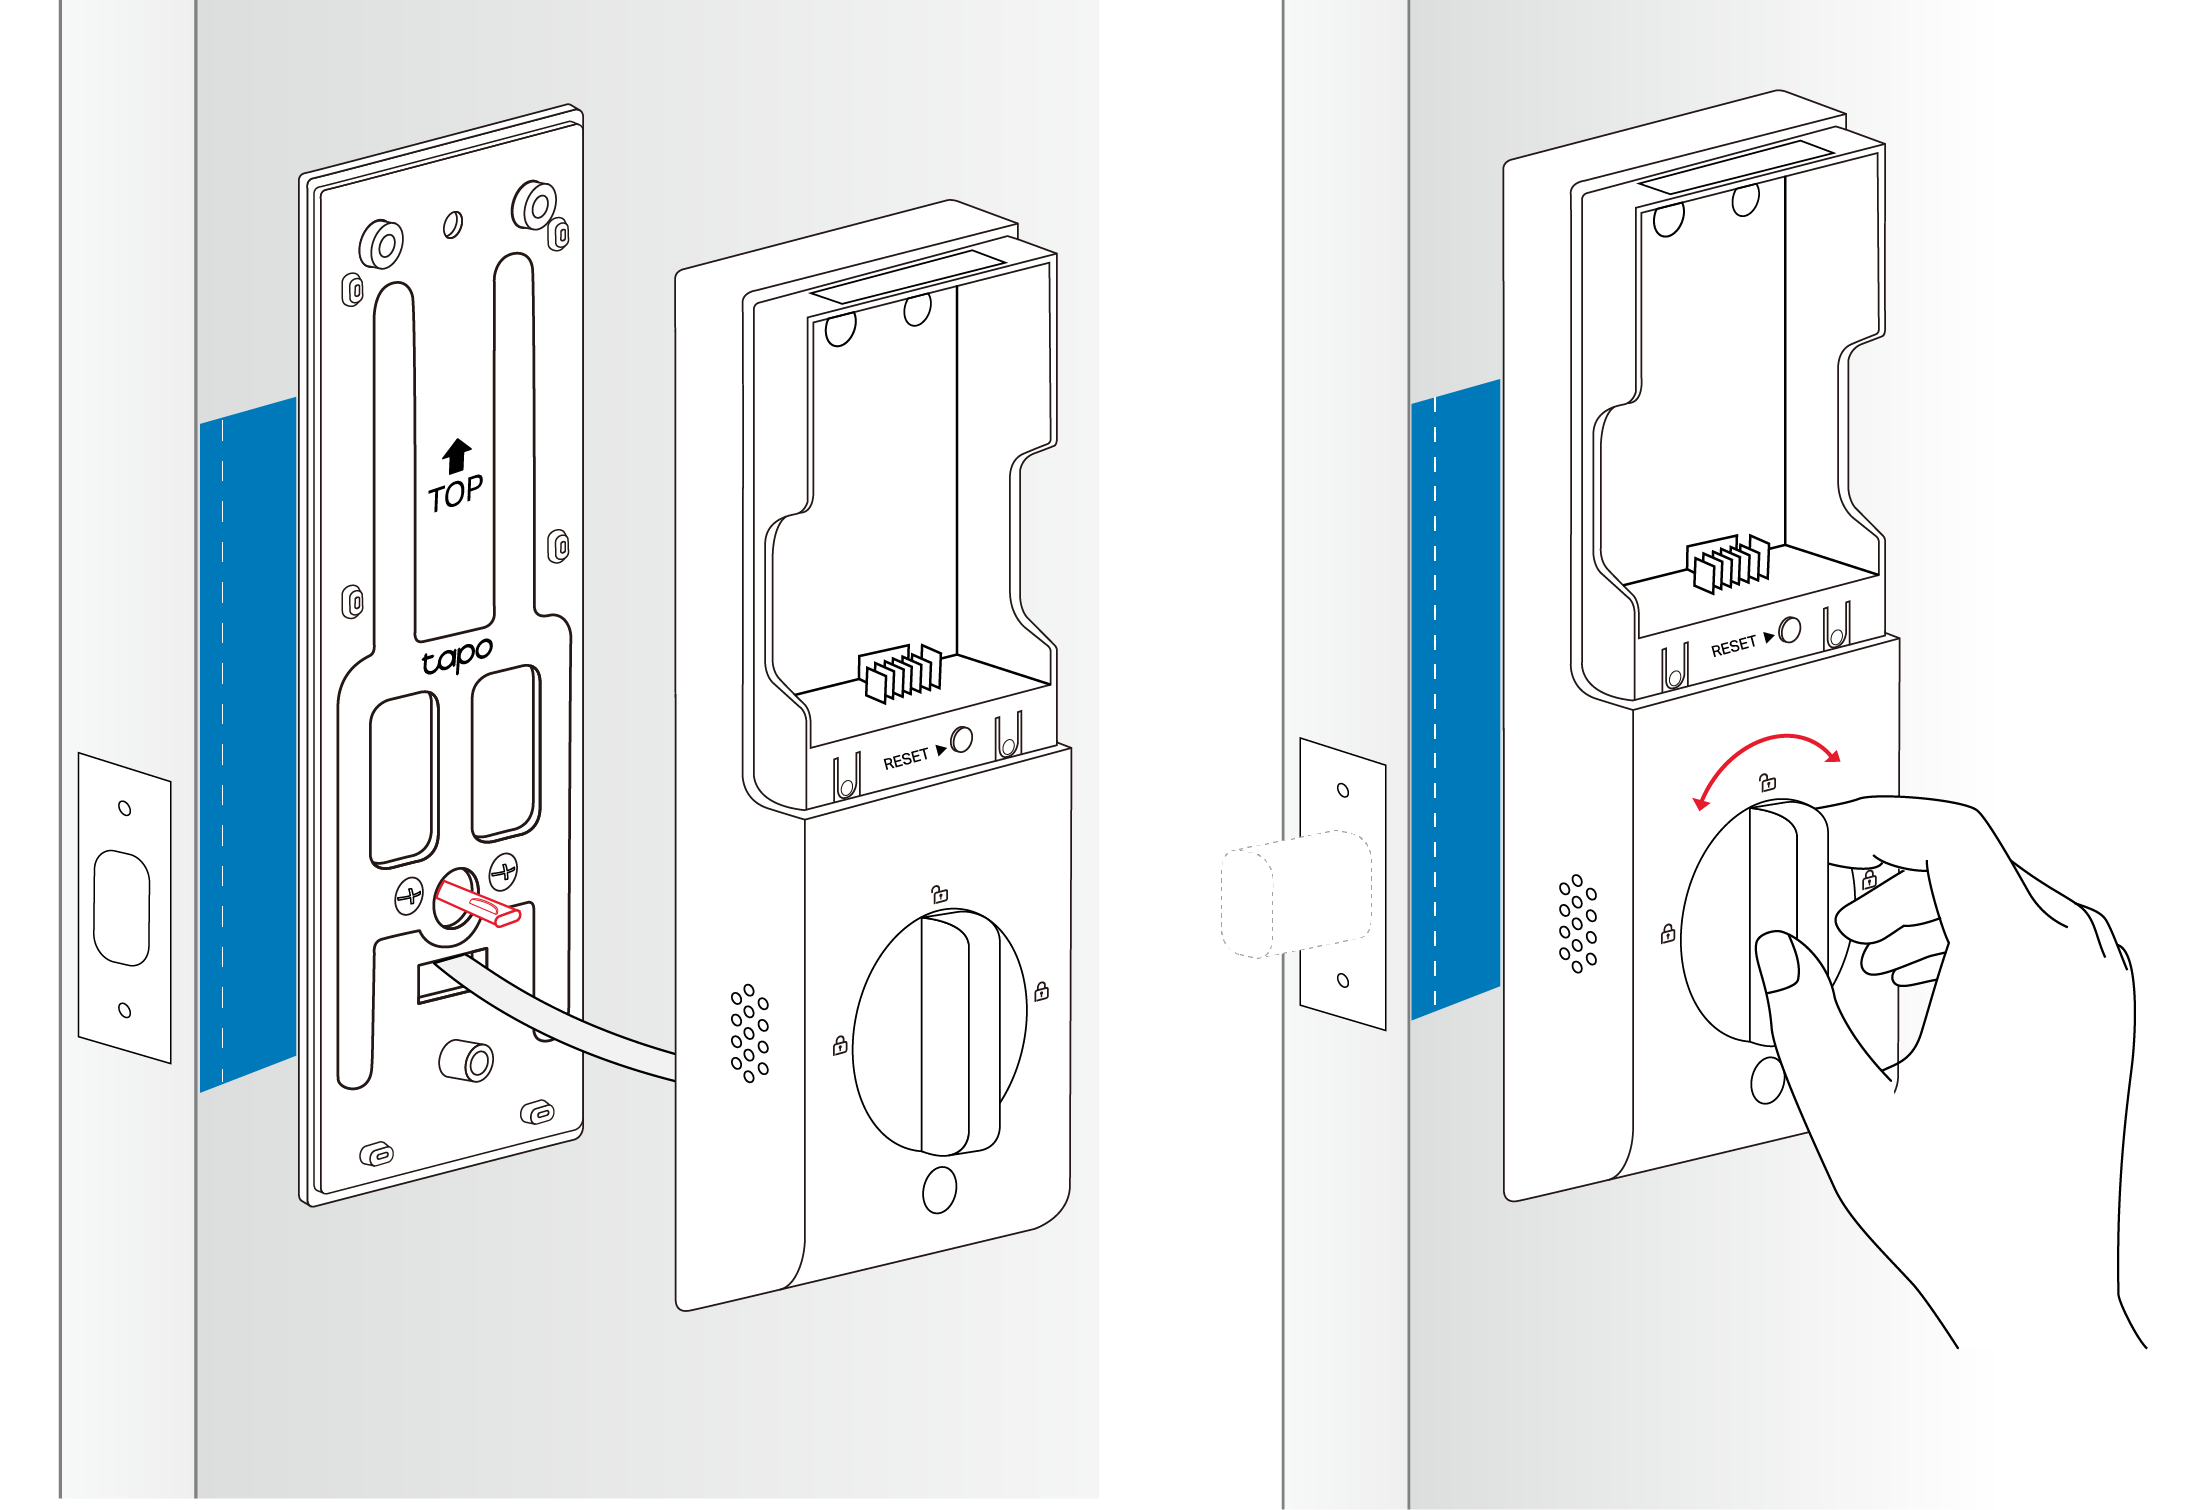
Step 6. Install the interior assembly
1) Remove the battery cover.
2) Connect the cable tightly. Ensure the color side faces up.
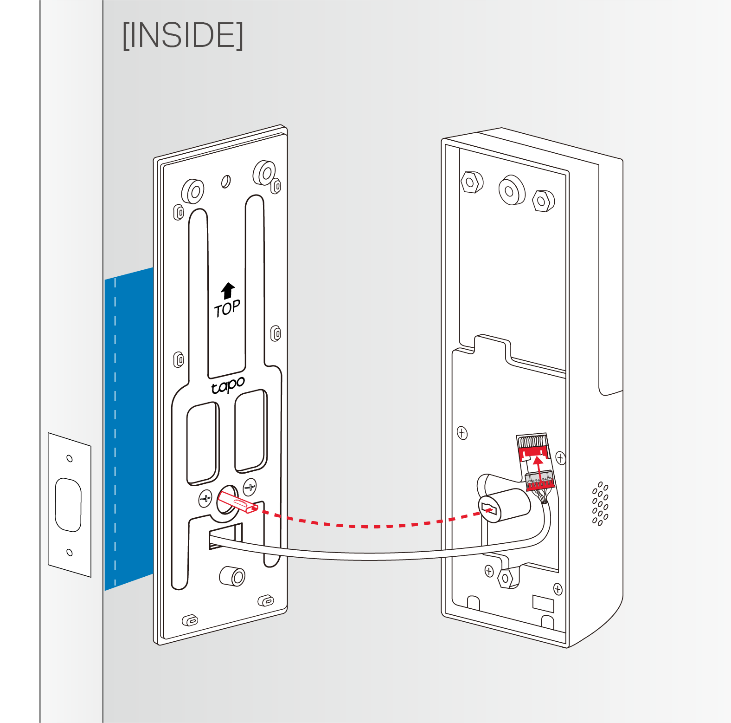
3) Align the tailpiece with the key cylinder. Attach the interior assembly to the mounting plate.
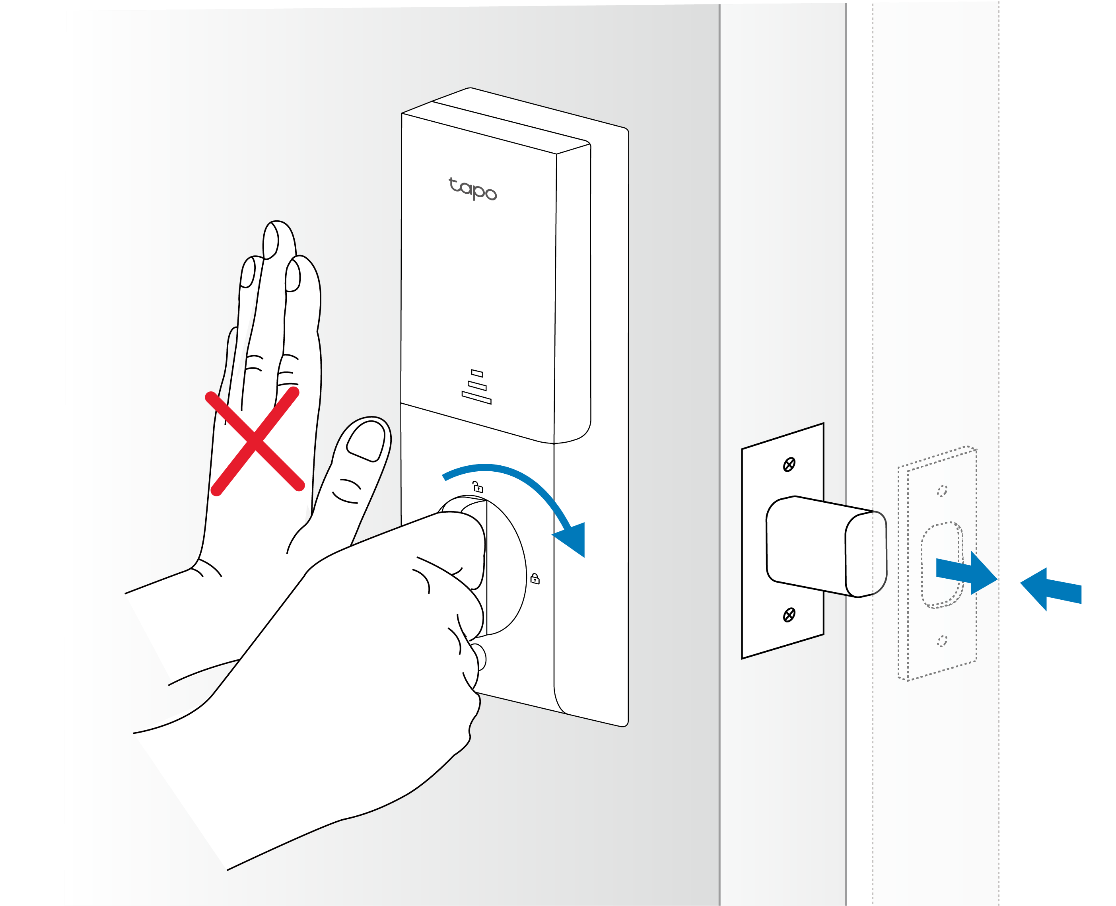
4) Rotate the thumb latch to ensure the latch retracts normally.
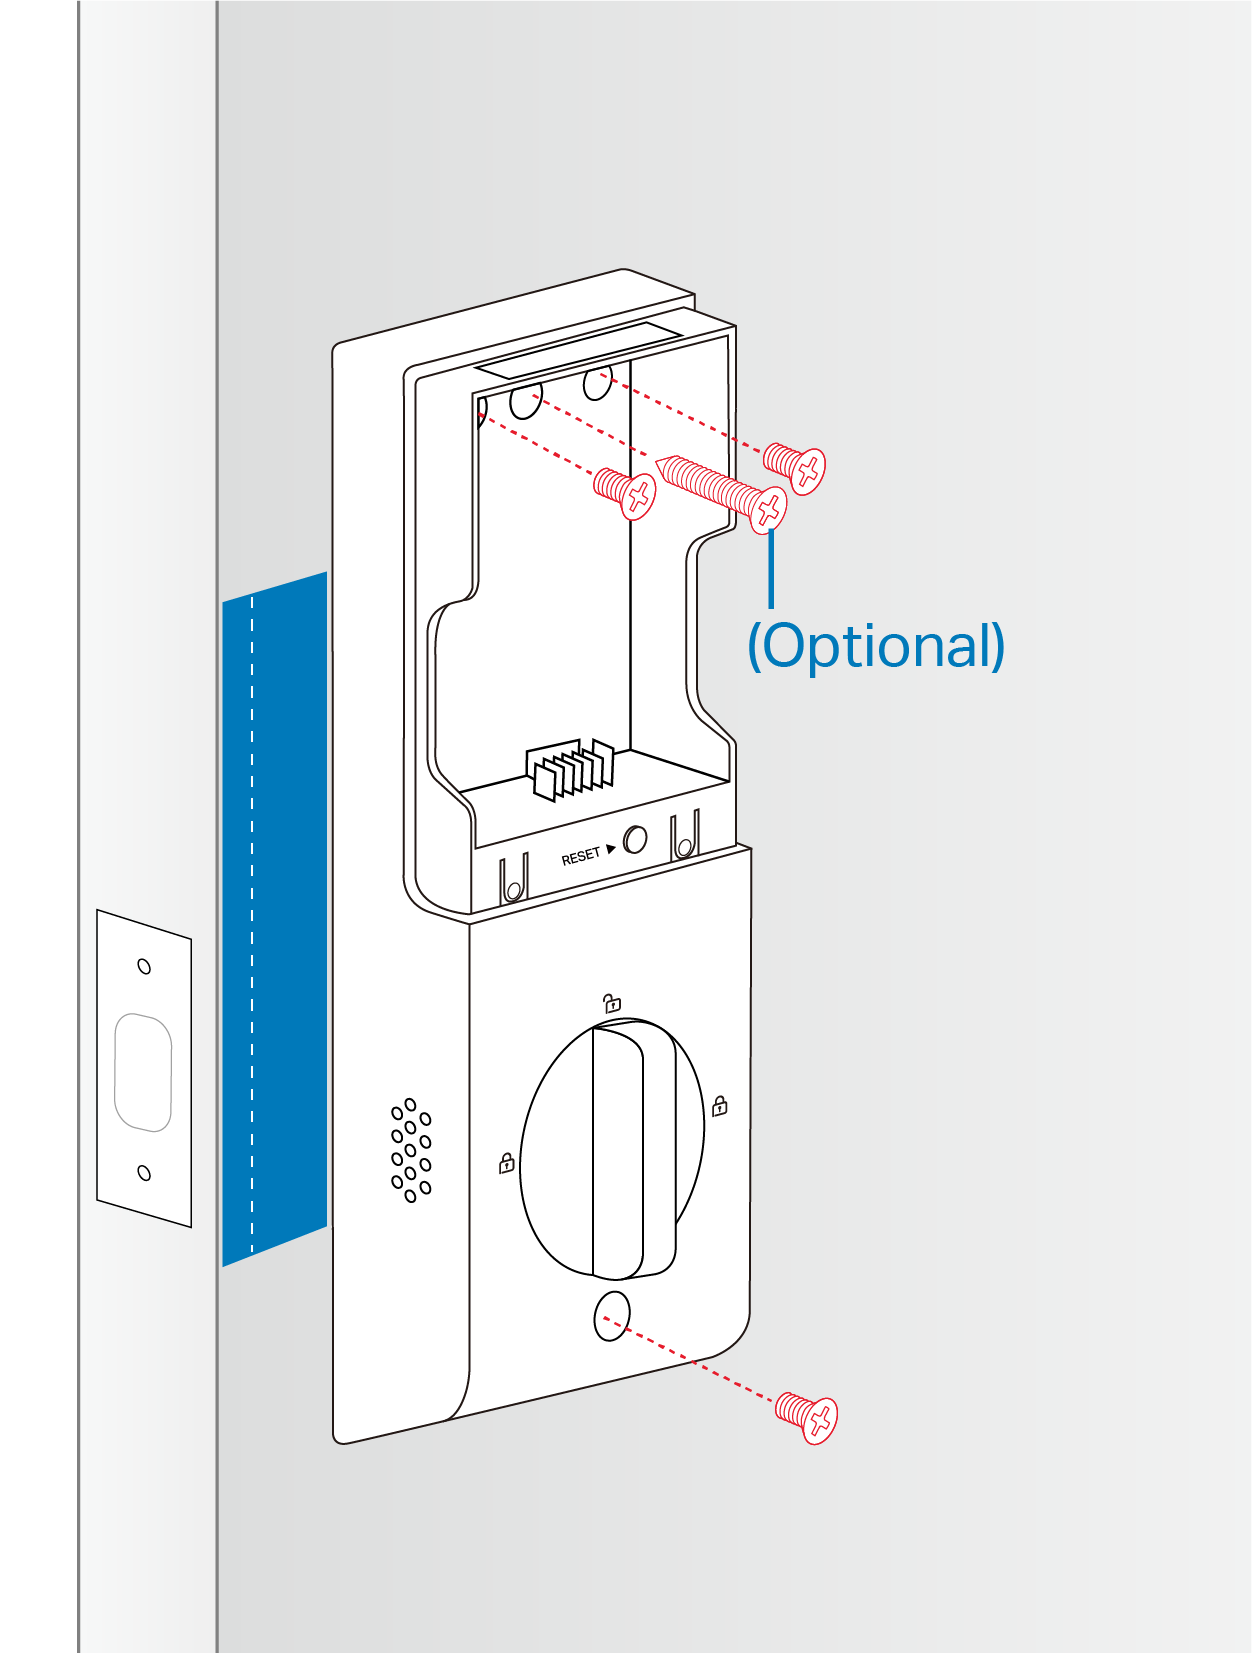
5) Use the three provided M4*7.5 screws to affix the interior assembly. The provided ST4×20 screw is optional. It is used to secure the interior assembly.
Step 7. Install the batteries
1) Insert the battery into the interior assembly. Replace the battery cover.
2) Insert the silicone cover into the bottom hole. Remove the stickers.

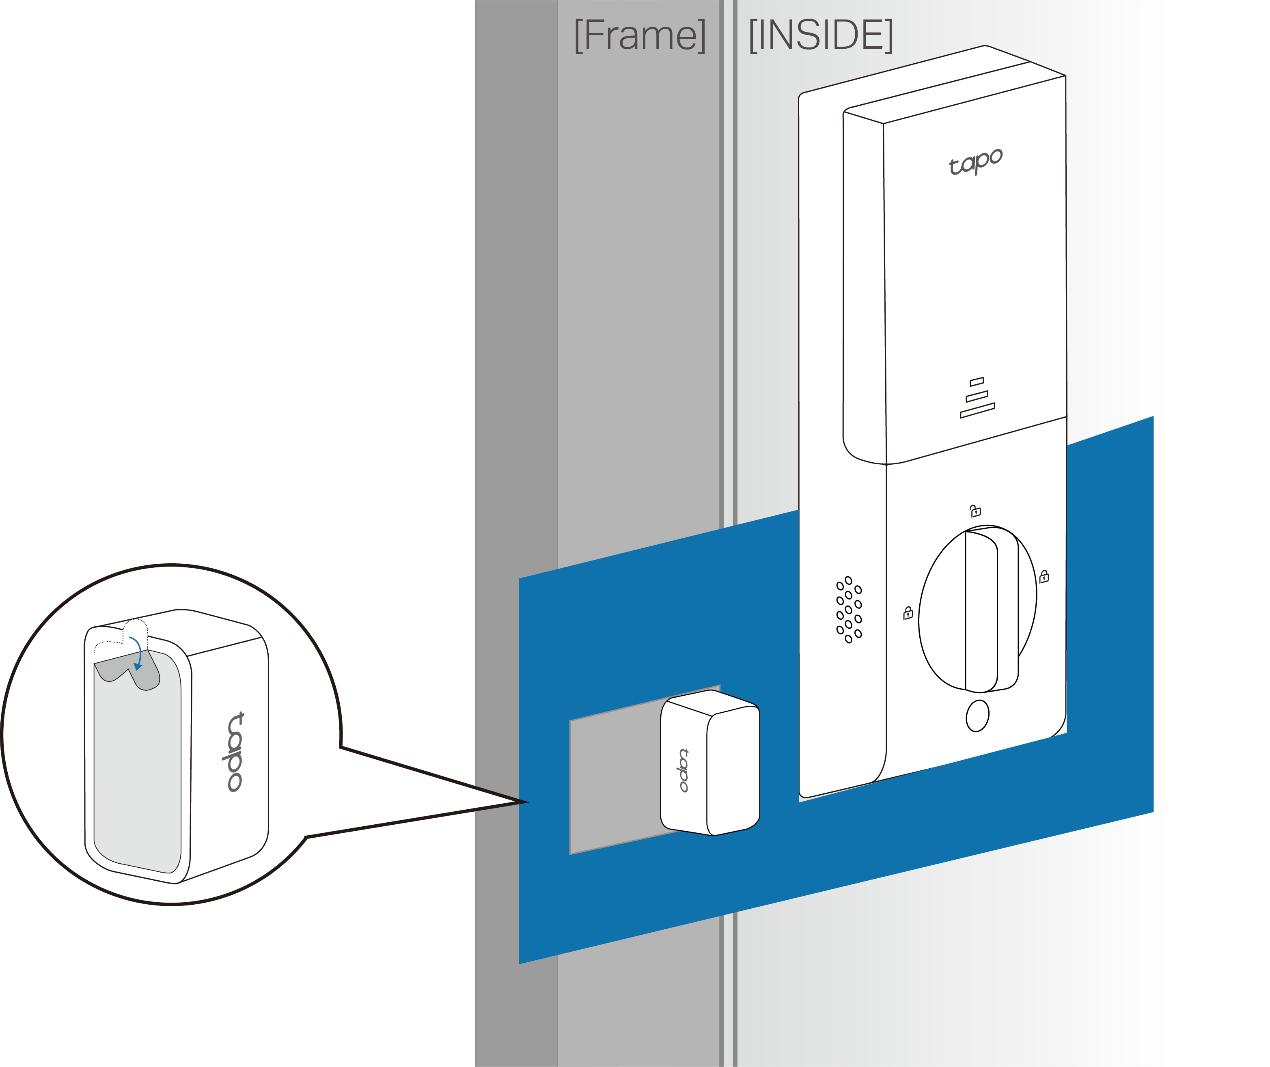
Step 8. Install the door sensor
Use the mounting template to locate the mounting location. Peel the adhesive from the door sensor and stick it to the door frame within the marked area, aligning the long side parallel to the lock. Press for at least 15 seconds to ensure it’s firmly attached.
Note: The adhesive is not suitable for rough or flaky materials.
Step 9. Install the strike plate
Insert the dust box and strike plate into the strike hole on the door frame. Ensure the depth of the strike hole is at least 1’’ (25.4 mm).
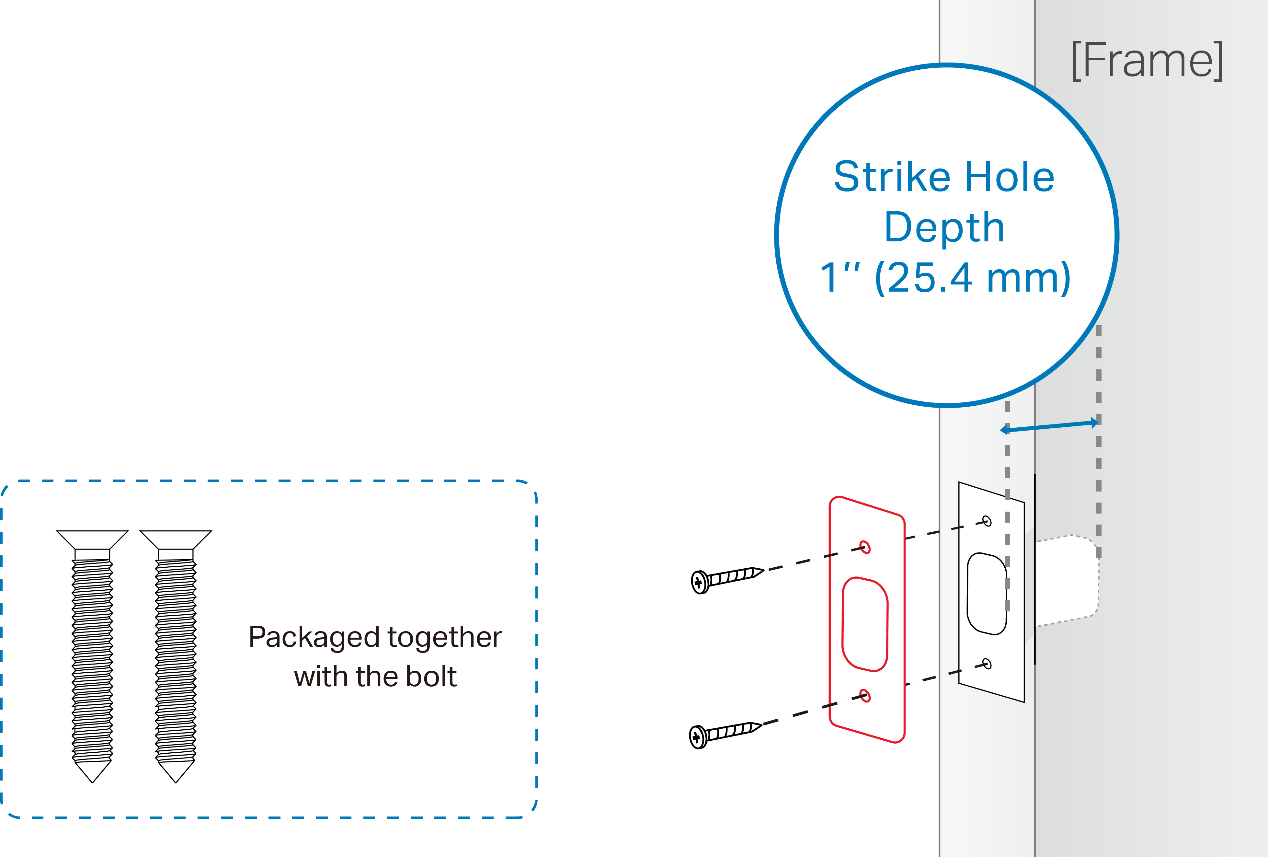
Note: If the bolt operates smoothly without pushing or pulling the door, you can use your original strike plate.
If you need to push or pull the door for smooth operation, adjust the position of the strike plate on the door frame to ensure a proper fit.
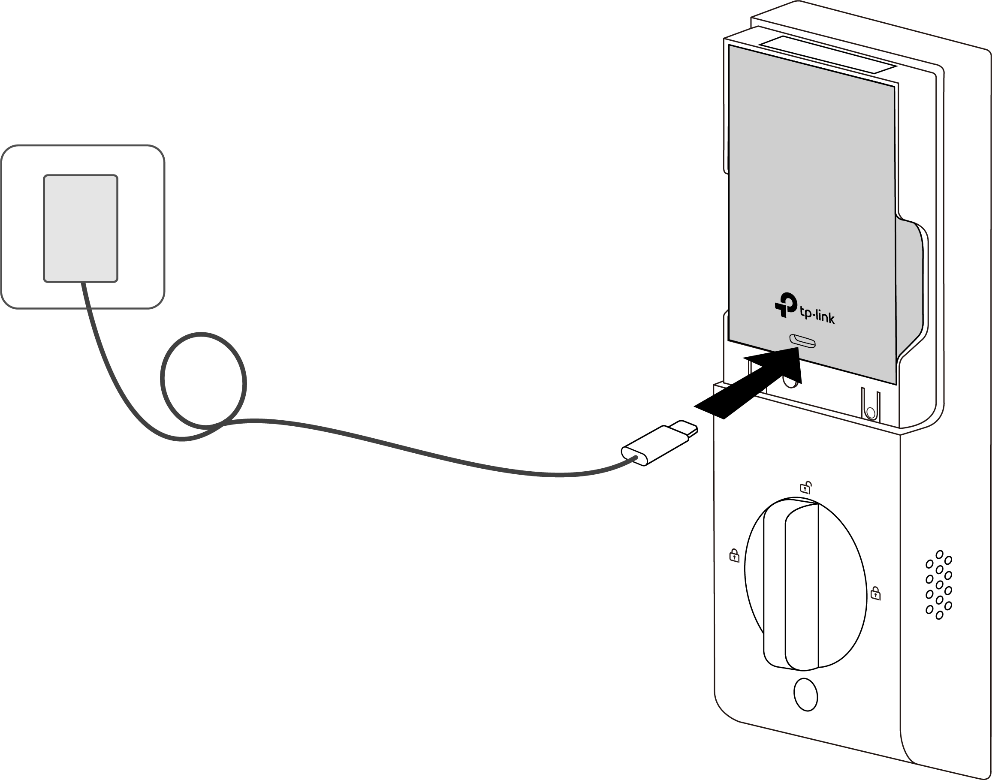
Installation is complete. Please set up your door lock and enjoy it. You can also charge the battery while the device is in use. Plug the provided USB cable into the battery pack's Type-C port, then connect it to a power outlet via a USB adapter with 5V/2A (or higher current) output.
คำถามที่พบบ่อยนี้มีประโยชน์หรือไม่?
ความคิดเห็นของคุณช่วยปรับปรุงเว็บไซต์นี้