How to setup and share a printer on TP-Link cable modem routers(Blue UI)
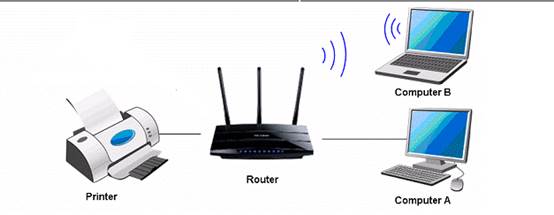
Definition: Print server is a function embedded in your Router. It allows you to share your printer with computers that are connected to the Router.
Preparation:
1. TP-Link Modem Router with USB port which supports print server function
2. USB printer and USB cable
3. Computer with OS of Windows XP/ Windows Vista/ Windows 7/ Windows 8/ Windows 8.1/10/MAC
Note:
1. Make sure you have already installed the printer’s driver on your computer and can print properly when the printer is connected directly to the computer. Otherwise, please install it first.
2. Any computer in your LAN have to install the Printer Controller Utility if it needs to share the print server via the Modem.
3. Print Server Function is not compatible with Linux system since there is no Printer Controller Utility for Linux at the moment.
Installation - For Windows 7, Vista & XP, Windows 8, Windows 8.1, Windows 10 and MAC
Note: Archer CR700 is used for demonstration in this article.
Step 1
Download the USB Printer Controller Utility from our Website.
Step 2
Double click TP-Link USB Printer Controller Setup.exe you’ve downloaded.
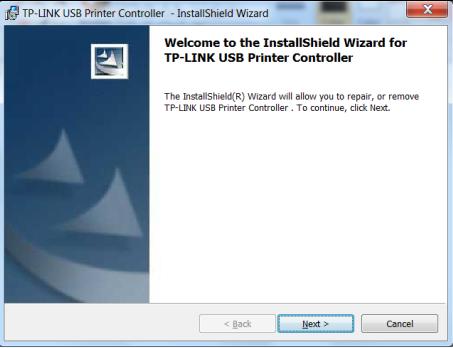
Step3
Click NEXT to start installing the printer share software.
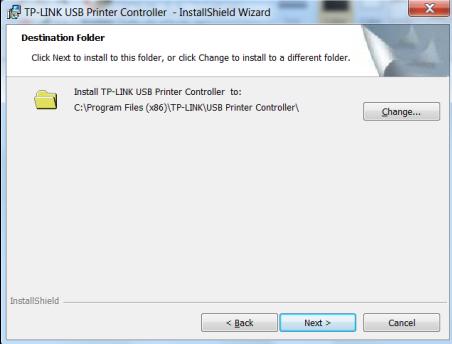
Step 4
Click Change…to select another destination folder, or leave it default and click Next
.
Step 5
Click Install to begin the installation.
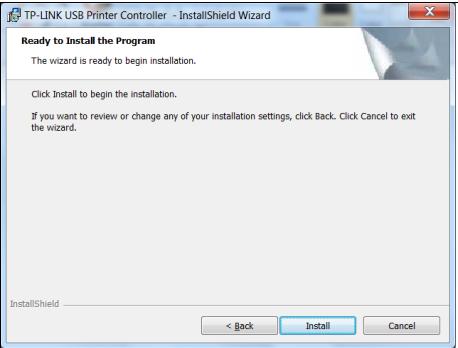
Step 6
Please wait a while, Click Finish to complete and exit the Install Shield Wizard.
Application -For Windows 7, Vista & XP, Windows 8, Mac OS 10.6 to 10.10.
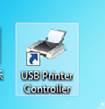
After successful installation, the icon will appear on the desktop of your computer.
Step 7
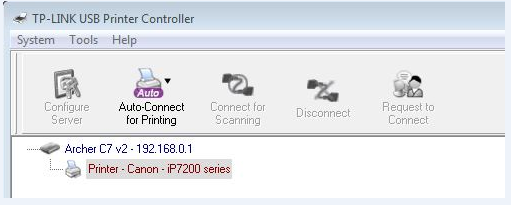
Double-click the icon To Launch the TP-Link USB Printer Controller
Step 8
Highlight the printer you want to set as auto-connect printer.
Step 9
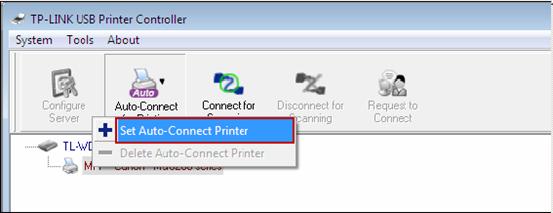
Click the inverse triangle mark on the Auto-Connect for printing tab to pull down the list, where you can select Set Auto-Connect Printer.
Step 10
Tick the name of the printer you would like to set as auto-connect printer, and then click Apply.
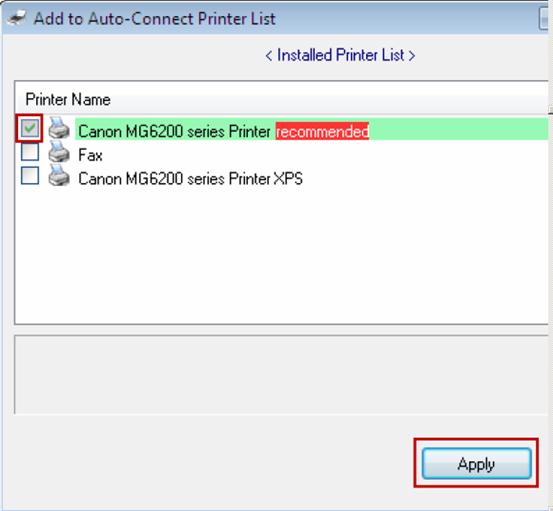
After successful setting, you will see the printer marked as Auto-Connect Printer. You can execute your printing tasks automatically.
Step 11
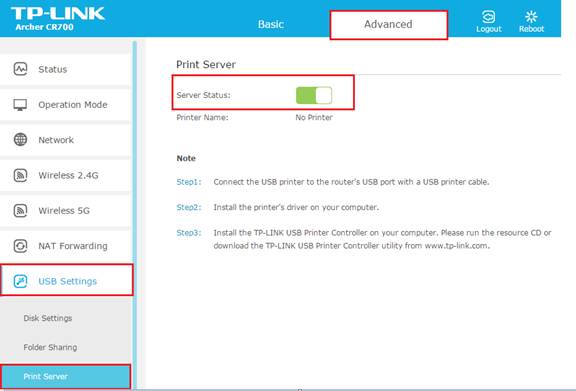
If it cannot print, please log into the web management page of this modem, please refer to How to log into the web-based management interface of Archer CR700?
And make sure the Pinter Server Status is on.
Get to know more details of each function and configuration please go to Download Center to download the manual of your product.
คำถามที่พบบ่อยนี้มีประโยชน์หรือไม่?
ความคิดเห็นของคุณช่วยปรับปรุงเว็บไซต์นี้

