How Do I Secure My Wireless Powerline Extender on a Mac Computer?
O artigo aplica-se a:
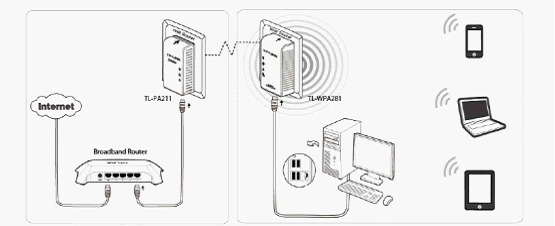
Step 1: Build a network like this first.
Unplug the adapter from your router or you can just unplug the adapter from the power socket, then connect the Macbook / Mac computer to the extender with an Ethernet cable.
Step 2: Set a static IP for your Mac computer:
(1) Click the Apple menu  and then go to System Preferences.
and then go to System Preferences.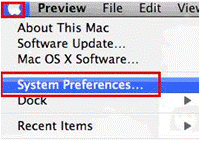
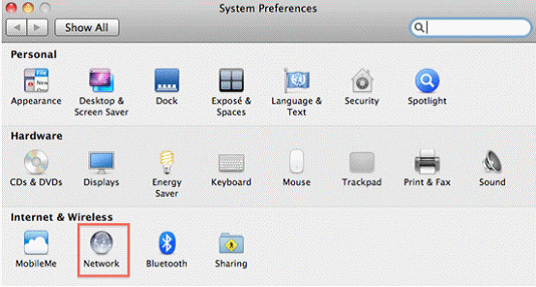
(2) Click Network.
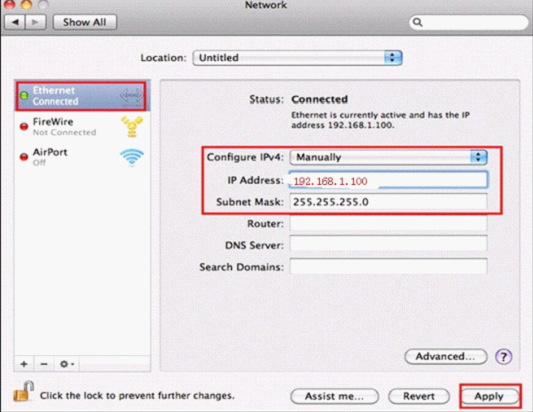
(3) On the left side, please select Ethernet.
Select Configure IPv4 as "Manually", and then fill in the IP address (192.168.1.100), Subnet Mask (255.255.255.0).
At last, click Apply.
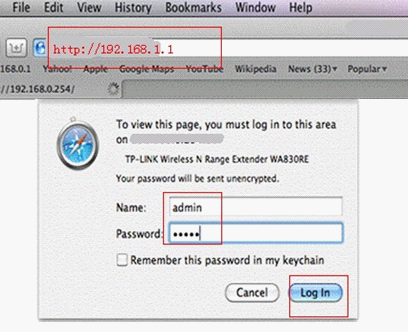
Step 3: Open the web browser (Safari or Firefox or others):
Note: If you cannot login, please change a cable & reset the wireless powerline extender to factory defaults settings
(Press and hold the Reset button for more than 10s) and try to login again.
Step 4: Configure the wireless network
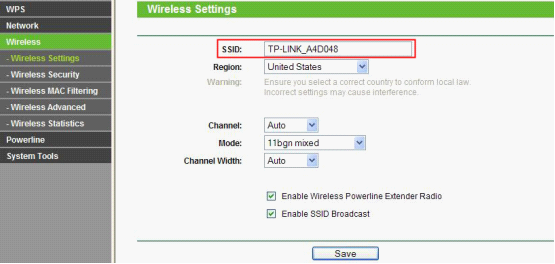
Please go to Wireless-> Wireless Settings page. Change the SSID (Network name), and Save;
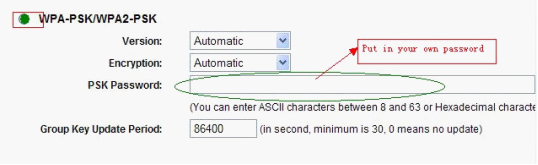
Please go to Wireless->Wireless Security page, select WPA-PSK/WPA2-PSK and type in the PSK Password.
Click Save.
Step 5: Go to System Tools> Reboot. Reboot.
Wait a moment and Check wireless network can work or not by wireless device.
Step 6: Then go to Apple Menu>System Preferences>Network>Ethernet:
Select Configure IPv4 as Using DHCP. Apply.
Until now, you have secured the wireless network. You can unplug the Ethernet cable and plug the Wireless
Powerline Extender to other wall socket in the same electrical circuit and enjoy your new wireless network.
If you want tosecure the powerline network, please refer to the FAQ 258.
Este guia foi útil?
A sua resposta ajuda-nos a melhorar o nosso site.


