How to setup an AC-class Wi-Fi Router as an Access Point (New Blue UI)
Note: To avoid connection issues during setup, make sure to complete the following steps through a computer wired directly to the router.
Step 1: Log into the router using tplinkwifi.net or the default IP address. The default login username and password are both admin (all lower case).
If needed, you may refer to How do I log into the web-based Utility (Management Page) of TP-Link wireless router? for more detailed information.
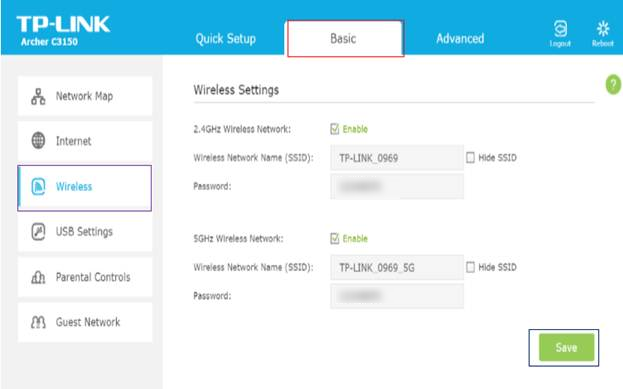
Step 2: Click Basic on the top navigation bar, then select Wireless on the left panel. Input your Wireless Network Name (SSID) and Password, then click Save (bottom left of the screen) to save your changes.
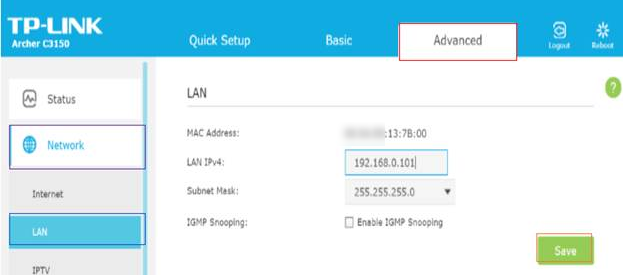
Step 3: Click Advanced > Network > LAN. Change the LAN IPv4 to one on the main router’s subnet, then click SAVE.
Example: If the root router’s IP is 192.168.0.1 with an IP range of 192.168.0.2-192.168.0.100 you would set the TP-Link device to 192.168.0.101
Note: After changing the IP address settings, you’ll need to reboot your router, then log back into the router with the new IP address.
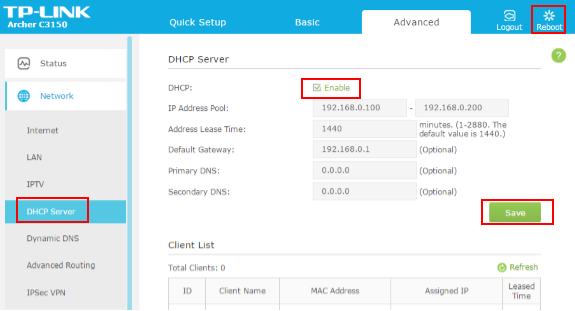
Step 4: Once you’ve logged back into the interface, click DHCP Server on the left panel. Uncheck the Enable box for DHCP. Click SAVE (bottom of the list of DHCP Server settings), then click Reboot on the rightmost side of the top navigation bar for your changes to take effect.
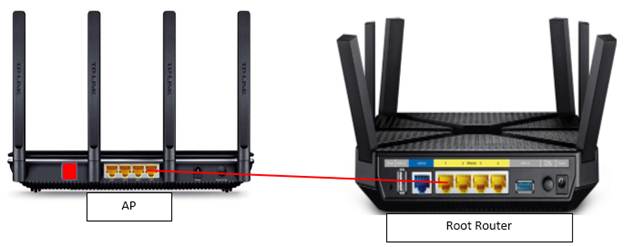
Step 5: Connect your TP-Link router to the root router with an Ethernet cable (LAN to LAN) and test your wireless connection through your computer.
Get to know more details of each function and configuration please go to Download Center to download the manual of your product.
¿Es útil esta pregunta frecuente?
Sus comentarios nos ayudan a mejorar este sitio.
2.0-F_normal_1591236317095o.png)