
How to Configure and Manage Floodlight Settings on a Tapo Camera
Tapo Floodlight Cameras provide strong nighttime illumination with flexible manual, detection‑based, and scheduled controls. This article explains how to configure the floodlight settings on your Tapo camera, along with the troubleshooting steps to ensure your floodlight works as expected.
Note: Feature availability may vary by device model, hardware version, and firmware version. Please refer to the options displayed in the Tapo app for your specific device.
Key Takeaways
- Configure Manual Control and set an Auto Off Timer from 15 seconds to 5 minutes for manually activated floodlight sessions.
- Enable Sensor Detection, Camera Detection, or both to turn on the floodlight when activity is detected automatically.
- Use Extended On Time to keep the floodlight on for 3 seconds to 2 minutes after a valid detection event ends.
- Set Auto On Effective Time with Night Mode, Sunset to Sunrise, or Custom Time to control when detection-based activation is active.
- Create a Light On Schedule based on Sunset to Sunrise or a Custom Schedule to automatically illuminate the area at specified times.
- If the floodlight behaves unexpectedly, review detection settings, schedules, smart automations, and manual controls to identify possible causes.
Manual Floodlight Control
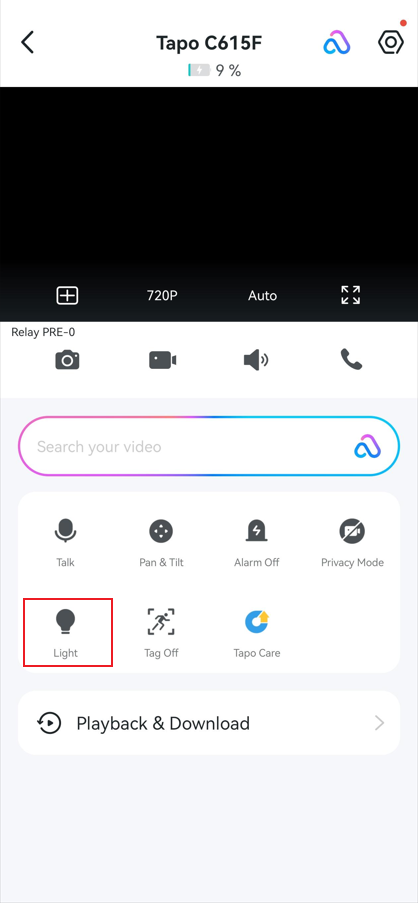
You can manually turn the floodlight on or off from the camera’s Live View page by tapping the Light icon.
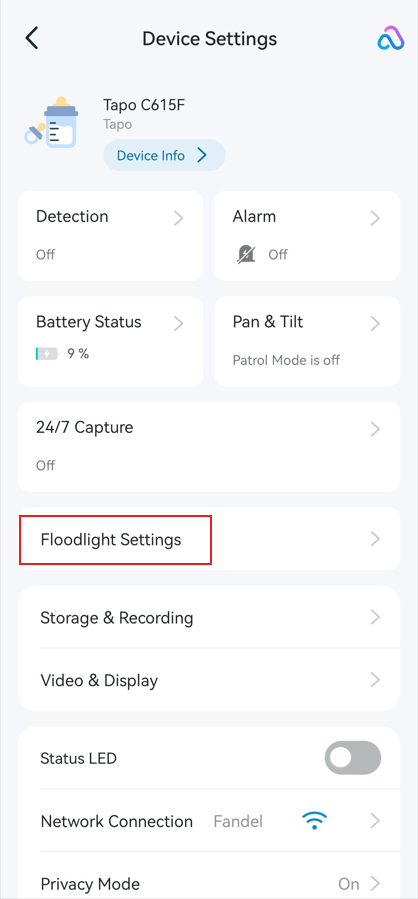
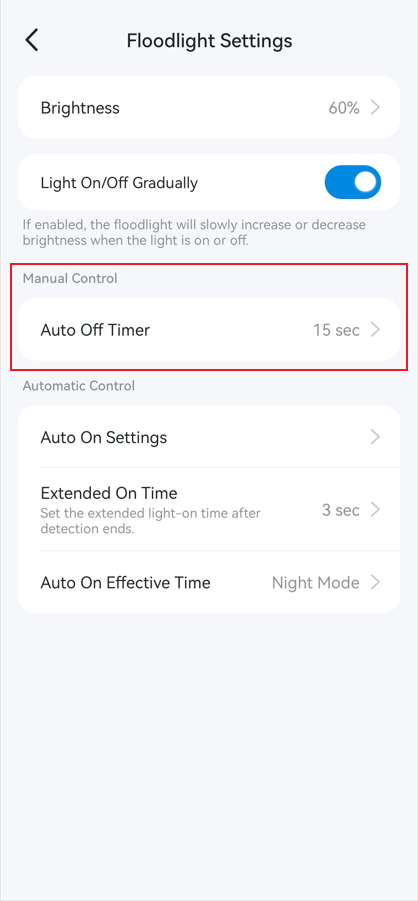
To configure how long the light stays on after being turned on manually, go to camera Device Settings > Floodlight Settings > Auto Off Timer. The duration can be set from 15 seconds to 5 minutes.
Detection-Based Floodlight Activation
The floodlight can turn on automatically when the camera detects activity.
Go to camera Device Settings > Floodlight Settings, and you can configure Auto On Settings, Extended On Time, and Auto On Effective Time.
Auto On Settings
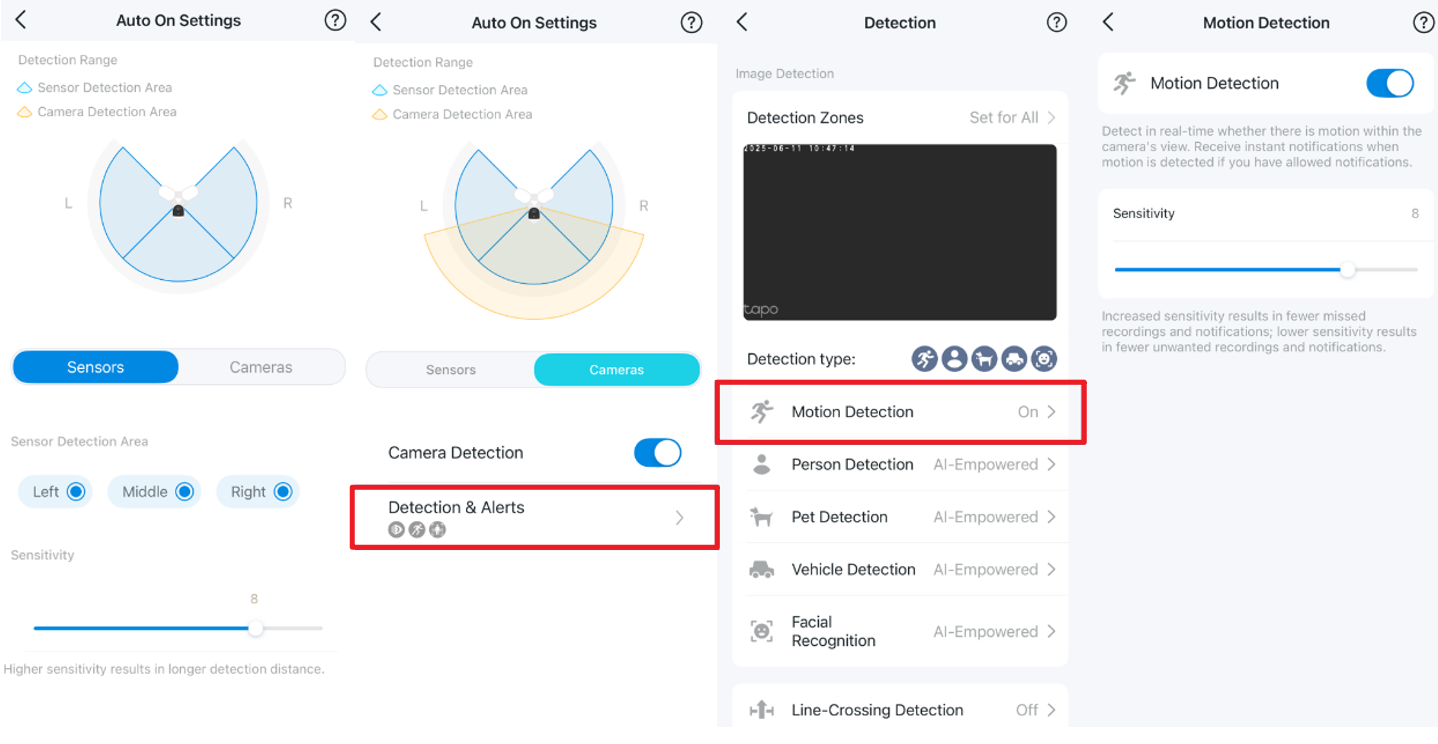
On the Auto On Settings page, you can choose to trigger the floodlight based on Sensor Detection, Camera Detection, or both.
Sensor Detection: Floodlight turns on when the camera’s PIR sensor detects motion.
- You can configure Sensor Detection Area and Sensitivity. Note that the sensitivity here is the same as Wake-Up Sensitivity. Changing one setting automatically updates the other.
- Sensor Detection typically responds faster, but it may be more prone to false triggers in some environments because it relies on the PIR sensor to detect changes in heat.
- On battery-powered cameras, frequent sensor detection and floodlight activations may also increase battery consumption.
Camera Detection: Floodlight turns on when the camera's detection algorithms identify activity within the detection zone.
- You can configure Detection Zones, Detection Types, and Sensitivity accordingly.
- Camera Detection generally provides more accurate triggering and helps reduce false activations.
- However, since the camera must analyze the scene before triggering the floodlight, a slight delay may occur compared to Sensor Detection.
Extended On Time
Extended On Time determines how long the floodlight remains on after a valid detection event ends. The duration can be set from 3 seconds to 2 minutes.
Extended On Time applies only to valid detection events, where both PIR and the detection algorithm are triggered. If motion is detected by PIR only (without algorithm confirmation), the floodlight stays on for a fixed 15 seconds.
Extended On Time behavior:
|
Trigger Condition |
Floodlight Behavior |
|
Valid event detected (PIR + algorithm confirmed) |
|
|
PIR-only detection (no event confirmed) |
|
|
During Extended On Time (after a valid event ends) |
|
Auto On Effective Time
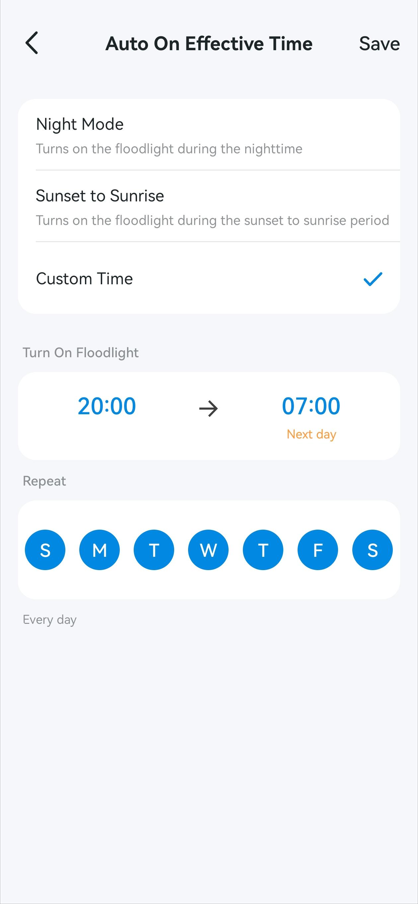
Auto On Effective Time defines when detection-based floodlight activation is active. Auto On Effective Time supports three modes: Night Mode, Sunset to Sunrise, and Custom Time.
If this setting is not available on your model, detection-based floodlight activation operates in Night Mode by default.
Scheduled Floodlight Control
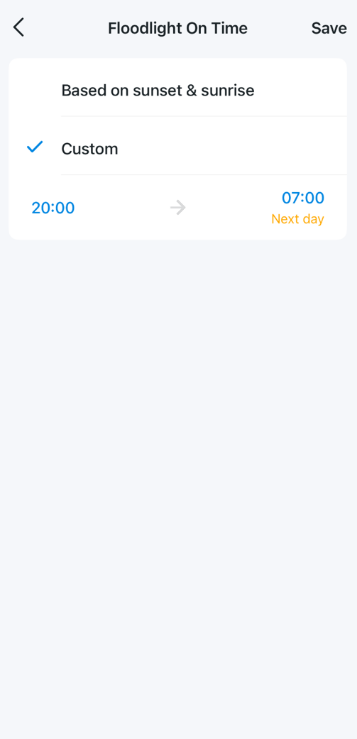
You can configure the floodlight to turn on automatically according to a schedule.
Go to camera Device Settings > Floodlight Settings > Light On Schedule. You can schedule based on Sunset and Sunrise or create a Custom Schedule.
Q&A
Q1: How do the different floodlight control methods work together?
- Turn On the Floodlight: Any of the three methods (Manual Control, Detection-Based Activation, Schedule Activation) can activate the floodlight.
- Turn Off the Floodlight: Manual control takes priority over Detection-Based and Scheduled Activation. If the floodlight is turned off manually, it will turn off immediately regardless of other active triggers.
Q2: What should I do if the floodlight does not turn on automatically?
Try the following troubleshooting steps:
- Open the camera's live view and tap the Light icon to check whether the floodlight can be turned on manually
- If manual control works, go to camera Device Settings > Floodlight Settings > Auto On Settings, ensure Sensor Detection and/or Camera Detection is enabled, and increase the sensitivity if necessary.
- Check Auto On Effective Time and verify that the configured active period is correct.
- Confirm that motion detection is working properly and adjust the camera position if needed.
Q3: What should I do if the floodlight turns on or off unexpectedly?
Check the following:
- Go to camera Device Settings > Floodlight Settings > Light On Schedule and verify whether any schedules are configured.
- Review Floodlight Settings > Auto On Effective Time to ensure the detection-based floodlight activation schedule is configured correctly.
- In the Tapo app, go to the Smart tab and check for any automations that may be controlling the floodlight.
- Confirm that no family member or shared users are manually controlling the device.
Q4: Can I set the floodlight to turn on at specific times during the night for illumination?
Yes. Go to Device Settings > Floodlight Settings > Light On Schedule. You can create a lighting schedule based on Sunset and Sunrise or set up a custom schedule according to your preferences. Note that this feature may not be available on all device models; please refer to your app display for the most accurate information.
To learn more about each function and configuration, please visit the Download Center to download the manual for your product.
Looking For More
Is this faq useful?
Your feedback helps improve this site.



TP-Link Community
Still need help? Search for answers, ask questions, and get help from TP-Link experts and other users around the world.