
How to Collect System Logs from TP-Link Aginet Devices: Aginet App and Web Management
If you need to troubleshoot an issue with your TP-Link Aginet device, collecting system logs can help identify the root cause. This guide explains how to obtain logs through the Aginet App and the device web management page.
Key Takeaways
- Most TP-Link Aginet devices allow you to export system logs from the web management page.
- User consent is required before enabling Advanced Log collection.
- Logs should be collected when the issue occurs and exported after the issue is reproduced.
How to Collect System Logs from TP-Link Aginet Devices
Scenario 1: Collect Logs Through the Aginet App
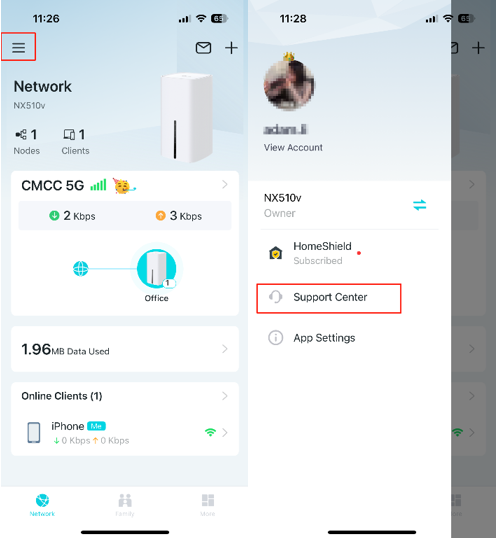
Step 1. Launch the Aginet app and log in to your account. Click on the three-line icon in the top left corner of the Aginet app and then select Support Center.
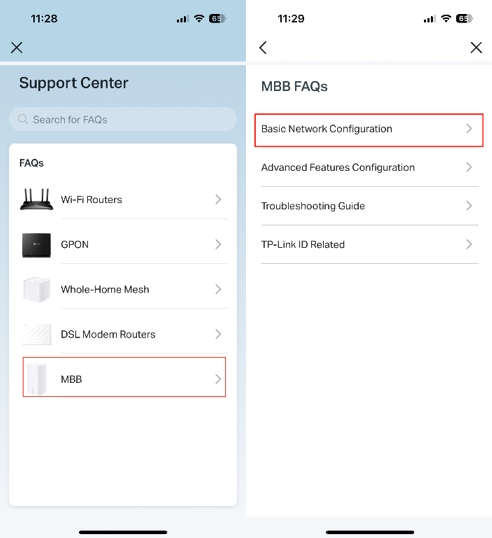
Step 2. Choose the relevant product type and an FAQ from the list.
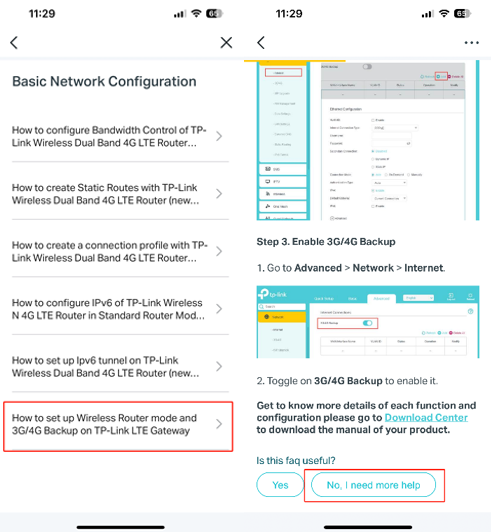
Step 3. Select any one of the FAQs listed, scroll down the FAQ page, then tap No, I need more help.
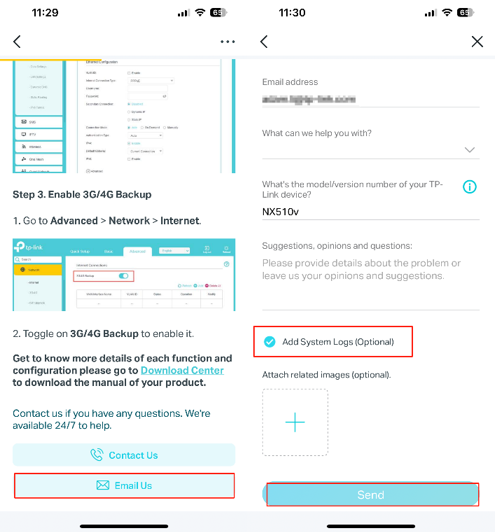
Step 4. Tap Email Us, choose suggestions within the What can we help you with option, and provide relevant details of your case. Then check Add System Logs and tap Send.
Scenario 2: Export System Logs Through the Web Management Page
Note:If your device supports Log Center, please refer to Scenario 3.
Here we take VX230v as an example:
Step 1. Launch a web browser, at the top of the window in the address bar type in https://tplinkmodem.net and press Enter to log in Router’s Web UI.
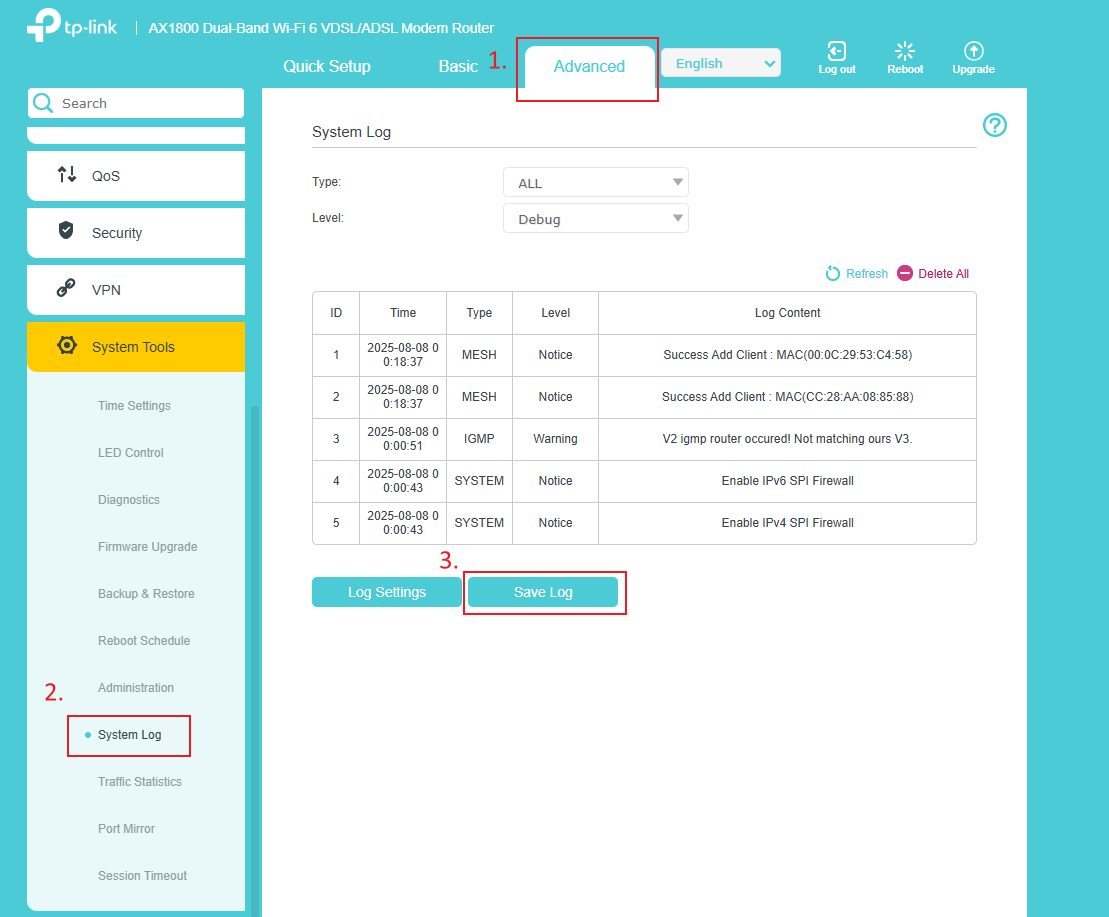
Step 2. Go to Advanced > System > System Log. You can view different logs based on log type. Click Save Log; the system log will be saved on your computer.
Scenario 3: Collect Logs Through Log Center
Here we take TP-LinkBox 7 as an example:
Step 1. Launch a web browser; at the top of the window in the address bar, type https://tplinkmodem.net and press Enter to log in to the router’s Web UI.
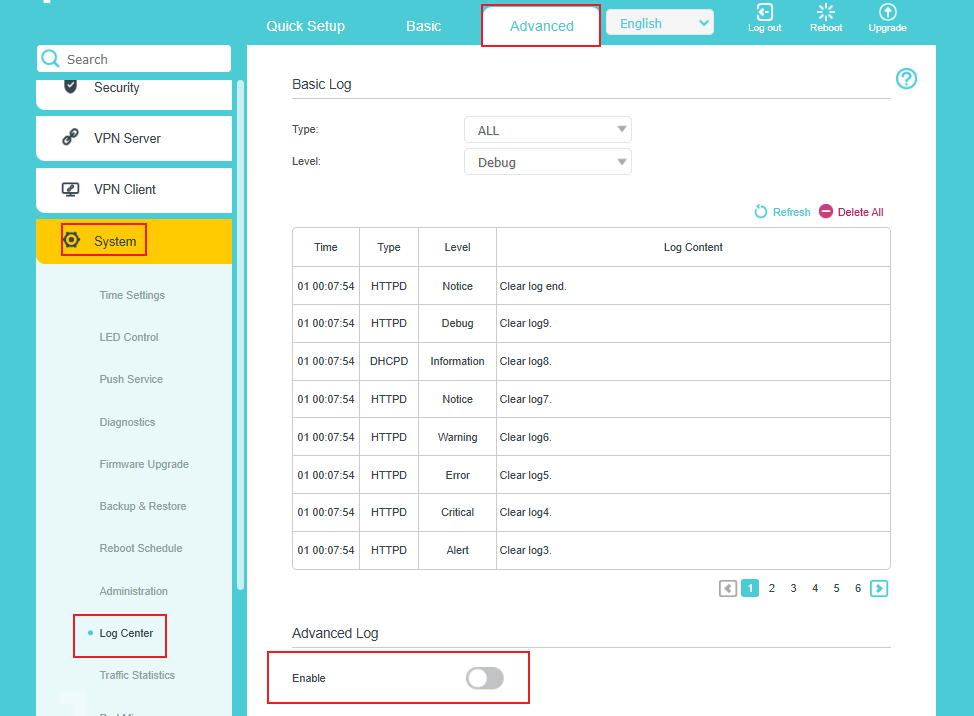
Step 2. Go to Advanced > System > Log Center; you can see both Basic Log and Advanced Log. At this stage, you need to enable Advanced Log.
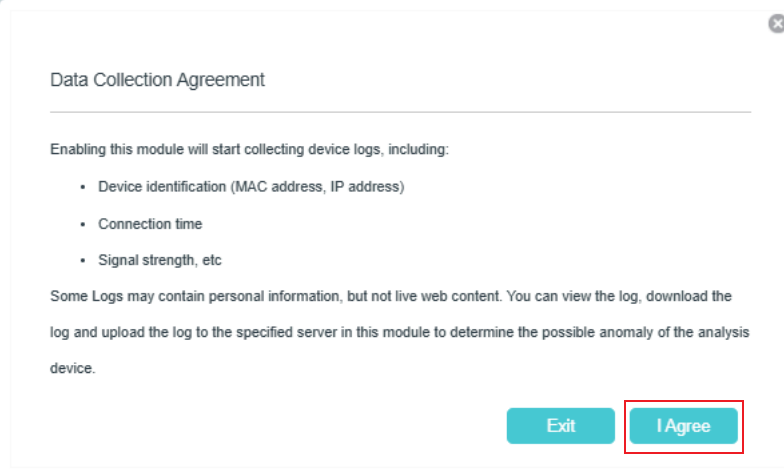
Step 3. When Advanced Log is enabled, the Data Collection Agreement is activated. To comply with privacy requirements, user consent is required. Please click I Agree to proceed.
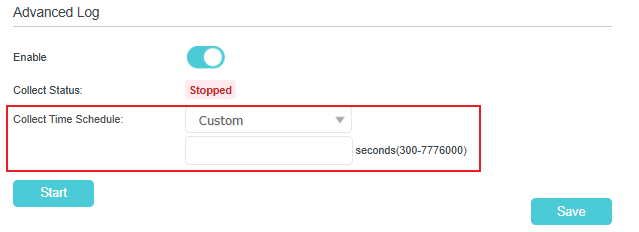
Step 4. Configure the Collect Time Schedule. Based on when the issue occurs and how frequently it happens, select an appropriate option such as 1 Day, 7 Days, or 30 Days. Alternatively, select Custom and specify a custom duration ranging from 300 to 7,776,000 seconds.
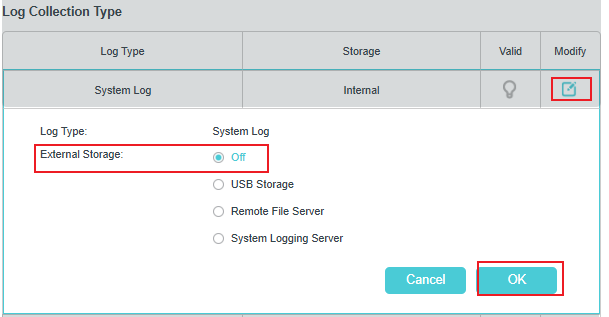
Step 5. Configure the System Log. Click the Modify button, External Storage can be set to Off, the log will be stored internally on the device. Once the configuration is complete, click OK.
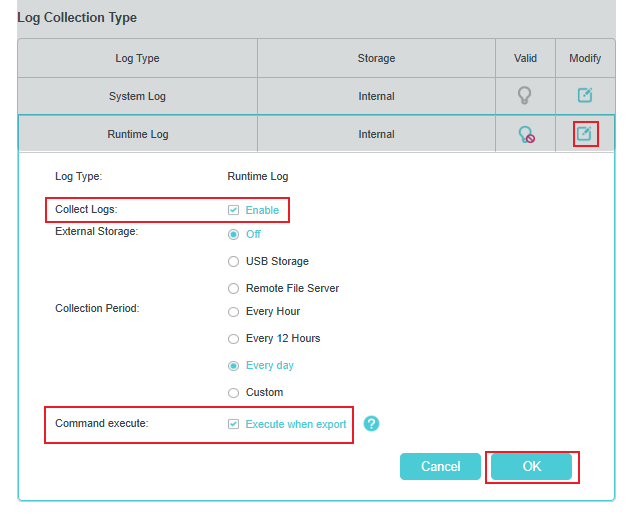
Step 6. Configure the Runtime Log. Click the Modify button and set Collect Logs to Enable. External Storage can be set to Off. Select an appropriate Collection Period based on how frequently the issue occurs. For Command Execute, check Execute when export. Once the configuration is complete, click OK.
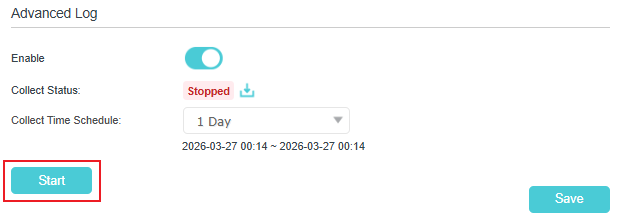
Step 7. Click the Start button to begin collecting logs. The Collect Status field displays the log collection status. Once log collection begins, the status changes to "Collecting".
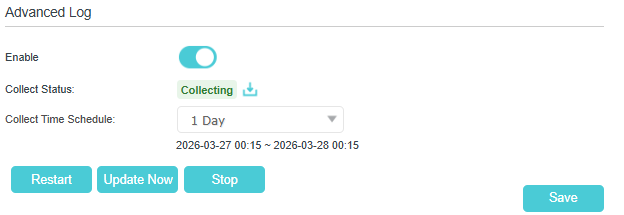
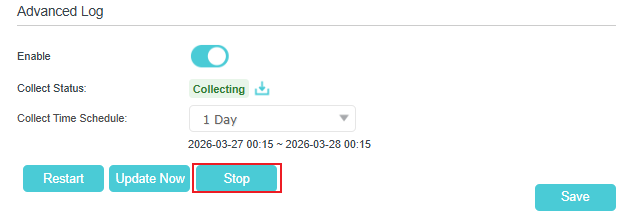
Step 8. After confirming that the logs have captured the issue, click the Stop button to end log collection.
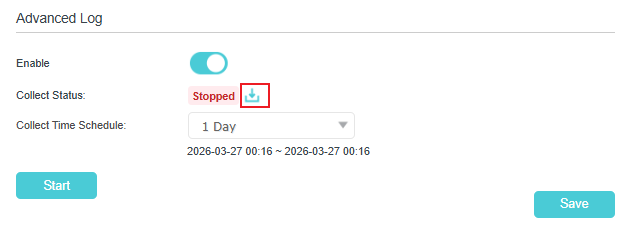
Step 9. Click the Download button to export the collected logs.
Looking For More
Is this faq useful?
Your feedback helps improve this site.



TP-Link Community
Still need help? Search for answers, ask questions, and get help from TP-Link experts and other users around the world.